
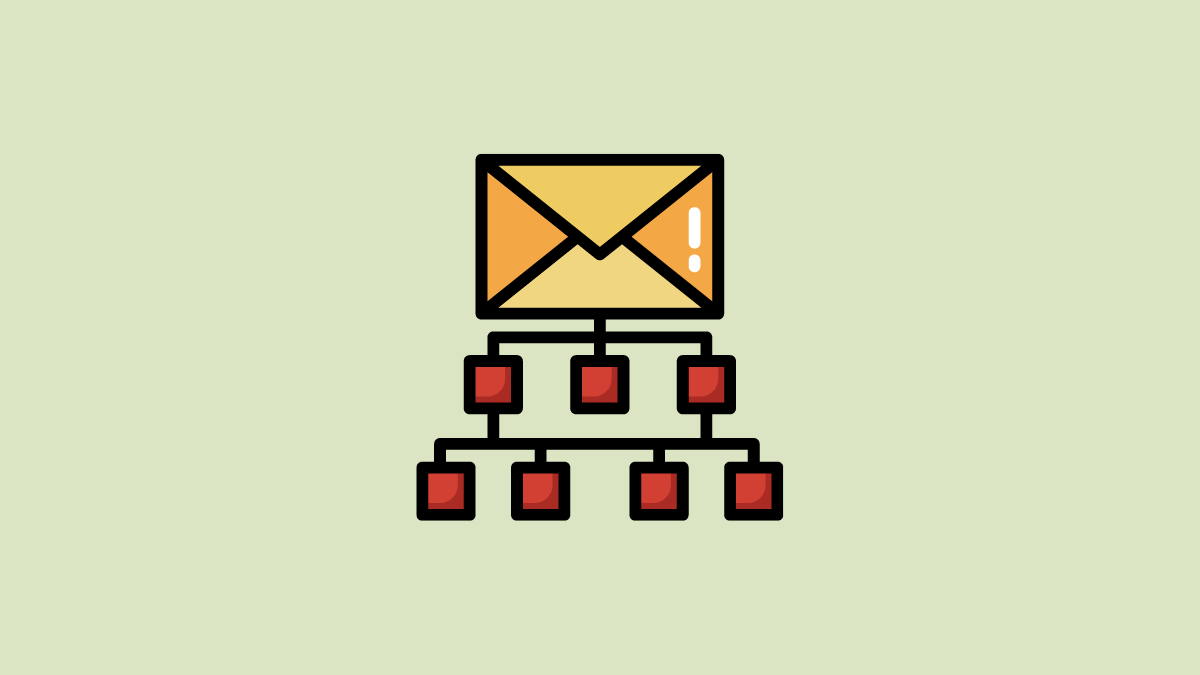
Managing your emails seems like one of those tasks that you always plan to do when you get the time, but it never actually gets done. More and more emails keep flooding your inbox, making it difficult and time-consuming to find what you are looking for. In fact, you may be spending more time searching for the right emails than reading them.
This is true even if you rely on Gmail, which has several nifty features, such as labels and filters, to make email management easier. However, we're here to tell you that organizing your Gmail inbox is much easier than you think, and offers several benefits, such as better time management, enhanced productivity, and improved communication.
And these benefits can in turn help alleviate your stress caused by an overloaded inbox. Just follow the tips we've shared in this post and soon you'll have a cleaner, easier-to-use Gmail inbox along with complete peace of mind.
Ensure Relevant Emails Appear at the Top
An inbox full of emails can be hard to navigate and can make finding the information you need quite challenging. To avoid this, make sure your relevant emails appear at the top. You can do so using the features that are built into Gmail.
By default, Gmail offers you five options for organizing your emails - Important First, Unread First, Starred First, Priority Inbox, and Multiple Inboxes. To change which emails appear first, follow these steps.
- Click on the gear icon on the top right corner of your Gmail inbox and then on the 'See All Settings' button.
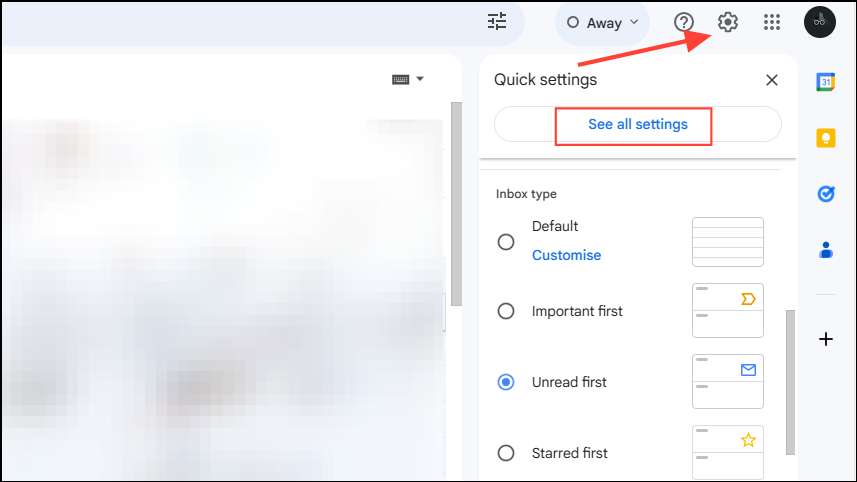
- When the main Settings page opens up, switch to the 'Inbox' tab. Then, select your preferred inbox from the 'Inbox Type' option.

- Select the 'Important First' option to let Gmail show you email messages it thinks are most important. Alternatively, you can choose to view unread or starred messages first.
You can also set it to Priority Inbox, which allows Gmail to learn which emails you interact with most frequently so it can display those at the top.
Customize Your Inbox View
With Gmail, you can customize your inbox in a variety of ways. For example, you can choose how email messages appear.
- Click on the gear icon to open the Settings panel.
- Choose between the Default, Comfortable, and Compact views. The Default option shows the name of the sender and the type of attachment below the subject. You can open attachments directly from your inbox with this view.
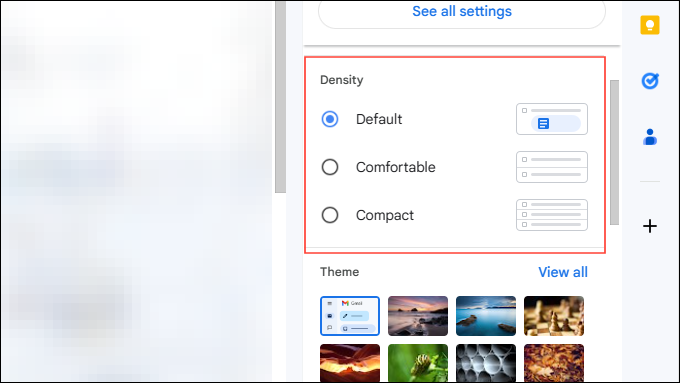
- The Comfortable option lets you know that attachments are present with the help of a paper clip icon but does not let you open the attachments directly. Finally, the Compact option lets you view more email messages on the screen.
Use the Spam Button
With the help of Artificial Intelligence, Gmail automatically determines which emails are unwanted and spam, preventing them from going into your inbox. That said, sometimes spam mail can still get through and reach your inbox, leading to clutter and distracting you from locating the information you need.
This can happen when Gmail fails to recognize those emails as spam. The solution in this case is to mark those emails as spam using the provided button.
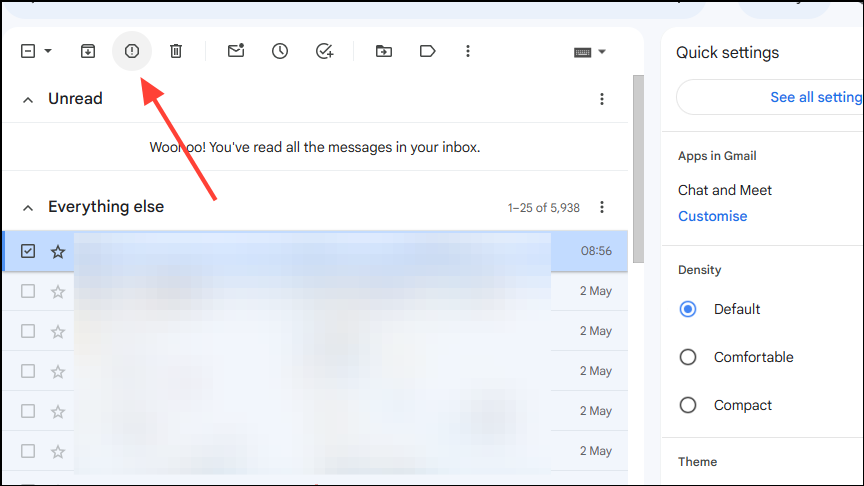
- Click on the check box next to the email you want to mark as spam to select the message.
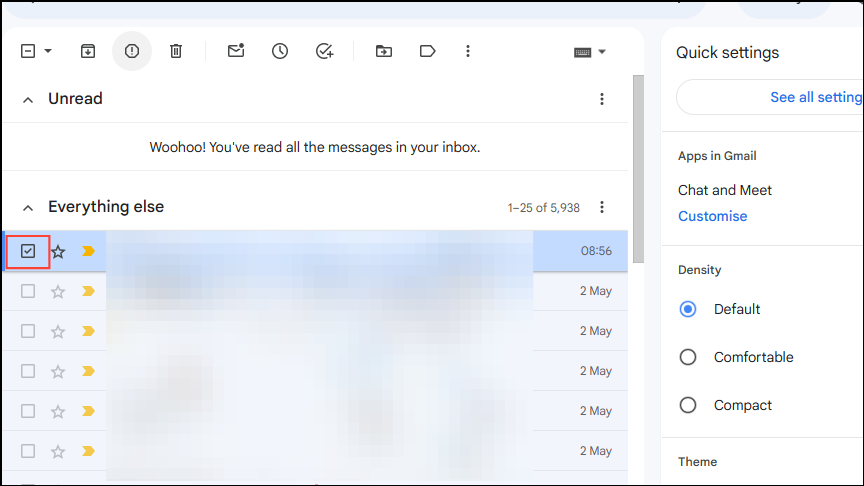
- This will show you a few buttons at the top. Click on the button that appears as an exclamation mark within a circle to mark the email as spam.
Now Gmail will automatically send all similar emails from the sender to the spam folder, helping keep your inbox clean. Alternatively, if you consider an email useful but it has been marked as spam by Gmail, you can also inform it that it is not spam.
Make Use of Filters
Having lots of emails means it won't be possible for you to sort through them all manually and decide which ones are useful. Fortunately, with filters, you don't have to. You can just let Gmail know which emails you want in a specific category by creating filters for them.
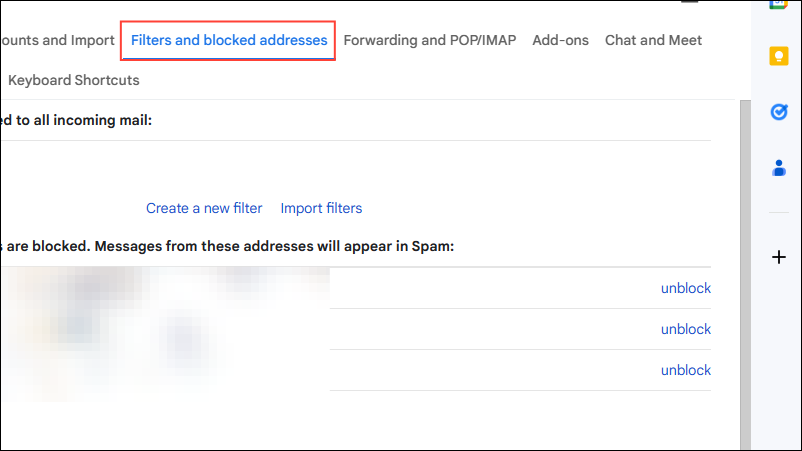
- To create a filter, go into Gmail settings and click on the 'Filters and Blocked Addresses' tab.
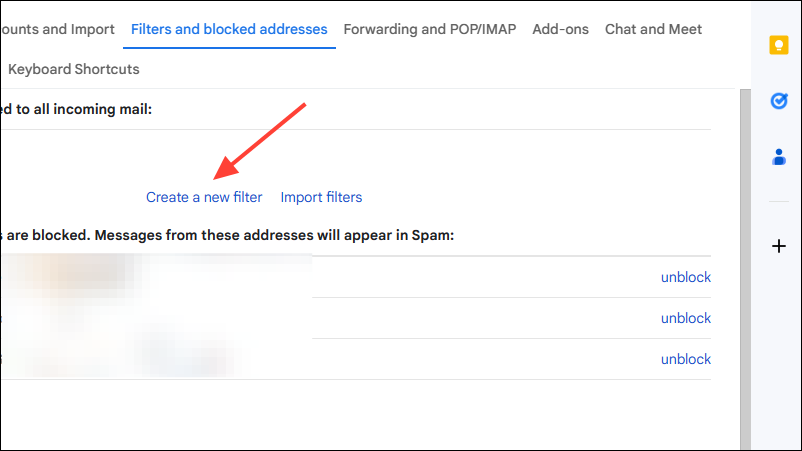
- Next, click on 'Create a new Filter'.
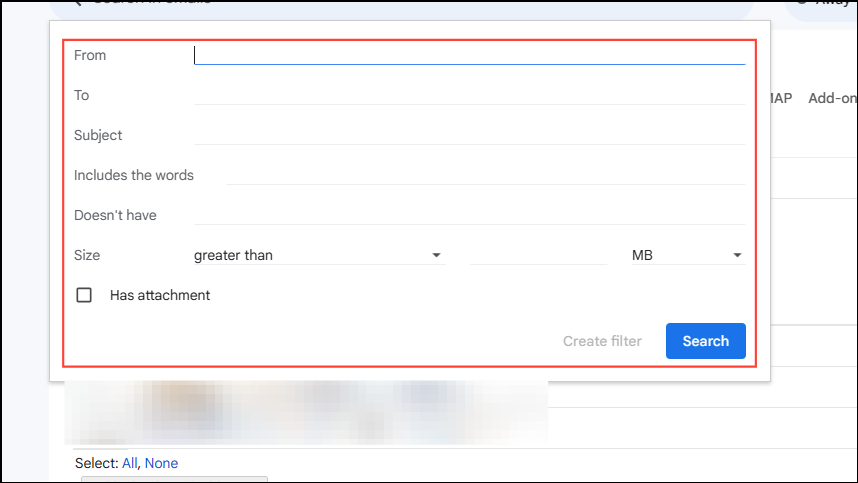
- Gmail will let you choose what that filter will do. You can choose emails from specific people or containing specific words, email size, and even whether they have attachments. It can directly send emails to the archives without going into your inbox, or automatically mark emails as read.
You can create different filters for your emails to ensure that only relevant emails end up in your inbox, making it easy to view them when you need them without wasting time.
Get Rid of Unused Tabs
By default, Gmail offers five tabs into which it categorizes your emails. These include the primary, social, forums, updates, and promotions tabs. Gmail automatically puts different emails under suitable tabs, helping reduce clutter caused by newsletters, promotional emails, and others.
However, not everyone needs all five tabs, in which case, the extra tabs may only be adding to the clutter. In such situations, you can disable the tabs you do not use by going into the Gmail settings.
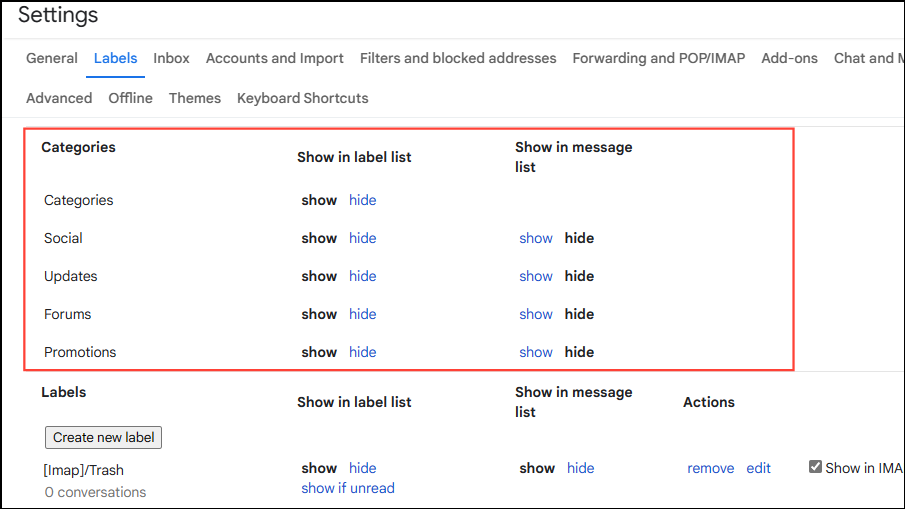
- On the Settings page, click on the 'Labels' tab and scroll down to the 'Categories' section.
- Here you can choose to show or hide the category tabs as per your requirements by clicking on the respective buttons.
Having fewer tabs will also make it easier to check your emails more frequently, so you can delete the ones you do not need.
Archive Emails
You have two options when it comes to removing emails that you no longer interact with. The first is to delete them, which moves them to the 'Trash' folder from where they are permanently removed after 30 days. The second option is to archive them, which moves them to the 'Archive' folder.
Archiving emails means they are removed from your inbox but not deleted. You can still search for them if you need them and will find them under the 'All Mail' tab. Archiving helps you store emails you may not have use for currently, without allowing them to create clutter in your inbox.
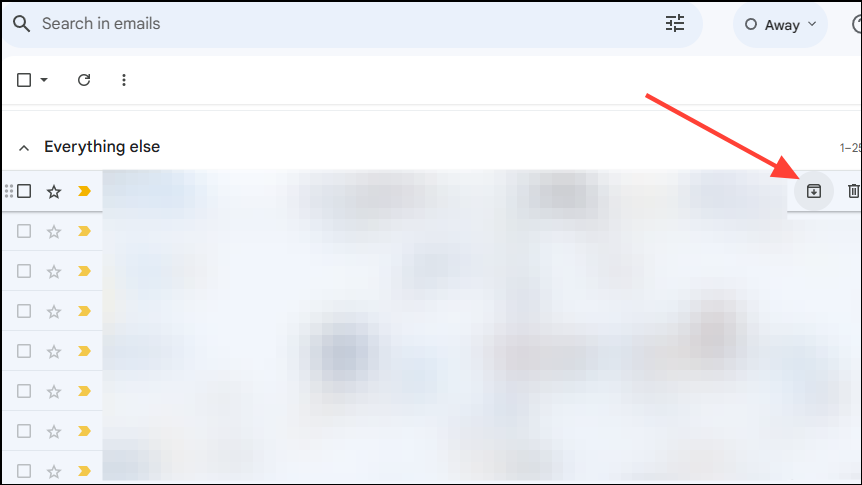
- To archive an email, simply hover over it and you will see the archive button on its right. Click on it to archive it.
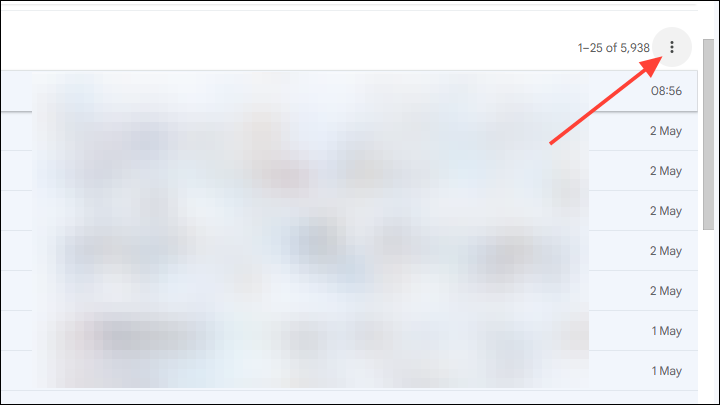
- Alternatively, click on the three dots on the top right and you will get various options that let you organize your emails.
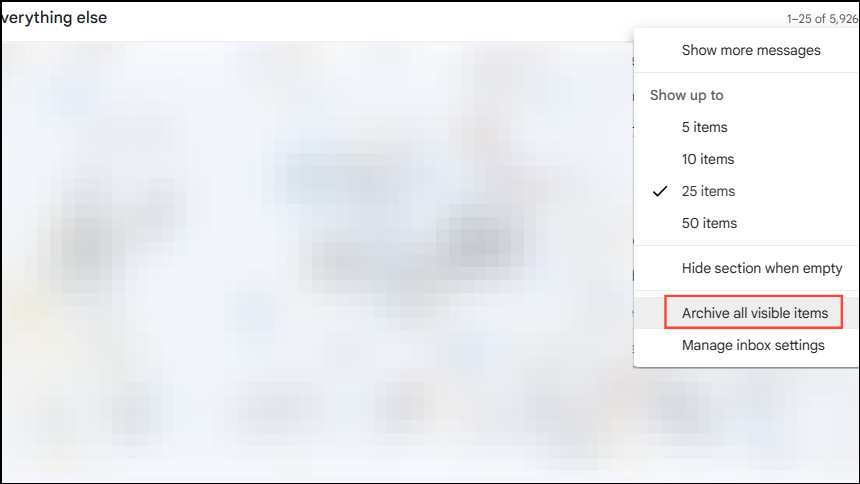
- Click on the 'Archive all visible items' to archive all email messages in your Gmail inbox.
You can even select emails from specific senders and archive them in bulk, freeing up space in your inbox quickly.
Enable Desktop Notifications
Want to keep track of emails as they come so you can immediately take the required action? If so, consider turning on Gmail desktop notifications. This feature lets you know each time an email arrives in your inbox, allowing you to manage emails in real-time.
- To enable desktop notifications, open the Gmail settings page and scroll down to the 'Desktop Notifications' option on the 'General' tab.
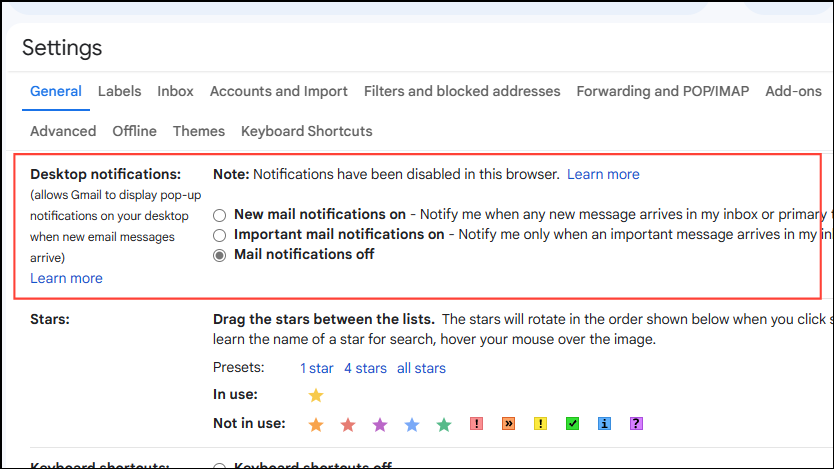
- Here you can choose to turn on notifications for all emails or just for important ones. You can even customize the email notification sounds from here. Once you are done, scroll down and save your changes.
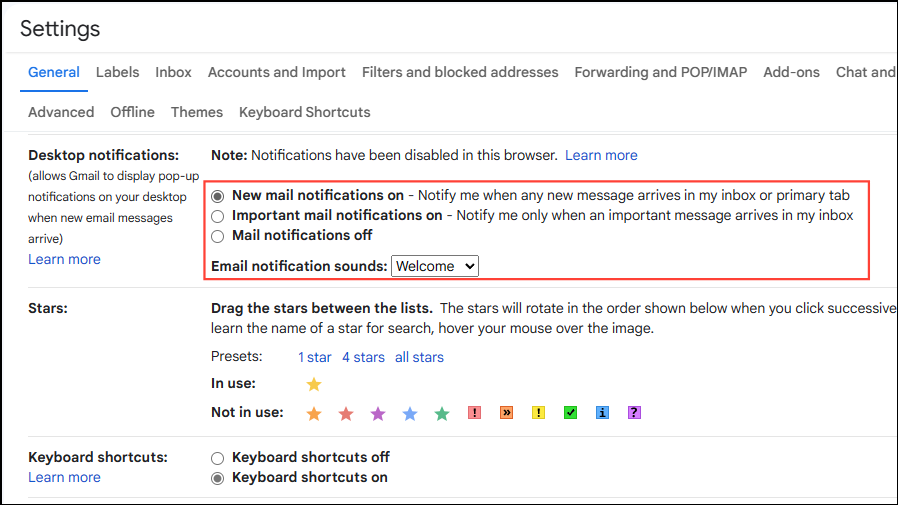
To take full advantage of Gmail's desktop notifications, you will have to turn on browser notifications as well, if they are turned off. Once you've enabled it, you can read, delete, archive, or respond to emails as soon as they arrive in your inbox.
Mute Email Conversations
You may often find yourself in email conversations that don't necessarily involve you, or those that you don't find very important at the moment. While you can always leave, another option is to mute the conversation thread, preventing updates from constantly popping up and distracting you.
Muting conversations will prevent new messages from appearing, but they will still reach you. You can find them in the archives. This means if you want, you can always check them later or search for a specific email when needed.
- To mute a conversation thread, click on the check box on the left of the email thread you want to mute to select it, then click on the three dots at the top.
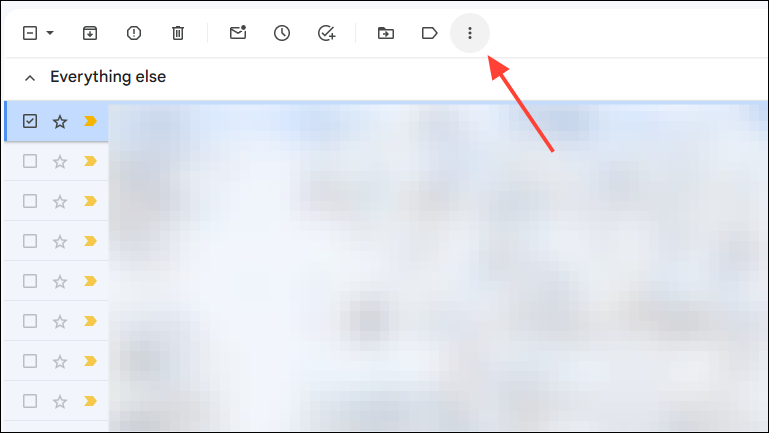
- The drop-down menu that appears will contain the mute option; click on it to mute the conversation.
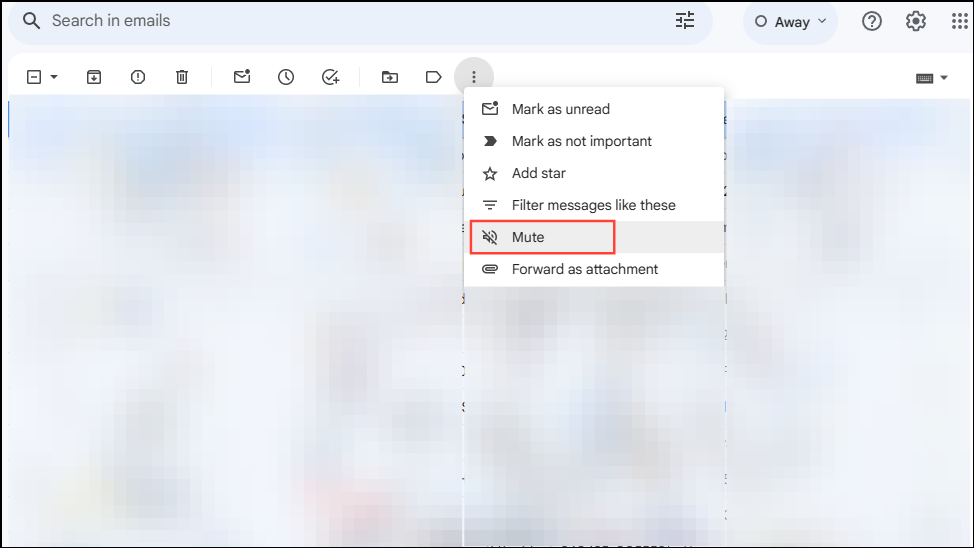
Any new messages in the conversation will not show up in your inbox and instead will directly be sent to the archives. You can easily locate muted messages by typing is:muted in the search bar.
Star Important Emails
Gmail does a pretty good job of determining which emails might be important for you on its own, and adding a yellow 'Importance Marker' next to them. However, there are still times when it might not be able to do so correctly. Fortunately, you can still let it know which emails are important by starring them.
While Gmail adds importance markers to entire email threads, you can add stars to individual emails in a thread. Doing so will help you search for specific emails more quickly and with minimal hassle.
- To add a star, simply click on the star icon next to an email in your Gmail inbox.
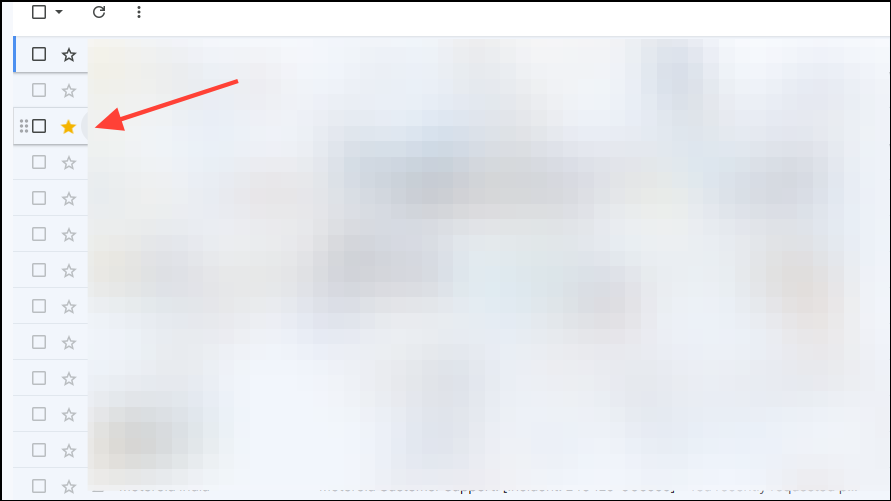
- Once you are done with an email thread, you can remove the star by clicking on the star icon again.
As you continue adding and removing stars, Gmail will get better at detecting which messages are important for you. You can access all your starred emails from the 'Starred' option on the left panel of your inbox.
Use Labels to Organize Your Emails
Gmail uses labels to separate emails into different categories, such as Inbox, Trash, and Drafts. It lets you create your own labels too, and you can even add more than one label to an email message. Labels function like tags, making it easy for you to find the right message, and you can even nest labels like subfolders.
A label can be 225 characters long and can be color-coded for better visibility. And you can set up Gmail so that it adds labels to emails automatically when they arrive.
- To create a label, scroll down on the left side of your Gmail inbox until you come to the 'Labels' section. Click on the '+' icon to create a new label.
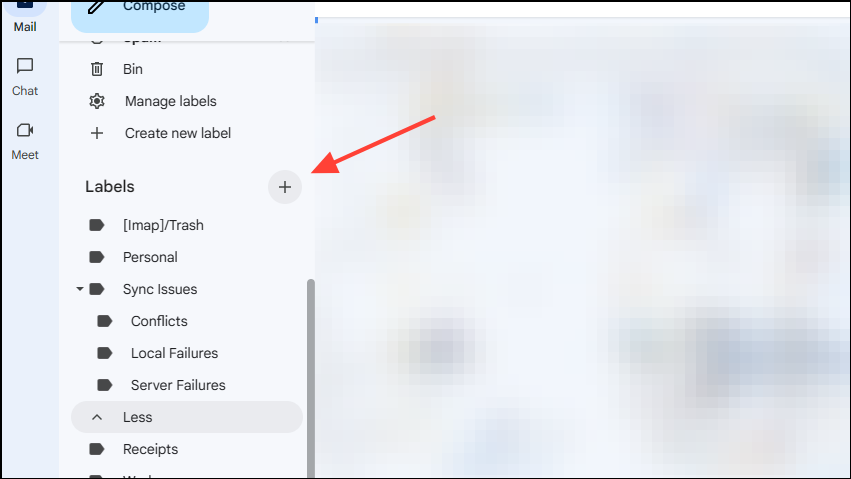
- In the box that appears, you can choose the label name and whether you want to nest it under existing labels. Click on the 'Create' button to create the label.

Using labels can make things easier when it comes to organizing your Gmail inbox, but they should be used strategically. While you can create numerous labels, too many labels will result in the same problem, so the right balance is crucial. Or, you can rely on third-party applications that help you add labels as tabs for easy access.
Try Out Multiple Inboxes
Gmail has a feature called Multiple Inboxes, which lets you manage multiple Gmail accounts through a unified inbox. Since there is no limit to the number of Gmail accounts you can create, you can have separate accounts for home and work and manage them with Multiple Inboxes.
- To enable Multiple Inboxes, open your Gmail and click the gear icon to access the settings.
- Scroll down to the 'Inbox Type' section and click on the 'Multiple Inboxes' option. Enabling this will let you create multiple panes for different email categories, such as topic, type, sender, etc.
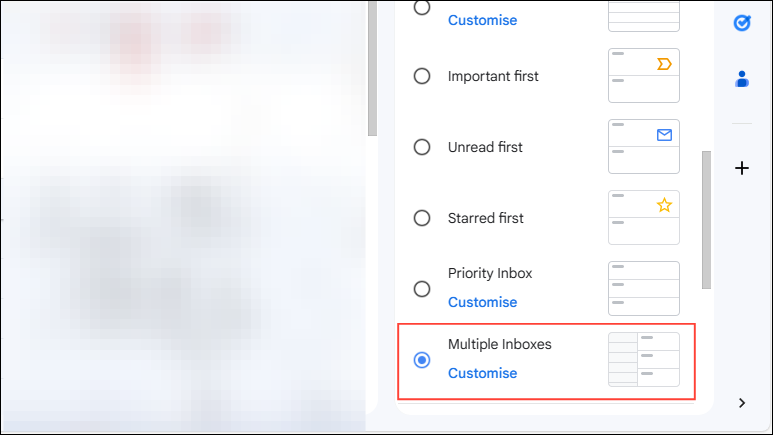
You can also choose specific emails to appear in a different mailbox and configure each section based on your priorities. The Multiple Inboxes feature helps provide a cleaner view of various email categories, providing a faster user experience.
Enable Nudges in Gmail
If you're getting a lot of spam emails, chances are that you've missed a few important ones when trying to avoid the spam. The Nudge feature in Gmail can help you out in such cases by reminding you of important email messages that need your attention. It runs on an algorithm that brings emails needing a response from you or the other party to the top of your inbox.
The feature can be pretty handy if you need a reminder about sending responses or follow-up emails.
- To enable Nudges, go into Gmail settings and scroll down while in the 'General' tab until you reach the 'Nudges' section.
- Click on the check box to enable Nudges for both emails that need responses and follow-up suggestions.

Once you have turned on Nudges, Gmail will automatically bring emails requiring a response to the top of your inbox. It will suggest emails that you may have forgotten to respond to, as well as those that require sending a follow-up email. Thus, you can quickly deal with email messages as needed, instead of letting them pile up in your inbox.
Use Hashtags within Gmail
As we've explained above, you can create labels to organize and manage your email messages easily. However, if you want to go one step further, you can also use hashtags when composing emails and then use these to easily search for specific emails in your inbox.
- For instance, you may be emailing a client regarding a project and can use #follow-up, #project-details, #name-of-the-project, etc. hashtags at the end of the message.
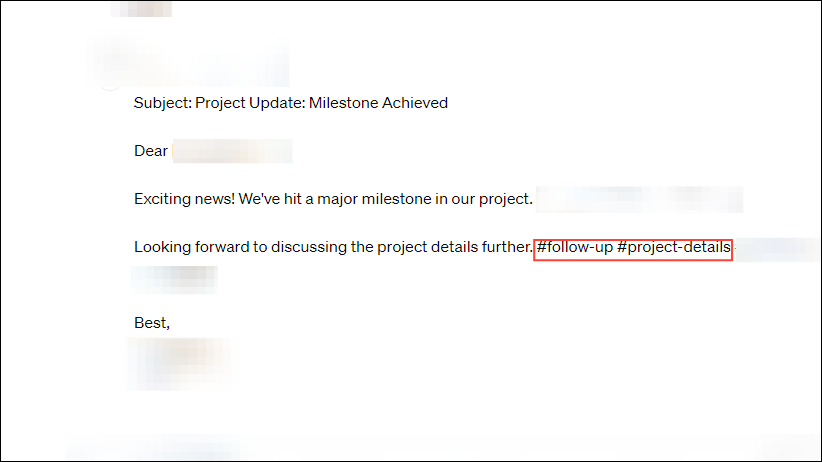
- Now searching for emails that are limited to this topic only requires searching for these hashtags in the search box.
When you type in the hashtags in the search box, all email messages containing those hashtags will appear in the search results. You no longer need to manually sort through tons of emails to get to the one you need.
Create Multiple Gmail Aliases
You can create multiple versions of your email address in Gmail with the help of the '+' sign and different combinations of numbers and words. This will let you filter emails from various senders, helping keep your inbox clean and clutter-free. Just make sure to create unique aliases when signing up.
Adding '+any.alias' to your email address will allow emails to reach your inbox. For instance, if your email is johndoe@gmail.com, you can create different versions of it, such as johndoe+friends@gmail.com or johndoe+work@gmail.com.
And you can simply filter emails and sort out important messages from junk mail. You can share a specific email address containing the '+' sign with people like close contacts to ensure those messages reach your priority inbox.
It is a good idea to make your email aliases self-explanatory so you remember the purpose for which you created them. This tip is also useful in managing things like subscriptions that are connected to your account, as you can create a specific group for each alias.
The tips we've shared here can help you organize your Gmail inbox quickly and easily, making email management a breeze. Almost each of these is easy to try out and implement and only takes a few seconds. And you can even try out a few of these when using Gmail on mobile devices.
If you're looking for more options that can make it easier to organize your Gmail inbox, there are several browser extensions and add-ons that might be worth checking out, like the one below.


Member discussion