
Docker is a tool which allows developers to quickly create, deploy and run applications by using containers. The concept of containerization is an approach in which the application, its dependencies and configuration are all packed in a single file known as a container.
Containers are kind of similar to a Virtual Machine, but instead of running whole OS and all its services, they only run bare minimum required by the software packed as a container and depend on host OS for the most part. These containers have better performance than running a complete Virtual Machine and are isolated from the host OS environment.
In this article, let’s look at how to install Docker and enable Hyper-V and WSL to run containers on Windows 10.
Prerequisites
You need Windows 10 64-bit Pro, Enterprise or Education edition with 1703 update or later (build 15063 or later) for using Hyper-V backend or Windows 10 64-bit with 2004 update or later (build 19041 or later) for WSL backend. Aside from this, a modern 64-bit processor with virtualization support and a minimum 4 GB of ram is required.
In addition to the above requirements, you need virtualization support enabled in the BIOS. To check if you already have virtualization enabled, open the Task Manager and go to the Performance tab.

If the virtualization is shown as ‘Disabled’, you will need to enable it in BIOS settings. Depending upon the Motherboard and CPU you have, the steps to enable virtualization differ.
For Intel processors, enable the setting called as Intel Virtualization Technology (VT-x) in the BIOS. Similarly, for AMD processors enable the setting called SVM mode in the BIOS. Refer to your motherboard manual to find the respective settings for your CPU.
Install Docker via Winget
Docker is available in the Winget repository, so it can be installed by using a simple command. If you don’t have the winget tool installed and wish to learn more about it, then check out our guide on how to install Winget package manager.
We will install the stable release of Docker available on Winget repositories. Open the PowerShell or CMD and run the following command to install it.
winget install -e --id Docker.DockerDesktop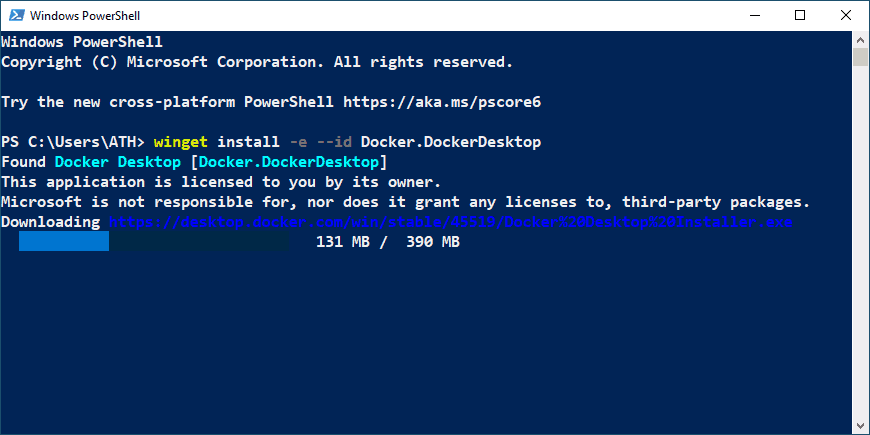
A UAC prompt will ask for permission to make changes, click on ‘yes’ to continue the Docker Desktop installation. Soon Docker will be installed on your system.
But we can’t run Docker yet, before doing so we need to enable Hyper-V or WSL for Windows 10 or else Docker will throw an error and won’t start. We’ll discuss that later in the guide.
Download and Install Docker Manually
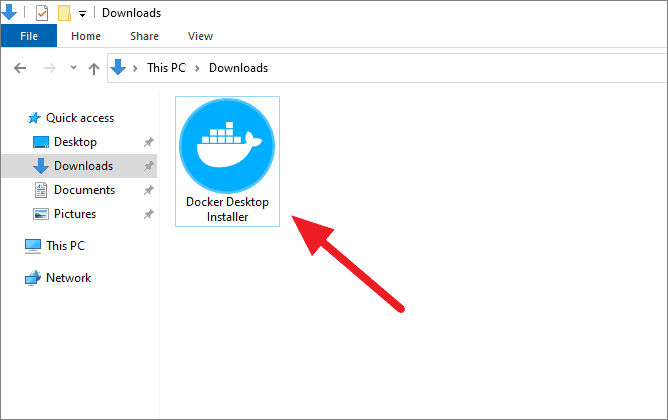
If you want to install Docker the manual way, head on over to the Docker Desktop downloads page and then click on ‘Download for Windows (Stable)’ button to download the installer file.

Then, go to your downloads folder and double click on ‘Docker Desktop Installer’ setup file to initiate the installation process.
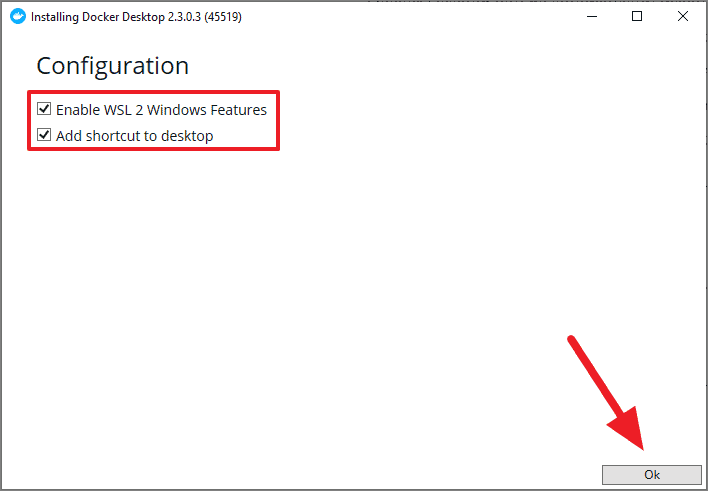
You will be presented with a configuration window in the setup process. Tick ‘Enable WSL 2 Windows Features’ if you are on Windows 10 Home edition or want to use Docker’s WSL 2 backend and Tick ‘Add shortcut to desktop’ if you want Docker Desktop shortcut, then press ‘Ok’ to begin the installation.
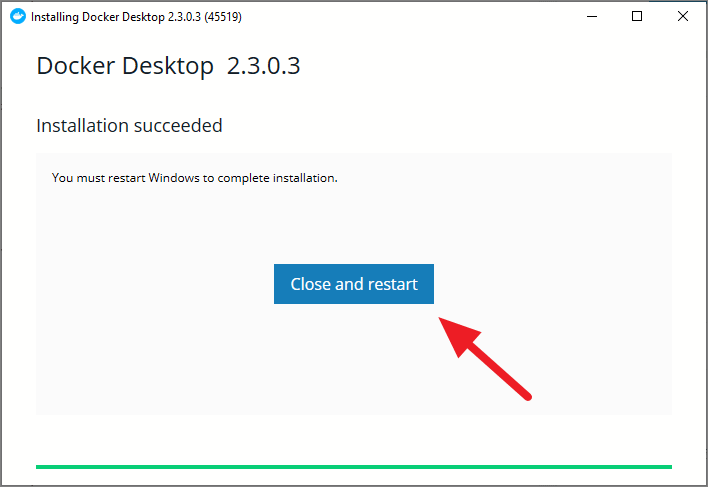
Once the Docker Desktop setup finished unpacking and installing the files, click on the ‘Close and restart’ button to complete the docker installation process.
Enable Hyper-V or WSL?
Now all that is left is to enable the Hyper-V or WSL depending upon the Windows 10 edition and version you have.
- Windows 10 Pro, Enterprise & Education edition with 1703 update or later: If you are not on 2004 update or later, then only Hyper-V backend can be used.
- Windows 10 Home edition with 2004 update or later: Only WSL can be enabled as Hyper-V feature is not available on Home edition.
- Windows 10 Pro, Enterprise & Education edition with 2004 update or later: Both the Hyper-V & WSL can be enabled and used with docker.
Enable Hyper-V
Hyper-V is a native hypervisor for Windows 10 which can be used to create and run virtual machines. Hyper-V is on the route to becoming the legacy option to run containers on Windows 10, as docker is planning to use WSL as its main backend to run containers.
But you still need Hyper-V if you want to run Docker native Windows containers. Thus to enable Hyper-V, open the PowerShell as administrator and run the following command:
Enable-WindowsOptionalFeature -Online -FeatureName $("Microsoft-Hyper-V", "Containers") -All
PowerShell will prompt you to restart the computer to complete Hyper-V installation, type Y and hit enter to do the same. After rebooting the computer, you can run Docker Desktop and use containers.
Enable WSL
Windows Subsystem for Linux (WSL) is a compatibility layer which allows users to run Linux application natively on Windows 10. The Docker WSL backend allows users to run native Linux Docker containers on Windows without Hyper-V emulation.
If you have the latest Windows 10 2004 update, then it is recommended to use the WSL as Docker backend as it performs better than Hyper-V backend. The Windows 10 Home edition users have no other option than using the WSL backend for Docker as Home edition don’t have Hyper-V feature.
Note: If you have ticked ‘Enable WSL 2 Windows Feature’ in the setup, this command can be skipped as Docker Setup enables WSL automatically. Go to the ‘Update WSL’ section below to continue with the process.
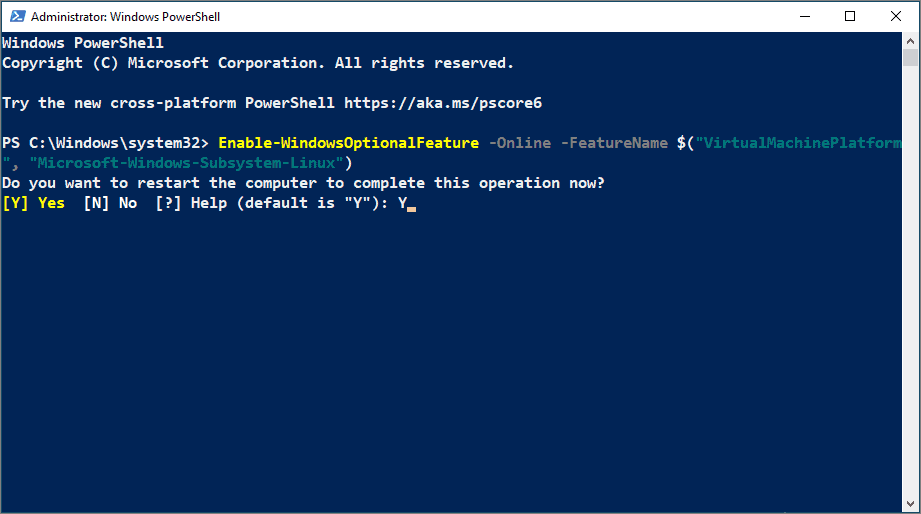
Open PowerShell as administrator then run the following commands to enable WSL and ‘Virtual Machine Platform’ WSL component for Windows 10.
Enable-WindowsOptionalFeature -Online -FeatureName $("VirtualMachinePlatform", "Microsoft-Windows-Subsystem-Linux")Press ‘Y’ and hit enter to restart the computer and complete the process.
Update WSL
After you have Completed the Docker Installation and restarted the system, when you run the Docker Desktop you will see an error as shown below.
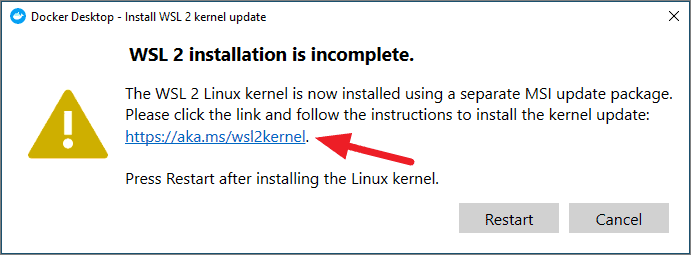
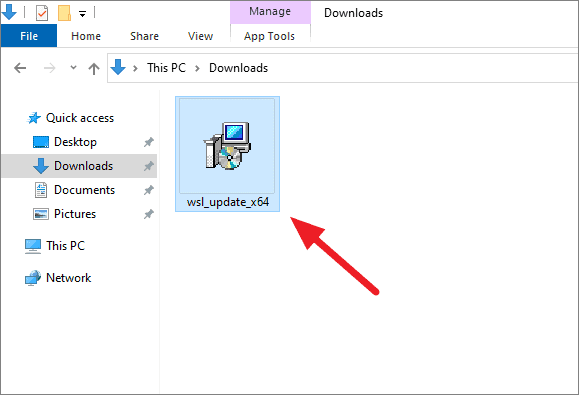
Click on this link or link in the error to go to Microsoft Docs page with the latest WSL2 kernel update. Then click on ‘download the latest WSL2 Linux kernel’ link on the page as shown below to download ‘wsl_update_x64’ setup file.
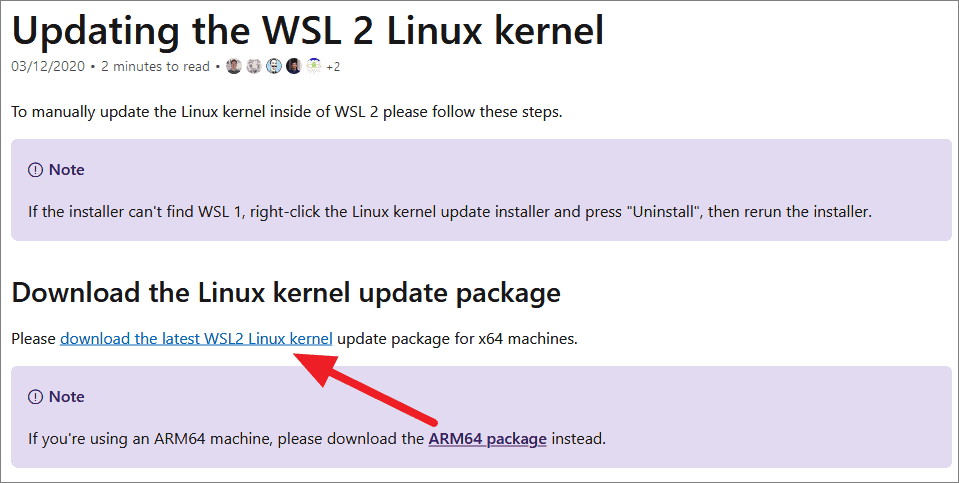
Double click on the setup file you downloaded in the step above and press ‘yes’ when prompted for permission.
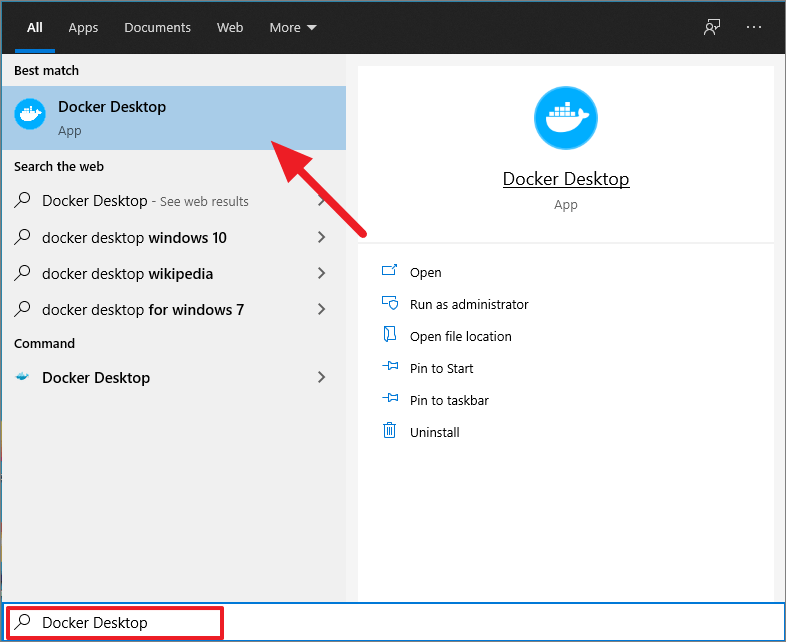
Once you’ve enabled and updated the WSL for Windows 10, you can run Docker searching for it in the Start menu.
Switch between Hyper-V & WSL Backend
If you have enabled both Hyper-V & WSL you can use both the backends and switch between them to either use the native Windows Containers or Linux Containers.
Switch to Hyper-V backend by going to the Docker system tray icon, right-clicking on it and selecting ‘Switch to Windows containers’ option. Similarly, you can switch to WSL backend by selecting ‘Switch to Linux containers’ option.
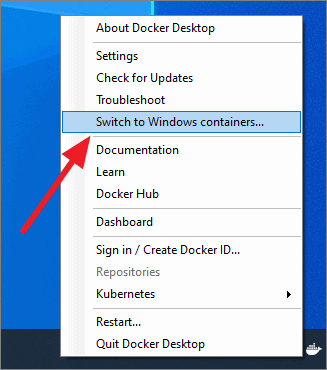
Switch to Hyper-V Backend 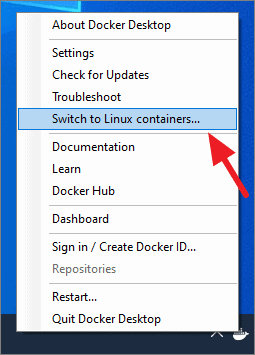
Switch to WSL Backend
Verify Docker Installation
The white whale in the system tray indicates that Docker is running. But you can also test your docker installation by opening the PowerShell or CMD and typing docker --version
PS C:\Users\ATH> docker --version
Docker version 19.03.8, build afacb8b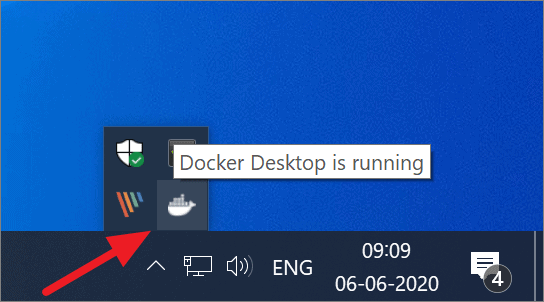
Next, try to pull the hello-world image and run a container by running docker run hello-world command in PowerShell or CMD:
PS C:\Users\ATH> docker run hello-world
Unable to find image 'hello-world:latest' locally
latest: Pulling from library/hello-world
0e03bdcc26d7: Pull complete
Digest: sha256:6a65f928fb91fcfbc963f7aa6d57c8eeb426ad9a20c7ee045538ef34847f44f1
Status: Downloaded newer image for hello-world:latest

Hello from Docker!
This message shows that your installation appears to be working correctly.
This message shows that our Docker installation was successful and we are ready to pull images and create containers.


Member discussion