
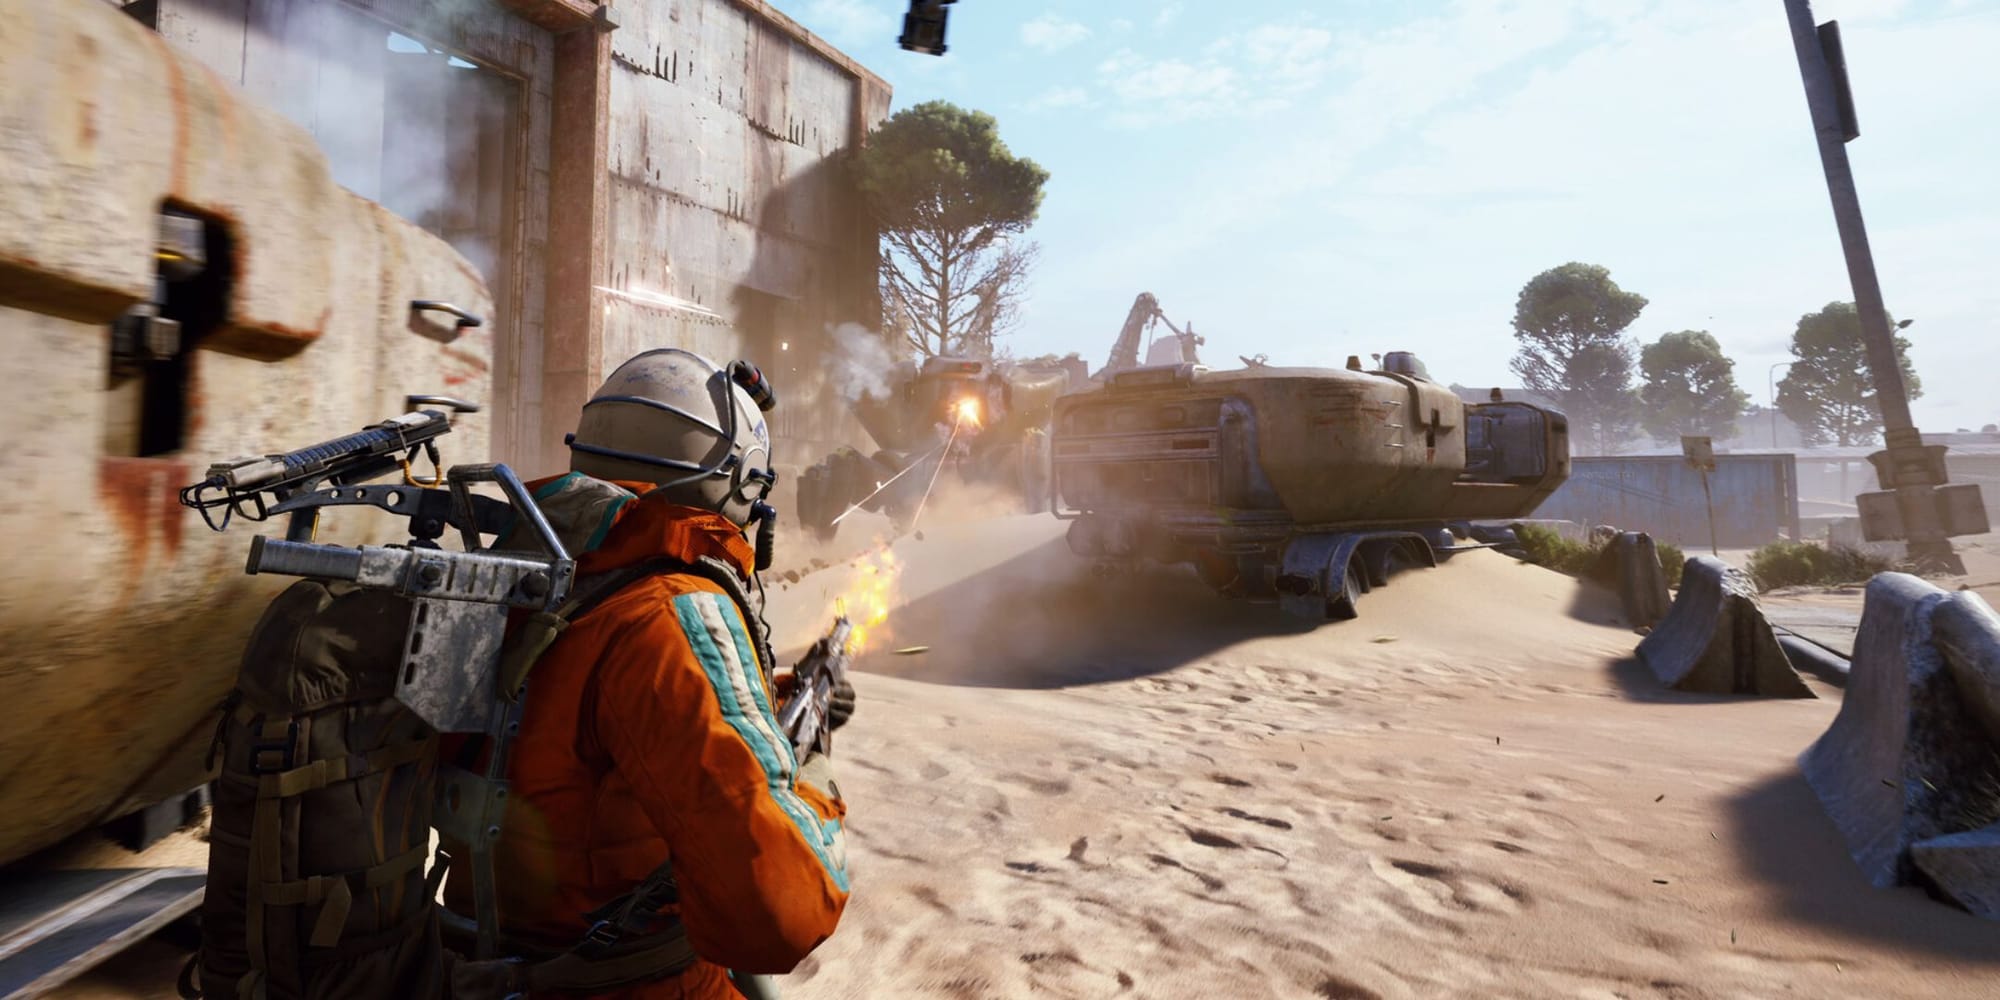
Arc Raiders drops you into a shifting Rust Belt where robots, rival raiders, and the weather all want your loot. A solid plan starts in Speranza and ends at an extraction that hasn’t vanished yet. Here’s how to survive those first runs and build momentum toward bigger scores.
Survival priorities for your first runs
- Always plot an exit before you pick a fight. Extraction points time out and disappear, so choose a route with a fallback.
- Noise invites trouble. Breaching and prolonged fighting pull ARC patrols and curious Raiders. Finish fast or move on.
- Loot with restraint. It’s better to bank a smaller haul than lose everything to an ambush or a storm shift.
- Short on kit? Use Free Loadouts to get back topside without risking hard-earned gear.
Know the ARC threats (recognize the sound, pick the fights)
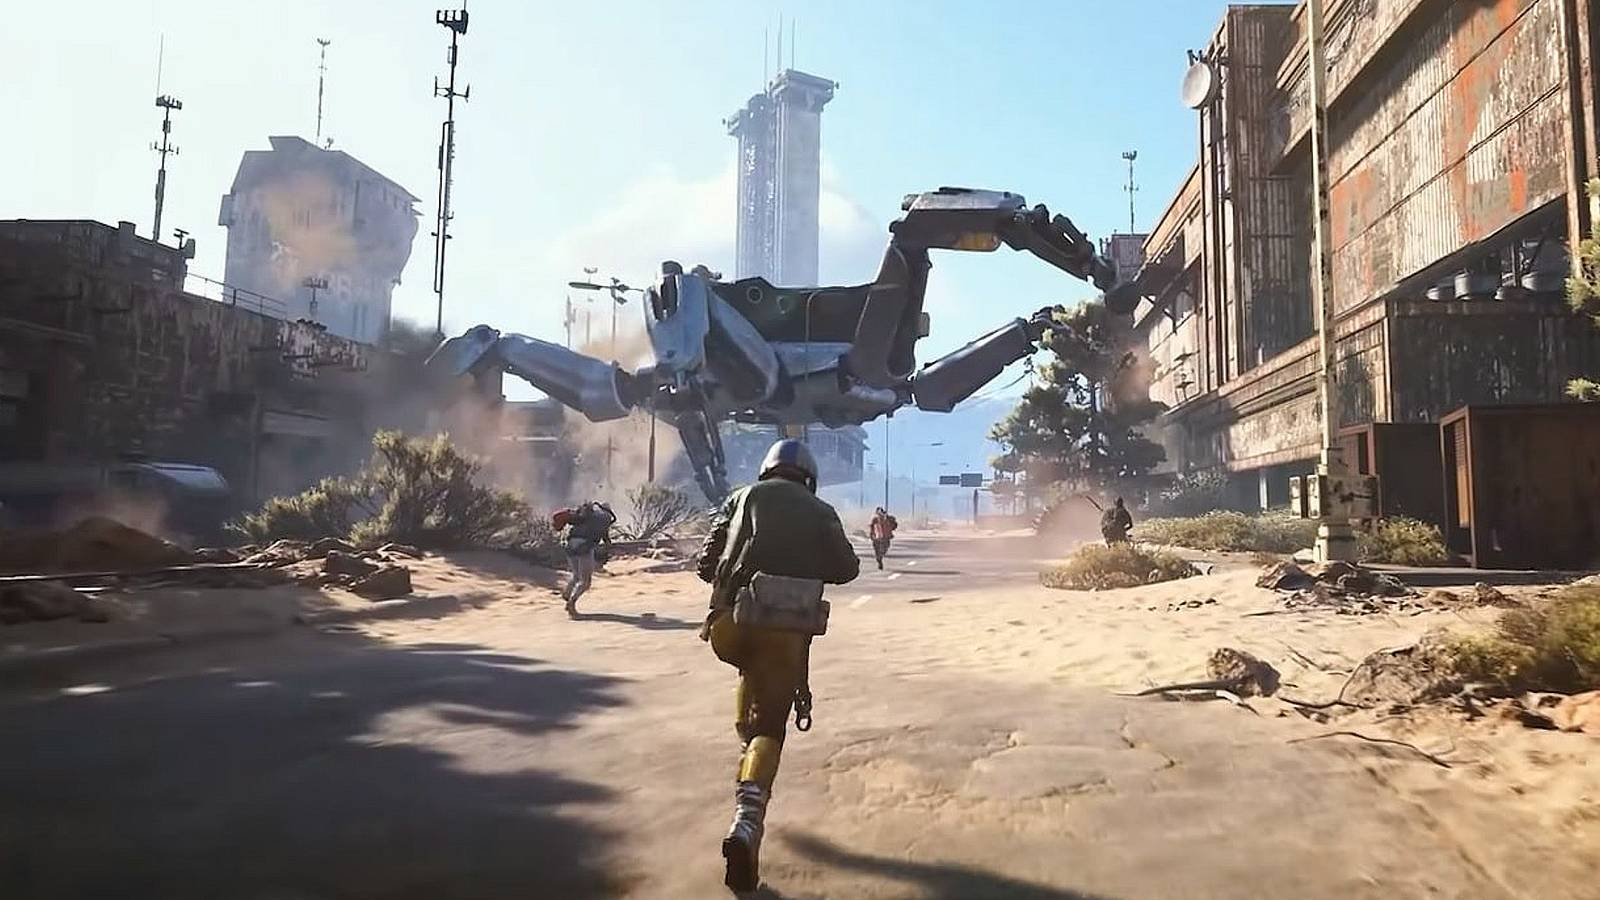
Audio cues matter. Most ARC machines announce themselves before you see them; use hums, rotor pitch, and heavy footfalls to set up cover and angles.
| ARC unit | What to expect | Practical responses |
|---|---|---|
| Ticks | Small, stealthy spiders that drop from ceilings/walls for surprise attacks. | Check overheads in tight spaces; backpedal and pop them before they latch. |
| Snitch | Airborne scout; if it spots you, it calls reinforcements. | Prioritize immediately; a single burst can save a whole fight. |
| Leapers | Large frame with devastating jump attacks. | Keep lateral movement, bait jumps into open ground, punish recovery. |
| Bombardiers | Indirect fire via spotter drones; mortar arcs punish static positions. | Break line-of-sight, eliminate spotters, relocate between volleys. |
| Wasps, Hornets, Bastions, Rocketeers, Fireball, Pop | Each brings distinct patterns and ranges. | Listen for unique audio tells and adjust spacing accordingly. |
| Queen | Massive guardian around the Harvester; top-tier threat. | Avoid early. Return once you’re confident in gear, comms, and ammo. |
Solo vs. squad (how matchmaking frames your risks)
- Go solo for quieter movement and less profile, but expect higher risk if cornered.
- Squads of up to three offer safety at the cost of noise and visibility.
- Matchmaking tries to pair similar group sizes, but it’s not guaranteed if the queue is uneven.
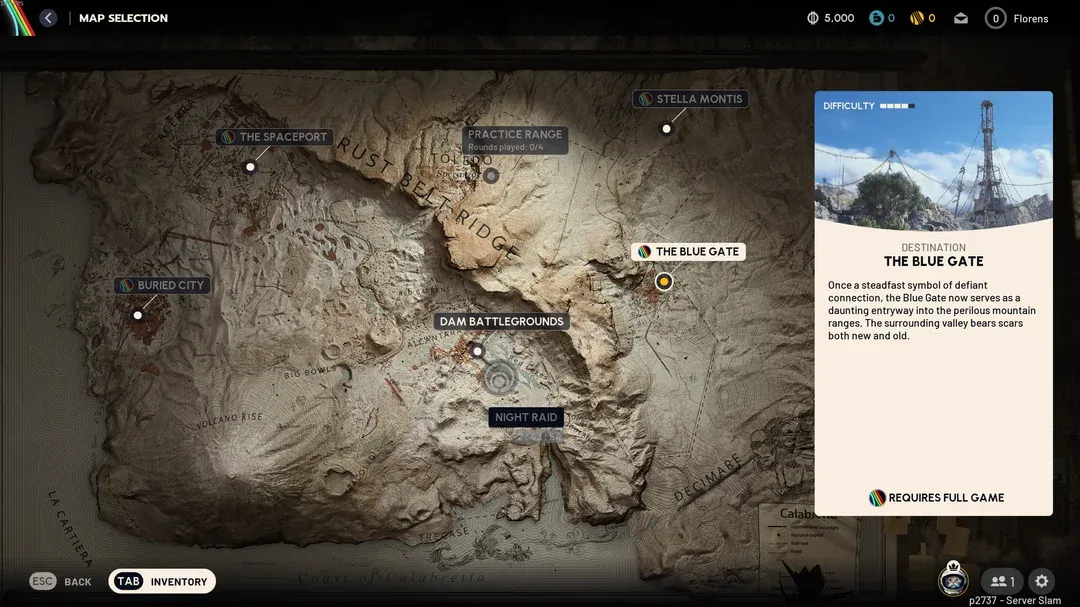
Learn the map: biomes, underground routes, and shifting conditions
- Dam Battlegrounds. Forests, swamps, apartments, and research sites — forgiving terrain to learn fundamentals.
- Buried City. Deserted urban sprawl with malls and hospitals. Metro stations are underground; the map marker points to subway entrances, not the extract itself.
- Spaceport. Industrial launch infrastructure with long sightlines and exposed approaches.
- Blue Gate. Mountains, tunnels, small towns, underground complexes — expect elevation changes and chokepoints.
Watch for special conditions. Night Raids, Harvest Seasons, and Electromagnetic Storms alter difficulty and loot distribution. If you’re undergeared, reroute or downshift your ambition when these hit.
Speranza: progression that affects every topside decision
- Level up to earn skill points and unlock ability tweaks that suit your playstyle.
- Complete Feats to earn Cred; spend it to unlock Raider Decks and associated rewards.
- Upgrade the Workshop to craft better weapons and gear so Free Loadouts aren’t your only fallback.
- Tackle Trials and Projects for structured challenges, rewards, and leaderboard runs.
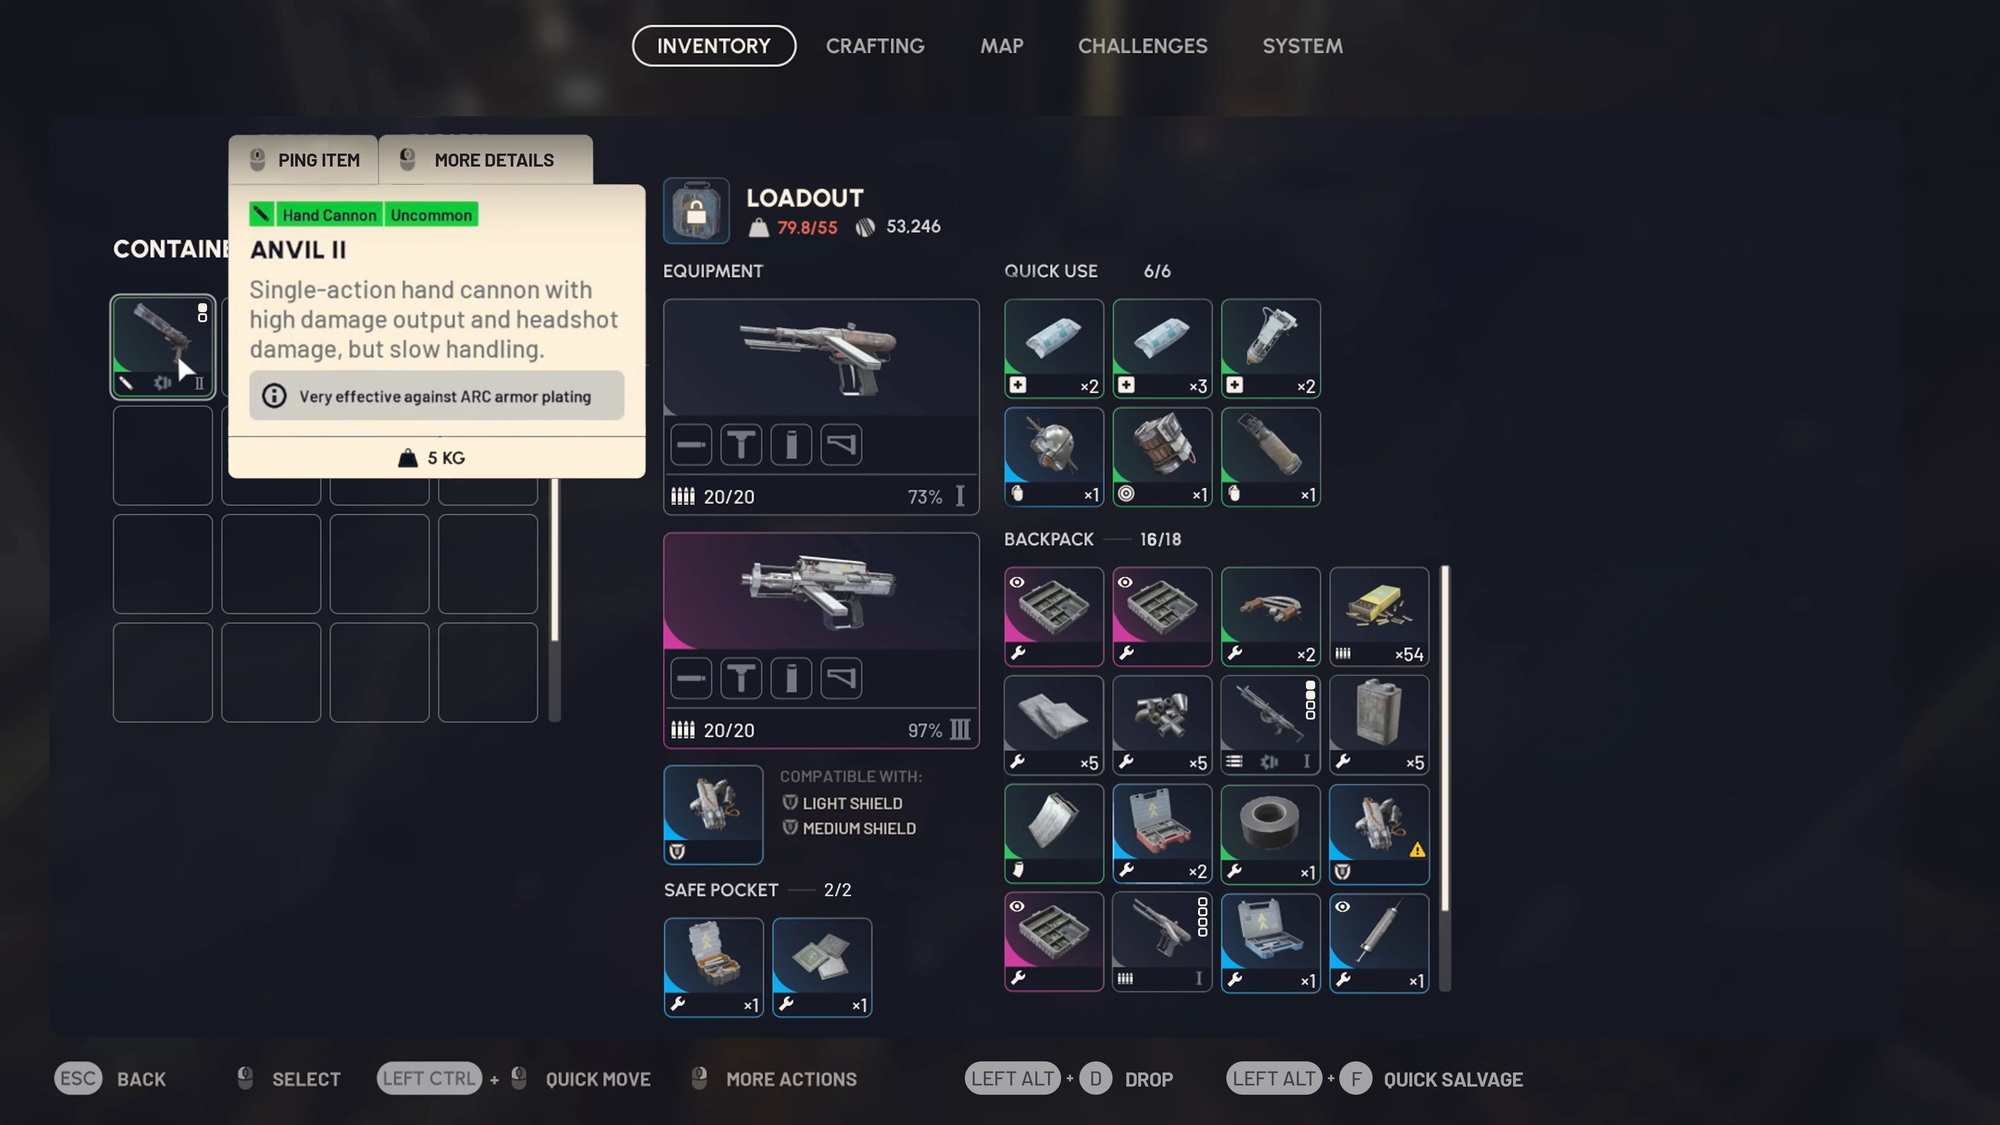
Loadouts that match the mission
- Weapons span from reliable rifles like Rattler to energy options like Equalizer and hard-hitting shotguns like Vulcano. Pick for the fights you plan to take.
- Gadgets matter: Lure Grenades to reposition enemies, Mines for denial, Ziplines for flexible extracts.
- Shields and Augments can bias your kit toward speed, stealth, carry weight, or offense. Tune them to the run’s objective, not habit.
- You don’t need to bring everything. Lean kits are quieter and easier to extract with.
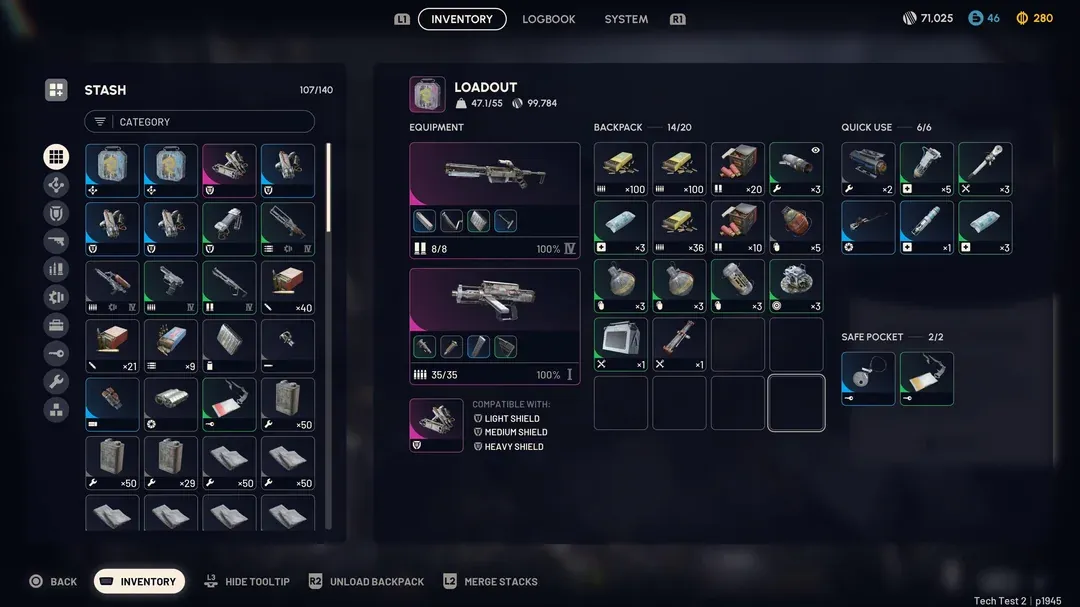
Inventory, salvage, and pocket management
- Watchlist key items to automatically mark subcomponents with the eye icon as you loot.
- Salvage anything you haven’t Watchlisted. Breaking gear into stackable parts keeps weight and clutter under control.
- Stash ammo in your Safe Pocket when you can; you can refill weapons from there mid-run.
- Scrappy the Rooster isn’t just a mascot — use the companion to collect items you’d otherwise leave behind under pressure.
Combat fundamentals that save time (and lives)
- Holster when moving. Holding Triangle to holster boosts movement speed and reduces stamina drain between fights.
- Finish downs efficiently. Downed Raiders take too long to finish with bullets — a knockout punch is faster and quieter.
- Expect roughly 100 HP on human Raiders. This gives a baseline for deciding when to commit or disengage.
- Cameras can be melee’d. Jump and use a vertical crowbar swing to disable security without spending ammo.
- Handle drones surgically. Shoot the same-side propeller to force a quick crash, then melee to finish. Fallen drones leave black smoke, making the crash site easy to locate for loot or confirmation.
- Read flares carefully. A flare often marks a recent death, but crafted flares can be used to mislead. Don’t charge a flare without a scan or flank.
Looting ARC wrecks and high-value targets
- Pre-destroyed ARC units are lootable, including the giant spider-type. Don’t overlook “cold” wrecks.
- If you climb the spiderbot to loot the hatch, grab quickly and jump off — the chassis heats up after opening.
The Rust Belt rewards pattern recognition and restraint. Each trip topside teaches enemy sounds, pathing quirks, and how far you can push your kit before greed gets you killed. Bank the lessons, upgrade in Speranza, and tune your loadout to the day’s conditions. The runs get smoother — and the extracts get richer — when you treat survival as the win condition.