
Weekly Trials in ARC Raiders are where the game quietly hides some of its best rewards. Week 13 ramps up the difficulty, mixing pure damage checks with map-knowledge tasks that demand efficient routing and awareness of other players. The stars themselves are simple: earn enough score in each objective to reach three stars and unlock its top-tier reward, then repeat for all five.
How ARC Raiders Weekly Trials and stars work
Weekly Trials unlock from level 15 under the Challenges tab in the Raider menu. Each week brings five rotating tasks that track your score as you play normal raids. Every Monday, those tasks reset and your final scores lock in on the leaderboard alongside the rewards you’ve already claimed.
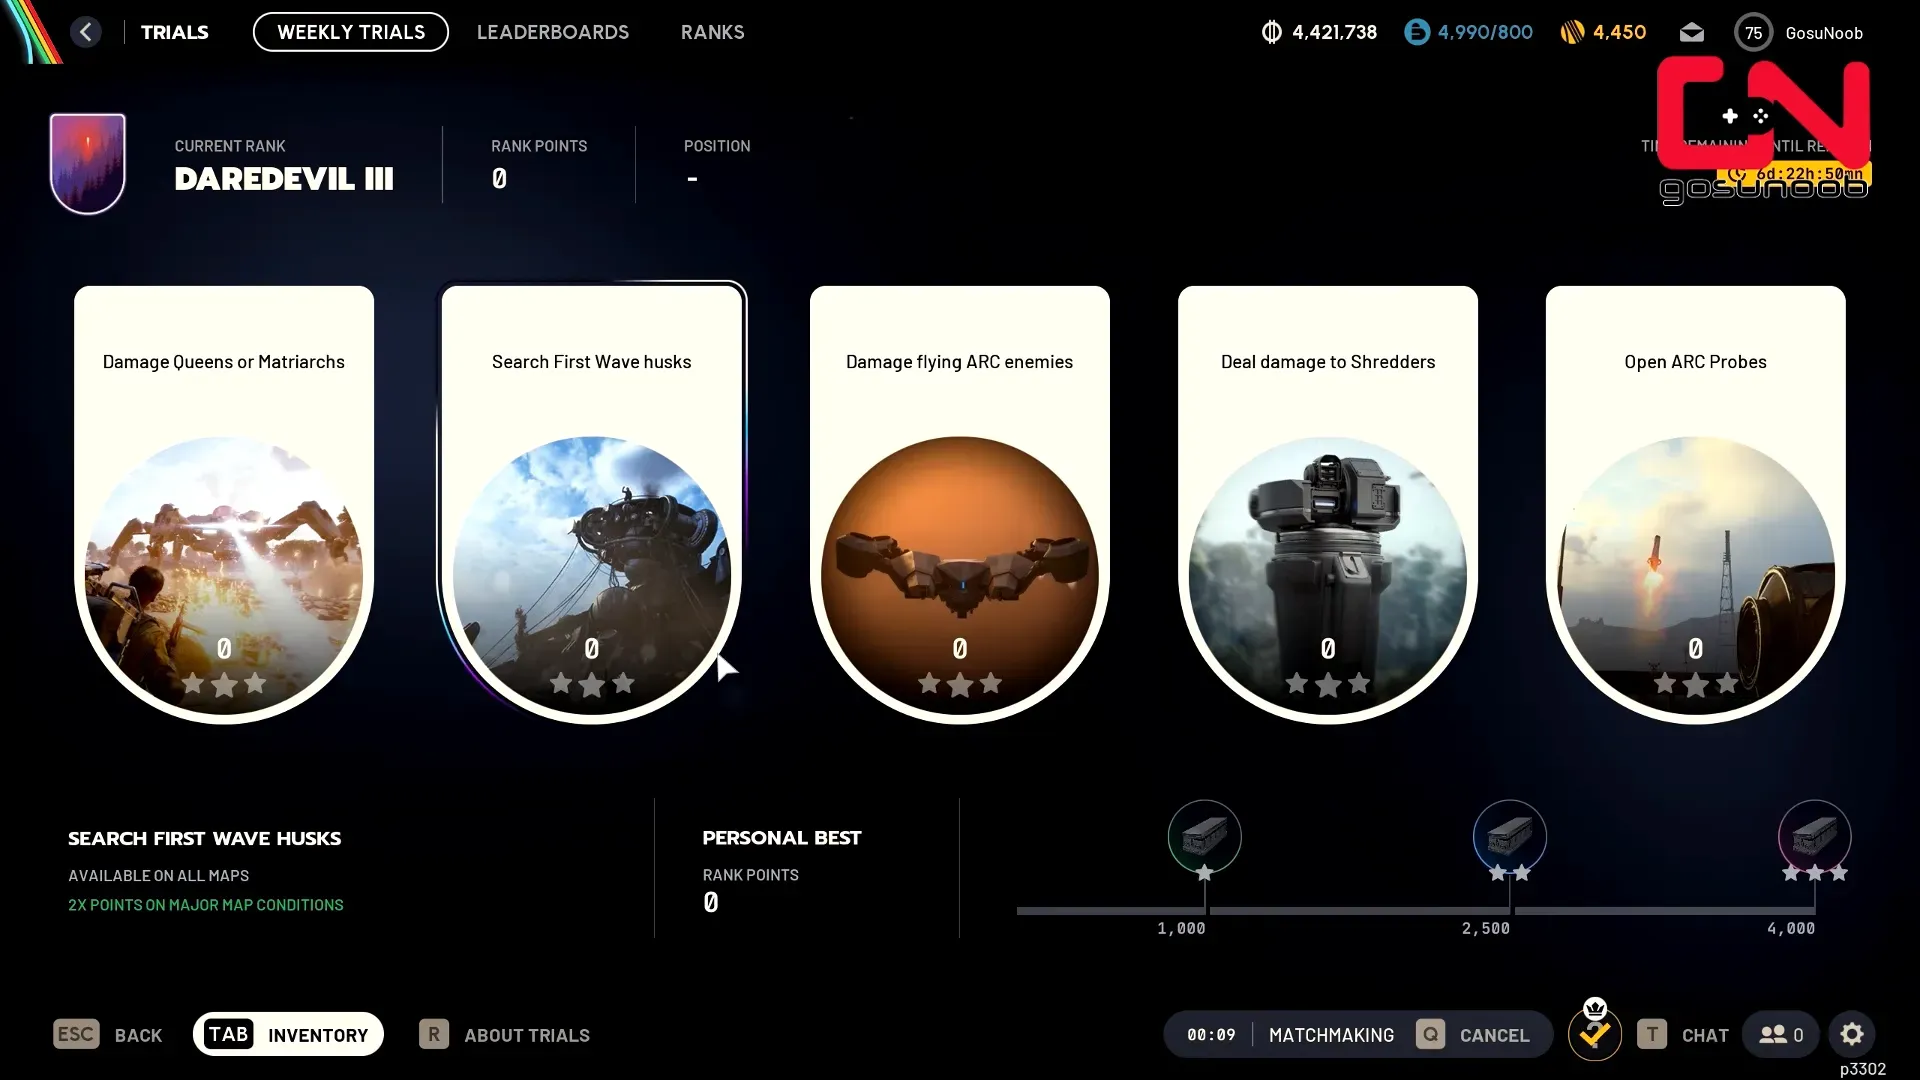
Each Trial objective has a star threshold at 1,000, 2,000, and 4,000 points. Hitting one, two, or three stars on an objective pays out once each for that week, typically stepping up from uncommon to rare to epic-quality rewards, with blueprints often reserved for the three-star payout. You can keep pushing your score afterward for rank, but additional runs do not grant more loot from that objective.
For Week 13, the five objectives are:
- Damage Queens or Matriarchs
- Search First Wave Husks
- Damage flying ARC enemies
- Deal damage to Shredders
- Open ARC Probes
The game tracks contribution, not last hits. You do not need to solo bosses or be the player who opens a map object to earn score, as long as you meaningfully participate.
Trial 1: Damage Queens or Matriarchs
This is the stress test for the week. Both the Queen and the Matriarch are endgame-tier ARCs built to punish sloppy positioning and under-geared players. The Trial only cares about how much damage you deal to one of them, not whether you land the killing blow.
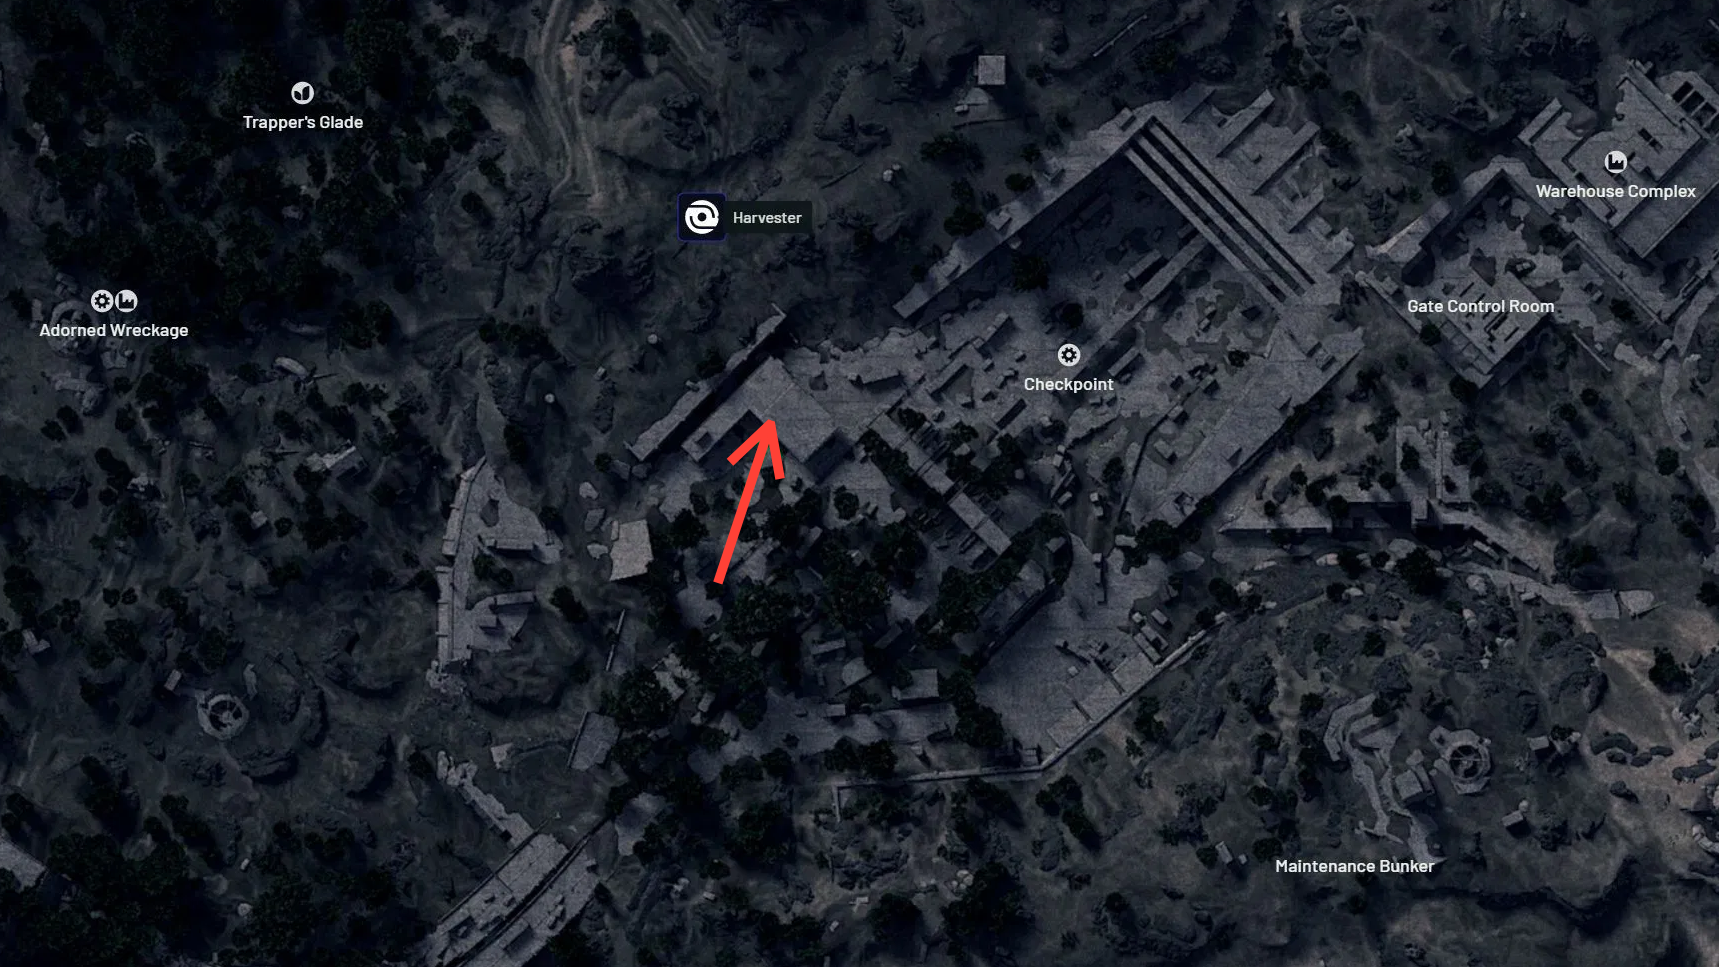
Where to find them. The Queen appears during the Harvester event on outdoor maps such as Dam Battlegrounds. The Matriarch has its own dedicated event, also on Dam. Both events are heavily contested because they attract squads looking for loot and Trials progress at the same time.
Queen vs. Matriarch. The Queen has more health but is easier to manage solo or in loose cooperation with strangers. The Matriarch technically dies faster but layers in dangerous backup ARCs that make the fight far more volatile. For consistent three-star runs, focusing on the Queen is the safer play.
Loadout and positioning. High-damage, mid-to-long-range weapons shine here. Bettina and Anvil are strong picks for main damage, with Equalizer used to strip armor plates and farm raw damage numbers. Barricades and door blockers help you build a secure firing line where you can commit to long damage windows without worrying about being flanked.
Scoring efficiently. The main trap is killing the Queen too quickly by tunneling weak spots. Criticals reduce the total time the target is alive, which caps your personal damage output and can leave you short of three stars.
Step 1: Spawn into a Harvester event where the Queen is active. As you approach, find elevated cover or a structure overlooking the boss arena so you can see the Queen without immediately drawing aggro from all adds.
Step 2: Strip armor and stack damage. Open by targeting armor plates with Equalizer or similar to rack up safe damage. Avoid obvious weak points until you are confident you have pushed enough score for three stars.
Step 3: Pace your finishing damage. Once you estimate you are near or above the top star threshold, you can start hitting weak spots to help close out the kill. If you are in a busy lobby, expect multiple Trailblazers, Wolfpacks, and Equalizers to be thrown; you may need to be quick and aggressive to get your share of damage before the boss melts.
Tip: Damage from throwable explosives like Wolfpack or Trailblazer can contribute thousands of points very quickly. A handful of well-placed throws, combined with sustained weapon fire, is often enough for three stars as long as you arrive early in the fight.
Trial 2: Search First Wave Husks
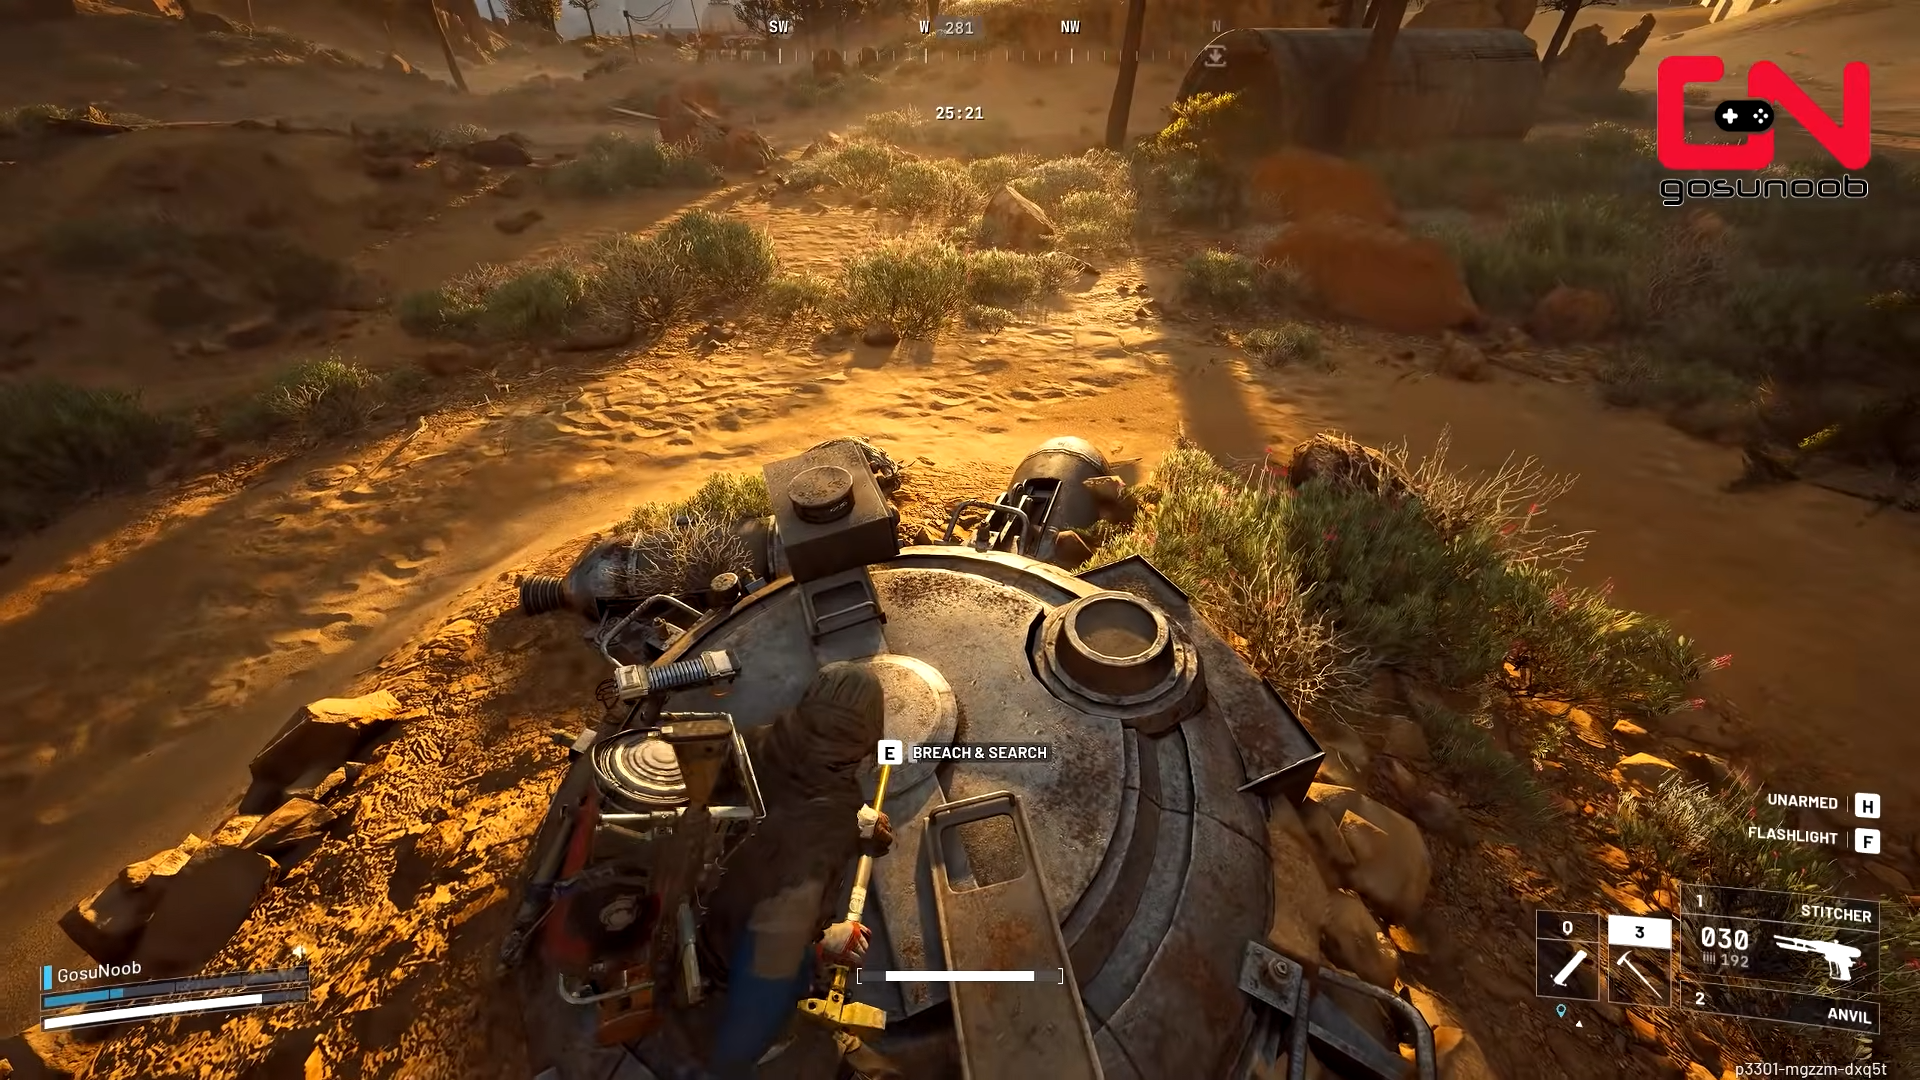
First Wave Husks are colossal dead ARCs scattered around the outdoor maps. For Week 13, the Trial requires breaching and then searching multiple husks rather than just interacting once.
Best conditions and map choice
Dam Battlegrounds during the Electromagnetic Storm event is the most efficient setup. In this condition, husks are charged with electricity that makes them much easier to spot from a distance, and their spawn density in zones like Red Lake and the Swamp is high enough to knock out the Trial quickly.
Step 1: Queue into Dam Battlegrounds when Electromagnetic Storm is active. As soon as you land, chart a route that hits either Red Lake or the Swamp first, depending on which is closer to your drop point.
Step 2: Scan for glowing husks as you travel. During the storm, they emit visible electrical arcs. Approach from cover, since nearby ARC patrols are common around these wrecks.
Step 3: Breach, then immediately disengage. Interact with the husk to start breaching; this takes a moment and leaves you exposed. As soon as the breach completes, roll or sprint away to avoid the electrical discharge from inside. The shock won’t kill you, but taking lightning strikes from the storm at the same time can.
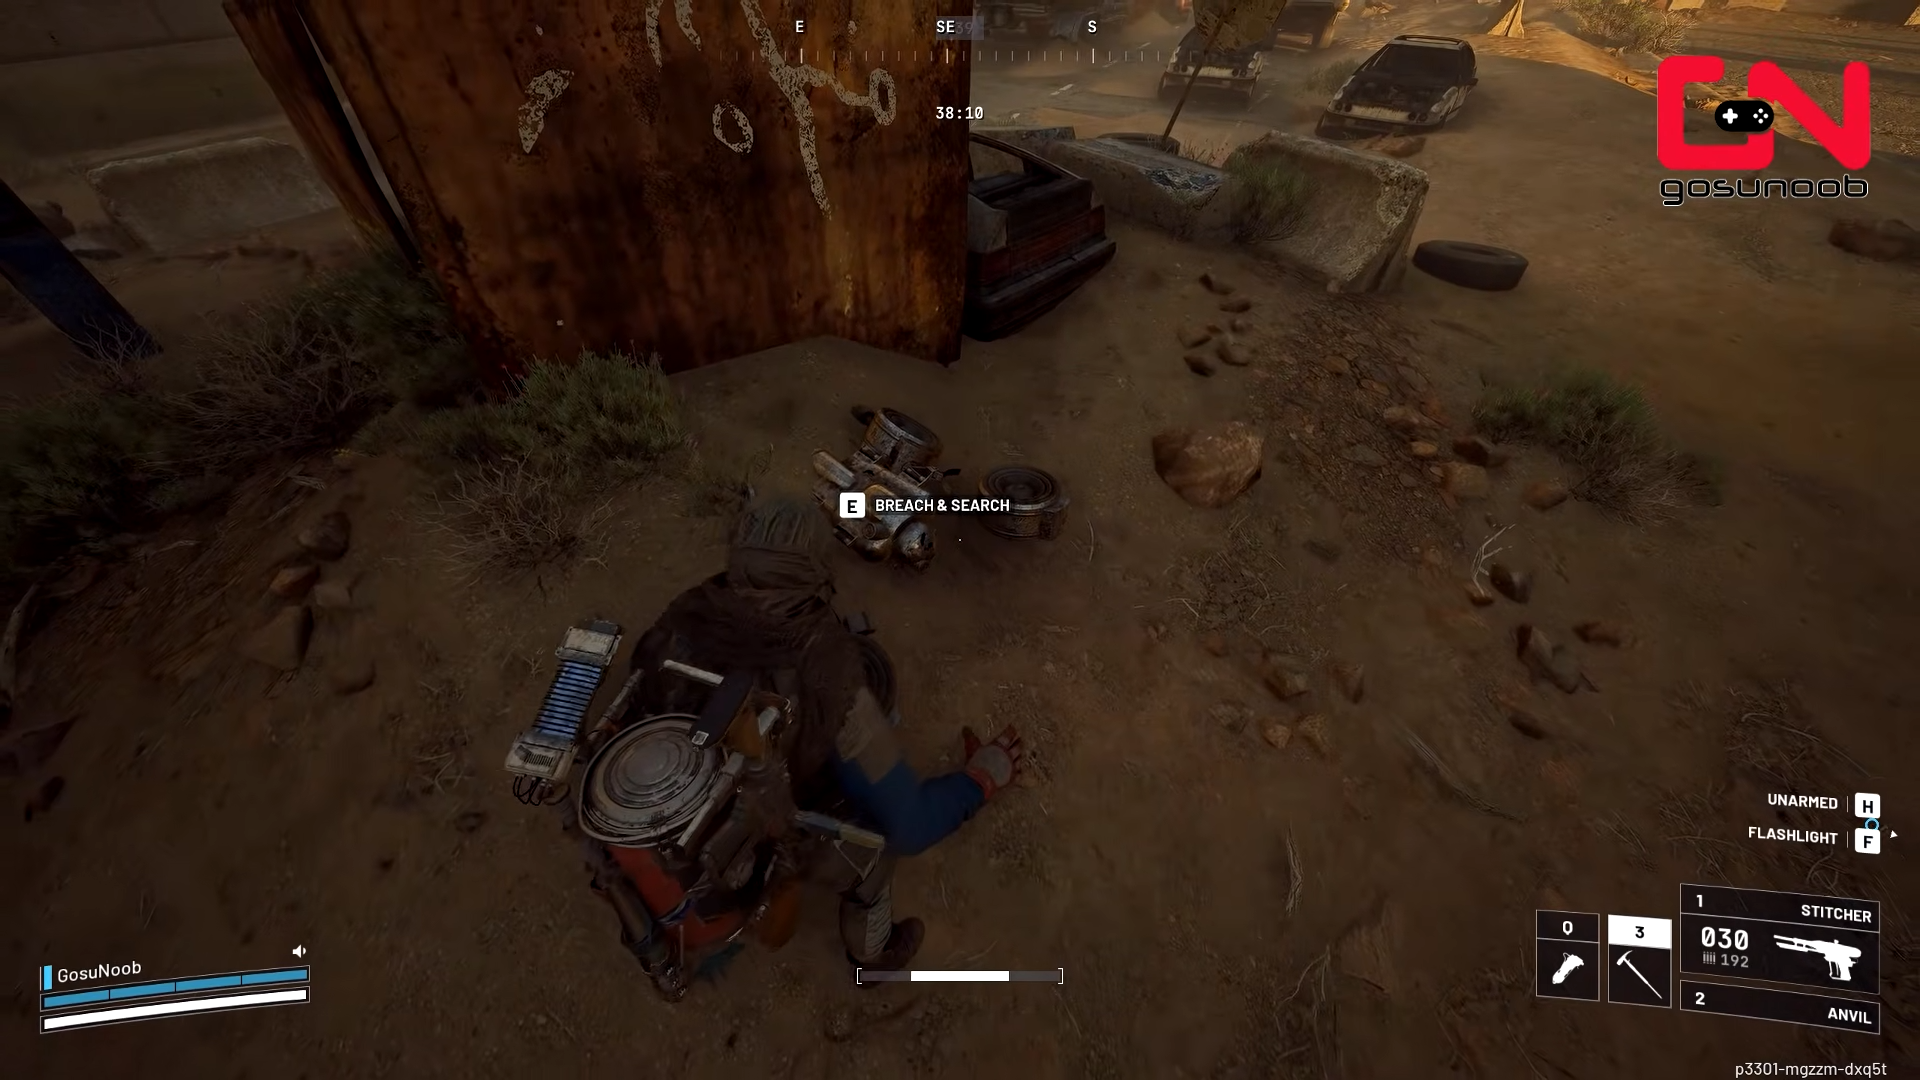
Step 4: Return to search the breached husk. Interact again to loot it and register progress for the Trial. Repeat this full sequence on additional husks in the same run until the Trial hits three stars.
Note: Breached husks that someone else has already opened will not count, so if you arrive at a husk with visible open panels and no interactive prompt, move on quickly rather than wasting time.
Trial 3: Damage flying ARC enemies
Flying ARCs are plentiful across the game, but the Trial scores you for damage, not kills. It also rewards tougher targets with more points, which matters if you want to hit three stars in as few engagements as possible.
Where and how to farm flying ARCs. Night Raid events on Dam Battlegrounds are ideal. The map fills with patrolling ARCs at night, and the event’s pacing funnels multiple waves through predictable paths. The key accelerator is the Snitch: a small ARC that, once provoked, calls in reinforcements that often include multiple Hornets and other airborne threats.
Loadout recommendationsWeapons that handle moving targets effectively are crucial. Renegade, Jupiter, Hullcracker, and Venator all offer reliable tracking or enough fire rate to land consistent hits on small targets. Prioritize ammo and reload perks over raw single-shot damage, since you care about volume of hits more than one-shot kills.
Step 1: Start a Night Raid on Dam Battlegrounds. Move along common patrol routes near the map’s central lanes and elevated structures until you locate a Snitch.
Step 2: Trigger the Snitch in a location you can control. Fire on it to start the alert, then fall back to high ground or solid cover where you have clear sightlines into the airspace around you.
Step 3: Focus on sustained damage, not quick kills. Put rounds into every flying ARC that appears, switching targets when a squadmate is about to finish one so you spread your damage across the wave. This maximizes points per wave and keeps you in control of aggro.
Step 4: Reset when pressure builds. If hostile players or heavy ground ARCs pile on, break line of sight, reposition, and trigger another Snitch later rather than dying with pockets full of ammo and no score.
Tip: The only flying ARCs worth skipping are Rocketeers if you want a low-stress run. They are dangerous, tanky, and often not needed to reach three stars when Snitch waves are supplying Hornets and other easier targets.
Trial 4: Deal damage to Shredders
Shredders are brutal, short-range ARCs that punish anyone who misreads their windup. Week 13 asks you to damage and defeat three of them, which pushes you into some of the game’s tightest indoor combat.
Where to fight Shredders. Stella Montis is by far the best map for this Trial. Its dim corridors, locked rooms, and interior choke points are exactly where Shredders like to lurk. The Cultural Archives sector typically spawns two to three in a single run, letting you clear the full objective without rotating to other zones.
For faster progression, pair Stella Montis with a Night Raid modifier. The 2x XP buff is useful if you are leveling gear while you work through the Trial, and the higher enemy density keeps the map from feeling empty between Shredder pulls.
Loadout and tools. A Heavy-ammo primary to handle both Shredders and opportunistic players.
- Il Toro or another high-burst shotgun for close-range bursts when the Shredder is exposed.
- Fuze and Lure grenades to control spacing and force Shredders into kill zones.
- Ample healing items to recover from splash damage if you mistime a dodge.
Step 1: Load into Stella Montis and navigate to the Cultural Archives. Move slowly through the corridors and listen for Shredder audio cues rather than sprinting; over-committing into an unseen Shredder often forces a panic retreat.
Step 2: Tag a Shredder from range to draw it out. Use a single shot or a grenade to get its attention, then back into an area with a lot of solid cover such as stacked boxes or pillars.
Step 3: Fight in a tight circle around cover. Shredders charge up an area-of-effect attack that explodes in a circular radius. When you see the windup, break line of sight by stepping behind a box or wall rather than trying to outrun the radius in a straight line.
Step 4: Rotate through your weapons as the Shredder exposes itself. Use grenades and Heavy weapons to break armor, then close in with Il Toro for decisive bursts when it’s staggered or stuck in a corridor.
Step 5: Repeat for additional Shredders in the same complex. After three kills with solid participation, the Trial should hit three stars without additional farming elsewhere.
Note: If you prefer to stay safer and spend more consumables, combinations like Showstopper plus multiple seeker grenades can delete a Shredder quickly from relative safety, at the cost of stash resources.
Trial 5: Open ARC Probes
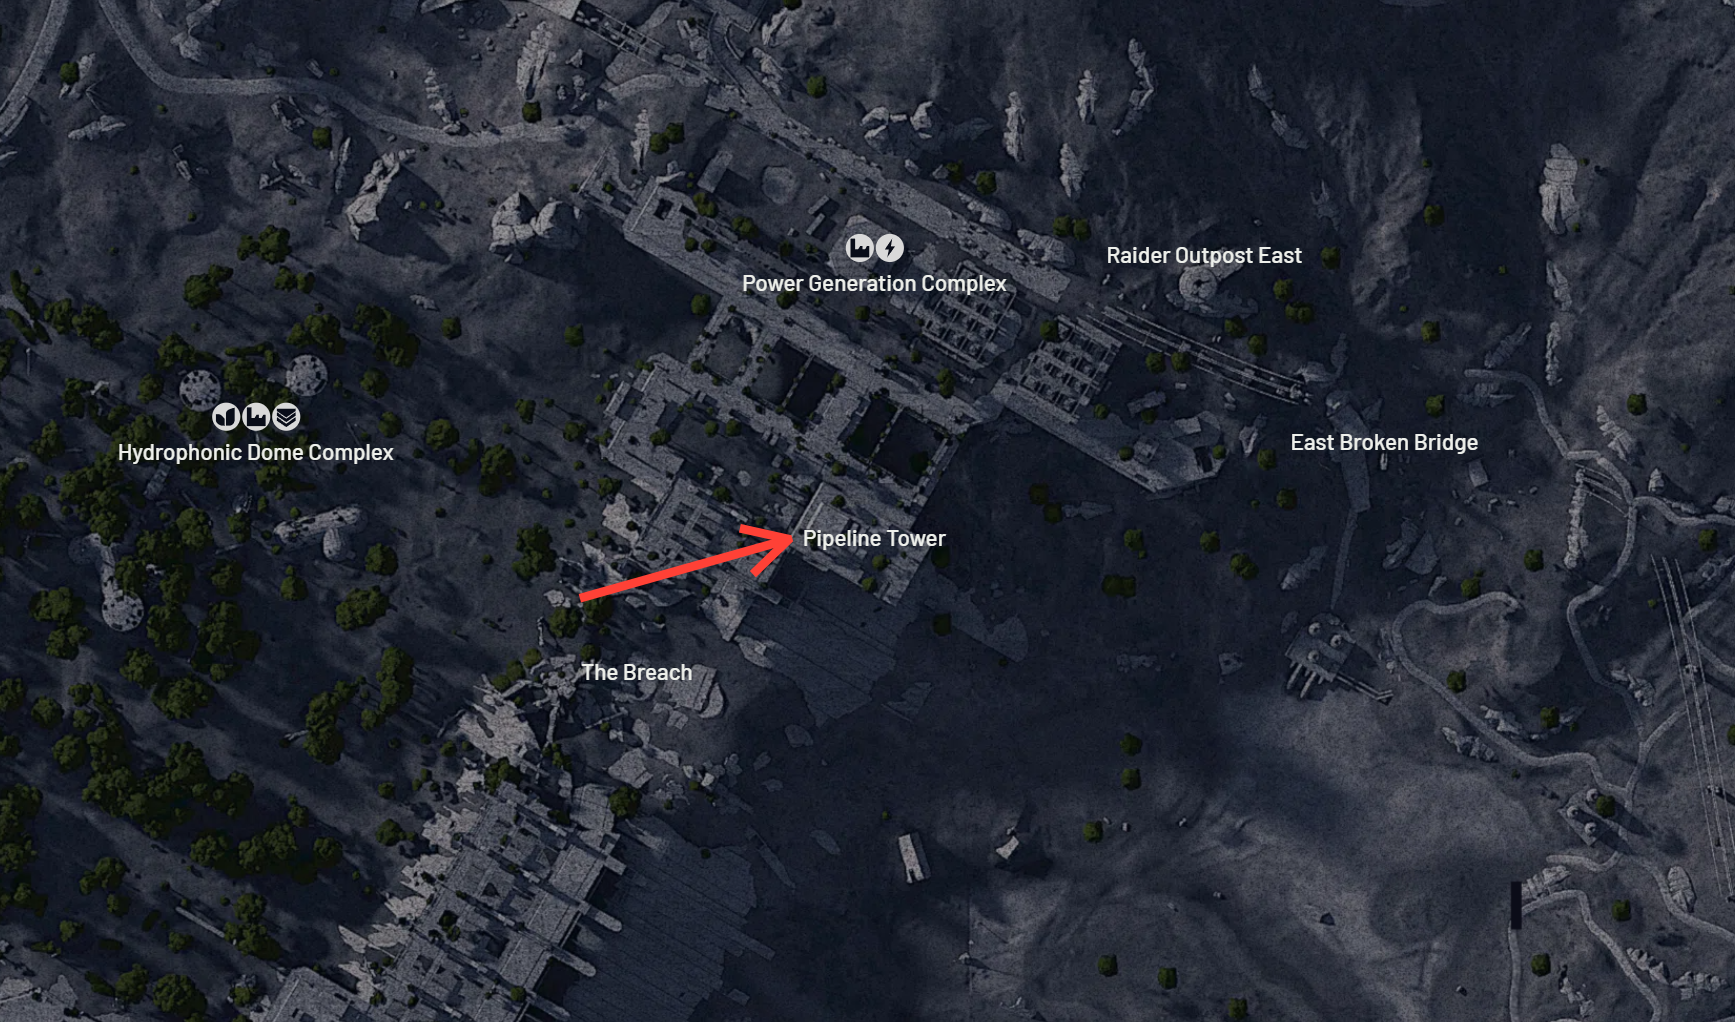
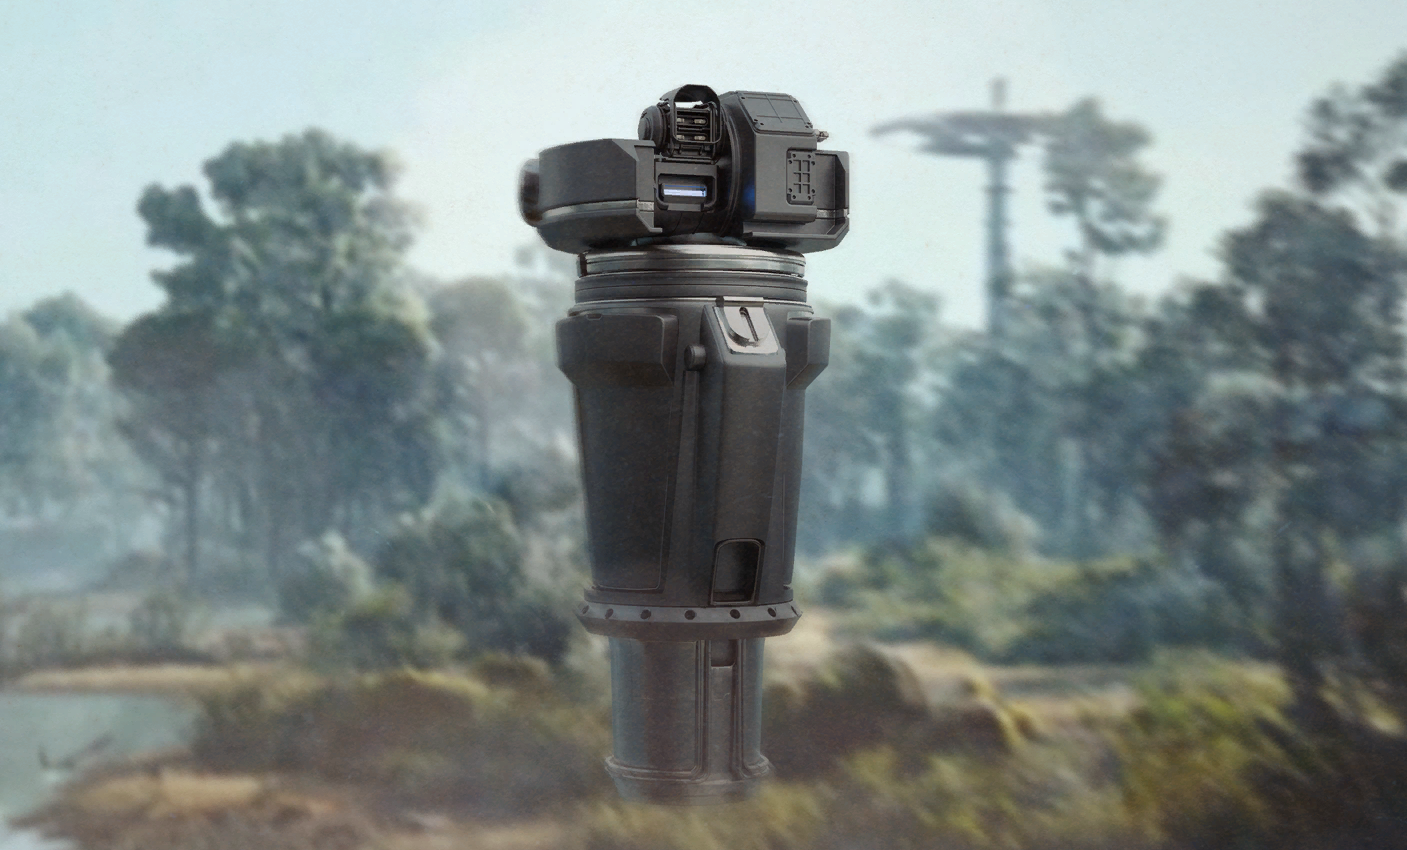
ARC Probes are the large rockets that crash into outdoor maps, broadcasting a beeping signal and leaving a smoke trail. They hold valuable loot, but for Week 13 the important part is opening and then searching them under pressure from nearby enemies and other players.
Best map and how probes behave
Spaceport offers a good balance of sightlines and cover for this Trial. Probes can land almost anywhere on outdoor maps, but the flat open spaces and clear skyboxes of Spaceport make their beeping and landing smoke easier to track on the move.
Step 1: Drop into an outdoor Spaceport raid. As you move between objectives, keep one eye on the sky for fresh probe entries and on the horizon for columns of smoke that mark recent landings.
Step 2: Use audio to triangulate. The probes emit a distinct beeping that grows louder as you approach. Cut your sprint occasionally to listen and adjust direction, especially when line of sight is blocked by structures.
Step 3: Secure the area before interacting. Probes are noisy when you open them and draw attention from both ARCs and players. Clear nearby patrols, check rooftops and angles where players might camp, and only then start the interaction.
Step 4: Open, then search the probe. Interact once to breach it, wait out the short opening animation, then interact again to search its contents. Only the search registers for Trial progress; leaving after the first interaction will not count.
Step 5: Relocate quickly after each probe. As soon as you finish searching, reposition or extract rather than looting in place. Anyone who heard or saw the probe will be converging on your location.
Tip: Probes that have already been opened by someone else do not count for the Trial. If you reach a silent probe with no interaction prompt and visible open panels, move on immediately to avoid wasting time.
Week 13 leans hard on event timing and map choices. Queens and Matriarchs reward early arrivals and smart damage pacing; First Wave Husks and ARC Probes favor players who can read conditions like Electromagnetic Storm and Night Raid to route efficiently; flying ARCs and Shredders ask for controlled aggression rather than chaos. Once each objective is three-starred, you can ignore rank completely or keep pushing for leaderboard bragging rights, confident that the important part—the rewards—is already locked in.