
The D3 Treasure Map puzzle in Dying Light: The Beast leads to a tucked-away safe with a fixed combination and a guaranteed reward. If you’re stuck on the clue or just want to move on, here’s the short version: reach the hidden attic near a Hardware Store, find the note by the TV for confirmation, and enter the combination below.
D3 Treasure Map safe code: 12 – 25 – 55What the “D3 Treasure Map” is pointing to
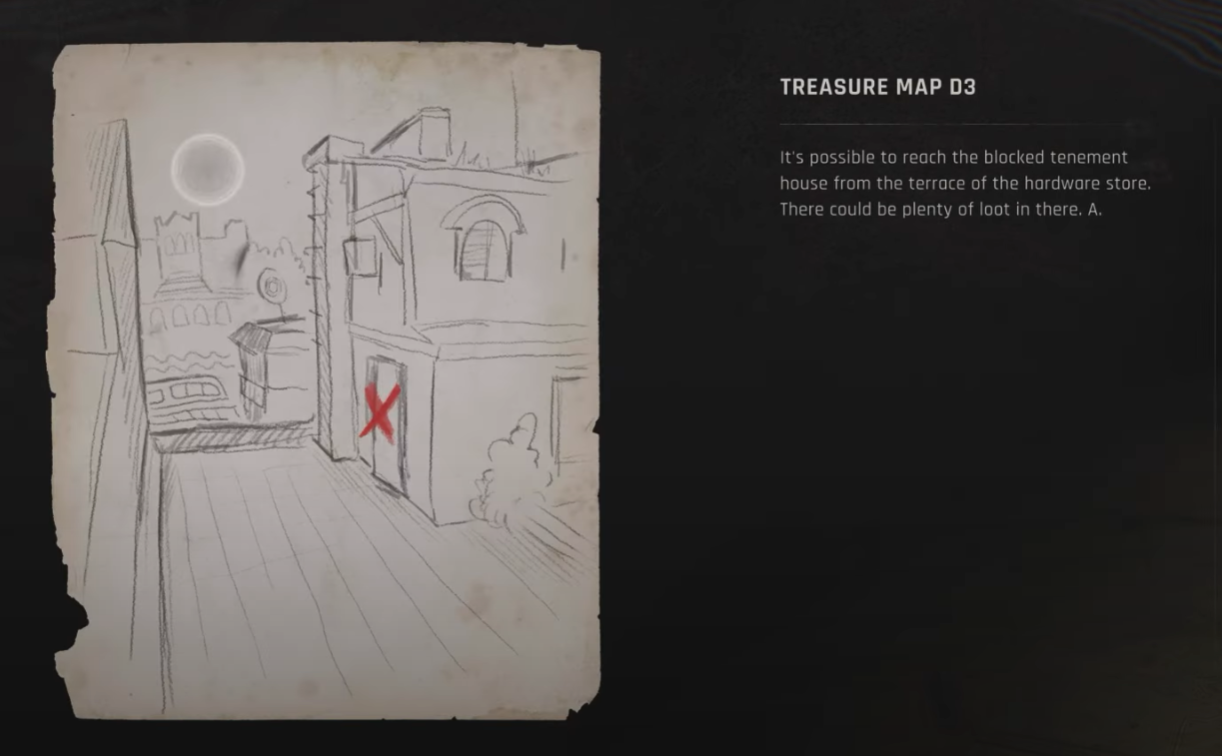
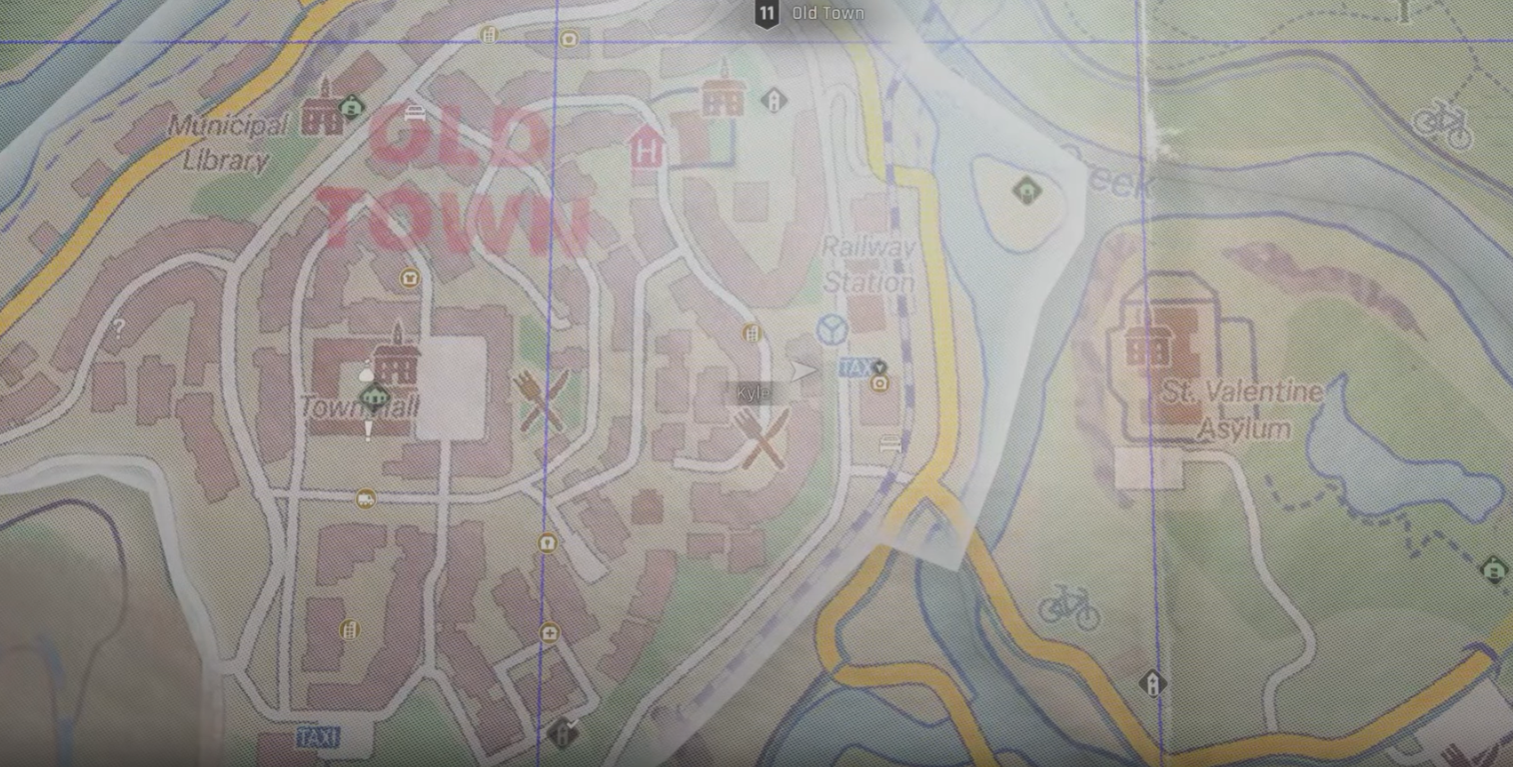
The treasure map references a grid label (D3) that directs you toward a Hardware Store location in Castor Woods. The stash itself isn’t inside the shop floor; it’s in a concealed attic close by. Once you’re in the right spot, look for an upper entry point and a room with a TV — a note near that TV reiterates the solution. Open the safe with 12–25–55 to collect your items.
Reward on first open: Medkit and five Legendary Regeneration Boosters.
Step-by-step: getting in and opening the safe
- Head for the Hardware Store marked in the D3 area. The store is a “Dark Zone” type that only appears on your map after you spot it in the world. Use binoculars to reveal points of interest from a distance; newly spotted Dark Zones are then permanently marked for return trips.
- Search the buildings directly around the storefront. You’re looking for a hidden attic space nearby rather than a back room in the shop. Expect a vertical approach — eaves, broken boards, or upper windows are common ways in.
- Inside the attic, locate the TV. A note placed beside it confirms the combination.
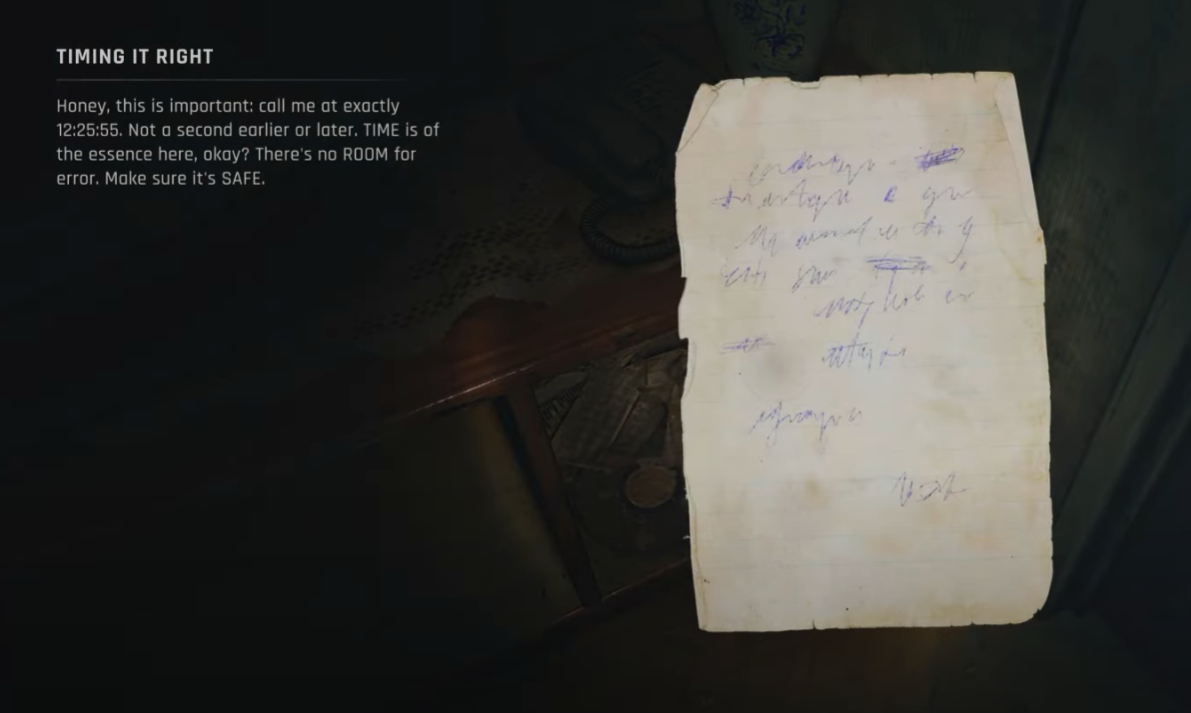
- Interact with the safe and dial the code left to right: 12, 25, 55.

Tip: Safe dials in The Beast always take three numbers in sequence. If you ever see a leading zero on a clue (for example, “09”), you can input just the number itself.
Why some guides mention the Hardware Store
In The Beast, Dark Zones come in different flavors — smaller, single-building sites such as Hardware Stores, Pharmacies, and Supermarkets, and larger multi-level spaces like Schools or Apartments. The D3 stash is associated with a Hardware Store location because that’s the recognizable landmark for the grid hint, even though the safe itself is hidden in an adjacent attic rather than on the shop floor.
What changes if you revisit the area
Dark Zones can be looted multiple times and enemies will repopulate, but unique rewards (like this safe’s Legendary boosters) don’t respawn. Once you’ve cleared a Dark Zone’s one-time reward, the icon shows as completed when you hover over it, and the map will indicate the type of materials you’re most likely to find on repeat runs.
Extra context if you want to keep hunting safes
- Safe codes are always three-part combinations, read left to right.
- Clues are typically in the same room or very close — notes, number puzzles, or objects that encode dates. When in doubt, sweep with Survivor Sense to ping interactables you might have missed.
- A few early examples, if you’re branching out:
- “Love Letter” safe: 11–14–20 (found by removing a framed dog photo to reveal the hint).
- Passport Office: 11–51–16 (taken from nearby signage).
- Supermarket parcel locker: 65–63–35 (note in a nearby train car).
Note: While common containers and enemies refresh, one-off safe rewards behave like other unique pickups — once collected, they’re done for that location.
Routing and prep
- Bring a few lockpicks anyway. The attic safe uses a code, but locked doors and containers are common in the surrounding buildings.
- Mark the exact building once you find the attic. It’s easy to lose track in tight town blocks or when you double back later.
- Use binoculars frequently. Revealing a Dark Zone once adds it to your map for future farming and reduces the time spent re-scouting.
If you’re chasing this for the unique consumables, the D3 Treasure Map is a quick win once you know the attic route and the 12–25–55 combination. After you’ve looted the safe, the Hardware Store area remains useful for routine materials — wiring and similar craft parts tend to be more common there — but the one-time stash won’t return.