
The Everdark Balancers — Weapon Bequeathed Harmonia Everdark Sovereign — sit at the end of their own expedition in Elden Ring Nightreign’s Forsaken Hollows DLC and are tuned to punish improvisation. The fight layers a multi-target opener, a faster “blood” variant, and a giant worm phase that can wipe careless parties with bleed and area damage.
Clearing this encounter consistently comes down to two things: planning your expedition to arrive properly stacked, and exploiting the boss’ specific weaknesses and stagger windows in each phase.
Where the Everdark Balancers fit in Nightreign
The Everdark Balancers are the final boss of the Everdark Balancers expedition and can be challenged on Day 3. Access to this expedition requires the Forsaken Hollows DLC for Elden Ring Nightreign.
You fight a variant of the Balancers encounter already present elsewhere in Nightreign, but here they appear as Weapon Bequeathed Harmonia Everdark Sovereign with an added Everdark “worm” phase and a much higher baseline difficulty.
Everdark Balancers weaknesses and resistances
The encounter looks chaotic, but its resistances are straightforward.
| Aspect | Behavior |
|---|---|
| Physical type | Especially weak to blunt damage from hammers and great hammers. |
| Status effects | Can be put to sleep; can be bled; frost buildup from the right weapon is effective. |
| Damage resistances | High resistance to most elements; holy is notably weak in this specific fight. |
| Magic | They resist “pretty much everything except magic”, so non-holy magic remains a solid option. |
| Blood phase nuance | In the worm/blood phase, fire damage performs extremely well, and holy tools like Marika’s Hammer hit significantly harder than usual on the grotesque forms. |
In practice, this means blunt weapons or one-handed status weapons (frost, bleed, or sleep) dominate the Balancers themselves, while fire or certain holy tools spike in value once they transform into their blood-soaked variants and when the worm appears.
Recommended roles, builds, and relic priorities
Party composition matters more here than in many other Nightreign expeditions.
Roles that overperform: Undertaker is a standout thanks to high HP, strong stance damage, and a character skill that restores stamina and boosts both attack power and physical damage negation. Two competent Undertakers can effectively stunlock Balancers by chaining ultimates. Wilder, Raider, and Guardian also work well, provided at least one build focuses on breaking stance with blunt weapons.
Weapons: Hammers and great hammers are the safest baseline. A one-handed status axe such as the Ice Rin Hatchet (frost damage) can be devastating when power-stanced or spammed one-handed for faster proc buildup. Colossal weapons remain viable if you are comfortable maintaining uptime, but they demand cleaner spacing and stamina planning.
Relics and upgrades to prioritize during the expedition:
- Damage negation and resistances — especially bleed resistance to survive the worm phase and the blood blooms.
- Stance break / physical attack boosts — to accelerate staggers when focusing a single Balancer.
- Stamina and HP upgrades — essential for staying aggressive in multi-enemy scenarios.
- Ultimate uptime tools — anything that gives you an ultimate at the start of the boss fight or reduces cooldown fits perfectly with Undertaker’s kit.
On the way in, clear as many “red” and defensive bosses as your timer allows. Those rewards often include bleed resistance and raw damage negation, and both are disproportionately valuable in this expedition.
Phase 1: multiple Balancers and Circle of Purification
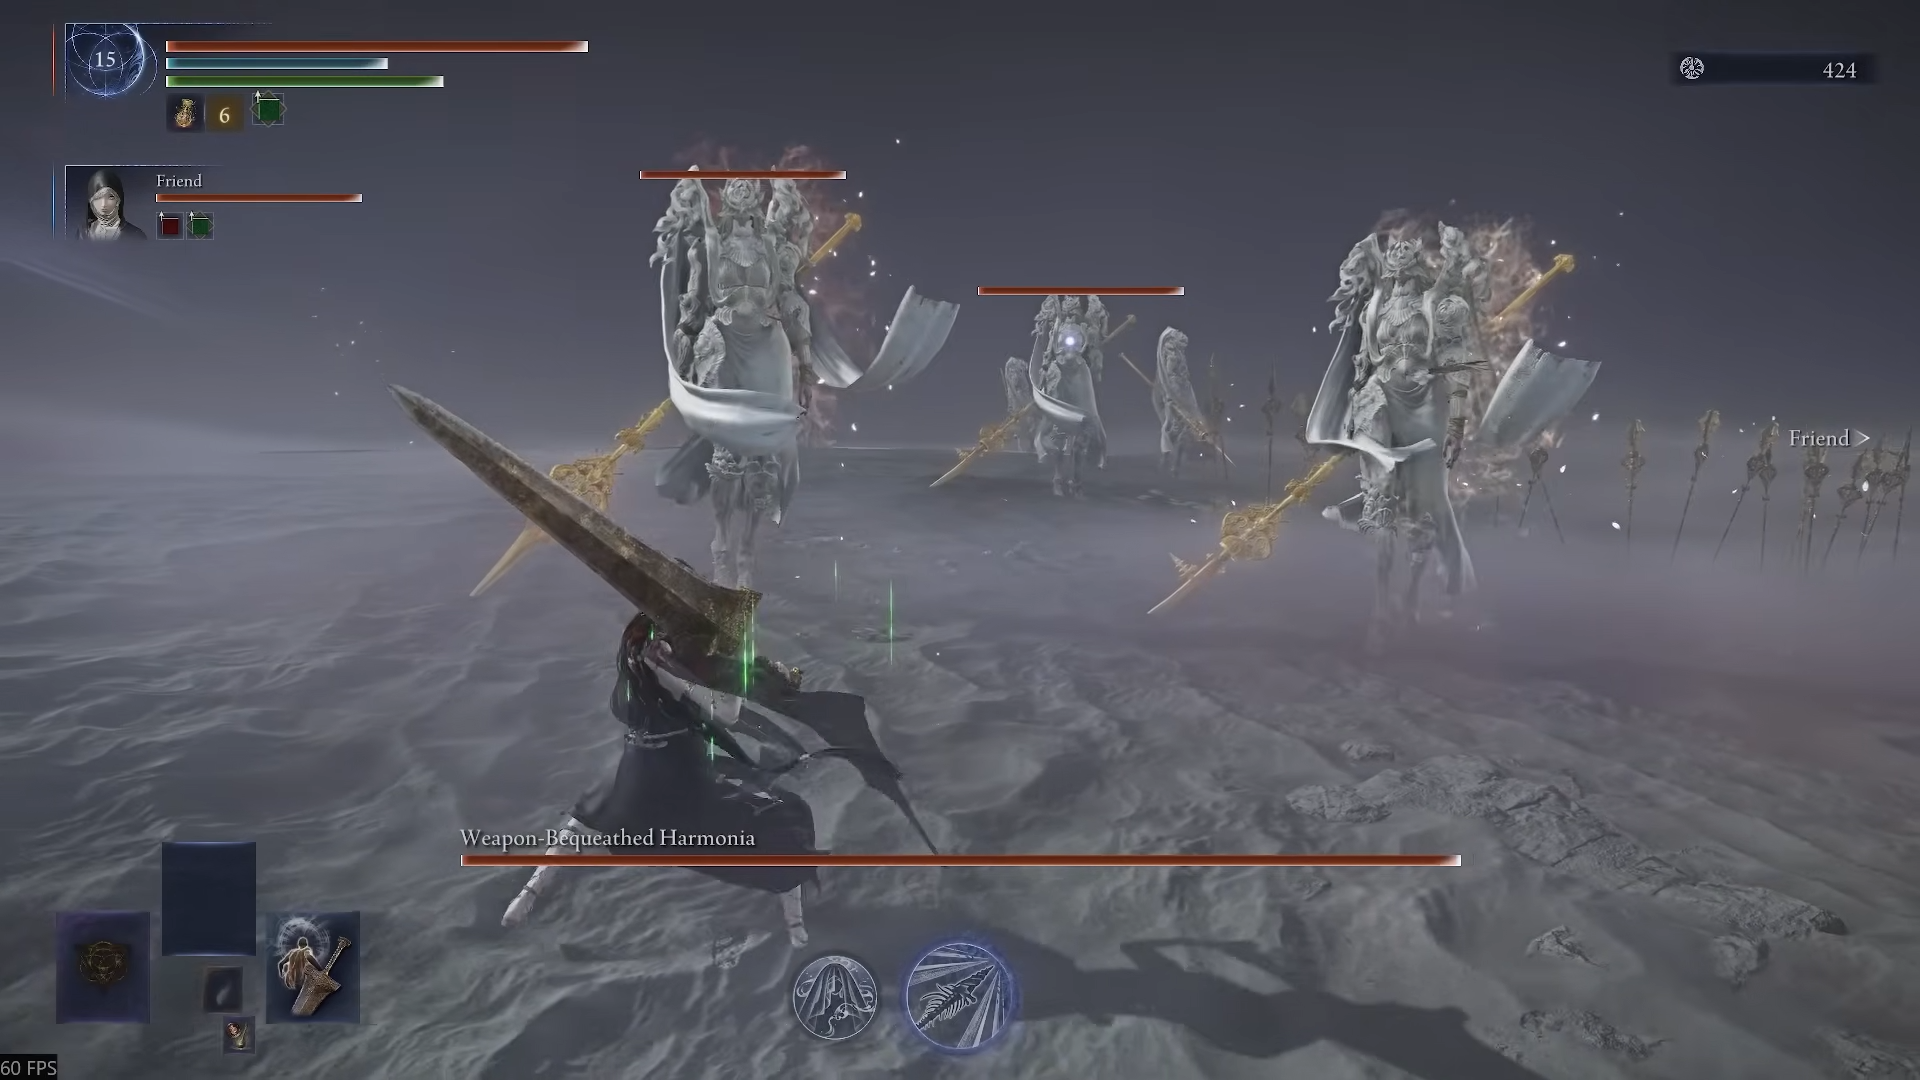
The fight opens much like the standard Balancers encounter: several Weapon Bequeathed Harmonia fight as a group, all sharing the arena.
Mechanically, Phase 1 tests target priority and situational awareness.
- Isolate targets. Trying to brawl the entire pack will usually end in a stun-locked death. Lure a single Balancer slightly away from the group and commit to bursting it down while the others reposition.
- Read the ground. Rings that appear beneath your feet telegraph the Circle of Purification attack, where spears erupt from the ground a moment later. Step or roll out as soon as the rings form; greed here is punished hard.
- Abuse blunt and status damage. Hammers, great hammers, and one-handed status weapons (especially frost axes like Ice Rin Hatchet) can rapidly break stance and proc their effects. Once a Balancer is staggered, capitalize with a full combo or critical and then immediately switch to the next target.
With at least one Undertaker, there’s an additional layer.
Step 1: Open with an Undertaker ultimate as soon as the Balancers group in range. This frontloads stance damage and creates a safe opening for the team.
Step 2: Have the second Undertaker wait roughly three seconds after the first ultimate finishes staggering the target before firing their own. This delay lets you chain stagger windows instead of overlapping them.
Step 3: At the end of each Undertaker attack string, trigger the Undertaker character skill. This refills stamina quickly, increases attack power, and grants temporary physical damage negation so you can stay in melee longer.
Once enough Balancers are defeated or their health drops to around three quarters, the encounter transitions into its blood-soaked second phase.
Phase 2: grotesque “blood” Balancers
In Phase 2, every Balancer you previously killed crawls back as a disfigured, faster version. Their aggression ramps up, but their underlying weaknesses are still exploitable.
- Shriek into charge. A high-pitched scream always precedes a rapid charge where Balancers thrust their spears forward. Treat the audio cue as your dodge button: roll as soon as you hear the shriek, ideally to one side or diagonally forward.
- Roll behind multi-slashes. Their chained spear slashes track heavily if you backstep, but rolling behind them as the first swing starts both avoids the combo and positions you for free hits.
- Never fight the pack head-on. Just as in Phase 1, pulling one grotesque Balancer away and deleting it quickly is far safer than tanking the full squad.
Phase 2 also introduces a powerful interaction around staggering.
- Stance break chain. Killing or fully staggering one Phase 2 Balancer causes the others to flinch. Parties that focus a single target can trigger repeated staggers across the group, buying breathing room.
- Holy and fire spikes. The grotesque forms appear notably weak to certain damage types. Marika’s Hammer, for example, can deal roughly double its usual damage in this phase. Fire-based setups also perform extremely well, especially later in the worm segment.
Continue rotating between targets: burst one down, pivot to the next while the first revives with an attack buff, and repeat. After enough health is shaved off in this phase, the arena gives way to the Everdark worm.
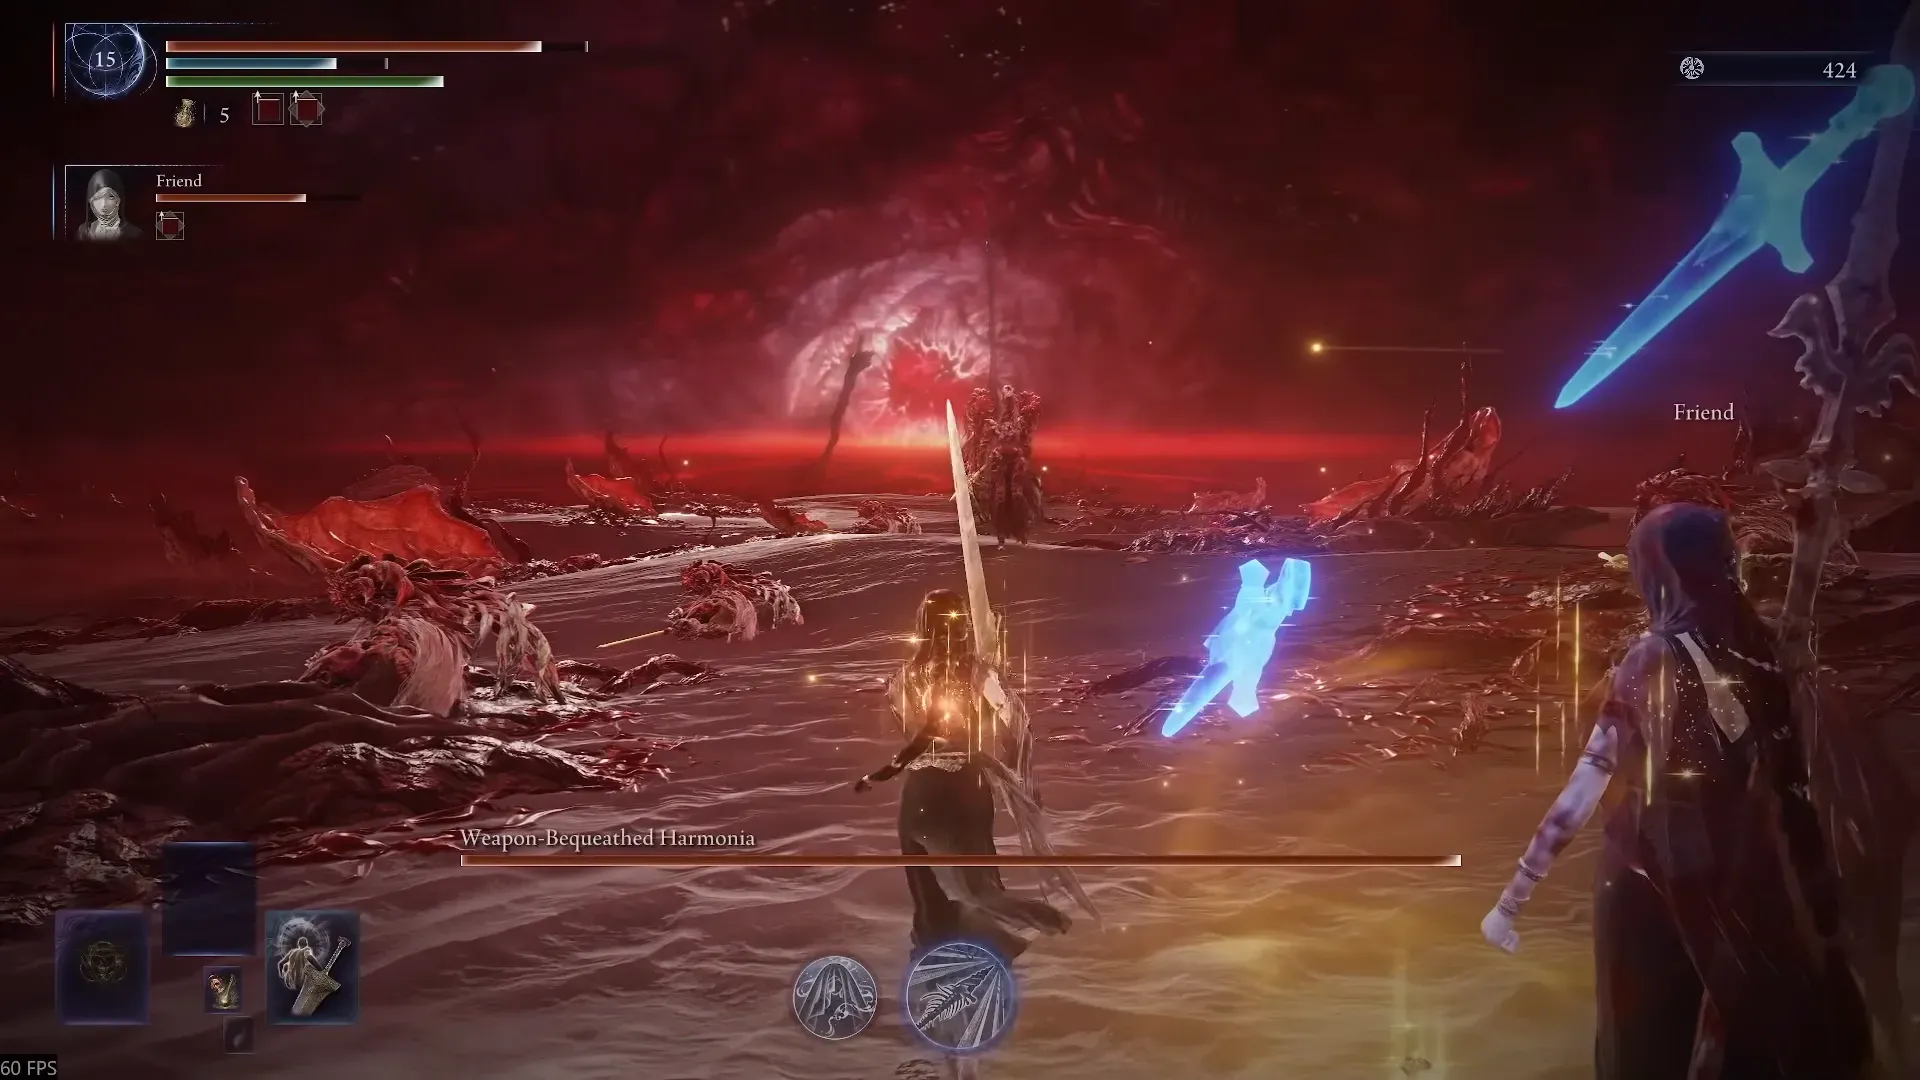
Phase 3: the Everdark worm and blood bloom
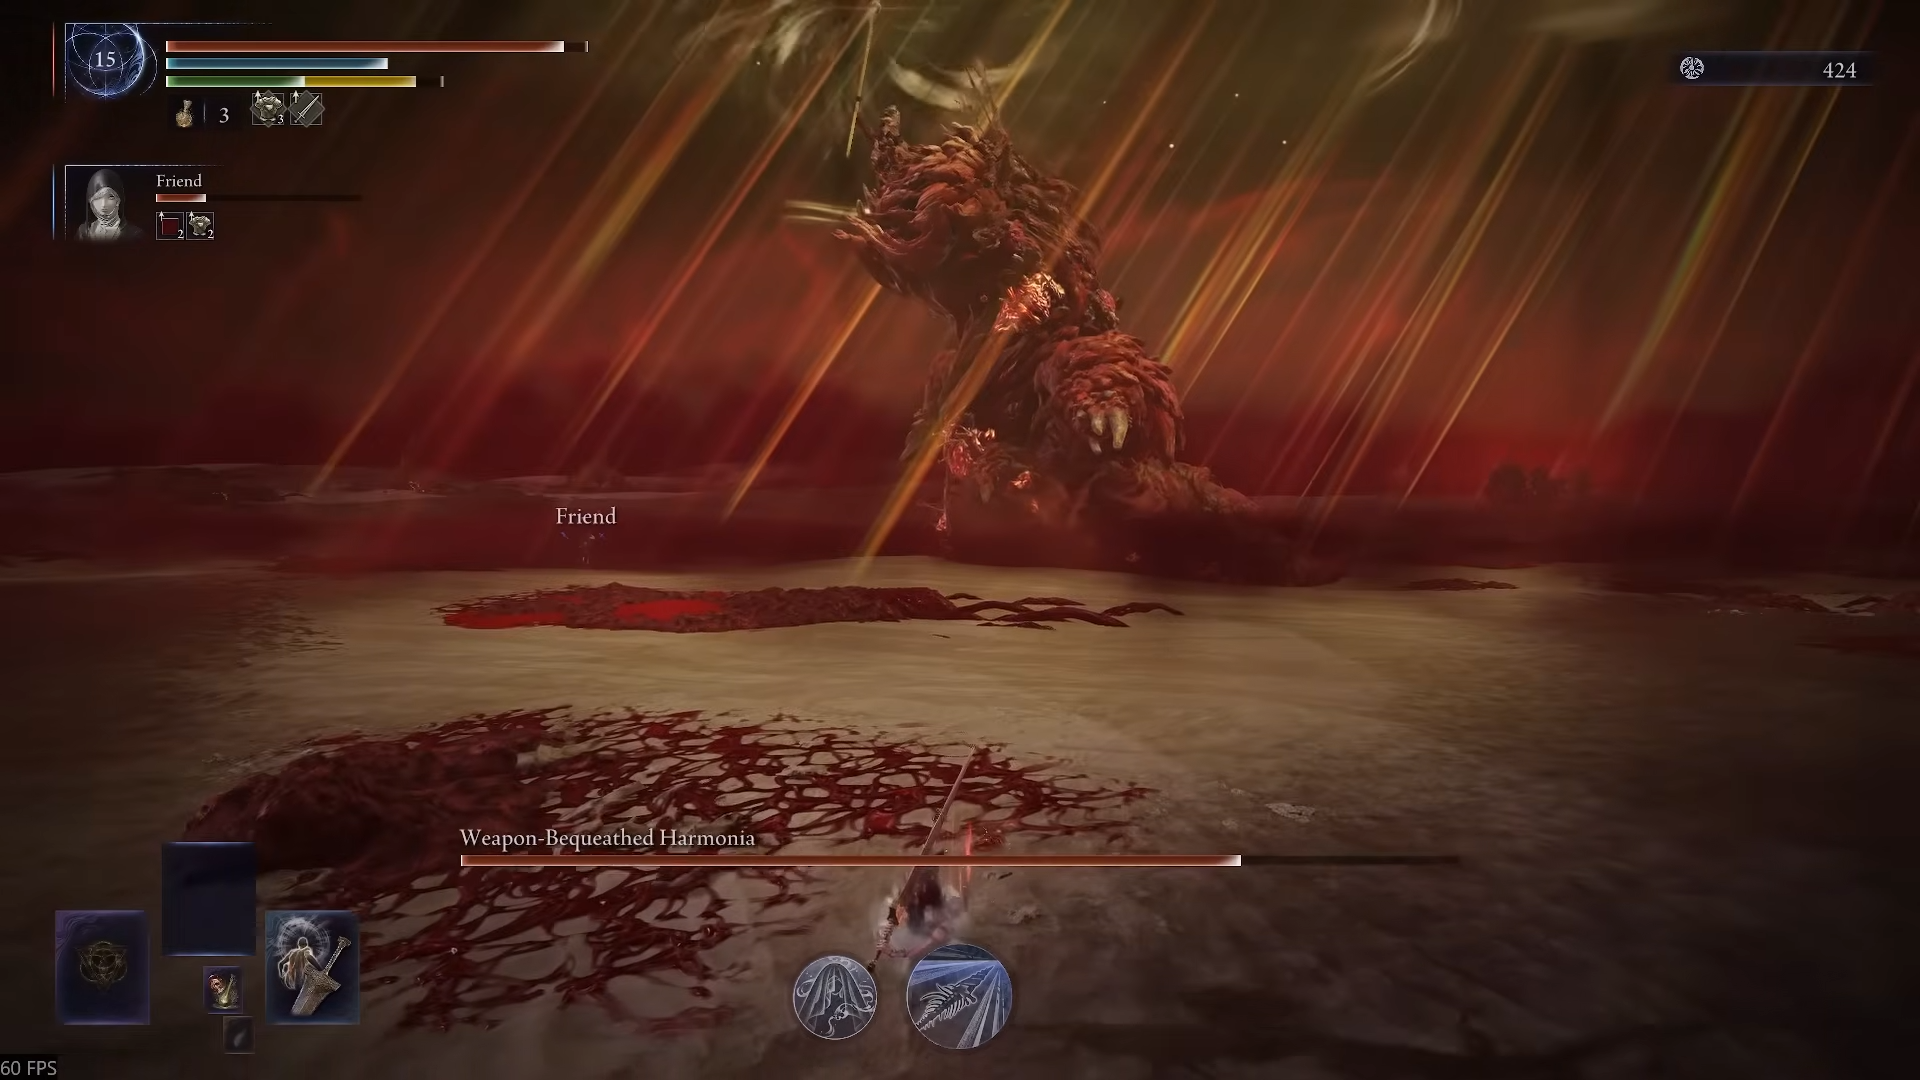
The final layer introduces a massive leviathan-like worm that tunnels through the arena and supports the Balancers with bleed-heavy attacks. This is where most parties wipe until they understand its rhythm.
Worm attack patterns and safe responses
- Ground dive and shockwave. The worm dives under the arena, then emerges with a spreading shockwave. Staying at medium distance and rolling as the shockwave reaches you is usually enough to avoid damage.
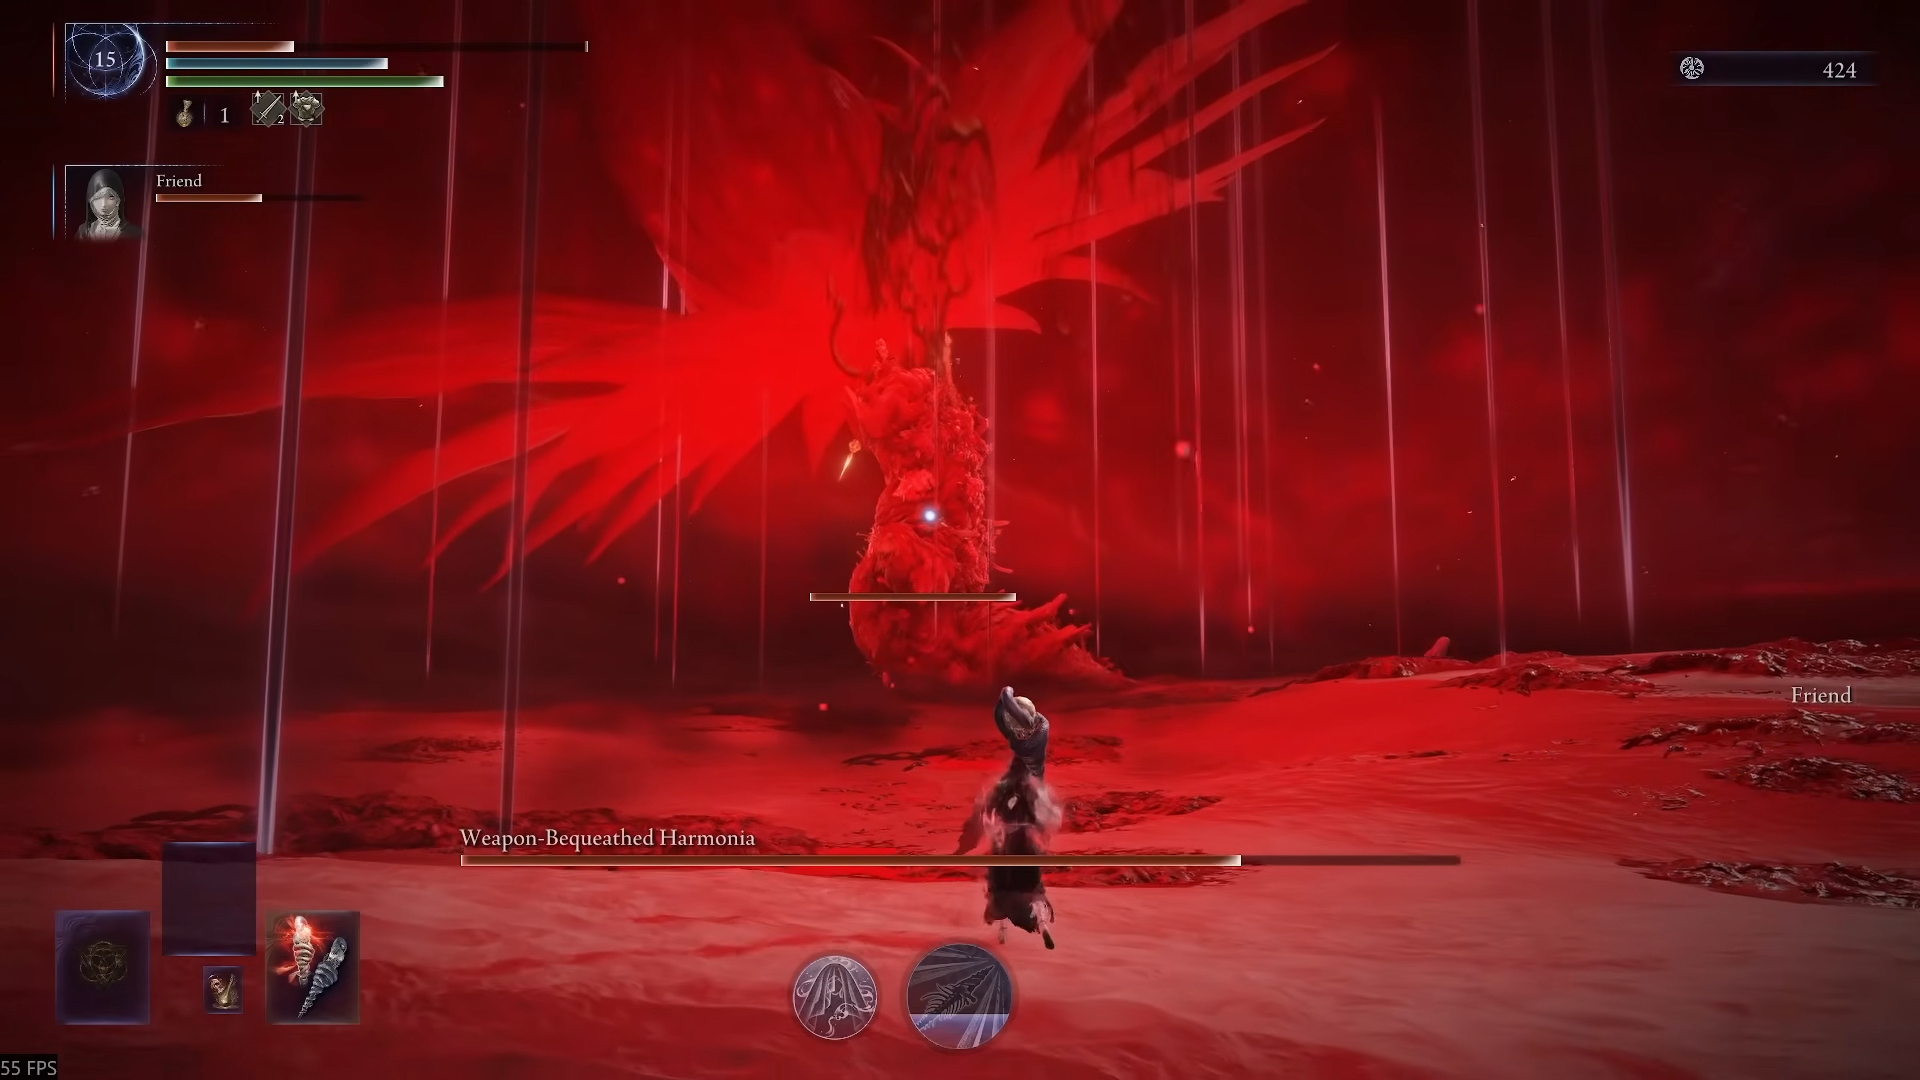
- Spear rain. It can call down spears across wide areas. The first impact marks an unsafe zone for a moment, but the safer strategy is counterintuitive: back away from the initial impact, then move into that original hit area once the next volley starts landing elsewhere.
- Bleed flowers and puddles. The worm seeds flower buds and blood puddles that build up Blood Loss. These are less threatening on their own than the big telegraphed attacks but will finish you if you stand in them during other damage.
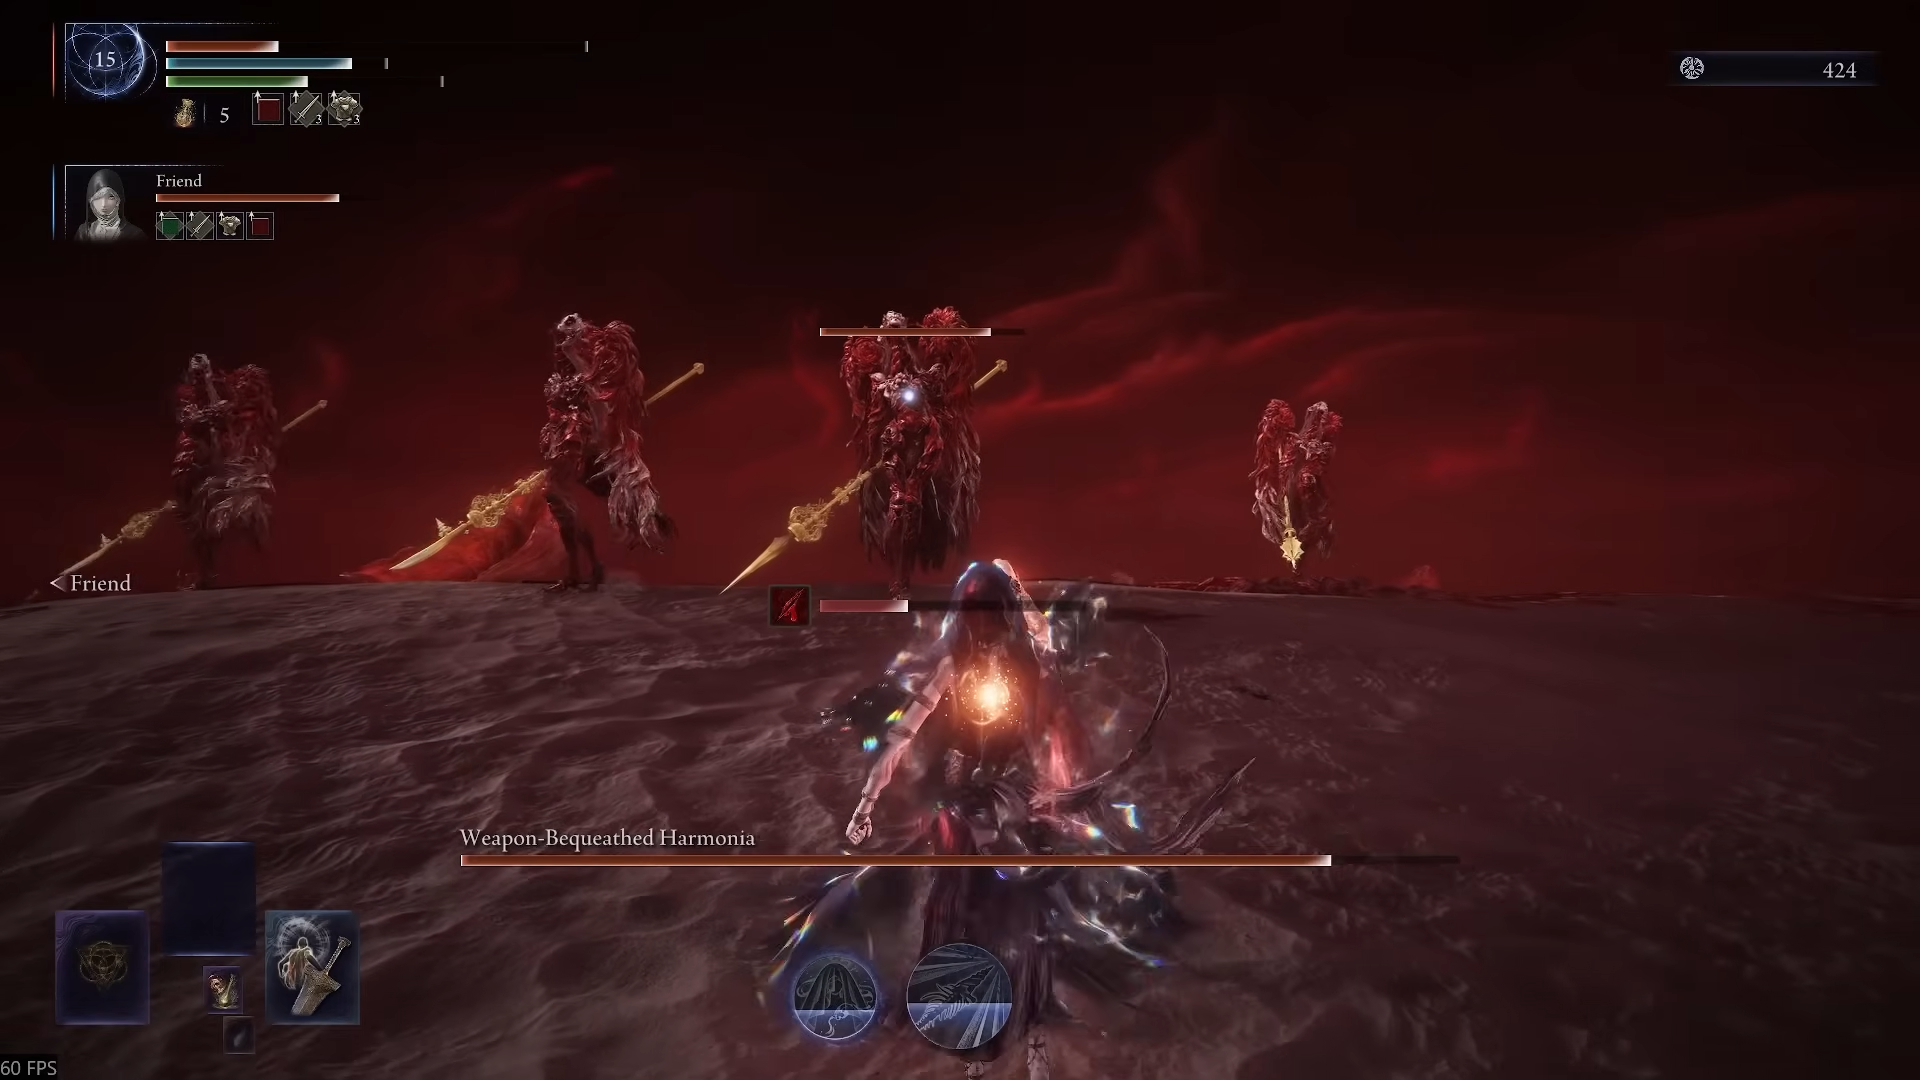
Many runs succeed by simply surviving the worm phase until it times out, at which point the fight returns to the Balancers. However, the encounter rewards more aggressive teams.
How to punish and even kill the worm
The worm has multiple weak points that behave similarly to white cysts on Dark Souls 3’s Cursed-Rotted Greatwood or the stone nodes on walking mausoleums. Exploiting them can end the phase early and heavily punish the Balancers.
- Target the pink weak spots. As the worm surfaces and starts its big blood bloom animation, several pink nodes appear on its body.
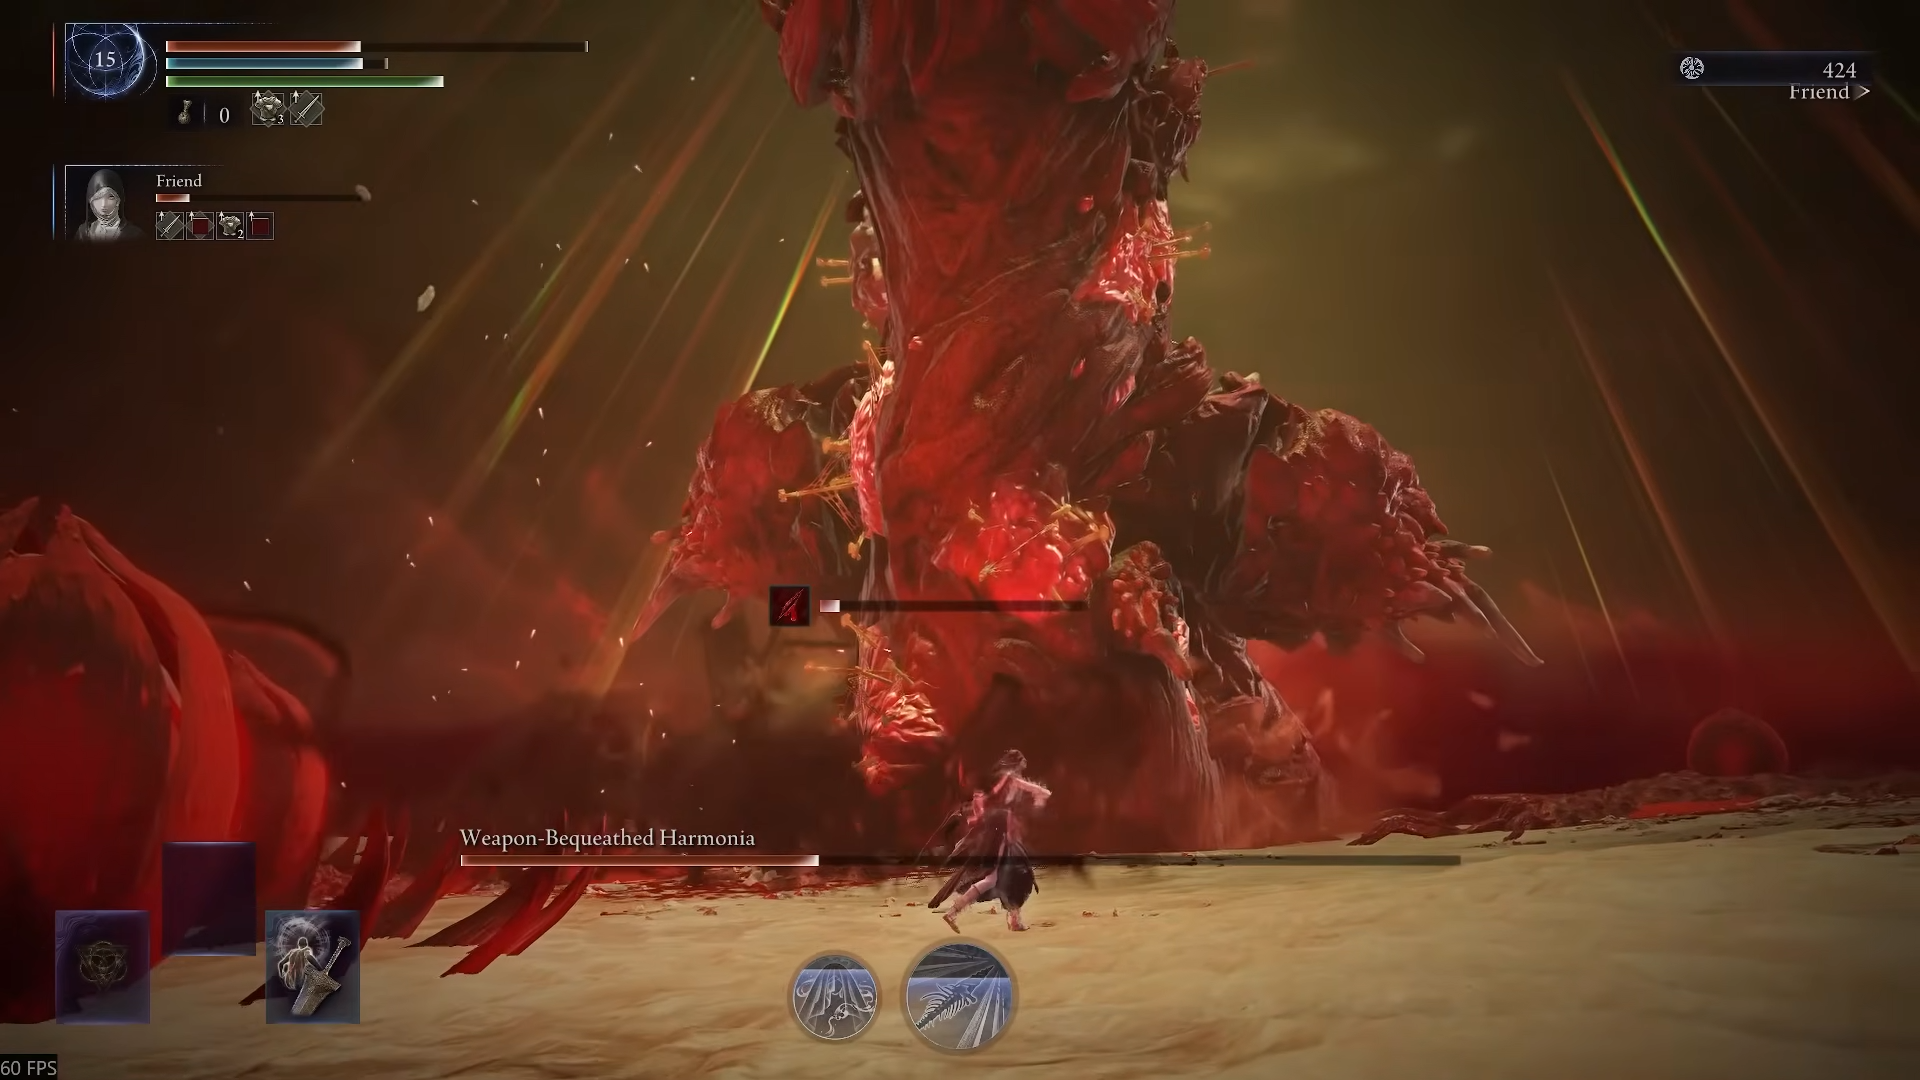
- Break multiple bulbs quickly. Destroying three or four of these bulbs before the flower fully blooms deals heavy damage and can remove the worm from the arena, preventing its full-room bleed explosion.
- Use fire during the blood phase. The worm appears especially vulnerable to fire. Fire-centric builds can burn it down fast enough that the subsequent Balancers phase starts with the entire group heavily staggered.
There is always a window where the worm simply sits exposed before unleashing the full blood blossom. That lull is the safest time to revive allies, heal, or commit to burning down its weak spots if your positioning allows.
Bleed resistance relics and consumables matter here. With enough mitigation, even imperfect dodging during the worm’s three expected appearances becomes survivable, especially if someone is focused on staying alive rather than maximizing damage each cycle.
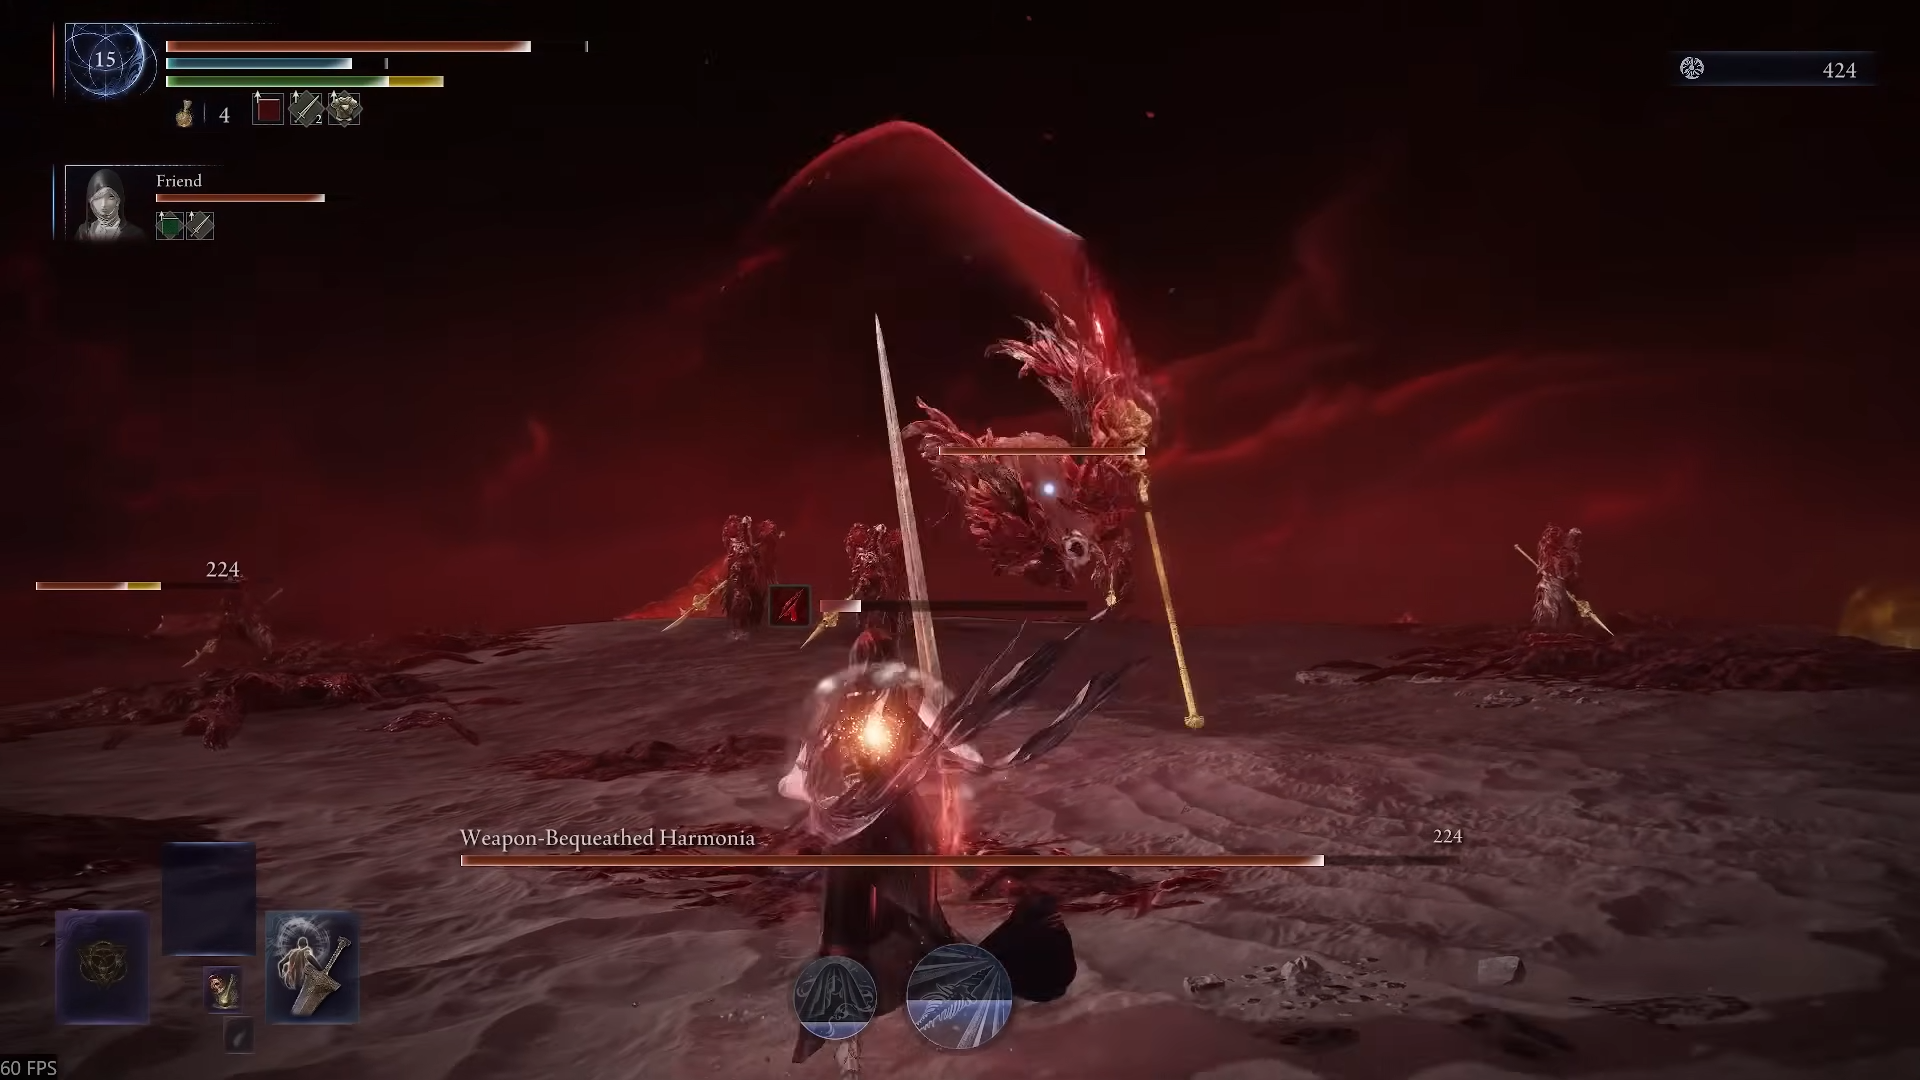
Returning to the Balancers after the worm
When the blood bloom ends — either through a timer or by bursting down the weak spots — the fight snaps back to Balancers in their grotesque state. The core game plan returns to what you learned in Phase 2, with more urgency.
- Spread and divide. Do not clump in the center of the arena. Have each melee player occupy a different lane, forcing Balancers to split their attention.
- Maintain the stagger loop. Continue killing or staggering one Balancer at a time to trigger flinches across the group. With two Undertakers, you can chain ultimates through multiple targets, darting through the pack and creating repeated knockdowns.
- Abuse one-handed status spam. Weapons like a one-handed frost axe shine in this final stretch. Fast swings, status buildup, and repeated stagger checks all stack in your favor, especially when paired with relics that favor skill damage or melee output.
Sleep effects remain technically viable against the Balancers here, but the encounter is already hectic. Many runs find more consistent success relying on raw stance pressure and well-timed ultimates rather than trying to juggle sleep windows.
The Everdark Balancers fight looks overwhelming because it condenses many of Nightreign’s nastiest ideas into a single arena: multiple agile enemies, a fast resurrection mechanic, a giant bleed-focused worm, and layered area denial. Once their weaknesses are understood — blunt and status weapons in the early phases, fire and targeted weak spots in the blood phase, and coordinated stagger loops throughout — the encounter shifts from impossible spectacle to a demanding but repeatable capstone for the expedition.