
Snow’s Blight conceals a fox-locked entrance that leads to a combat-filled hideout and a bounty target. You’ll solve two outside puzzles to free small fox statues, slip through a newly opened crawlspace, manipulate a few more statues inside a cavern to spawn ropes, then clear the camp and collect your rewards.
Find Snow’s Blight Shrine (Teshio Ridge)
Head to the Snow’s Blight Shrine on the western side of the Teshio Ridge region. As you approach, the area marks itself on your map. Expect enemies around the shrine; clear them out and untie the captive settler before working the door puzzles.
The hideout beyond houses the Nameless Killer bounty target.
Open the shrine: solve the two outside puzzles
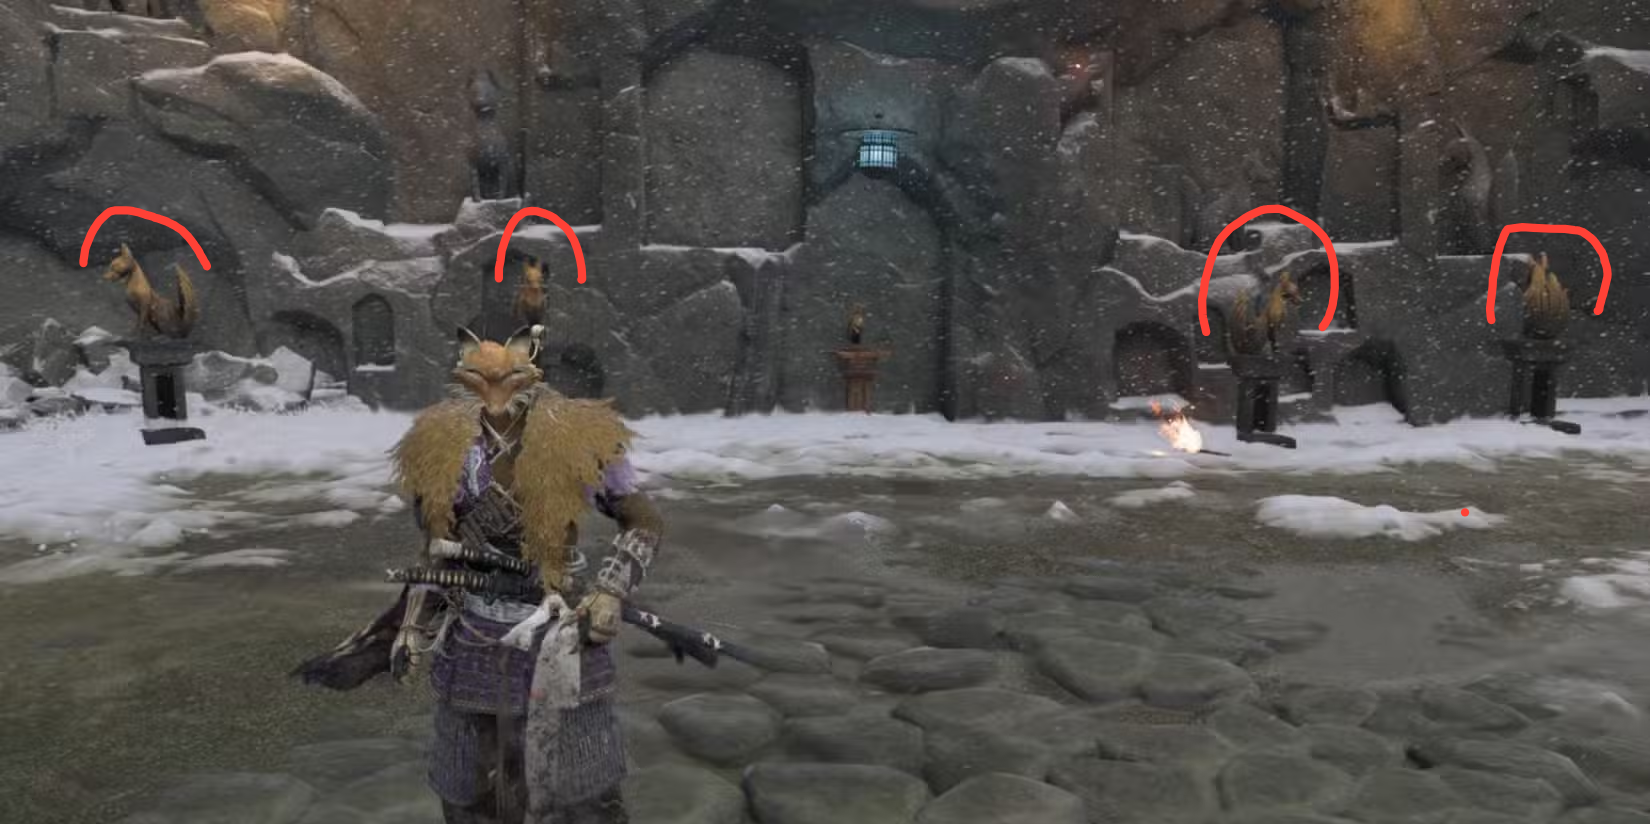
Your goal at the entrance is to place two small fox statues on the plinths flanking the door. Each statue is locked behind a separate puzzle positioned to the right and left of the doorway (as you face it).
- Right-side puzzle (four rotating foxes): match each statue to the stone carvings above. From left to right, set them to: Left, Forward, Right, Back. When the sequence is correct, pick up the small fox statue that unlocks and carry it to a door plinth.
- Left-side puzzle (torches): light or extinguish the four small torches to mirror the lamps above them. From left to right, the pattern is: Lit, Unlit, Lit, Unlit. Grab a burning stick from the brazier to light torches; use R2 to extinguish where needed. When the mechanism clicks, collect the second small fox and carry it to the remaining door plinth.
With both fox statues set on the two plinths beside the door, a low crawlspace opens in the wall near the placement area. Drop to crouch and slip through.
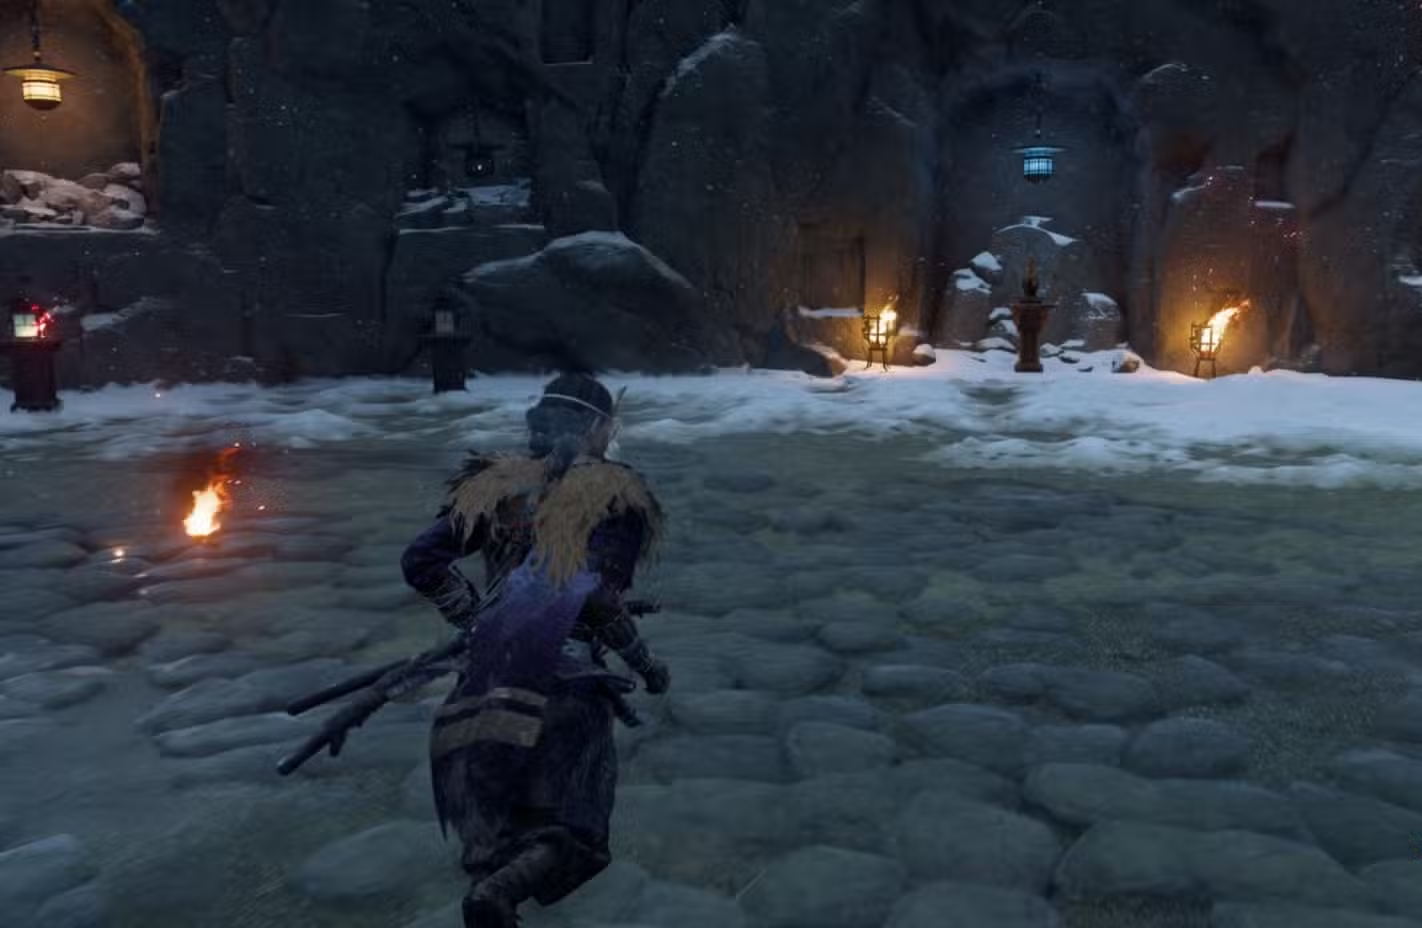
Cross the cavern: spawn the ropes, ignore the decoys
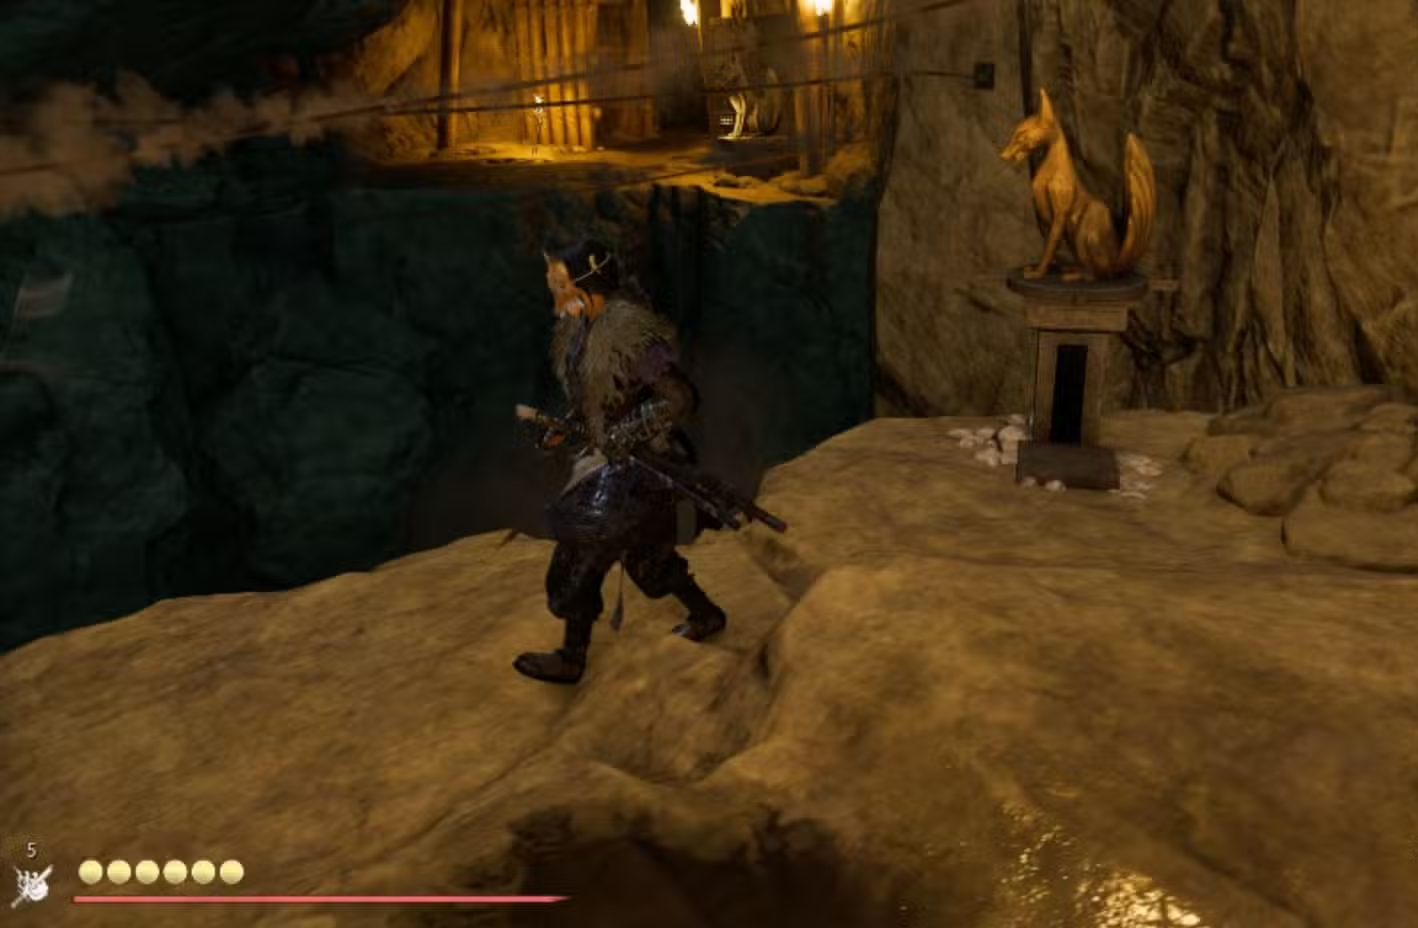
Inside, you’ll reach a gap you cannot jump. The rope lines appear only after you align nearby fox statues correctly:
- At the first gap: rotate the two fox statues so they face each other. A rope stretches across for you to use.
- Next section: you’ll pass two additional fox statues mounted as lamps. They are decorative; leave them alone.
- Ahead, at another mechanism: rotate the single fox statue to face Left. More ropes will appear, opening the path forward.
Follow the ropes to reach the hideout proper.
Clear the hideout: bounty target, altar, and loot
Inside the camp, eliminate every enemy. When the area is fully cleared, the main gate at the far end opens, giving you access to the leader arena.
- Defeat the camp leader (Nameless Killer). Dispatching the boss completes the Nameless Killer bounty.
- Proceed past the gate to the Altar of Reflection and interact with it.
- Before leaving, pick up the Nine Tails puzzle box positioned in front of the altar.
Bounty reward: 2,000 Coins plus the Sword Kit “Nameless Death.”
Quick solutions
| Stage | Puzzle/Action | Exact solution | Result |
|---|---|---|---|
| Entrance — right | Four fox statues (match carvings) | Left, Forward, Right, Back (left to right) | Small fox statue unlocks |
| Entrance — left | Torch alignment (mirror lamps) | Lit, Unlit, Lit, Unlit (left to right); use brazier and R2 | Second small fox statue unlocks |
| Entrance door | Place statues | Set both small foxes on the door’s two plinths | Crawlspace opens nearby |
| Cavern — first gap | Two fox statues | Rotate to face each other | Rope appears |
| Cavern — mid | Two fox lamp statues | Ignore (decorative) | — |
| Cavern — final mechanism | Single fox statue | Rotate to face Left | Additional ropes appear |
| Hideout | Combat and bounty | Clear all enemies; defeat Nameless Killer | Gate opens; bounty completes |
| Altar area | Collectibles | Use Altar of Reflection; pick up Nine Tails puzzle box | 2,000 Coins; Sword Kit “Nameless Death” |
Tip: If the entrance puzzles won’t respond, recheck torch states against the overhead lamps and confirm the four fox orientations match the carvings in order from left to right. In the cavern, only statue moves that spawn ropes are required—skipping the lamp pair prevents accidental misalignment.