Ever wanted to take a scrolling screenshot of a selected area on a webpage? It’s not possible by the default means in Windows 10, Linux, Mac, or any other OS. But if you’re using Chrome or Firefox on your computer, the “Nimbus Capture” extension let’s you effortlessly take a screenshot of a selected area while scrolling through a page.
The extension also supports basic editing such as drawing arrows and boxes over a important areas of a screenshot, plus there’s an option to save a screenshot as a PDF file as well. There’s direct integration for uploading/sending screenshot to Slack, Google Drive, Dropbox, and more.

To install “Nimbus Capture” extension in Chrome or Firefox, click on either of the links below to download the extension from the official repositories.
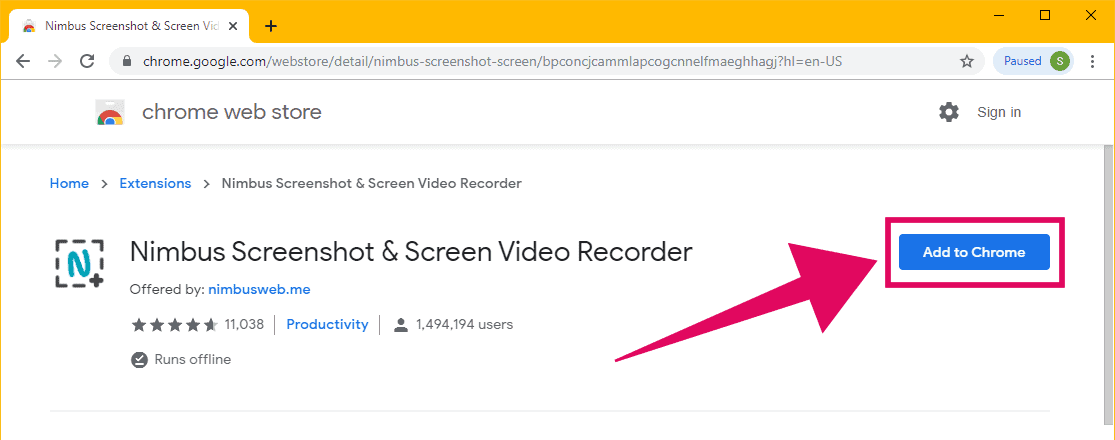
We’ll be using Chrome for this tutorial, but Nimbus works same way on both Chrome and Firefox. You can follow the instructions below to take scrolling screenshot of selected area using Nimbus Capture for Firefox as well.
After installing the Nimbus Capture extension, look for the extensions’ icon next to the address bar in your Chrome or Firefox browser. Click on the icon to open Nimbus Capture options menu.
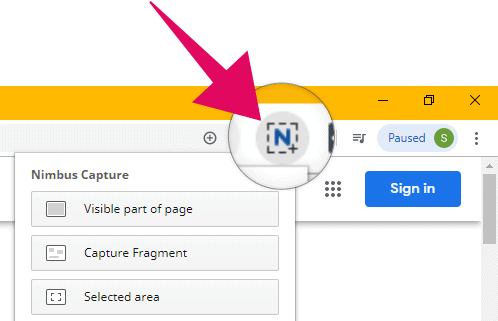
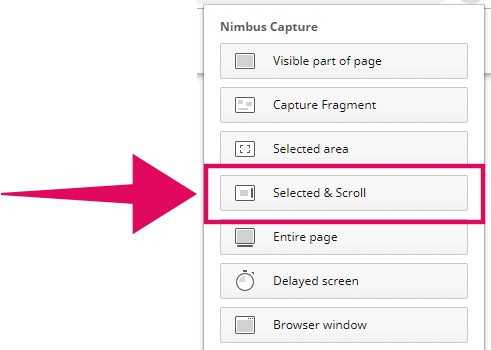
From the available options in Nimbus Capture menu, click the “Selected & Scroll” button to capture a selected screen area while scrolling.
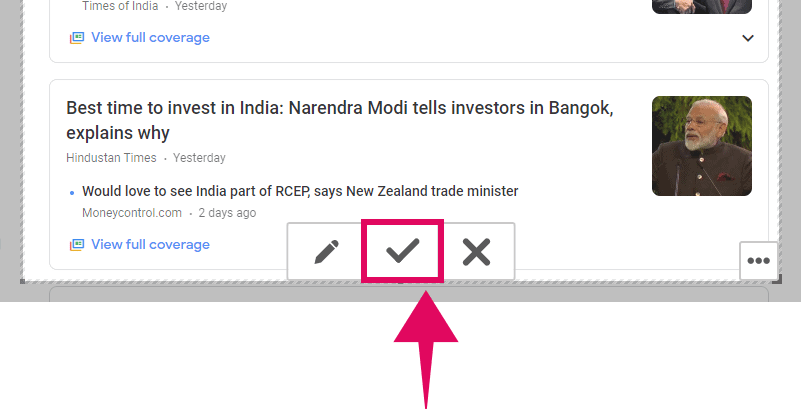
Now click and drag to capture a screen area. To capture area below the scroll, drag the cursor (while selecting area) to the bottom of the browser’s window to scroll through the webpage.

After selecting the area you want to capture, click the ✔ button to save the screenshot on your computer. If you wish edit the screenshot before saving, hit the ✏ button to view editing control panel.
Quickly take a scrolling screenshot using keyboard shortcut
If your work involves taking a lot of scrolling screenshots of selected area, you may want to take advantage of Nimbus Capture’s keyboard shortcuts.
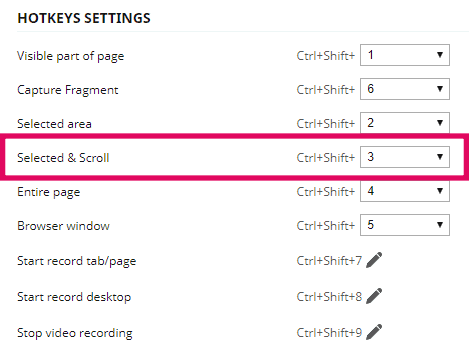
The default shortcut to use the “Selected & Scroll” screenshot option in Nimbus Capture is Ctrl + Shift + 3. You can change it to your liking by going to the extension’s options/settings menu in Chrome and Firefox.
You can also configure the file name pattern for saved screenshots in the settings menu.

