
If you’re stuck on today’s Pips (Saturday, September 20, 2025), this guide offers light-touch nudges for Easy and Medium and a full, logic-first walkthrough for Hard. If you want to see the live puzzle, head to the Pips game page. Spoilers for Hard begin where noted.
How the rules drive your strategy
- Number tiles: all halves inside that colored region must sum to the specified total.
- Equal (=): every half in the region shows the same pip value.
- Not equal (≠): no two halves in the region share the same value.
- Less than (<) / Greater than (>): each half in the region must be below/above the threshold.
- A single exact digit (like 6): that half must be that number.
- Uncolored spaces: free — any value can pass through.
Tip: Manage “scarce” resources first — usually blanks (0s), high pips (6s), and doubles. If a region’s requirement forces only one or two specific compositions, place those pieces early to avoid cornering yourself later.
Easy (Solution)
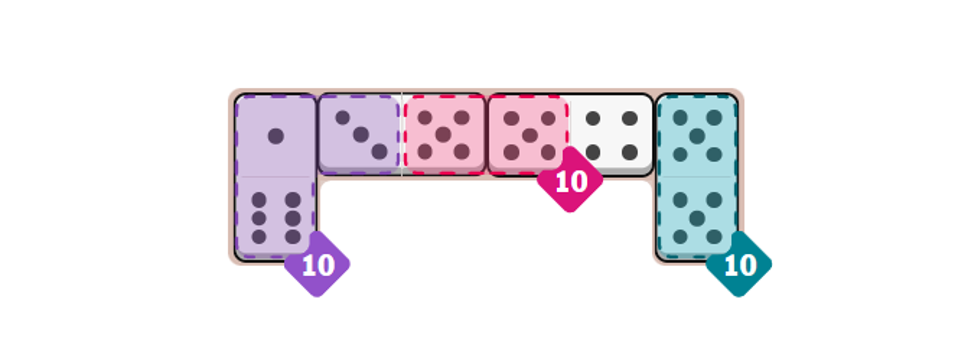
- Look for any single-number tiles and complete them first; they tend to lock in orientation for adjacent placements.
- Use doubles to cap regions that need matching or cleanly finish small sums.
Medium (Solution)
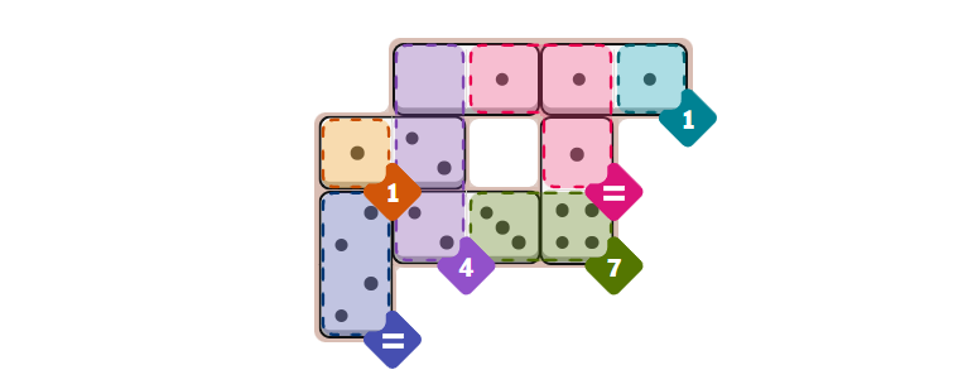
- If an “=” region spans many squares, count your inventory — often only one value is feasible without exhausting key pips needed elsewhere.
- When two target-sum regions compete for the same high-value dominoes, decide which gets the 6 early to avoid backtracking.
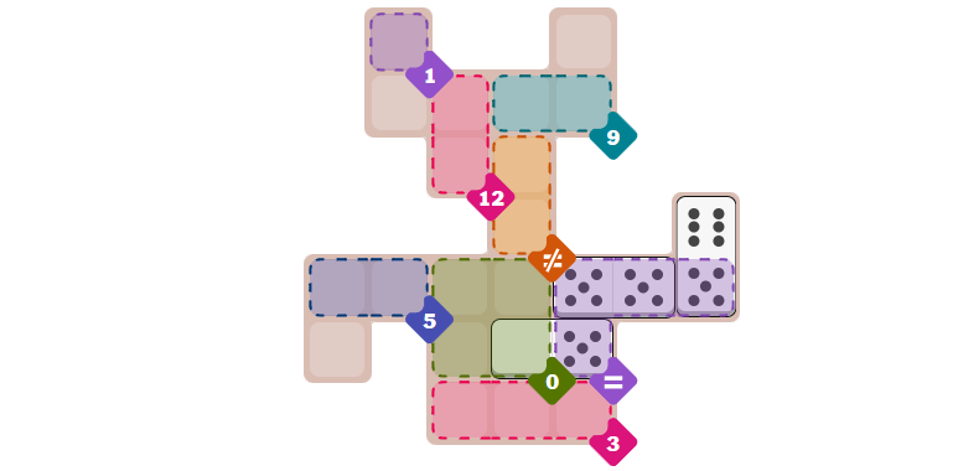
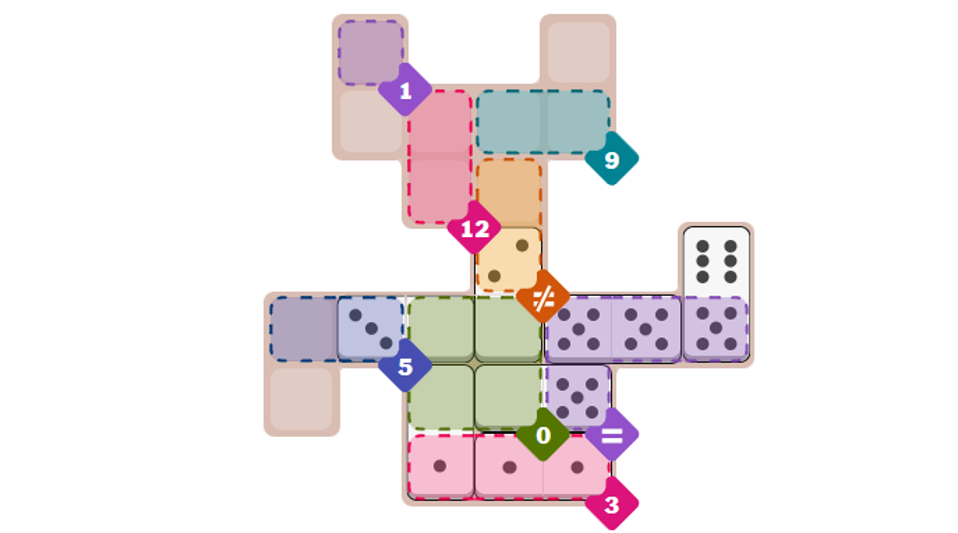
Hard — step-by-step walkthrough (spoilers)
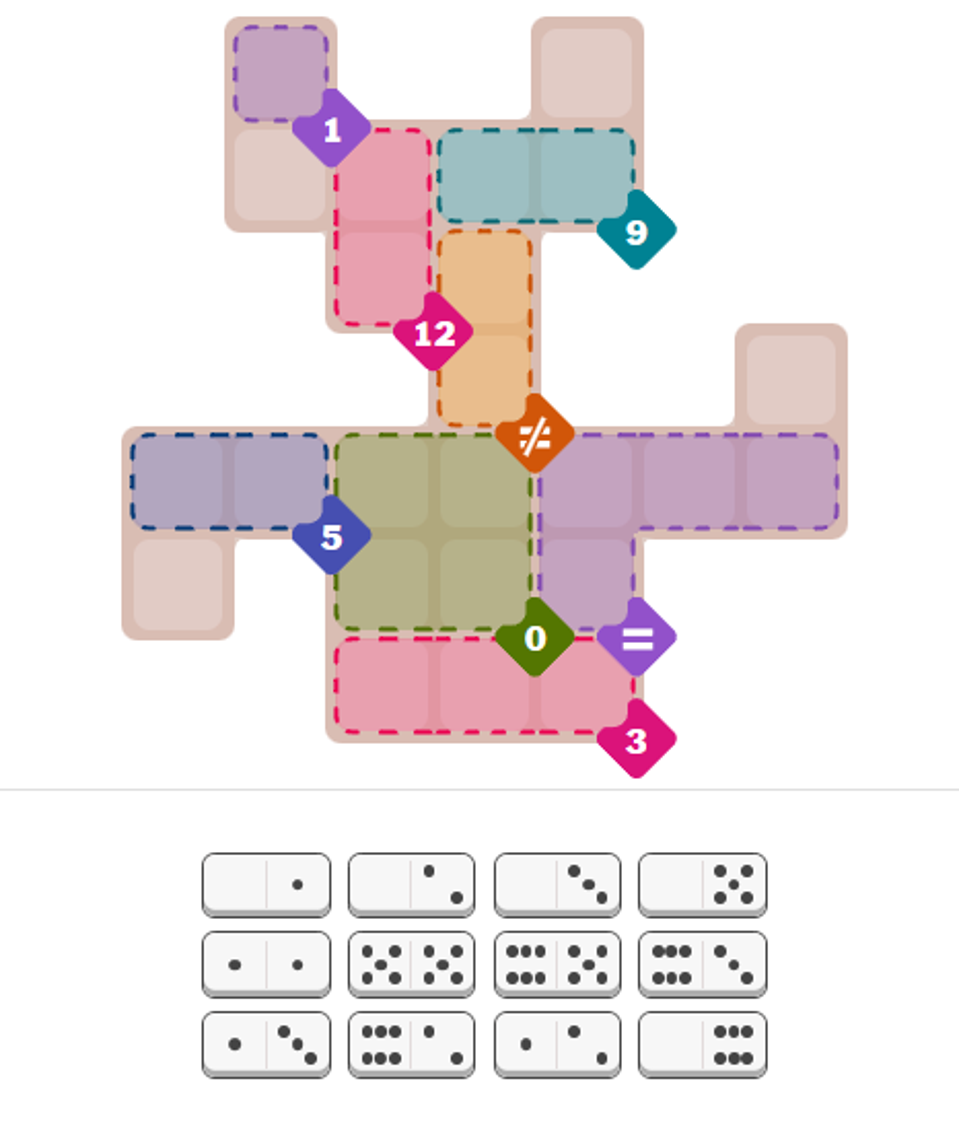
Today’s Hard grid is tight on two fronts: you’re short on blank halves and you can’t splurge on 6s. Before placing anything, note three constraints that force the solution path:
- You need three 6s overall: two to make a pink 12 (6+6) and one to combine with a 3 for a blue 9 (no 4s exist, so 5+4 is off the table). After that, you have no spare 6s to play with.
- A central green region requires 0 across its squares, but you only have five blank halves total. Every 0 must be deliberate.
- The purple “=” group can’t be built from small pips you’ll need elsewhere, so it has to be all 5s based on the remaining inventory.
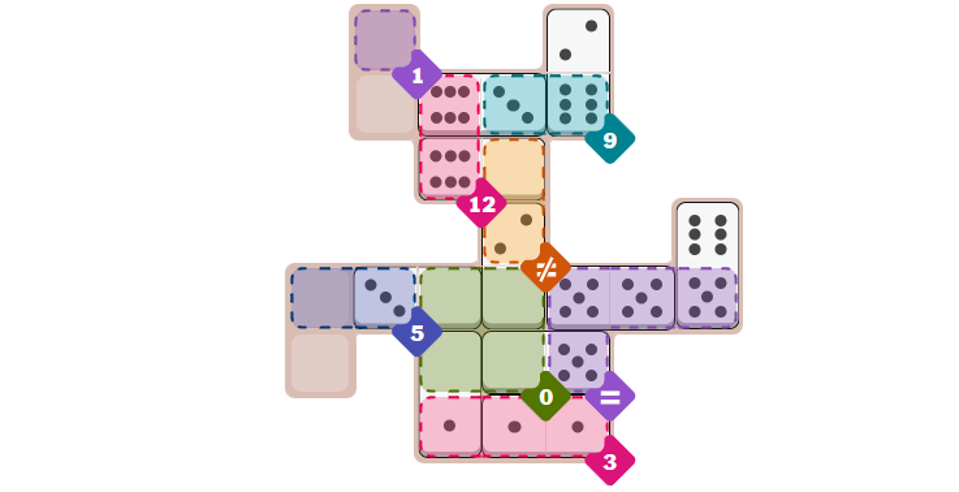
Phase 1: Lock the “=” and protect your 0s
- Commit the purple “=” to 5s. Any domino that pairs 5 with 0 can donate its 0 to the central green 0 region — do that immediately to conserve blanks where they matter.
- Use your 5/5 to expand the purple equal run. Place the 5/6 in a neutral spot (a free space), because every remaining 0 is earmarked for green and you can’t afford to burn a 6 inside a region that doesn’t need it.
Phase 2: Finish the green 0 region
- With some blanks already seated, complete green 0 using remaining 0-halves siphoned from other groups. You’ll likely route a 1/0, 3/0, and 2/0 into green 0 from adjacent regions that can tolerate those nonzero partners.
- This exhausts your blank halves. Note: that’s intentional — it forces the pink 3 region to be three 1s (no 0s left), which simplifies later choices.
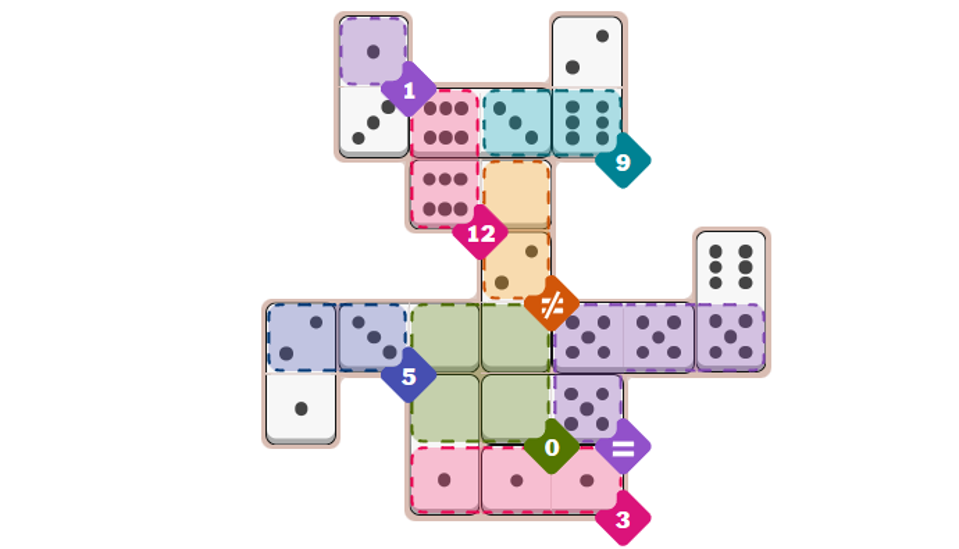
Phase 3: Spend your 6s with purpose
- Reserve two 6s for the pink 12. The last 6 must pair with a 3 to make the blue 9. Do not bury a 6 anywhere else — you don’t have extras.
- If you’re holding a 6/0 that isn’t part of pink 12 or blue 9, park it in a region like orange ≠, where the 0 half can live without violating uniqueness and the 6 doesn’t collide with your 6+3 plan.
Phase 4: Clean up with the small pips
- With green 0 complete, pink 12 placed as 6+6, and blue 9 satisfied as 6+3, fill remaining free tiles with the leftover low-value halves to finish adjacent requirements (for example, a 1/3 into a single-number tile, then 2/1 into the last open space).
Why this path works
- Blank scarcity dictates the order: any 0 not routed into green risks stranding you later. By finishing green 0 early, you turn pink 3 into a deterministic all-ones cluster.
- Eliminating flexibility on the 6s (two for 12, one with 3 for 9) prevents silent failures where the final high-value domino can’t legally fit.
- Committing purple “=” to 5s preserves lower pips for the pink 3 and other small targets, and aligns with the inventory you actually have.
Common pitfalls
- Spending a 6 outside pink 12 or blue 9 — you’ll dead-end late.
- Letting a 0 land anywhere but green 0 until that region is finished — you don’t have enough blanks to recover.
- Trying to make blue 9 with 4+5 — today’s set contains no 4 to support that route.
Carryover skills for tomorrow
- Audit the inventory: count 0s and 6s before you place the first tile.
- Collapse forced regions first: big “=” groups and high totals often have a single viable composition.
- Use placement to double-dip: when you move a 0 into a mandatory-0 area from a neighboring group, you solve two constraints at once.
If you prefer to play it fresh before checking placements, load today’s grid on the Pips game page and apply the constraint checklist above — the board will narrow itself quickly once you spend the blanks and 6s in the right order.