
Omamori in Silent Hill f are equipable charms that add passive combat and survival perks. You’ll find some tucked away in specific areas and pull others from Hokora shrines using Faith. A handful only appear on New Game Plus, and one is single-use. Below is a spoiler‑light, location‑first guide to every hidden omamori you can grab on an initial playthrough, what changes in NG+, and a complete effects list for the 23 shrine omamori.
| Category | Count | Notes |
|---|---|---|
| Total omamori | 40 | 23 shrine draws + 17 hidden (some NG+ only) |
| Shrine omamori | 23 | Random pulls at Hokora shrines; cost scales 300–1000 Faith |
| Hidden omamori | 17 | Fixed placements in the world; some appear only in NG+ |
| Single-use omamori | 1 | Blessed Hand Mirror (prevents fatal hit, then breaks) |
| Equip slots | Upgradable | Expand via Abilities → Omamori Slot (costs ema + Faith) |
| New Game Plus | 4 confirmed | Shrew Mole, Rabbit, Swallow, Goat (+1 unconfirmed) |
| Completion rewards | 2 trophies | Omamori Sage (all hidden), Omamori Collector (all shrine) |
How omamori work (slots, acquisition, and one-time items)
- Equip slots: You can expand how many omamori you can equip by upgrading the Omamori Slot in the Abilities menu. Each upgrade consumes one ema and Faith; early tiers cost 1500 Faith (Level 1), then 3000 Faith for subsequent levels.
- Two acquisition paths:
- Hidden: Fixed placements in the world, often tied to chapter beats or side rooms.
- Hokora draw: Randomized pulls at shrines. Cost rises in 100‑Faith steps until it caps at 1000 per draw. Sources disagree on the exact starting price (it begins around 300–400 Faith), but expect the full set of 23 to require roughly low‑20k Faith overall.
- New Game Plus: Several hidden omamori only appear on NG+ after you can open Inari/Oinari boxes and doors with the brooch.
- Single‑use item: Blessed Hand Mirror will shatter to prevent a fatal hit and fully restore you. You can find replacements later, and you only need to collect one for completion tracking.
Hokora shrine omamori (all 23 and their effects)
| Omamori | Effect |
|---|---|
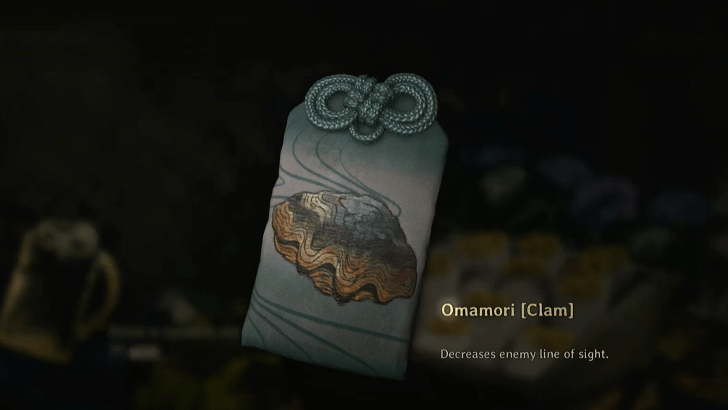
| Clam | Decreases enemy line of sight |
| Plum | Increases max Stamina |
| Bamboo | Increases max Sanity |
| Mantis | Restores Health after each successful Counter (small) |
| Owl | Greatly decreases Sanity consumption while using Focus |
| Sakura | Increases effectiveness of Health-restoring items and omamori |
| Bear | Greatly increases stun power when weapon durability is low |
| Turtle | Greatly decreases damage taken at full Health |
| Crab | Weapon durability does not decrease while using Focus |
| Kudzu Leaf | Increases max Health, Sanity, and Stamina |
| Boar | Greatly speeds up Stamina recovery and shortens Out-of-Breath duration |
| Willow | Increases effectiveness of Sanity-restoring items and omamori |
| Butterfly | Greatly reduces Stamina cost of dodging (disables dodge chaining) |
| Otter | Restores spare weapon durability after defeating an enemy |
| Serpent | Auto-Counter on visual hint (costs Sanity, slower recovery) |
| Beetle | Greatly increases damage to stunned enemies |
| Camel | Reduces Sanity consumed by charged attacks |
| Swordfish | After a Counter, Stamina not consumed for a short time |
| Dolphin | Restores some max Sanity after a Perfect Dodge |
| Elephant | Prevents staggering from normal attacks, but damage taken increases |
| Tanuki | Converts incoming physical damage into Sanity damage |
| Weasel | Greatly increases normal attack damage but removes stun ability |
| Daisy | Grants unlimited Sanity & Stamina, but any physical hit kills instantly |
Hidden omamori effects (quick reference)
| Omamori | Effect |
|---|---|
| Whale | Restorative item use can’t be interrupted by normal attacks |
| Cat | Greatly reduces damage taken during a dodge |
| Pine | Increases max Health |
| Spider | Greatly reduces weapon durability loss from light attacks |
| Hawk | Greatly speeds up Focus charge |
| Blessed Hand Mirror | Prevents one fatal hit, fully restores Health/Sanity/Stamina, then breaks |
| Wolf | Increases damage when using high-durability weapons |
| Bull | Greatly reduces Stamina cost of heavy and charged attacks |
| Horse | Greatly reduces Stamina consumed while sprinting in fights |
| Crow | Slightly restores Health after defeating an enemy |
| Suzuran | Expands the Perfect Dodge window |
| Hound | Slightly restores current max Sanity after defeating enemies |
Hidden omamori locations
- Whale — Early escape sequence house: go upstairs to grab the bloody key, then enter the opposite room to pick up back‑door keys. Use them on the kitchen/back door, climb down the exterior ladder, and turn around to find the charm near the wall.
- Cat — Shrine Path (Shrine Vault puzzle): in the western/southwestern ema boards, interact with the orange cat ema on a blue background and flip it to reveal the omamori.
- Pine — Doctor’s House on the road to Rinko’s: climb the rear ladder to enter, find a drawer key in the downstairs chest, unlock the upstairs drawer to read the note, then enter the now‑opened adjacent room and check the dresser drawers for the charm.
- Hawk — Second shrine realm (“Corridors”): after reaching the second half and discovering the missing gate key, enter the nearby room where an enemy emerges; the charm sits on a chest by the window.
- Blessed Hand Mirror — Room just past the Sacred Door, next to a Hokora and supplies. It’s a consumable omamori; you’ll encounter more later, typically before major fights.
- Wolf — Ebisugaoka Middle School: open the locker labeled with the initials “TT” using the code 377.
- Bull — Worship Hall (eastern section): after solving the rotating light/statue puzzle to obtain the key, return to the locker room before heading back to the Grand Hall. A back room that was locked will now be open; the bull charm is inside.
- Horse — Mountain path to Shu’s house: after the small lake section, take the right path after a wooden bridge; the charm sits in front of a small shrine off the main trail.
- Crow — Shu’s house ritual sequence (spirit realm): after you gain the arm that opens narrow‑gap doors, use it to access the northwest corner room on the first floor.
- Suzuran — Descent back toward town after the ritual: near a blocked path, a small house has a breakable crate around the back containing the charm (an enemy may rush you from the right as you approach).
- Spider — Early town/farm area: head to the northern farm shrine to find a key to Sakuko’s Mailbox by rocks left of the gate, then backtrack to Sakuko’s house (pigtail icon in the southwest) and use the key on the mailbox.
- Hound — Treasure Hall (first crest path): after following the direction indicated by the fox statue, enter the first door on the right to find the charm.
Hidden Omamori (New Game Plus)
| Omamori | Effect |
|---|---|
| Shrew Mole | Dodging costs no Stamina when near death |
| Rabbit | Heavy Attack right after a Perfect Dodge becomes a powerful Counter (high Stamina cost) |
| Swallow | Consecutive Counters (without Focus) stack a damage buff, up to five stacks (reset on hit) |
| Goat | Reduces damage taken when outnumbered, scaling with enemy count |
| Unconfirmed | One additional NG+ hidden omamori remains unverified |
Hidden omamori locations (New Game Plus)
- Shrew Mole — Shrine Path: in the newly accessible southeast section, cross the bridge to the large tree, then check behind it for a shoe box you can open.
- Rabbit — Ebisugaoka Middle School exterior: on the western side, climb through a classroom window where you hear a crackling radio; the shoe box is at the back.
- Swallow — Worship Hall west side: shimmy through a gap in the southern wall to a door that now opens in NG+; the charm is inside.
- Goat — Ebisugaoka “fourth visit” mountain hut: the hut where you acquire the gate key is open in NG+; the charm is directly in front of you upon entering.
- Note: One additional NG+ hidden omamori has not yet been verified.
Trophies and replay behavior
- Collecting all hidden omamori awards Omamori Sage; collecting all purchasable omamori awards Omamori Collector.
- On subsequent playthroughs, hidden omamori you already claimed are replaced with offerings, so you won’t pick up duplicates.
- You only need one Blessed Hand Mirror for completion credit, even though additional mirrors appear later.
FAQs
- How many omamori exist? Forty total: 17 hidden (some NG+ only) and 23 shrine draws.
- Do shrine draws stay random? Draws are randomized per pull, with the cost stepping up by 100 Faith until it caps at 1000. Starting price varies by source (around 300–400 Faith).
- What’s the middle school locker code for Wolf? 377.
If you’re progressing in story order, prioritize Whale, Pine, and Hawk early — they stabilize healing, survivability, and Focus timing — then add Bull, Horse, and Suzuran when combat density ramps up. Use shrine draws to fill gaps in your build: Turtle, Boar, and Owl are consistently useful, while Daisy, Elelphant, and Weasel fundamentally change risk and should be slotted with intent.