

Apple isn’t known to play well with others. And when you own an iPhone and a Windows PC, the incompatibility issues between the two OS can become a problem. Most of the time, we manage. But sometimes we desperately need a feature to work cross-platforms.
Live Photos are one such feature. Apple introduced live photos a few years ago and it’s one of the most loved features of the camera app. Live photos look like photos but aren’t just photos. With live photos, your iPhone captures the moments that happen 1.5 seconds before and 1.5 seconds after you take the photo.
So, while it looks like a normal photo at first glance, in reality, it’s a short video of 3 seconds. On your iPhone, you can hold the photo to play the video, choose another frame from the video to save as a photo, use fun effects like loop or bounce to it.
But if you want to transfer it to your PC, how do you make sure that you get all the additional footage for 3 seconds and not just the still image? There are a few ways to view a live photo on your PC. But they aren’t exactly straightforward. You can’t simply view a live photo the same way you would on your iPhone.
Use the USB Cable to View and Transfer Live Photos to a Windows PC
Using a USB cable to transfer iPhone data to a Windows PC is one of the most popular options. iPhone creates a JPEG and a MOV file when you capture a live photo. To use the USB cable to transfer data, you have to install iTunes on your PC.
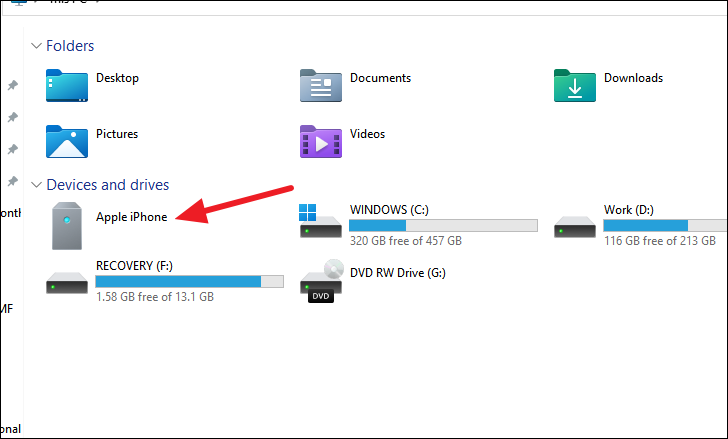
Once you’ve installed iTunes and connected your iPhone via the lightning cable, open the ‘File Explorer’.
Then, go to the ‘Apple iPhone’ option.
Further, go to the folder ‘Internal Storage’.
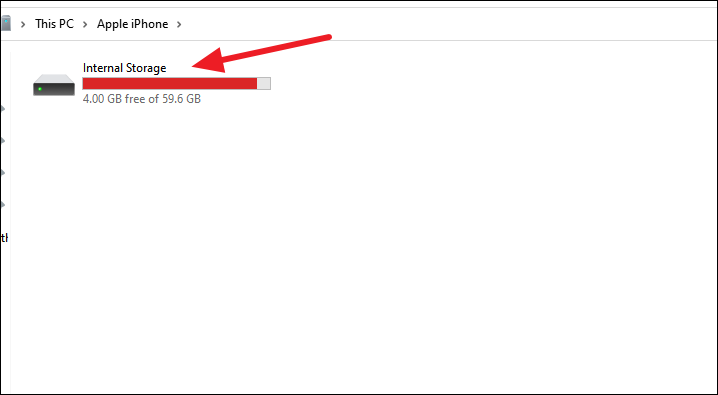
It’ll have a single folder named ‘DCIM’; open it.

The DCIM folder has different folders that have your iPhone photos and videos on them.
The live photo will have a photo and a video with the same name. To view the “live” aspect of it, play the video using any media player.
You can copy both the photo and video to your PC. But if you delete the original copy from the iPhone, the photo & video combination on your PC won’t act like a live photo if you try to import it back to your phone.
This isn’t the most ideal method there is, though. It can be difficult finding the photo you’re looking for in the sea of folders, as there’s no apparent rhyme or reason to the categorization of the media. So, for someone with more than a handful of photos on their phone, it can take a while to find the one you’re looking for.
Use iCloud Photos to View Live Photos
If you use iCloud Photos to sync your photos to the cloud service from Apple, you can easily view your live photo on your Windows PC.
There are two ways to use iCloud photos on a Windows PC. You can either use it online or download the iCloud for Windows app. If you plan on using iCloud Photos on your PC sparely, you can simply use it online. Because going through the process of setting up the app will take some time.
There’s also another benefit to using iCloud Photos online. When using it online, your photos appear in chronological order and hence, are easier to sort through. In the Windows app, there is no order to how your photos and videos will appear.
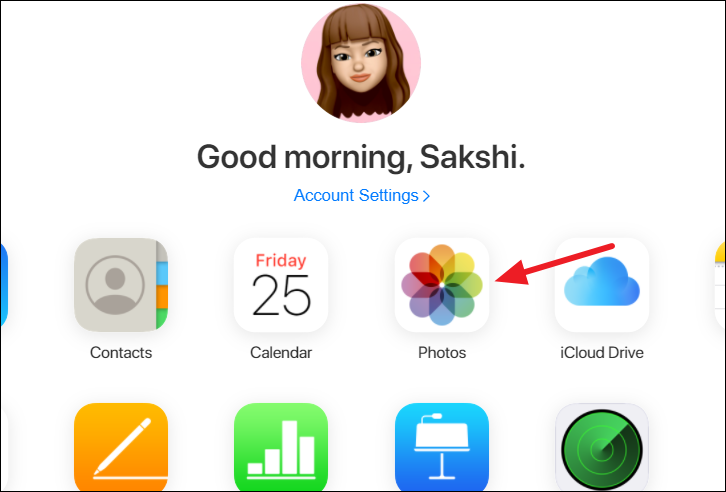
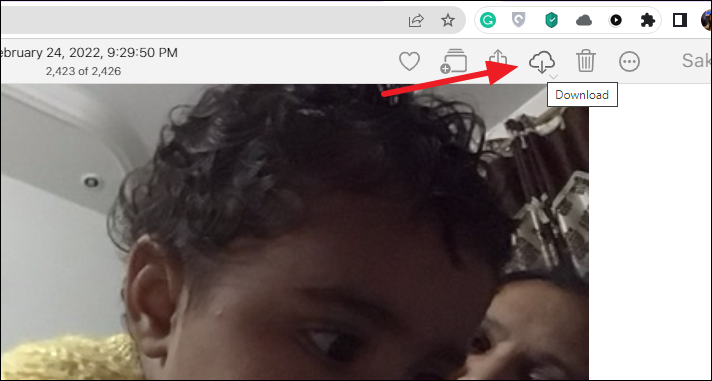
Go to icloud.com and log in with your iCloud account. Then, click the ‘Photos’ option to open your iCloud photos.
If your motive is only to view the photo, simply click it to open it. The live photo will play as it does on your iPhone.
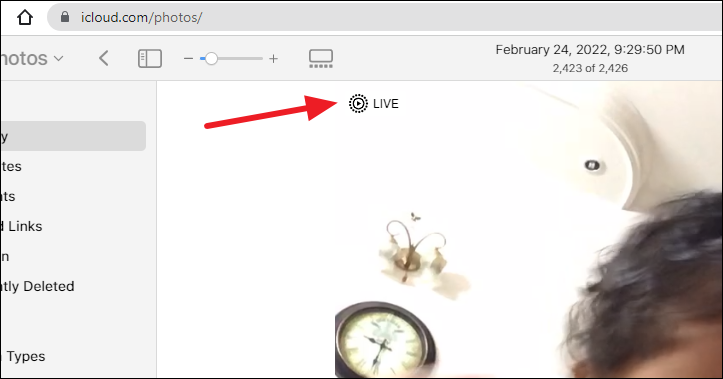
You can also download the photo to your PC. Click the ‘Download’ button in the upper-right corner. The live photo will download as a JPEG and a MOV file.
Convert the Live Photo to a GIF File
Another option, instead of using the MOV file to view the live photo, is to convert the photo to a GIF file. You can convert the live photo to a GIF file by using third-party apps or software either on your iPhone, PC, or on the web. There are countless options available at your disposal.
But this option, too, has its limitations. A lot of such apps are either paid apps or support a limited number of photos at a time. Even those that offer free conversion add a watermark to the converted GIF. Moreover, if you import the live photo as a GIF, it won’t have the audio in it.
One app you could try for free to convert your live photo to GIF is the Lively app from the App Store. Converting the live photo to GIF is as simple as selecting the photo and tapping the ‘Export GIF’ button. Before saving the GIF file, you can trim the video, adjust the speed and file size.

But it’s important to note that converting the live photo to a GIF file would slightly degrade its quality. The app also adds a watermark to the GIF unless you purchase the premium feature to remove it.
But this is just one example. You can search for other such apps on the App Store. You’ll find plenty of them, free as well as paid.
Although there are many options available to view a live photo on your Windows PC, there’s no perfect solution to exporting it. None of the options export the live photo in a way that keeps its features intact, such as the ability to select a different frame from the photo at a later time. But if your only motive is to be able to view the live photo as a moving photo, you can easily achieve that.


Member discussion