
Hard mode in 99 Nights in the Forest is not just “more enemies and bigger numbers.” The Forest Is Angry update adds a corruption layer over the entire map, turns exploration into a race against spreading rifts, and doubles the stakes with better diamond payouts for long runs. If you flip the switch, you commit to a very different rhythm of play.
How hard mode works in 99 Nights in the Forest
Hard mode is an opt-in ruleset that sits on top of a normal run. Once enabled, corruption starts to spread from rifts across the forest. That corruption slowly applies permanent debuffs to your run, changes enemy behavior, and eventually reaches your food and healing.
Two things to keep in mind before you start:
- It is a one-way switch. Once hard mode is active, you cannot turn it off for that save.
- The payoff is better rewards. Surviving long enough in hard mode gives double diamond payouts at key milestones (night 50 and night 99).
Everything in hard mode revolves around watching the corruption level and keeping it under control. Leave it alone, and the run will eventually become unsustainable, even if your base defenses are solid.

How to activate hard mode (Research/Scientific Outpost and lever)
Hard mode is tied to a specific structure on the map rather than a lobby toggle. You trigger it inside the Research Outpost, also referred to as the Scientific Outpost, a large white building that’s easy to distinguish from cabins, towers, or the fishing hut.
Step 1: Start a new run and get access to your map. The permanent outpost is marked on it; it appears as a white rock-like marker and is located north of the main campfire area.
Step 2: Travel to the outpost. Go inside the main floor and look for a steel door on the left side of the interior.
Step 3: Open the door and head down into the basement. This space contains notes, the corruption root, and one or more levers mounted near the monitors.

Step 4: Have each player pull their lever to vote for hard mode. There is one lever per player in the round, and the event only starts once every lever is flipped.
Step 5: Wait for the activation. The outpost becomes fully relevant from day 3 onward. Once the conditions are met, a short cutscene plays and hard mode starts, enabling corruption and rifts.
Access to the outpost and its levers opens as early as day 1, which gives teams time to scout it, discuss whether they are ready, and plan their builds before committing.

Corruption level: the real difficulty slider
Once hard mode is live, a corruption percentage governs how punishing the run feels. That number climbs over time as nights pass and rifts spawn, but you can push it back by actively cleaning up infected areas.
Inside the Research/Scientific Outpost, a monitor shows three key things:
- Current corruption level
- Which debuffs are active
- How many rifts are currently affecting the map
Later, you can bring that information home. Opening the hard mode chest rewards a Research Monitor Blueprint, which lets you build a banner-like monitor in your base so you don’t need to commute to the outpost just to check corruption.
Corruption is not a soft suggestion; if you ignore it, debuffs will stack and eventually force a wipe, even for well-geared squads.

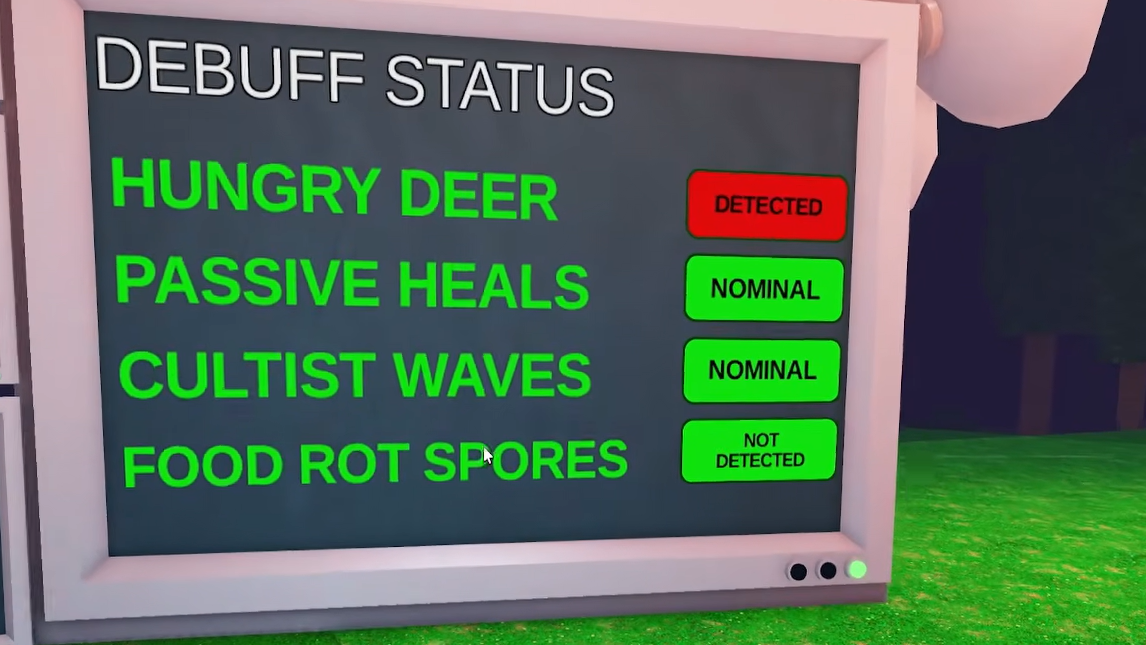
Corruption debuffs in hard mode
The corruption system applies permanent debuffs as the percentage rises. Four debuff types exist, and any given run can end up with three of them active.
| Debuff | What it changes |
|---|---|
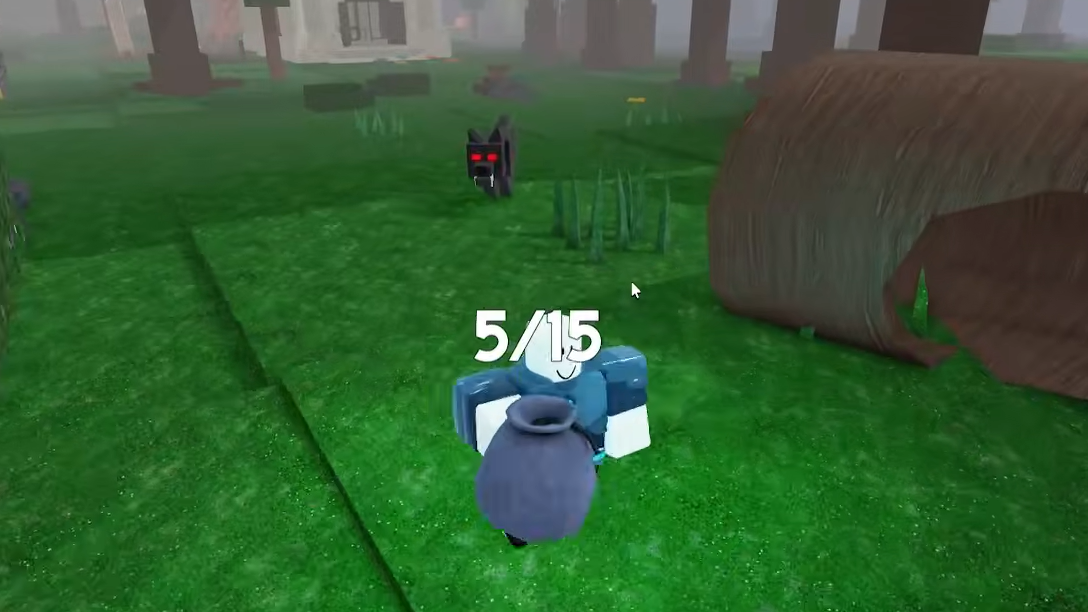
| Hungry Deer | Turns the deer into an aggressive threat that actively hunts players. |
| Passive Healing | Disables or heavily reduces natural HP recovery; you must rely on bandages and medkits. |
| Cultist Waves | Increases the strength and frequency of cultist attacks on your base. |
| Food Rot Spores | Causes your stored food to grow spores and become inedible, leading to starvation if not managed. |
These debuffs layer on top of each other as corruption escalates. Early on, they may feel mild, but at high corruption, it is common to be hunted by hostile wildlife, unable to heal passively, starved for food, and under constant siege.
Keeping corruption in check is less about chasing a perfect zero and more about slowing this ramp so debuffs arrive later and stack more slowly.

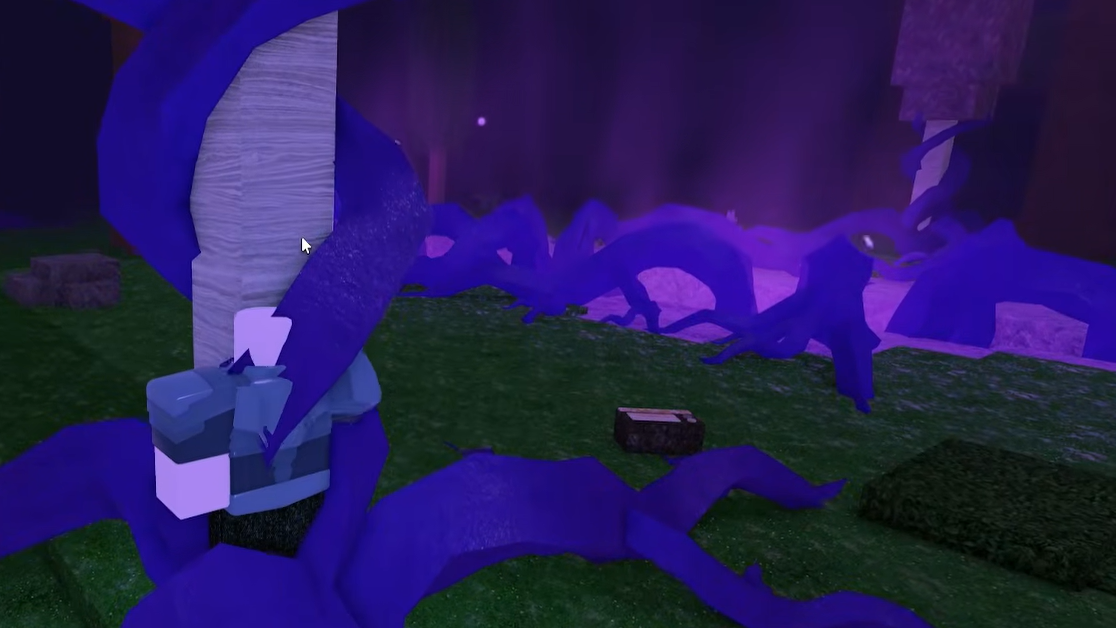
Rifts, corrupted trees, and corrupted animals
Rifts are the main engine behind corruption. They appear as purple anomalies scattered around the forest once hard mode is enabled. Each rift gradually infects the area around it, changing nearby trees and wildlife and pushing the corruption meter upward.
New rifts spawn roughly every night, which means you are always on a timer. Clearing one rift simply gives you breathing room before the next appears.
How to clear a rift
Step 1: Patrol the forest and watch for new purple rift effects on the horizon or map. Treat every new rift as a priority objective.
Step 2: Enter the infected area and chop down any corrupted trees. These are visually distinct, with darker bark and visible signs of infection.
Step 3: Hunt down corrupted animals near the rift. These enemies are more aggressive than their normal counterparts and are part of the corruption source.
Step 4: Stay in the area until the obvious signs of corruption vanish and no hostile corrupted wildlife remains. Once fully cleared, that rift stops feeding the global corruption level.
Corrupted meat can drop from infected animals, but it is not especially valuable; the main benefit of these fights is reducing the global pressure on your run.
Using the ping system in hard mode
The Forest Is Angry update adds a lightweight ping system that becomes crucial in hard mode. On PC, pings are mapped to the Q key. On mobile, a bell icon handles the same job.
Simple pings solve two of the biggest problems in corruption runs: losing track of new rifts and splitting the team at the wrong time. Use pings to:
- Mark fresh rifts as soon as someone spots them
- Flag corrupted animal packs for backup
- Call teammates back to base when cultist waves begin
In late-game hard mode, where food is scarce and healing is limited, saving time by instantly aligning the team on one objective often matters more than raw damage output.
Best practices for controlling corruption
A hard mode run lives or dies on how you manage the early and midgame corruption curve. A few habits make the system much more forgiving.
- Push out early and often. Don’t turtle around your camp for multiple days while rifts spawn unchecked. Explore in daylight, clear what you can, then return to fortify before night.
- Always deal with new rifts. Every unchecked rift is a passive corruption generator and a future debuff. Make them a priority over low-value side tasks.
- Use the Research Monitor Blueprint quickly. As soon as you get the blueprint from the hard mode chest, build the monitor at your base. Constant access to corruption data makes decision-making much easier.
- Share healing and utility items. Bandages, medkits, MREs, and similar supplies become the only way to recover once passive healing is gone. Keep them in circulation instead of stockpiling on a single player.
Hard mode items and the Research Outpost chest
Once hard mode is active, the basement of the outpost also functions as a small supply hub. Chests here can drop:
- The Research Monitor Blueprint for your base
- Bandages and Medkits for direct healing and revives
- MREs and other food items that temporarily ease hunger pressure
These early injections of healing and information are designed to offset the spike in difficulty that comes once corruption fully spins up. Skipping them makes the next phase of the run significantly harsher.
Hard mode rewards and why you’d opt in
There are no flashy hard mode–exclusive weapons hiding behind the corruption system. The big incentive is raw progression speed.
- Reaching night 50 in hard mode pays out double diamonds.
- Reaching night 99 does the same again, doubling that late-game payout.
With those multipliers, hard mode becomes the most efficient way to grind diamonds if your group can survive. The tradeoff is higher risk of losing a deep run to stacked debuffs like Food Rot Spores, plus no passive healing.
For newer players, it makes sense to learn normal mode first and only flip the lever once you are comfortable with basic survival, base building, and class roles. For veterans, hard mode turns the game into an ongoing triage between defending your camp and healing the forest.
Hard mode reframes 99 Nights in the Forest from a static tower defense into a moving war against a hostile ecosystem. The runs that succeed are the ones where players treat corruption as a first-class objective, use the outpost tools to track it, and move quickly to shut down rifts before the debuffs choke off their food, healing, and time.