
City layouts sit at the center of Anno 117: Pax Romana. The game is generous with relocation and shared warehouses, but population density, service coverage, and area effects still decide whether an island hums or stalls. The tools have changed since Anno 1800 — diagonal roads, flexible production placement, huge late‑game radii — and that opens up new patterns that reward both efficiency players and beauty builders.
Core layout rules in Anno 117
Several basic rules shape every settlement, no matter how ornate the final design becomes.
| System | What matters for layouts |
|---|---|
| Roads | Buildings must touch a road connected to the Trading Post via Warehouses; fields only need to touch their farm. |
| Movement vs. smell | Services (Sanctuary, baths, forum) use road distance; smell‑based effects (garum, lavender, soap) use circular range, roads optional. |
| Warehouse inventory | Warehouses share inventory across the island, so farms and processing can be separated physically and still function. |
| Road tiers | Upgrading from Dirt to Paved extends effective service range and speeds logistics; Marble is largely cosmetic for range. |
| Relocate / Copy | Whole blocks can be moved or cloned; layouts are patterns you iterate, not permanent mistakes. |
| Diagonal tools | Roads and buildings can snap at 45°, letting you rotate patterns or carve diagonals through a grid. |

Why 2×X housing blocks dominate early layouts
Most strong early‑game layouts in Latium revolve around simple 2‑tile‑deep residential strips. They behave well with markets, spinners, and other early services, and they’re easy to extend.
| Block type | Pros | Cons | Good for |
|---|---|---|---|
| 2×3 | Very short; trivial to cover with any service radius. | Lower density; more roads per house. | Starter towns, cramped coastlines. |
| 2×4 | Balanced density and coverage; combines nicely into 4‑block “squares”. | Slightly less efficient than long strips. | Standard early Latium quarters. |
| 2×5 | Better density; works if you’re precise with service placement. | Easier to leave corners out of range by accident. | Mid‑game blocks around strong service cores. |
| 2×6 | High density; good for late‑game when service range is boosted. | Coverage is demanding; awkward on small islands. | Patrician quarters on XL islands. |
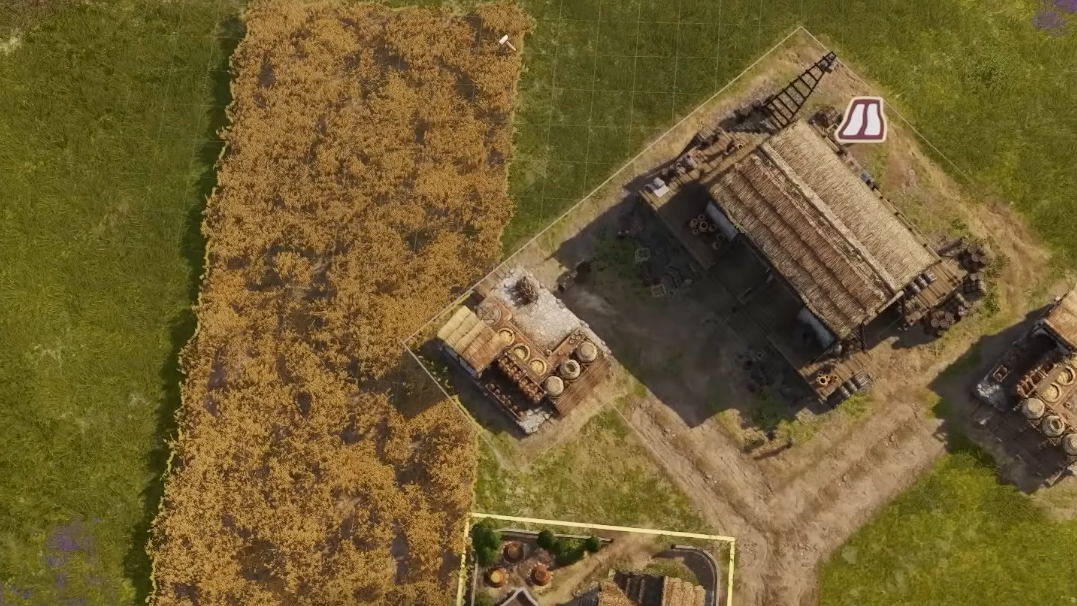
The main trap is the tempting 3×3. A full 3×3 square wastes the center tile unless you break the pattern or thread a road through it. Many players skip the center house entirely or use 3×3 clusters only once they’ve designed room for a service or production building in the middle.
Latium starter layout: a reliable early grid
Latium’s forgiving terrain and Roman architecture suit strict grids. A proven opening focuses on timber, a compact market‑centered quarter, and a separate agricultural band.
Step 1: Timber and first workforce
- Place around 10 Libertus Residences near the Trading Post, all touching roads.
- Find nearby trees and drop 2–3 Woodcutters into the forest.
- Draw a straight road back toward the Trading Post and attach 2 Sawmills along that road, close to the Woodcutters.
- If the cluster sits far from town, add a Warehouse on the road between them and the Trading Post.
The third Woodcutter smooths out travel time and keeps the Sawmills supplied. You want Timber flowing continuously while you sketch your first quarter in Planning Mode.

Step 2: First residential square and services
A simple, expandable pattern uses four 2×4 blocks arranged into a larger square:
- Lay down four 2×4 Libertus blocks that form a big square around an empty central cross of roads.
- Ensure every house touches a road tile; avoid diagonally “floating” houses here.
- On the shoreline, add a Fishing Hut to cover food until farms come online.
Once the square stands, drop a Market on the outer edge of one block so its radius just touches all four groups. That Market becomes the spine of the district: later spinners, felters, and other tier‑1 services can stack with it in a straight line, creating a mixed‑use service strip that multiple housing blocks touch.
Latium agriculture band for ~600 residents
Shifting food and clothing production out of the dense grid frees up prime land and keeps debuffs away from homes. A rectangular agricultural layout can comfortably support an early tier‑2 city of roughly 600 inhabitants.
| Production | Field shape | Processing | Notes |
|---|---|---|---|
| Porridge | 2× 16×6 Oat fields | 2× Porridge Stands | Place Stands directly next to the fields; no area effect to worry about. |
| Tunics | 3× 6×12 Hemp fields | 3× Spinners | Put Spinners back in the city grid; they provide income and knowledge in an area. |
| Pilei | 3× Sheep farms equivalent | 4× Pileus Felters | One Felter more than farms; surplus wool can be sold or banked. |
| Bread | 1× Wheat field | 1× Bakery | Sits well near other rural industry due to fire risk. |
| Garum | Inputs from coast (Scomber’s Shack, Salt Pond) | 1× Garum Works | Keep the Works in the agricultural band to avoid −Happiness in town. |
All of these should hug a Warehouse so cart travel remains short. Because Warehouses share inventory, the city‑center Spinners, Felters, and Bakers can draw from these rural stocks without any direct adjacency.
While building this band, keep alternating between expanding the population and adding new chains. A simple rhythm — one new residential quarter, one new production chain — prevents workforce shortages or unsold goods.
Tier‑2 Latium: service strips and industrial sidebars
As Plebeians move in, blocks get taller and needs diversify. Two principles keep a growing Latium city controllable: service spines and focused industrial pockets.
Service spines through the grid
The easiest way to keep dense quarters covered is to turn one column of your grid into a vertical strip of services and production buffs. Along that central strip you can stack, for example:
- Market
- Spinner and Pileus Felter (fashion and knowledge)
- Sanctuary
- Grammaticus
- Baths, later Forum or Theatre
On the horizontal axis, repeat the pattern “two residential blocks, one service/prod block, two residential blocks”. The inner rows receive coverage from almost every building in the strip, and you can safely leave some outer‑ring houses at tier 1 as buffer zones or lower‑demand workers.
Compact industrial sidebar
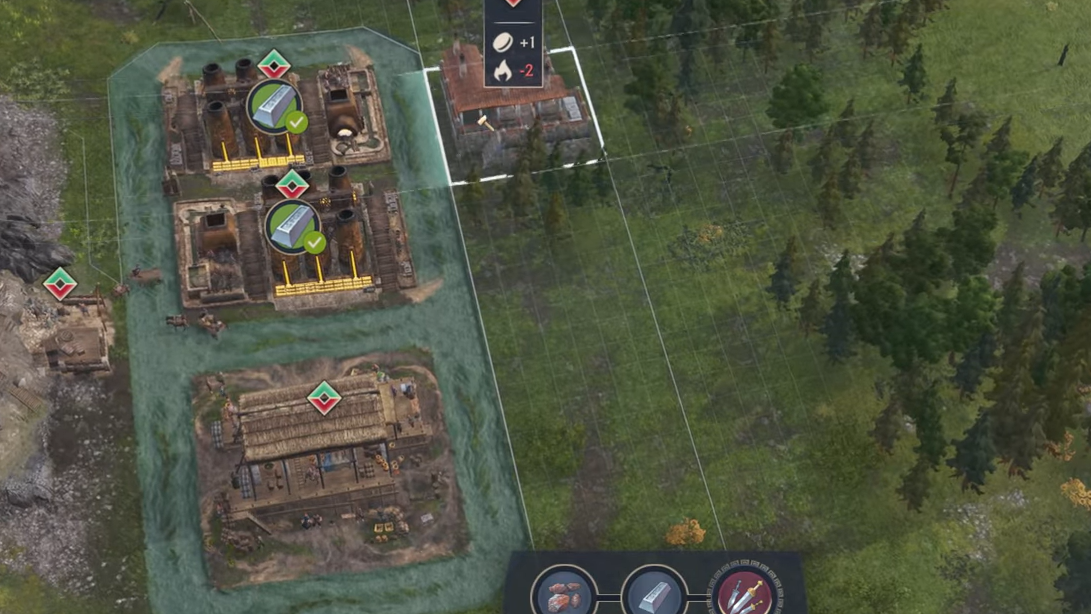
Industrial chains that require rivers, forests, or hills sit best in tight sidebars, still road‑connected but clearly separated from housing. For a basic tier‑2 town:
- Find two river slots touching the same coast or bank.
- Place one Clay Pit and one Grain Mill on those slots.
- Attach a Warehouse between or beside them.
- Add 2 Tilers next to the Pit, and a Charcoal Burner in nearby forest.
- Extend the road back to your main grid.
That small industrial pocket keeps Tiles and other building materials flowing, with fire‑risk buildings clustered where one Vigiles can reach them.
Villa and Guesthouse layouts for mature Latium cities
Once Villas and Guesthouses arrive, the game stops being about markets and taverns and starts being about coverage radii. Their ranges differ, so layouts that snap to those ranges scale better into the late game.
| Anchor building | Effective radius (tiles) | Typical housing block | Best phase |
|---|---|---|---|
| Guesthouse | ≈24 | 2×2 blocks around the Guesthouse | Early expansion before full civic techs. |
| Villa (dense) | ≈36 | 2×3 blocks (“23 layout”) | Late game with Paved Roads and full civic upgrades. |
| Villa (flexible) | ≈36 | 2×4 blocks (“24 layout”) | Mid‑ to late game; works even without all techs. |
Guesthouse‑centered 2×2 clusters are simple: drop the Guesthouse in the middle, wrap it in small 4‑house squares, and lace in aqueducts and services between those clusters. It is forgiving when road range is still short.
Villa layouts go bigger. With 2×3 blocks, you gain better density but push some corners to the edge of the Villa range. Those designs assume you have Paved Roads and all civic upgrades that boost service range. The 2×4 variant sacrifices a bit of density in exchange for more reliable coverage before the tech tree is finished, which fits cities that are still climbing through Equites but not yet capped on governance research.
Diagonal layouts and the 45° problem
Diagonal construction is one of Anno 117’s headline tools, and it changes how you think about connecting blocks — but it doesn’t change the fact that most buildings are rectangular. That creates a few quirks.
- Roads can bend and curve through forests or around hills, but under the hood they’re still a series of straight segments, so “curves” resolve into visible angles when zoomed in.
- Buildings rotate in 45° increments only. You can’t place a house at a 30° angle to smooth out a curve.
- Service ranges and marketplace footprints don’t project identically in pure diagonal grids. A pattern that works orthogonally can misalign when rotated 45°.
Players who lifted orthogonal layouts directly into fully diagonal cities quickly ran into half‑tile mismatches — a market that suddenly leaves one edge uncovered, or a block that no longer lines up with aqueducts. If you want a true 45° city, treat it as a separate design problem. Either:
- Adopt layouts hand‑drawn for the 45° grid, like radial “cartwheel” patterns centered on a Villa or Forum.
- Use diagonals only as scenic avenues cutting through a mostly orthogonal city, keeping your core service coverage on the cardinal grid.
The second approach mirrors how many Roman towns combined strict grids with a few grand diagonal axes. It also makes it easier to reuse tried‑and‑tested orthogonal blocks for services and housing while reserving diagonals for parks, villas, and cosmetic districts.
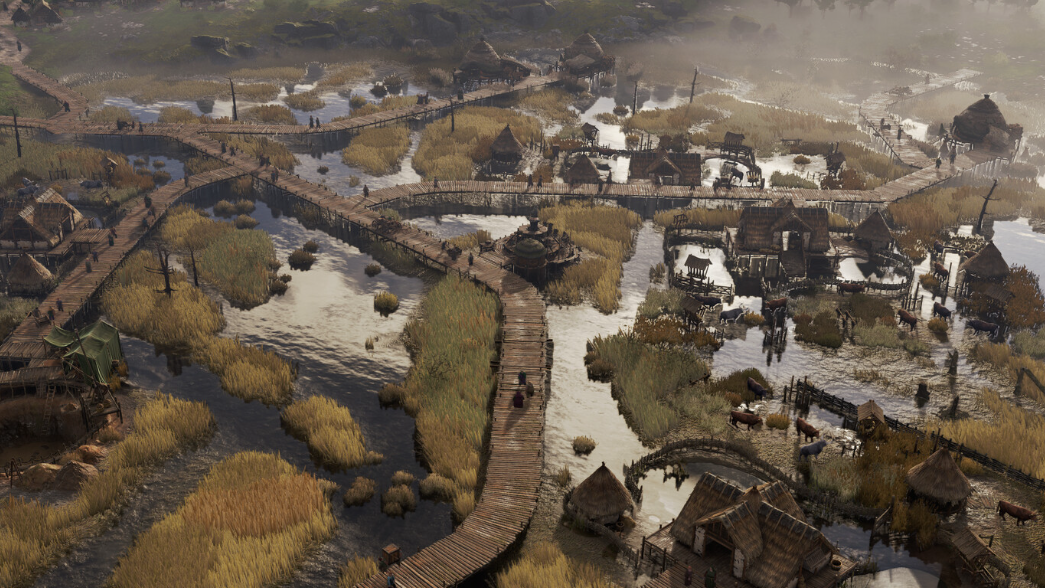
Albion layouts: grids in a swamp
Albion looks like the place where grids should die — marshy ground, rocky ridges, winding paths. Underneath the scenery, though, the same rectangular logic applies, and space is tighter. Layouts there split between Romanized grids and more organic Celtic quarters.
Albion tier‑1: Waders and “Swamp City”
For Waders, a basic dirt‑road grid still works well: compact blocks of houses around a Market and Bardic Hall, plus early Tunic and Reed Shoe production stitched into the edges. A more distinctive pattern appears once Drainage is researched, and you can build in wetlands.
“Swamp City” is a 45°‑oriented Wader layout dropped into a drained marsh. Drainage channels form a clear boundary; dirt roads thread a rotated grid of houses inside. It offers:
- Full or near‑full Public Service coverage on dirt roads, with only some outer‑ring homes missing a specialist or two.
- Built‑in slots for early production, such as Tunics and Reed Shoes.
- Aesthetic value — a Celtic town that isn’t just a Latium copy‑paste.
Because wetland buildable space is so constrained, counting the outer boundary and laying those edge roads first helps avoid discovering halfway through that your diagonal grid has slammed into a cliff or lake.
Albion tier‑2: Roman Mercators and Celtic Smiths
Albion splits into Romanized Mercators and Celtic Smiths, and both sides benefit from purpose‑built patterns:
| Albion tier‑2 group | Layout focus | Coverage assumptions |
|---|---|---|
| Mercators (early) | Rectangular dirt‑road grid with Market, Bardic Hall, Grammaticus, and double Tunic/Reed Shoe production built in. | Full coverage with basic roads; no Fanum yet. |
| Mercators (“Dog Bone”) | Paved‑road layout shaped like a stretched barbell; Roman services and land‑based tier‑2 production stitched along the spine. | Paved Roads assumed; Fanum can replace a third Grammaticus later. |
| Smiths (full production) | Dirt‑road layout that fully supplies Celtic tier‑2 needs — Spinner, Shoe Weaver, Dairy, Brewery, Hosier, Wire‑Twister, Shieldbeater, Horner. | Full Public Service and Incident Resolver coverage on dirt roads. |
The “Dog Bone” in particular is a good example of how Roman layouts thread production directly into the city: spinners and weavers double as area buff sources, and paved roads stretch their service ranges enough that even a long, narrow quarter can be fully served.
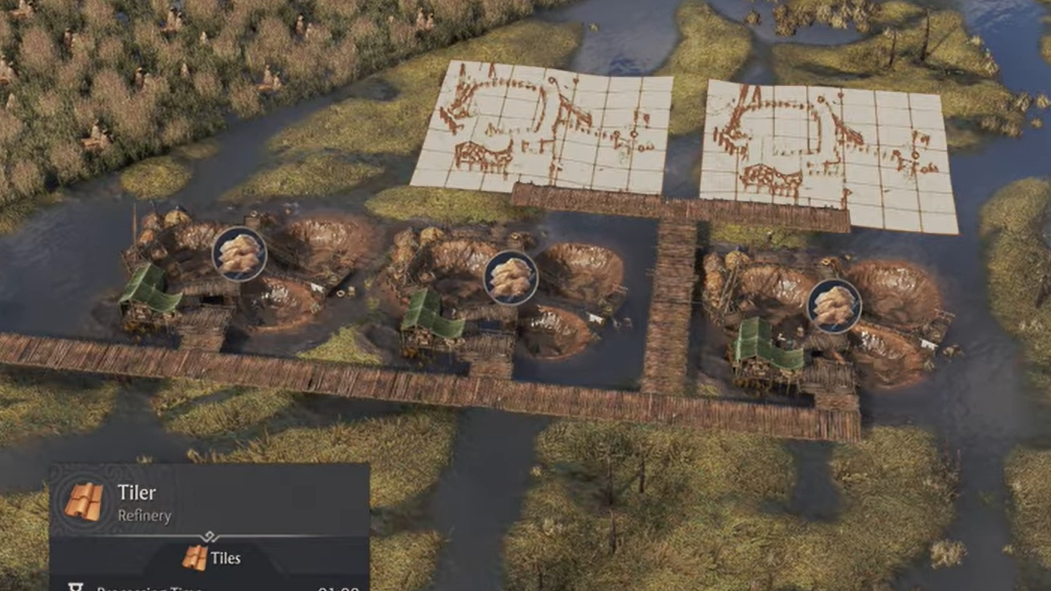
Dedicated production blocks for clean cities
Beyond early timber and food, most production in Anno 117 slots into reusable rectangles. Treat these as modular estates you bolt on to any island edge rather than improvising each time.
| Chain | Typical block | Extras | Notes |
|---|---|---|---|
| Porridge | 1×, 4×, or 8× stacked oat‑field rectangles with Porridge Stands and a Warehouse on one side. | None needed. | Easy to tile along any flat rural band. |
| Tunics | Single or 4‑chain blocks pairing Hemp fields and Spinners around a Warehouse. | Optionally mix in Grammaticus if near housing. | Hemp sits best away from houses but Spinners like city centers. |
| Pilei | 4‑Felter rectangles up to massive 28‑Felter grids with double Warehouses. | Fire and incident coverage for large layouts. | High‑throughput blocks for Patrician cities. |
| Bread | 4‑Bakery block with Grain inputs offsite and a Warehouse. | Vigiles for fire safety. | Keep away from inner residential blocks. |
| Garum | Small 3‑Works cluster drawing fish and salt from harbor chains. | Custodia against riots. | Place these with other “nasty” industries. |
| Soap | 2‑ or 4‑chain blocks with Renderers and Soap Makers around a Warehouse. | Custodia for happiness penalties. | Good candidate to exile to rural corners. |
| Amphorae, Olive Oil, Wine, Togae, Fine Glass | Mid‑ to late‑game rectangles tuned for 2–6 processing buildings, often with Vigiles or Medicus embedded. | Special inputs like river slots, mountains, or forests handled outside the block. | Design these near appropriate terrain but keep the pattern rectangular. |
Because many noisy or risky chains bundle their own Custodia or Vigiles into the layout, they are easy to drop in bulk without rethinking your fire and riot coverage every time.
3×3 “service cores” and late‑game city centers
Early on, 2×X strips rule. Later, as baths, forums, theatres, sanctuaries, and aqueducts unlock, a different pattern emerges: rows of 3×3 housing clusters wrapped around fat civic buildings. One strong approach looks like:
- Create two parallel rows of 3×3 housing blocks.
- Between them, leave a 2‑tile‑wide central corridor.
- Use that corridor for services: Wells, Watchtowers, Spinners, latrines, and other production buildings that buff nearby residences.
- At intervals, break the corridor to fit wide buildings like the Forum, baths, theatre, or Sanctuary.
Many of those late‑game civic buildings share a common “thickness” along one axis, so a central avenue designed as a “five‑tiles‑plus‑two‑tiles” band can host nearly all of them with roads separating their footprints. Upgrading to Concrete‑boosted roads then pushes their coverage out far enough that all surrounding 3×3 blocks stay fully served.
This structure turns the middle of the city into a true civic spine: a sanctuary and forum‑lined avenue slicing between dense insulae, with aqueducts and baths punctuating the line and every house within walking distance of most services.
Put together, these patterns — 2×4 starter blocks, Villa‑centric grids, 45° “cartwheels”, swamp diagonals, and modular production rectangles — create cities that feel Roman without sacrificing playability. The relocate and copy tools mean you can start rough, experiment freely, and then crystallize your favorite patterns into repeating districts. Anno 117 rewards that kind of iteration: first, you meet needs, then you bend the grid until it looks like somewhere people might actually live.