
Augments are some of the most impactful upgrades in Arc Raiders, and the epic Mk. 3 variants can completely reshape how your kit plays. The catch is that augment blueprints are rare, and they do not come from the same container pools as weapon or grenade blueprints. Knowing where they appear most often is what turns a long, frustrating hunt into a focused farm.
All epic augment blueprints in Arc Raiders
Epic augments are tied to five specific blueprints:
- Combat Mk. 3 (Flanking)
- Combat Mk. 3 (Aggressive)
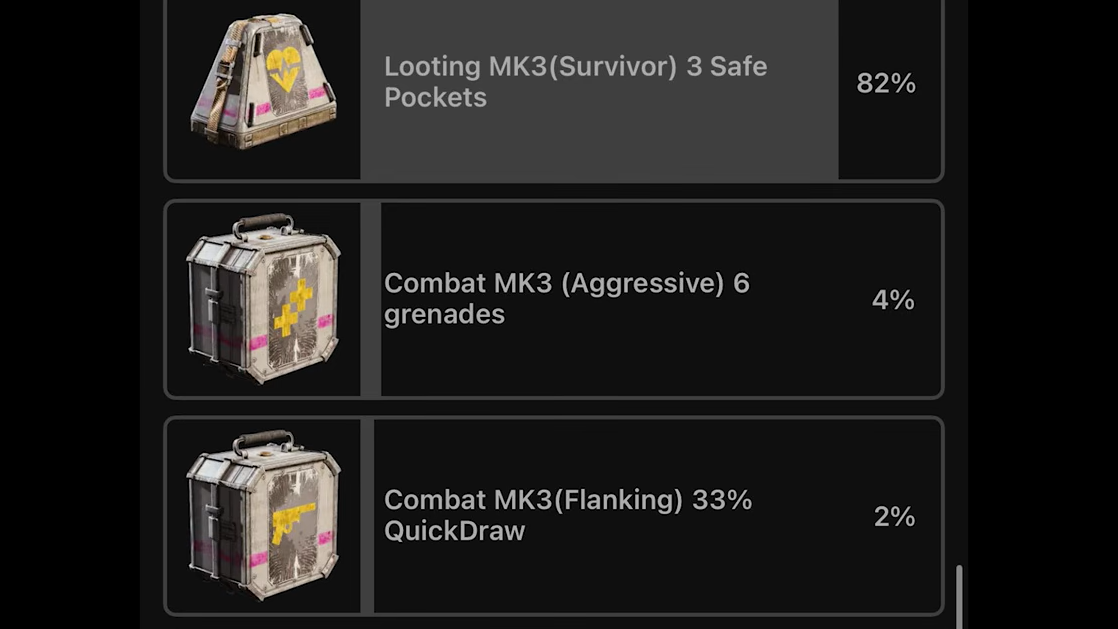
- Looting Mk. 3 (Survivor)
- Tactical Mk. 3 (Defensive)
- Tactical Mk. 3 (Healing)
Each of these is crafted at Gear Bench 3 once you have the blueprint. The recipes share the same components: 2x Advanced Electrical Components and 3x Processor. The power spike comes from their effects rather than their cost. Looting Mk. 3 (Survivor) in particular is widely regarded as one of the strongest blueprints in the game because it grants three safe pockets, supports a medium shield, and still gives strong carry weight and inventory capacity.
These augments do not drop fully built on any kind of vendor track. To use them consistently, you must extract with the blueprint at least once, then consume it in your inventory to unlock the recipe in the Workshop.

How augment blueprints drop
Augment blueprints share the same underlying system as other blueprints: they are extremely low chance drops that can appear in containers or as special loot. There are two important differences:
- Container type matters more than usual. Augment blueprints lean heavily toward medical-themed containers such as blue multi-drawers, white medical drawers, cabinets, and certain lockers rather than weapon boxes or grenade tubes.
- Location theme is strongly weighted. High-tier medical POIs and specific breach rooms on each map have far better odds than generic houses or cars.
Augment blueprints can appear:
- In medical POIs on every map (not just Blue Gate).
- Inside breachable high-value rooms, especially in medical complexes and lobbies.
- In black boxes, cabinets, blue multi-drawers, and white drawers that share augment and medical loot pools.
- From Surveyors as extremely rare drops.
- From Trials rewards, where high-star crates can roll augment blueprints.
Map conditions also matter. Night Raids, Electromagnetic Storms, Cold Snap, and the Locked Gate condition on Blue Gate all increase high-tier and specialty blueprint drop chances inside affected areas. Augment blueprints can still drop in normal daytime raids after the blueprint system update, but special conditions are a noticeable boost when you have the choice.
Best global strategies for farming augment blueprints
Loot RNG is always a factor, but there are consistent ways to skew the odds in your favor without wasting time in low-yield areas.
- Prioritize medical POIs over generic “red” zones. The drop pool for augment blueprints is closely tied to medical loot zones and their containers. A mid-tier medical wing is usually a better bet than a random high-value residential block.
- Focus on drawers and cabinets, not just big chests. Blue multi-drawers, white medical drawers, file cabinets, and cabinets are prime augment containers. Weapon cases and grenade tubes remain more important for weapon and explosive blueprints.
- Hit breach rooms whenever possible. Breachable doors in Reinforced Reception (Blue Gate) and the lobby or medical complexes on Stella Montis have some of the highest reported augment blueprint density.
- Lean into map conditions that boost loot quality. Night Raid, Electromagnetic Storm, Cold Snap, and Locked Gate all make high-rarity drops more likely in their affected POIs.
- Use Trials as a parallel track. Trials unlocked at level 15 give high-tier loot crates at each star threshold. These crates can roll augment blueprints and are a strong weekly backstop while you farm in raids.
Blue Gate: Reinforced Reception and other key spots
For a long time, the most concentrated augment blueprint drops came from Reinforced Reception in Blue Gate, specifically the underground complex reached via the central corporate plaza.
Players consistently pull epic augment blueprints there, including:
- Combat Mk. 3 (Flanking)
- Combat Mk. 3 (Aggressive)
- Tactical Mk. 3 (Healing)
- Tactical Mk. 3 (Defensive)
- Looting Mk. 3 (Survivor)
The critical area is the lower level reached by a zipline from Reinforced Reception. From the bottom of the zip, the first right turn leads to a barricaded loot room behind a breach door. That room and the nearby secure power-cell door room have a dense cluster of containers that lean heavily toward utility and augment blueprints rather than just weapons.
To route this area efficiently:
Step 1: Spawn on Blue Gate and check the raid timer. If the lobby is fresh with roughly a full 30 minutes on the clock, commit to a run toward Reinforced Reception. If the time is already heavily drained, your odds of beating other players there drop sharply.
Step 2: Move straight to Reinforced Reception and take the zipline down into the underground level. Equip at least one safe pocket and enough healing to survive PvP, since this area attracts other players.
Step 3: From the bottom of the zip, take the first door on the right, then move straight ahead to the barricaded door. Breach it using explosives or appropriate tools, then loot every container inside, giving special attention to drawers, lockers, and any black boxes.
Step 4: Before or after that room, interact with the nearby computer terminal to unlock the “find the gun locker” audio puzzle and the so‑called “red room” puzzle in the same complex. Their reward rooms add more containers that share the same high-value blueprint pool.
Reinforced Reception remains a high-yield augment spot, but the blueprint system update broadened augment drops to other medical areas. It is no longer the only viable route, and its popularity means PvP pressure is extreme. If you want a quieter path, medical POIs on other maps are now competitive.
Dam Battlegrounds: Testing Annex and other medical POIs
On Dam Battlegrounds, augment blueprints surface most often in or around medical-focused POIs:
- Testing Annex
- Research & Administration
Players have looted Looting Mk. 3 (Survivor), Tactical Mk. 3 (Defensive), and other augment blueprints here from ordinary drawers and shelves, not just locked cases. Testing Annex in particular is attractive because it combines medical drawers with the general high blueprint density that Dam Battlegrounds already has in areas like Control Tower and Power Generation Complex.
Buried City: Hospital, Pharmacy, and hidden rooms
Buried City is a strong alternative to Blue Gate for augment farming, especially if you prefer more mixed PvP and PvE.
The most important locations are:
- Hospital (including the keycard-locked medical wing)
- Pharmacy POIs
- Certain hidden rooms and stashes in the New District and parking structures
Multiple players have pulled Looting Mk. 3 (Survivor) and Tactical Mk. 3 (Defensive) blueprints in the Hospital during Night Raids, both from open drawers and from rooms gated by Hospital keycards. Parking garage stashes and grey-shelf rooms on the first floor have also produced augment blueprints.
For efficient farming:
Step 1: Queue Buried City with Night Raid enabled when possible. The combination of higher loot quality and a dense medical complex gives you more chances per run.
Step 2: Route straight to the Hospital. Clear the first floor rooms with grey shelves and cabinets, then move into any blue multi-drawers and white medical drawers on upper floors.
Step 3: If you have the relevant keycard, open the Hospital key room and loot every drawer. Keyed rooms have produced multiple augment blueprints in a single raid.
Step 4: On the way to extraction, detour through any Pharmacy POIs or known hidden stash rooms you are comfortable contesting. Prioritize drawers and cabinets before generic crates.
Spaceport: Hidden Bunker and Arrival/Departure medical wings
Spaceport is already one of the best maps for weapon blueprints, but several structures also support augment drops through their medical wings and special events.
Key spots include:
- Arrival and Departure buildings, especially their medical wings.
- The Hidden Bunker event, where white drawers and medical containers inside the bunker and adjacent rooms have a high chance to roll rare blueprints, including Looting Mk. 3 (Survivor).
During Hidden Bunker, white drawers inside the bunker and the medical wings of Arrival and Departure are some of the strongest single-container targets for augment blueprints. Outside that event, medical drawers in these buildings remain a good option when you are already farming Spaceport for other loot.
Stella Montis: Medical, Assembly, Security Wing, Lobby
Stella Montis leans more toward general high-tier loot than blueprints, but its medical complexes have become important augment sources after the blueprint update.
The main augment-heavy POIs are:
- Medical and Medical Research
- Assembly
- Security Wing
- Lobby, including its breach room
- Medical Storage key rooms
Players have pulled multiple Looting Mk. 3 (Survivor) blueprints from Stella Montis Medical and its Storage key room, sometimes finding two Survivors in different containers in a single raid. Tactical Mk. 3 variants have also dropped from ordinary white drawers in the medical section.
When targeting Stella for augments:
Step 1: Route directly to Medical and check any breach doors in the Lobby on the way. The Lobby breach room shares much of the same augment-heavy loot pool as Reinforced Reception’s room on Blue Gate.
Step 2: Work systematically through blue drawers, cabinets, and white medical drawers in Medical and Assembly, then into the Security Wing if time allows.
Step 3: If you have Medical Storage or other keycards for the complex, prioritize those rooms; they have produced multiple Mk. 3 augment blueprints per run.
Events, Trials, and Surveyors as secondary sources
Beyond static POIs, three systems give extra shots at augment blueprints without forcing you into the most contested rooms every time.
Map conditions and events
Several map-wide conditions raise blueprint quality or alter where rare drops appear:
- Night Raid increases rare blueprint chances in containers, especially in medical POIs.
- Electromagnetic Storm and Cold Snap push loot quality up overall and make Reinforced Reception on Blue Gate even more attractive.
- Locked Gate on Blue Gate adds extra pressure to high-value underground sections but improves blueprint yields while active.
- Hidden Bunker on Spaceport specifically boosts rare blueprint chances in its white drawers and nearby medical wings.
Whenever you plan a farming session, it is worth checking which map conditions are active and favoring raids where Night Raid or a blueprint-friendly event is running on a map with strong medical POIs.
Trials
Trials unlock at level 15 and reset weekly. Each trial tracks your progress toward objectives such as looting Supply Drops or dealing damage to specific enemies, with reward crates at one, two, and three stars.
High-star reward crates can roll any high-tier blueprint, including augment blueprints. This makes Trials a slow but reliable background path: you work through them while playing normally, and every completed trial is another chance at an augment drop without relying on a specific drawer or breach door.
Surveyors
Surveyors, the large rolling ARC units that project a blue beam into the sky, can drop unusual blueprints when destroyed. Augment blueprints, including Looting Mk. 3 (Survivor), have appeared as rare Surveyor drops on Dam Battlegrounds and other maps.
Surveyor farming is not efficient as a primary method, because they are well-armored and do not appear every raid, but if you see one nearby, it is worth taking the time to destroy and fully loot it.
Augment blueprints in Arc Raiders are still driven by RNG, but they are not evenly spread across the world. If you focus on medical POIs, breach rooms in Reinforced Reception and high-end lobbies, blue multi-drawers, and white medical drawers during Night Raids and major events, your chances of seeing Combat Mk. 3, Tactical Mk. 3, and especially Looting Mk. 3 (Survivor) rise dramatically. Layer Trials and the occasional Surveyor kill on top of that, and you can work toward a full epic augment set without being locked into a single high-stress loot room every session.