
Crafting sits at the center of Arc Raiders. Your Workshop lets you turn scavenged parts into weapons, shields, and lifesaving consumables that outclass the overpriced stock in Speranza. This explainer walks through accessing the Workshop, which benches to build first, how upgrades work, where materials come from, and the blueprint system that unlocks the best gear.
Open the Workshop and add the right benches
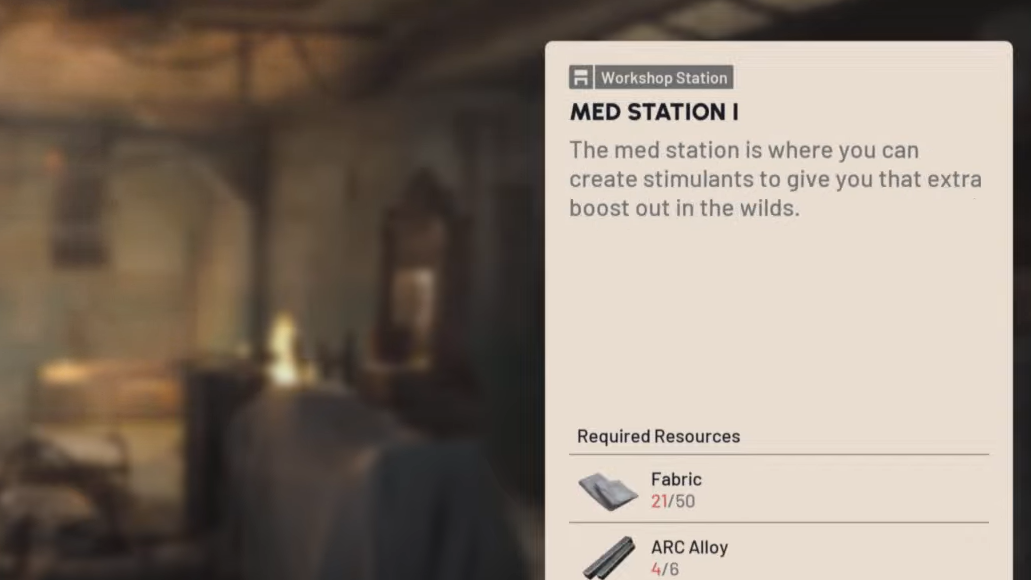
Access the Workshop from the lobby menu between raids. You start with a basic setup and add specialized benches to unlock new recipes. If you want to make weapons, you need the Gunsmith. If you want field meds and shield tools, you need the Medical Lab. Each bench upgrades through three tiers, and higher levels unlock stronger weapons, larger shields, and more advanced items.
| Workbench | What it’s for | Examples of what it crafts/unlocks |
|---|---|---|
| Basic bench (starter) | Entry-level crafting | Basic weapons, most ammo types |
| Gunsmith | Weapons and weapon mods | Starter guns, silencers, magazines; Silencer III at Level 3 |
| Medical Lab | Healing and recovery | Bandages, Surge Shield Rechargers; Defibrillator (Level 2), quick 50 HP shots (Level 3) |
| Gear Bench | Personal protection and augments | Light/Medium/Heavy shields; Medium shield unlocks at bench Level 2 (requires sufficient augment tier to equip) |
| Explosives Station | Throwables | Gas grenade, light impact grenade, blaze grenade |
| Utility Station | Tactical tools | Barricade kit, smoke/lure grenades, zipline, Photoelectric Cloak, Snap Hook grappling tool |
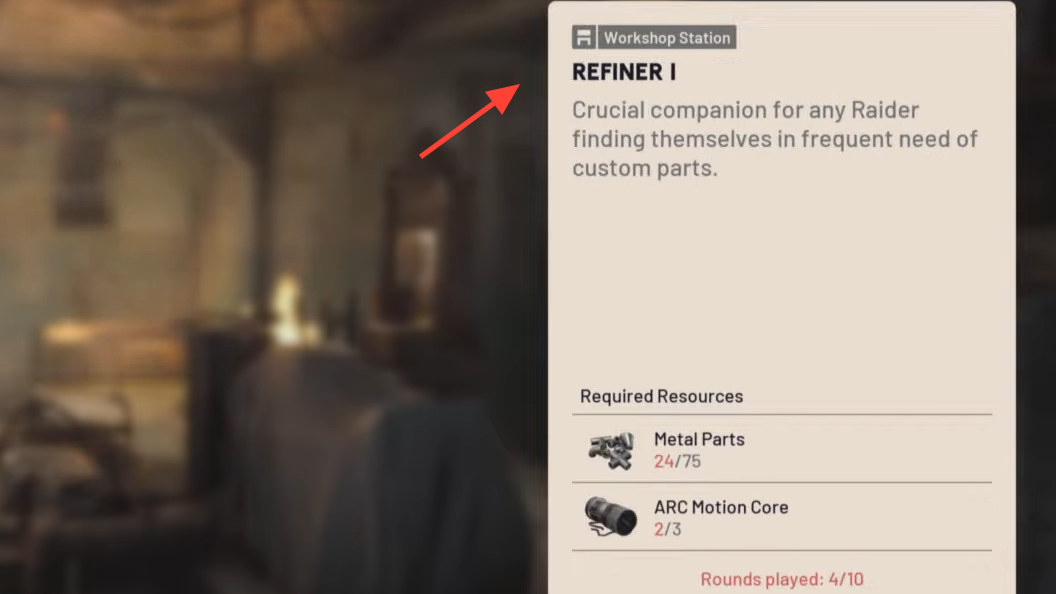
| Refiner | Material conversion | Electrical components, antiseptic, advanced mechanical components, mod components |
Prioritize Gunsmith and Medical Lab first. They provide immediate survivability and damage gains early on.
Upgrade flow and example costs
Benches upgrade to a maximum of Level 3 using items you extract from raids. A practical early path:
- Gunsmith Level 1: 20 Metal Parts, 30 Rubber Parts
- Medical Lab Level 1: 50 Fabric, 6 ARC Alloy
- Gunsmith Level 2: items like Rusted Tools, Mechanical Components, and Wasp Drivers
- Medical Lab Level 2: items like Syringes and Antiseptic for Defibrillators and stronger shield rechargers
- Gunsmith Level 3 and Medical Lab Level 3: high-end silencers and instant-heal shots
You can complete one bench tier at a time to avoid spreading materials too thin. The Refiner, once upgraded, pays off as a long-term investment by converting common drops into bottleneck parts.

Collecting materials: loot targeting and recycling
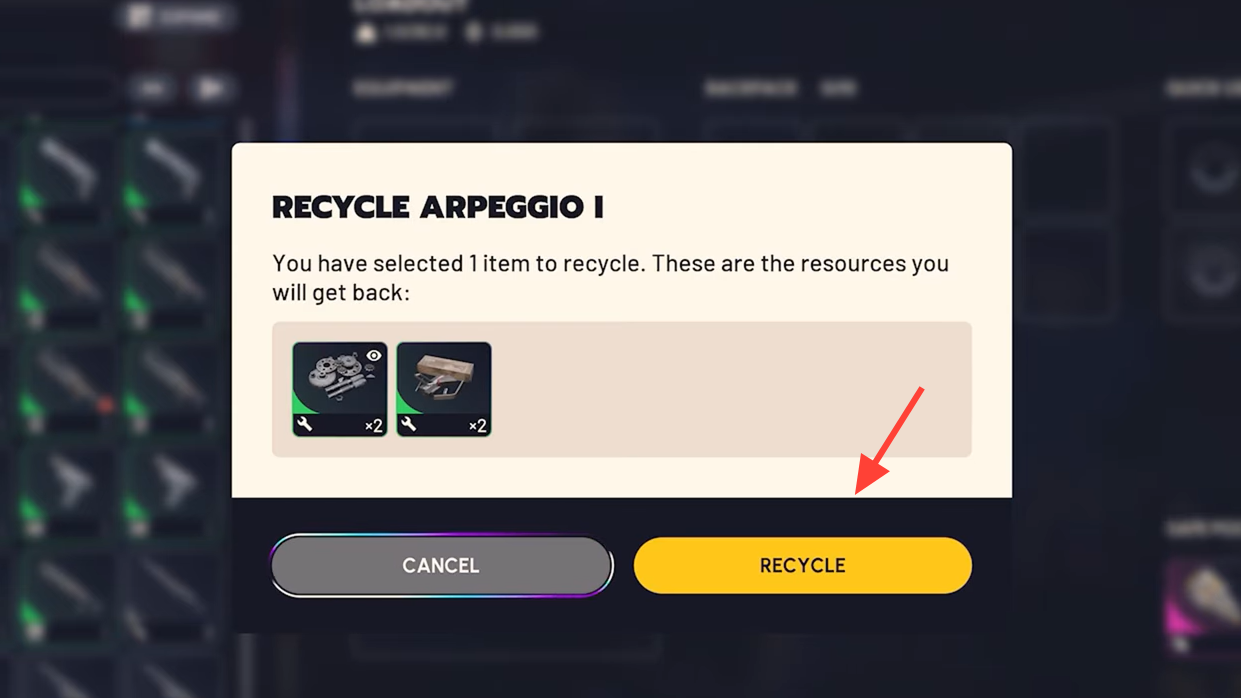
Materials come from two places: what you bring back from the surface and what you recycle. Open your inventory and recycle nonessential items to break them into crafting components. Item descriptions indicate whether something can be recycled.
- Be cautious with high-rarity gear; in most cases, don’t recycle it unless you’re certain.
- Target loot by map icon: “Electrical” locations are where wires spawn consistently.
- Destroy ARC drones for ARC Alloy, a common limiter for early medical and bench upgrades.
Recycling supports the early grind for Metal Parts, Rubber Parts, and Fabric, which feed basic weapons, meds, and attachments.
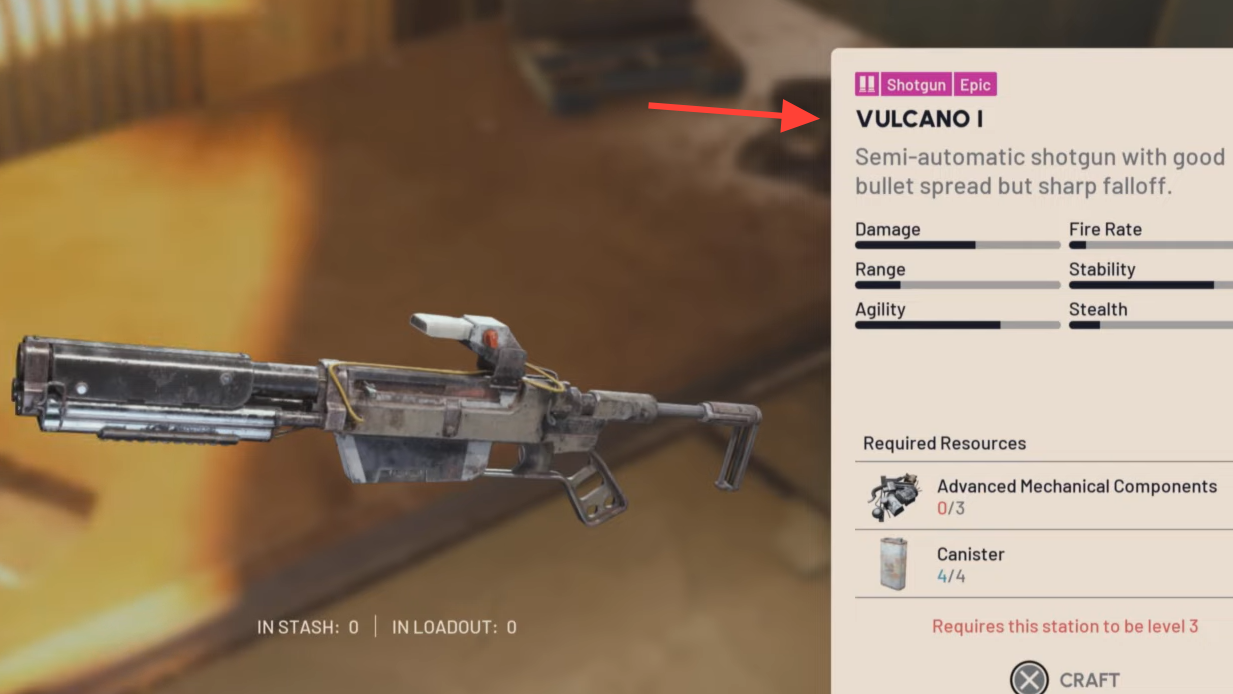
Crafting and upgrading weapons
Once the Gunsmith is installed, you can craft new guns or upgrade ones you already own. Upgrades raise a weapon’s tier up to a maximum of IV and can improve stats like durability and reload speed.
| Weapon | Upgrade | Indicative cost |
|---|---|---|
| Rattler | I → II | 10 Metal Parts, 10 Rubber Parts |
| Ferro | I → II | 7 Metal Parts |
| Ferro | II → III | 9 Metal Parts, 1 Simple Gun Part |
| Ferro | III → IV | 1 Mechanical Component, 1 Simple Gun Part |
Upgrading early, cheap weapons is an efficient way to stabilize your loadout while you hunt blueprints for stronger options.
Use the Refiner to break bottlenecks
The Refiner turns common materials into scarce components. A key early recipe converts 5 Metal Parts into 1 Mechanical Component, smoothing out the mid-game spike when bench and weapon upgrades suddenly demand mechanicals, mod parts, and electrical components.
As your Workshop grows, plan conversion chains so you’re never stuck with a pile of unusable scrap when one critical component is missing.
Blueprints: permanent unlocks for weapons, mods, and tools
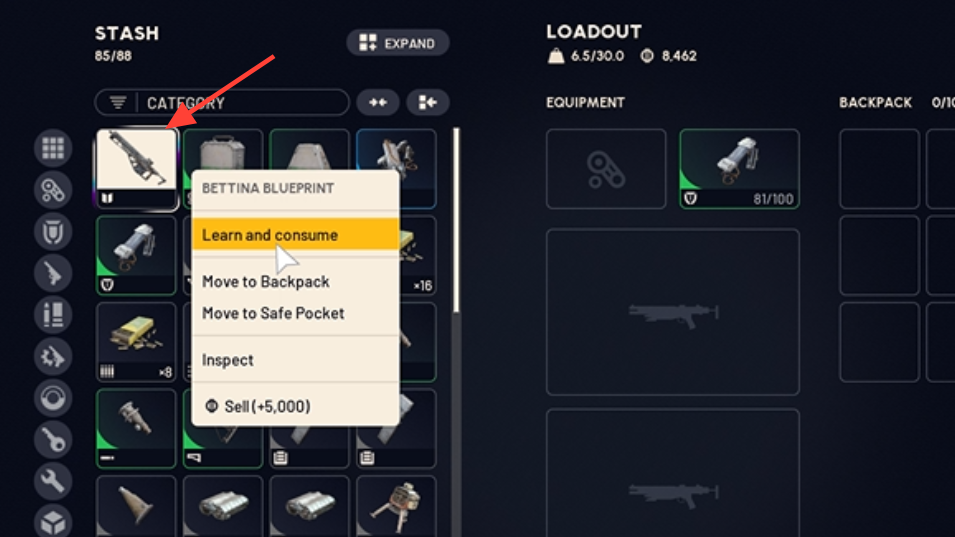
Blueprints are recipes you learn once and use forever. Find one, extract with it, and use the “learn and consume” action in Speranza to add the item to your crafting list. Duplicates are worth carrying out—common weapon blueprints sell for about 5,000 coins each after you’ve learned them.
- Where they come from: hidden caches and high-value containers, AI and player bodies, mission rewards, and vendor reputation tracks.
- Event drops: rotating activities can reward weapon blueprints you won’t see elsewhere, including energy weapons.
- What to prioritize: Refiner material blueprints first (e.g., Advanced Mechanical Components, ARC Circuitry), then one primary weapon that matches your playstyle, plus core attachments like silencers and extended magazines.
Learn blueprints promptly; once learned, they persist regardless of raid outcomes.
Material priorities by progression stage
- Early game: Metal Parts, Rubber Parts, Fabric, ARC Alloy
- Mid game: Mechanical Components, Electrical Components, Antiseptic
- Late game: Advanced Mechanical Components, high-tier lab reagents, and single-use gate items for Level 3 bench upgrades
Keep a reserve for ammo and bandages so you’re never forced to sell or recycle what you need to survive your next extraction.
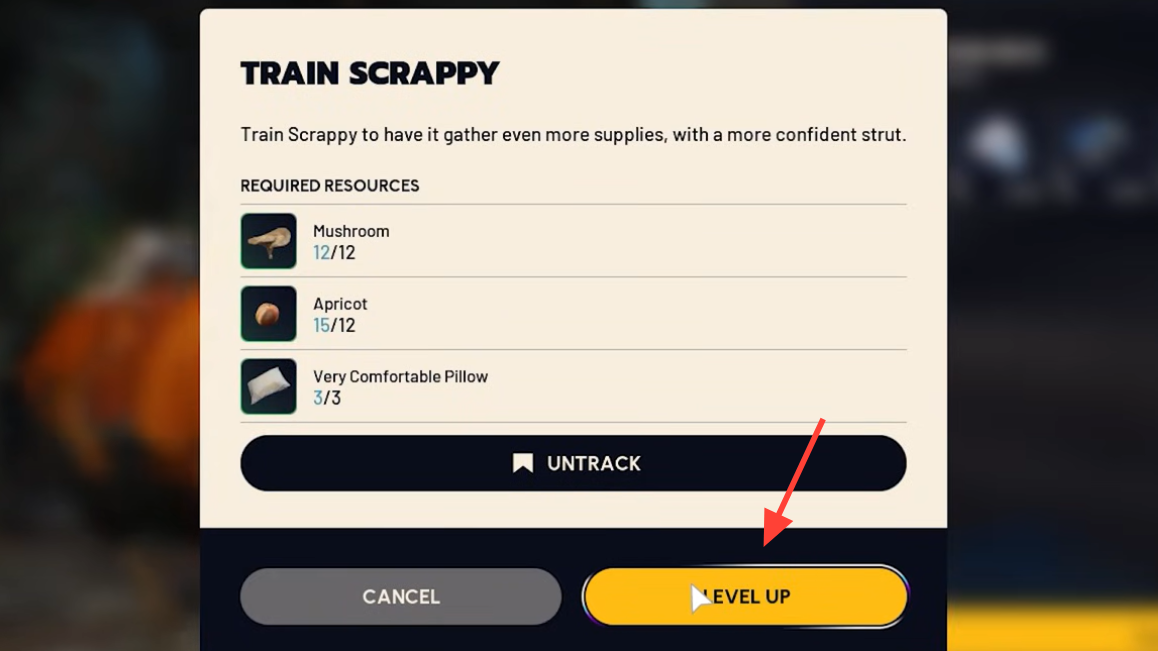
Scrappy: passive materials between raids
Scrappy periodically delivers basic materials to your Workshop. You can upgrade his output with items picked up during raids, such as collars, blankets, and other trinkets. Check his box whenever you return—those free components add up and reduce how often you need to run low-risk farming routes.
In-raid crafting and emergency uses
There are two often-missed safety nets when you’re running dry mid-raid:
- Skill-based crafting: unlock Survival branch skills to craft basic consumables on the fly; a later skill expands the list further.
- Direct use of materials: Fabric can be used like a simple bandage, and ARC Powercells from defeated ARC units can recharge shields in a pinch.
Both options can turn a doomed run into a successful extract.

A practical early-game plan
- Install Gunsmith Level 1 (20 Metal Parts, 30 Rubber Parts). Craft or upgrade a starter gun and add a basic silencer if you have the blueprint.
- Install Medical Lab Level 1 (50 Fabric, 6 ARC Alloy). Stock bandages and shield rechargers; keep a small reserve of Fabric and Alloy.
- Recycle nonessential loot to build a base of Metal, Rubber, Fabric, and Chemicals. Target Electrical icons to stock wires.
- Use the Refiner to convert surplus Metal Parts into Mechanical Components as soon as you hit mid-game recipes that require them.
- Hunt blueprints methodically—prioritize your primary weapon, core attachments, and Refiner material recipes. Learn them immediately; sell duplicates for coins.
Treat the Workshop like a long-term project. Build the Gunsmith and Medical Lab first, lean on recycling and targeted farming for early materials, and use the Refiner to turn common scrap into the components that gate your next upgrade. Once your blueprint library grows, you’ll spend less time waiting on lucky drops and more time crafting exactly what your loadout needs.