
The Matriarch has around 35,000 HP and extremely heavy armor, so there is no single fixed number of Hullcracker shots that always kills it. The total you need changes with how well you hit weak points, how many other raiders are shooting, and how often you waste shots into the shield. That said, you can still plan a safe ammo budget.
Quick answer: Go in expecting to personally fire around 150–250 Hullcracker rounds’ worth of damage if your squad is small or slow, with Wolfpacks on top. In larger public fights where several Hullcrackers are working the boss from good positions, individual players often spend closer to 80–150 rounds.
How Hullcracker Damage Translates To A Matriarch Kill
The Matriarch is built to soak damage. With 35,000 HP and thick armor plates, the Hullcracker’s job is to strip armor and push damage into exposed weak points.
From reported encounters:
- Players who joined large ad-hoc groups brought around 200 Hullcracker rounds and finished the fight with roughly 70–80 rounds left, meaning they spent about 120–130 rounds while other raiders also contributed significant damage.
- Solo and small-group players commonly bring 200+ rounds and still describe the fight as an expensive ammo sink, especially when they cannot sit in perfect weak-point positions the entire time.
- One solo player dumped 40 Hullcracker rounds into the Matriarch from a distance and did not secure the kill, which lines up with 40 rounds being only a fraction of the total HP bar if you are mostly hitting body armor.
All of that points in the same direction: a full 35,000 HP health bar takes the equivalent of multiple full Hullcracker inventories if you are not hitting weak spots efficiently.
Recommended Hullcracker Ammo For Different Group Sizes
Use these numbers as conservative planning targets rather than hard requirements.
| Group Size / Role | Safe Hullcracker Ammo To Bring |
|---|---|
| Solo Matriarch attempt | At least 200–250 rounds |
| Small coordinated squad (2–3 Hullcrackers) | 150–200 rounds each |
| Large public event with many launchers | 100–150 rounds each |
| Late-joiner “tagging in” near the end | 40–80 rounds |
Going under these values is risky unless you are specifically joining a nearly dead Matriarch, or you are confident that several other Hullcrackers are already committed to the fight.
Why The Required Shots Vary So Much
Even with the same total HP pool, the number of rounds needed shifts for several reasons.
Weak-Point Damage Vs. Body Shots
Hullcracker rounds against bare cores and weak joints can take huge chunks off the health bar. Firing into intact plates or into the blue energy shield wastes shots.
- Head and upper hull weak point: On Dam Battlegrounds, high-ground strategies focus Hullcracker fire on the head and upper body to strip armor, then onto the exposed red Head Core. This pushes damage per shot very high.
- Leg weak spots from below: In some positions (especially when the Matriarch walks over you into a lower area), you can shoot the weak points behind its “knees” from underneath. This also lets you keep firing through the shield because you are inside it.
- Pure body spam: Sitting at long range and only hitting armor, never exposing cores, dramatically increases how many rockets you need.

Energy Shield Downtime
The Matriarch regularly raises a blue energy shield that ignores all incoming damage, including Hullcracker and Wolfpacks.
- Any shot fired during the shield is 100% wasted.
- Disciplined players stop firing when the shield appears and reload, heal, or recharge shields instead.
The more clean uptime you get on exposed weak points during unshielded windows, the fewer total rockets you will need.
Other Raiders Helping Or Stealing Damage
The Matriarch event often pulls half the map towards the boss. If several players with Hullcrackers and high-DPS primaries are present, your personal ammo use can be modest even though the boss’s full HP is still being chewed through.
On the other hand, trying to duo or trio the Matriarch from bad positions (low ground, constant add pressure) means your squad does most of the work and spends far more rockets.

Wolfpacks And Other Damage Sources
Grenades and primaries also matter when deciding how many Hullcracker shots to bring.
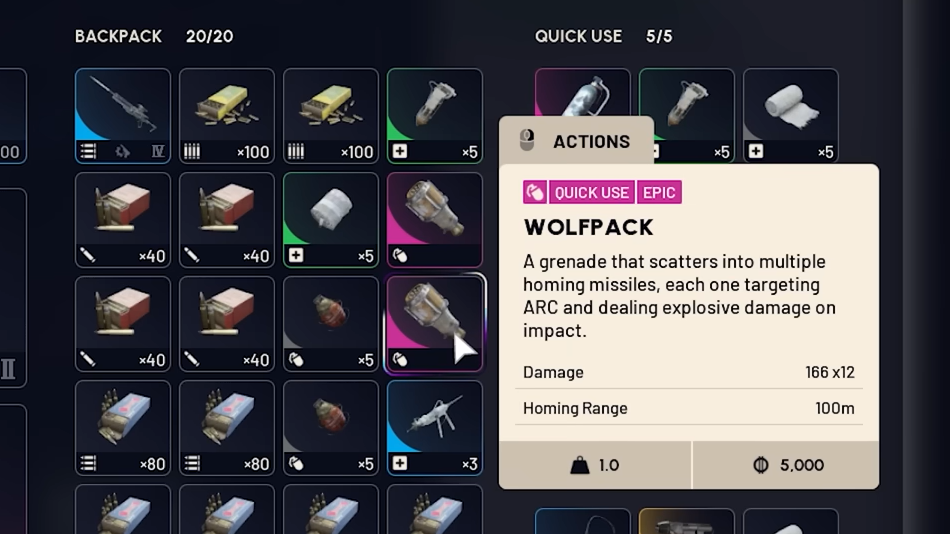
- Wolfpacks: These are excellent for bonus damage when the Matriarch is vulnerable and unshielded. However, even large stacks will not “delete” the boss; they are supplemental, not a full replacement for launcher damage.
- Showstoppers and other grenades: Useful for controlling adds such as Bastions and Rocketeers so that Hullcracker users can stay on target.
- High-DPS primaries (Venator, Anvil, etc.): These clear adds and contribute chip damage to the Matriarch whenever you cannot safely fire the Hullcracker.
If you are bringing many Wolfpacks and strong primaries, you can shave some rockets off the earlier ammo recommendations, but going in under 150 rounds in a small group is still a gamble.
Best Loadout Structure For A Reliable Kill
The Matriarch is designed as a high-end PvE threat and a PvP magnet at the same time. Surviving long enough to spend hundreds of rockets is as important as bringing them.
Core Gear Choices
- Augment: Tactical Mk. 3 (Defensive) so your shield can recharge while sprinting between cover or while kiting homing missiles.
- Shield: Heavy Shield if you expect to sit in high-aggro positions; Medium Shield works for safer long-range play but leaves less room for error.
- Primary weapon: Hullcracker as your dedicated boss damage tool.
- Secondary: Venator or another high-DPS rifle to control waves of Wasps, Hornets, Leapers, Rocketeers, and Bastions.
Consumables
- Heals: Sterilized Bandages, Vita Shots, and at least several shield recharges.
- Grenades: Mostly Wolfpacks for extra boss damage; mix in a few Showstoppers or crowd-control explosives for adds.
- Safe item: A Raider Hatch Key in a safe pocket so you have a planned extraction even if PvP breaks out around the corpse.
Positioning To Reduce Rocket Usage
Good positioning dramatically lowers the number of Hullcracker rounds you need by letting you hit weak spots consistently and avoid downtime.
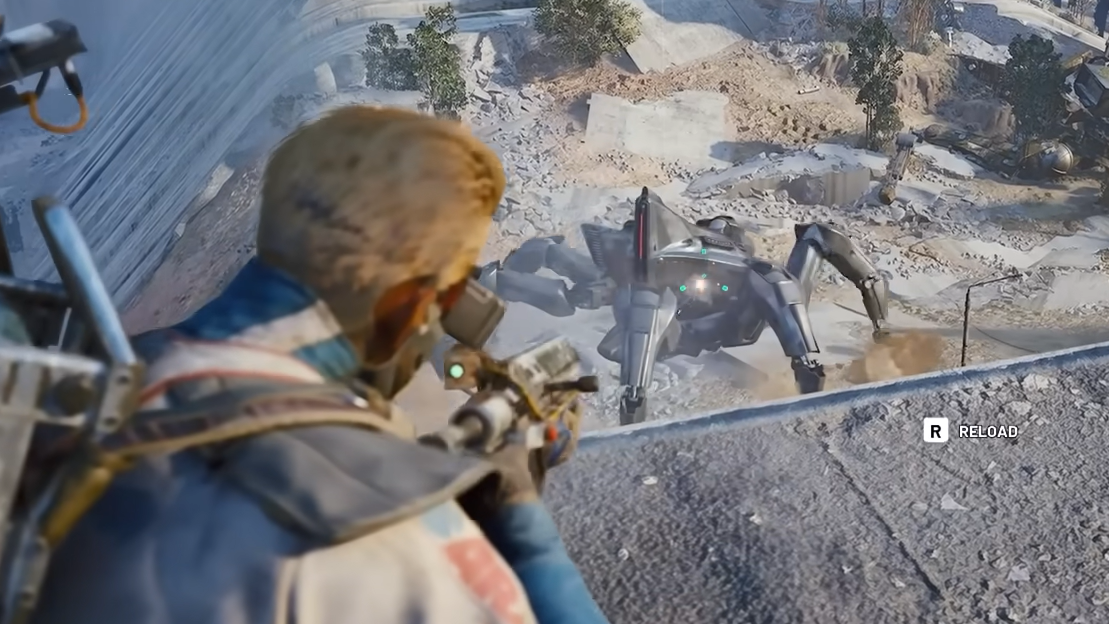
Dam Battlegrounds: High Ground Strategy
On Dam Battlegrounds, the Matriarch spawns in the pit at the dam break, surrounded by raised platforms and structures.
- Fight from high ground, such as pipeline towers or upper ledges, so homing missiles slam into the walls below you instead of tracking cleanly to your position.
- From above, you get consistent angles on the head and upper hull, which makes stripping armor plates and hitting the Head Core much easier.
- Use ziplines and cover to rotate if gas mortars or flashbangs start locking down your firing lane.
Close-Range Weak-Spot Angles
Some players take a higher-risk approach by fighting near or under the Matriarch.
- If the Matriarch walks over a ramp or structure and exposes its underside, you can drop under it and fire directly into the leg joints and kneecap weak points.
- From these positions, you can often keep shooting even when the energy shield is up, because your shots originate inside the shield bubble.
- This dramatically increases damage per rocket but punishes mistakes; if you lose your cover or get clipped by rockets or gas at close range, you may lose your gear.
Choosing between long-range high ground and risky close-range angles is effectively choosing whether you want to spend more rockets or more personal risk.
Managing Adds So Hullcracker Shots Count
Every Bastion or Rocketeer that goes ignored is another reason to waste rockets or retreat from a good angle.
- Have at least one player focus primarily on add control with a strong primary weapon and grenades.
- Kill Rocketeers quickly; their own missile spam stacks poorly with the Matriarch’s homing barrages.
- Drop Bastions fast when they threaten your Hullcracker positions, otherwise you will be forced off high ground and into worse sightlines.
The cleaner your lanes stay, the more often Hullcracker users can stay scoped on weak points and turn each shot into meaningful damage.
Loot And Why It Is Worth All Those Rockets
Matriarch kills drop high-end materials and the key boss item: the Matriarch Reactor.
- Matriarch Reactor: Exotic rarity. Used to craft top-end weapons such as the Aelion.
- Other materials: Magnetic Accelerators, Advanced ARC Powercells, ARC Performance Steel, plus regular ARC drops.
Because the corpse drops multiple high-value items and can be looted by anyone nearby, many raiders will rush the area when the Matriarch starts smoking and catching fire. Always expect PvP around the final phase and extraction routes.
Practical Loadout Examples
To turn all of this into a concrete plan, here are two sample loadouts.
Solo Or Duo Matriarch Hunter
- Hullcracker with 220–250 rounds.
- Venator secondary for add control and PvP.
- Tactical Mk. 3 (Defensive) augment, Heavy Shield in good condition.
- 6–8 Wolfpacks, 2–4 Showstoppers.
- Plenty of Sterilized Bandages, Vita Shots, and shield recharges.
- Raider Hatch Key in a safe pocket.
High-Ground Damage Dealer In A Larger Squad
- Hullcracker with 150–200 rounds.
- Flexible secondary (Venator, Anvil, or similar).
- Tactical Mk. 3 (Defensive), Medium or Heavy Shield.
- 4–6 Wolfpacks for burst phases.
- More shield recharges than health items, since rockets are the primary threat.
As long as you respect the shield timing, aim for weak points, and bring a conservative amount of Hullcracker ammo, the Matriarch becomes a question of positioning and patience rather than pure luck.