
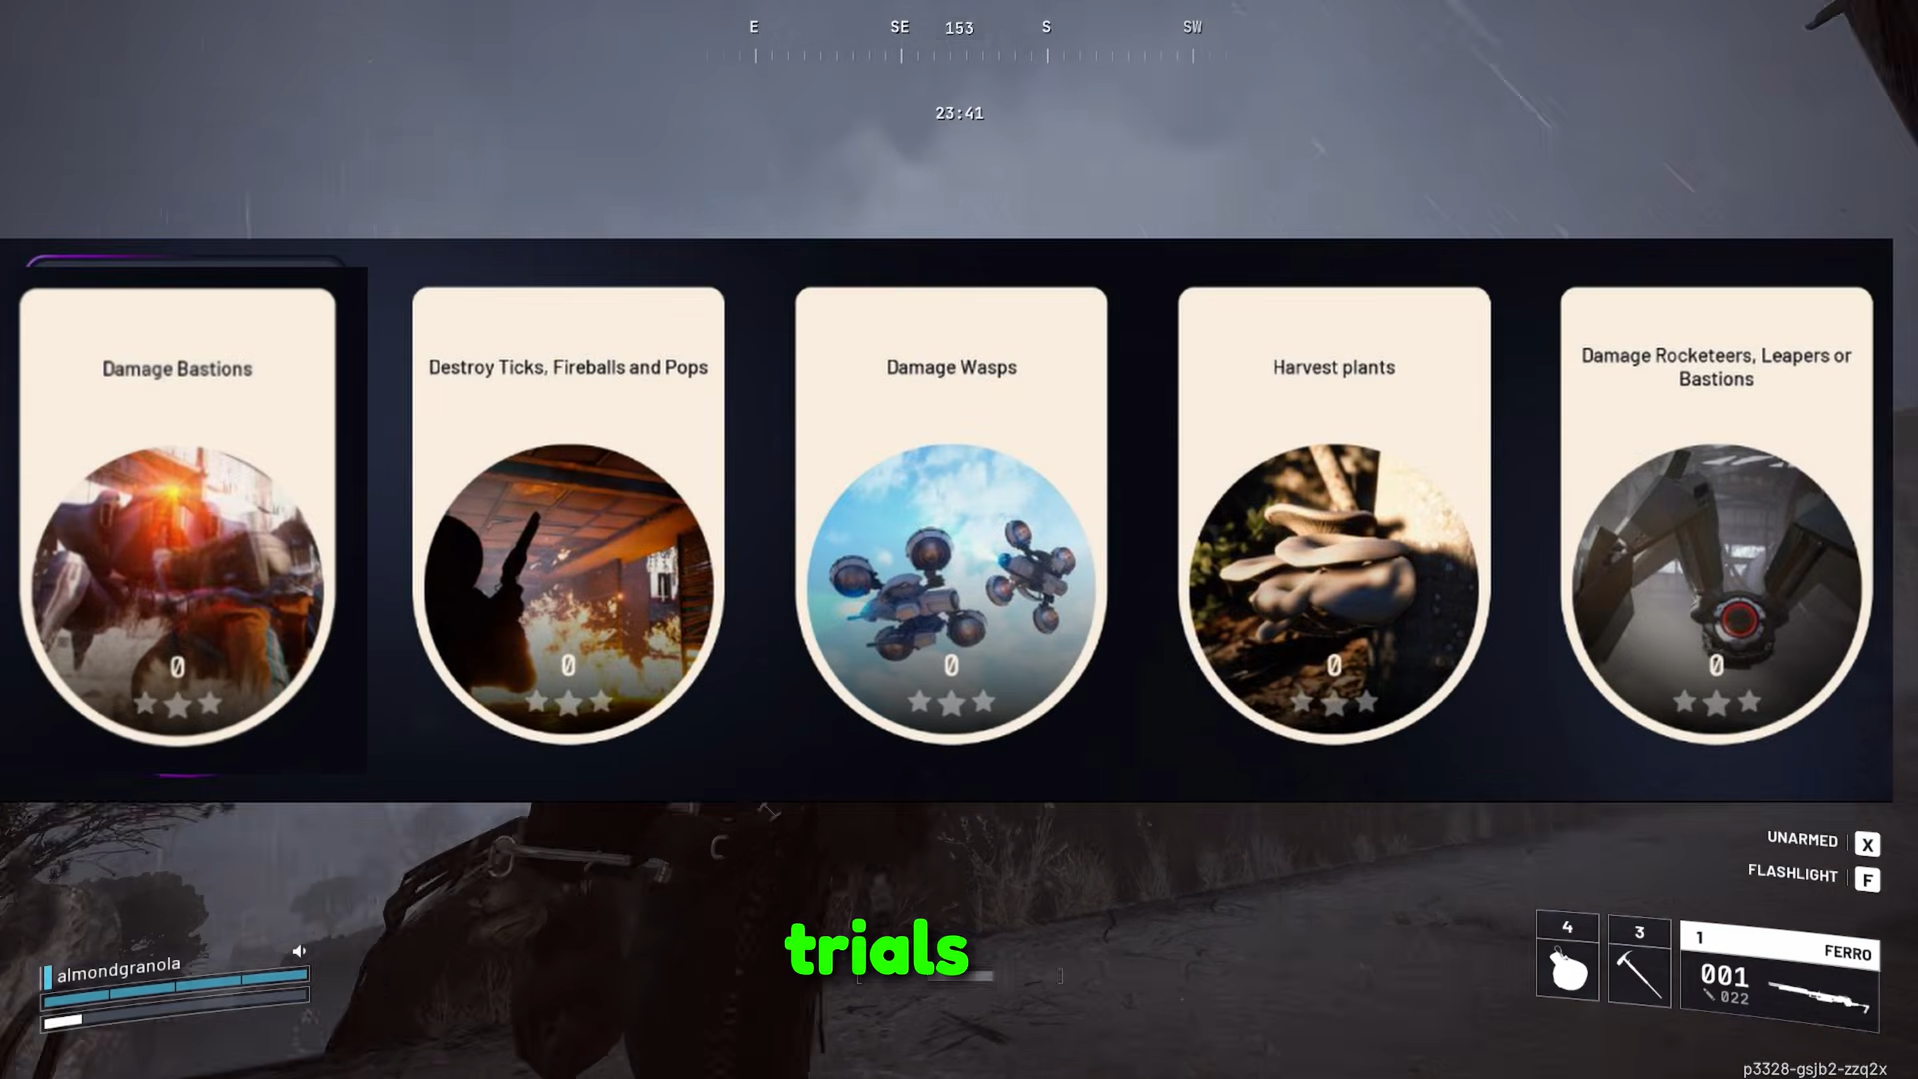
Week 14 Trials in ARC Raiders revolve around damaging miniboss ARCs and clearing out smaller enemies while you pick plants. Each objective awards stars at 1,000, 2,000, and 4,000 points, with three stars giving the best rewards, including frequent blueprint drops.
Quick answer: Play mostly Night Raid or Electromagnetic Storm matches on Spaceport, Buried City, and Stella Montis, bring a solid heavy weapon (like Anvil, Ferro, or Renegade), stack ammo and a medium shield, and focus on Bastions and other minibosses first, then clean up the easier Trials like plants and small ARCs.
Week 14 Trials objectives and timing
Week 14 includes five objectives:
- Damage Bastions
- Destroy Ticks, Fireballs, and Pops
- Damage Wasps
- Harvest plants
- Damage Rocketeers, Leapers, or Bastions
These Trials are active from January 26, 2026, to February 2, 2026. You can re-run them all week, but rewards only drop once per star per objective; beating your personal best later only improves leaderboard rank.
Best overall maps, conditions, and loadouts
Trials score is doubled in Night Raid and Electromagnetic Storm, so hitting 4,000 points is much faster there than in daytime conditions.
| Objective | Recommended map & condition |
|---|---|
| Damage Bastions | Spaceport – Night Raid or Electromagnetic Storm |
| Destroy Ticks, Fireballs, Pops | Buried City – Night Raid, or Stella Montis |
| Damage Wasps | Spaceport – Night Raid or Electromagnetic Storm |
| Harvest plants | Spaceport – Night Raid or Electromagnetic Storm; or any map with Lush Bloom active |
| Damage Rocketeers, Leapers, Bastions | Spaceport – Night Raid or Electromagnetic Storm |
For most runs, a basic but strong loadout works across several Trials:
- Anvil, Ferro, Renegade, or Kettle (Tier IV preferred)
- Optional Osprey for flying targets
- Heavy + medium or light ammo (three to four stacks total)
- Light or medium shield
- Shield rechargers
- Normal or herbal bandages
- Optional explosives: Trailblazers, Wolfpacks, Blaze Grenades, Deadlines
How Trials scoring and rewards work
Trials use the same scoring thresholds across objectives:
| Score | Stars | Typical reward tier |
|---|---|---|
| 1,000 | 1 star | Uncommon (green) |
| 2,000 | 2 stars | Rare (blue) |
| 4,000 | 3 stars | Epic (pink), often a blueprint |
Rewards are granted after extraction. They go straight to your stash even if you skip the post-mission screen or the stash is already full; you simply cannot move more items from your inventory into a full stash until you clear space.
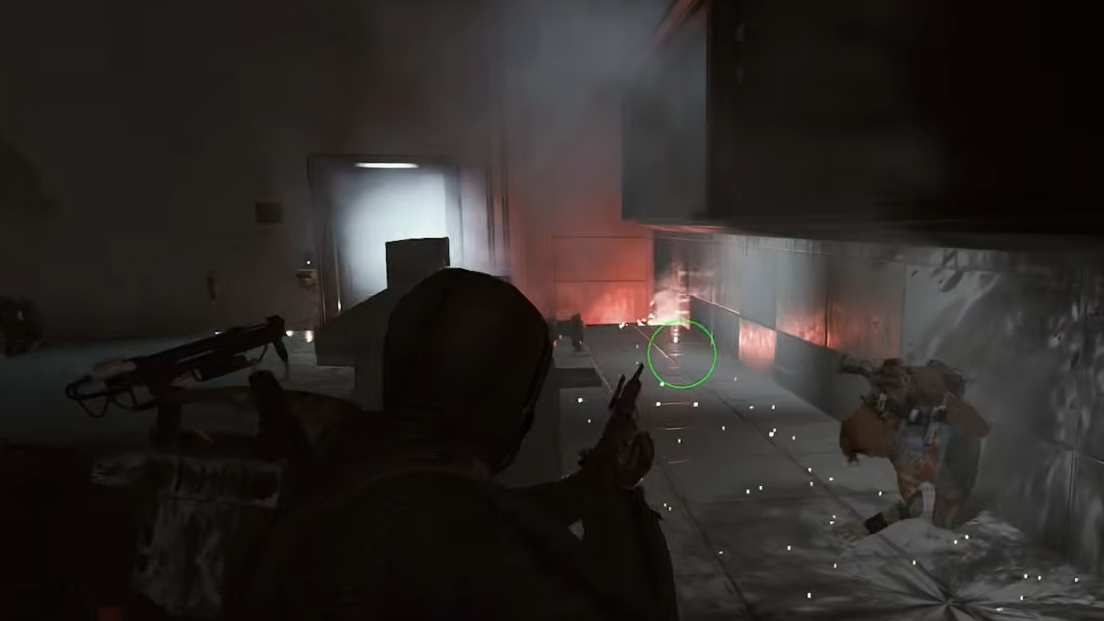
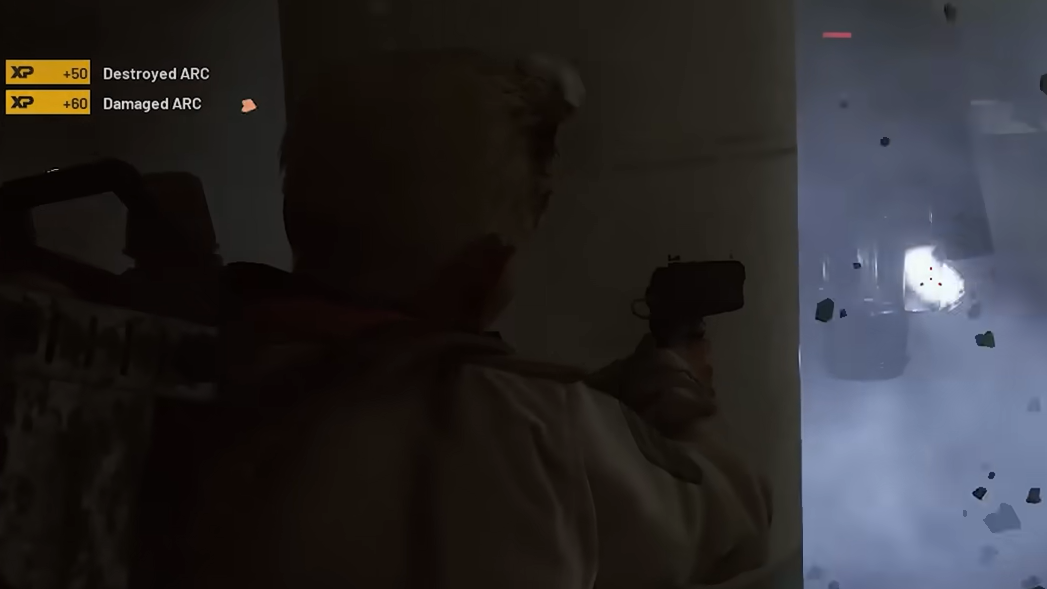
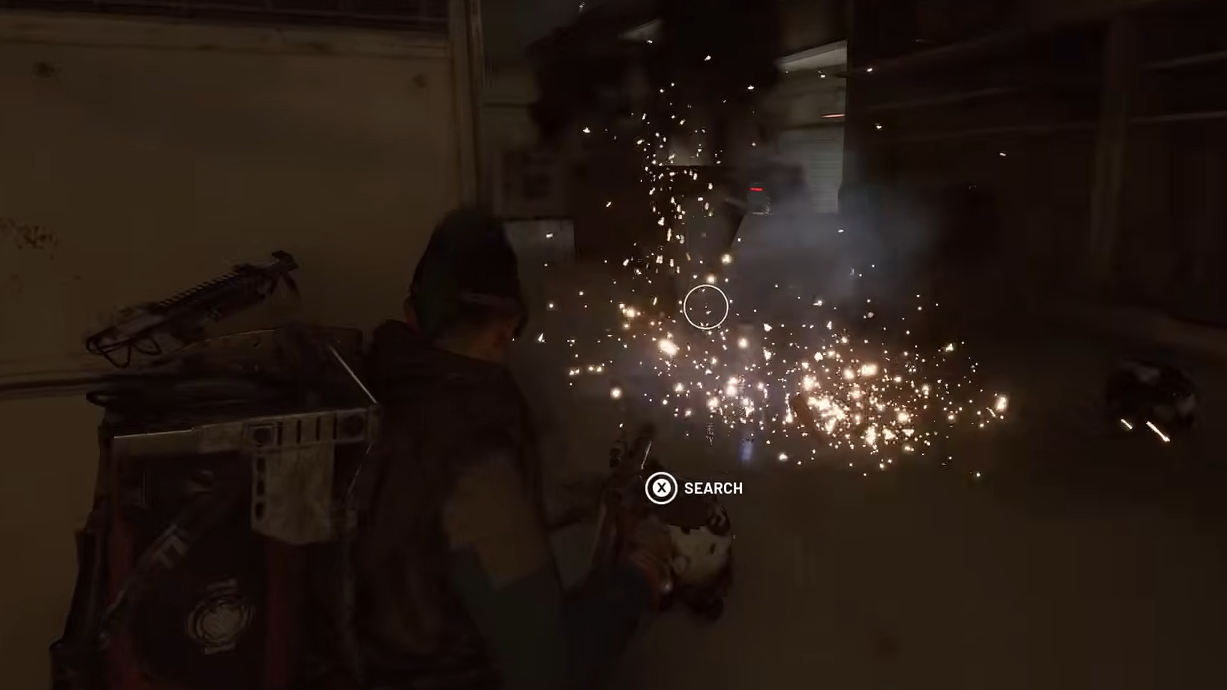
Damage Bastions (3 stars)
Bastions are tough miniboss ARCs with high fire-rate machineguns. Week 14 effectively expects you to destroy two Bastions to reach 4,000 points, especially if you are benefiting from the 2x Trials score multiplier.
Recommended Bastion loadout
For reliable Bastion kills:
- Anvil, Ferro, or Renegade (Tier IV preferred)
- 120 Heavy ammo and 240 Medium ammo
- Light or medium shield
- Shield rechargers and bandages
- Optional: 4x Trailblazers or 2x Deadlines
Best place to find Bastions
Good Bastion spawns appear in several locations:
- Spaceport – Departure Building and Container Storage
- Blue Gate – area near Warehouse Complex
Spaceport during Night Raid or Electromagnetic Storm is ideal because of the 2x Trials points.
Safe Bastion strategy
On Spaceport:
1. Load into Night Raid or Electromagnetic Storm and move toward Departure Building or Container Storage.
2. Once you locate a Bastion, use cover and focus a single yellow leg joint. Breaking it stuns the ARC and limits its movement.
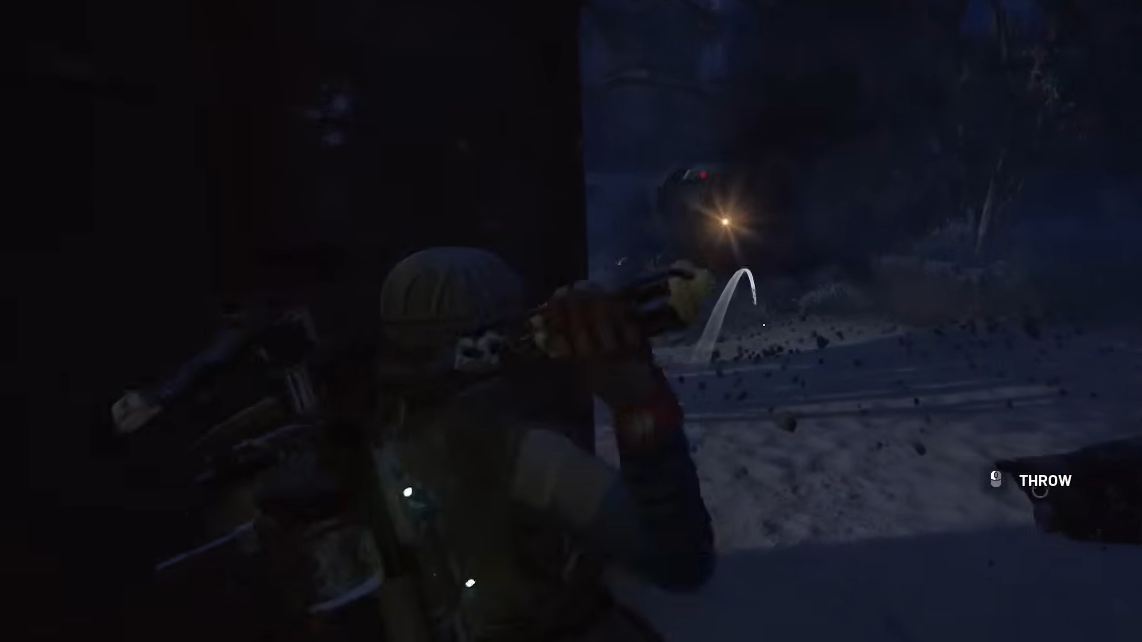
3. While it is stunned:
- If you have Trailblazers, throw two at its feet.
- If you have a Deadline, attach it to the Bastion and back off.
4. If you lack explosives, keep repeating the leg break and then shoot the yellow canister weakspot on its back. Once the core is exposed, focus heavy fire on the core.
5. Destroy two Bastions during the match to comfortably reach three stars, then extract.
Playing in a party helps: one player baits the Bastion’s fire while others attack legs and weakspots from safer angles.
Destroy Ticks, Fireballs, and Pops (3 stars)
Ticks, Fireballs, and Pops are common small ARCs often found indoors and in medium to high loot allocation areas. They die quickly, so the main challenge is spawning and chaining enough of them while staying safe.
Recommended small ARC loadout
- Kettle with Extended Mag (Tier III or IV preferred)
- Backup Anvil for tougher targets
- 80 Heavy ammo and 160 Light ammo
- Light or medium shield, shield rechargers, bandages
Best maps and routes
Two maps stand out:
- Buried City – Night Raid, using a dedicated farming route
- Stella Montis – dense spawns of Ticks and Fireballs
On Buried City during Night Raid, the 2x Trials score accelerates progress. Move through indoor and industrial zones, clearing Ticks and Pops in tight rooms and Fireballs in corridors and around medium-tier loot zones. Stella Montis also works very well due to its compact layout and high spawn density.
Key points for three stars:
1. Prioritize one-on-one engagements. These enemies are weak, but large mixed packs can still burst you down.
2. Focus on head and core weakspots to one-burst them with Kettle or a similar weapon.
3. Keep moving through known indoor clusters until you hit 4,000 points, then extract in one piece.
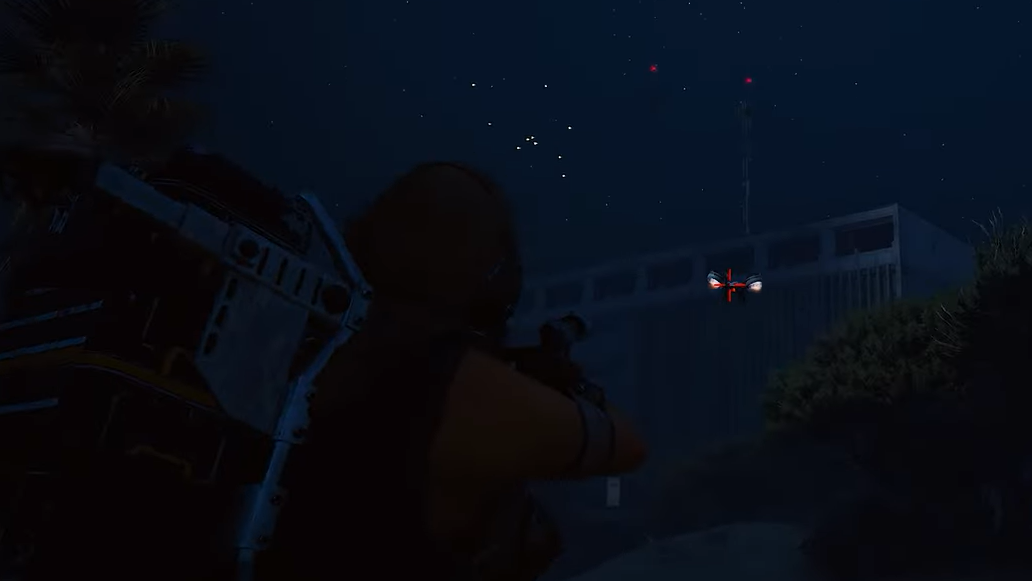
Damage Wasps (3 stars)
Wasps are flying ARCs that appear across all topside maps. They are more dangerous than small ground ARCs but are still easy targets once you exploit their weakpoints and movement pattern.
Recommended Wasp loadout
- Anvil, Ferro, Kettle, or Renegade
- Optional Osprey for dedicated anti-air
- 120 Heavy ammo and up to 240 Light or Medium ammo
- Light or medium shield, rechargers, bandages
Best way to farm Wasps
Spaceport again works well, especially under Night Raid or Electromagnetic Storm. There are two reliable approaches:
1. Elevated sniping
1. Load into Spaceport with a long-range primary.
2. Climb to high ground around the Launch Towers or other elevated platforms.
3. Wait for Wasps to patrol; they spawn frequently around the map.
4. Aim for the wing motors or blades. Destroying these causes a crash, and all damage leading up to it counts for the Trial.
5. Stay at or above Wasp altitude. They struggle to track targets that high, making you much harder to hit.
2. Triggering Wasps via Snitches
On Spaceport, triggering Snitches will often spawn Wasps. You can deliberately set off Snitches near strong cover, then farm the responding Wasps from safety with an Osprey or other accurate weapon.
Keep your distance, focus on weakpoints, and accumulate damage until you cross the 4,000-point threshold.
Harvest plants (3 stars)
The harvesting Trial is the least risky. You do not need to fight ARCs at all if you avoid unnecessary engagements.
What counts and what doesn’t
Harvestable plants count toward this Trial. Examples include:
- Mushrooms
- Great mullein
- Agave
Fruit like lemons and pears does not count. Focus on plants that appear with a harvesting prompt rather than simple lootable fruit.
Best maps and conditions
Two very effective approaches:
- Spaceport under Night Raid or Electromagnetic Storm, which offers both plants and doubled Trials score.
- Any topside map with the Lush Bloom condition active, which rotates every couple of hours.
Lush Bloom dramatically increases the number of plants on the map. It does not grant extra points per plant, but you reach 4,000 points much faster because you find so many harvestables in a small area.
Safe harvesting route concepts
On Spaceport or similar layouts:
1. Enter with a free or very light combat loadout; you mostly need inventory space.
2. Move through areas flagged as Vegetation, looking for clusters of mushrooms and other plants.
3. Stay alert for ARCs, but avoid combat whenever possible; kiting enemies away from dense plant clusters can save time and resources.
4. Continue harvesting until the Trial UI shows you have reached the top star tier, then extract safely.
If you prefer Dam Battlegrounds, the Swamp region is especially rich in plants, and Blue Gate’s Olive Grove is another reliable plant farming spot for olives and lemons (though remember fruit does not count for this objective).
Damage Rocketeers, Leapers, or Bastions (3 stars)
This Trial overlaps heavily with the Bastion Trial and focuses on three miniboss ARCs: Rocketeers, Leapers, and Bastions. Damaging any combination of them contributes to the score, and eliminating two minibosses under the higher score conditions is generally enough to reach 4,000 points.
Recommended miniboss loadout
- Anvil, Ferro, or Renegade
- Four stacks of ammunition (Heavy and Medium)
- Medium shield, shield rechargers, herbal bandages
- Optional: Wolfpacks for Rocketeers, Blaze Grenades for Leapers, Trailblazers for Bastions
Deadlines are extremely strong against large ARCs, but can be risky for this particular Trial because they require you to get close; a mistake can end a promising run abruptly.
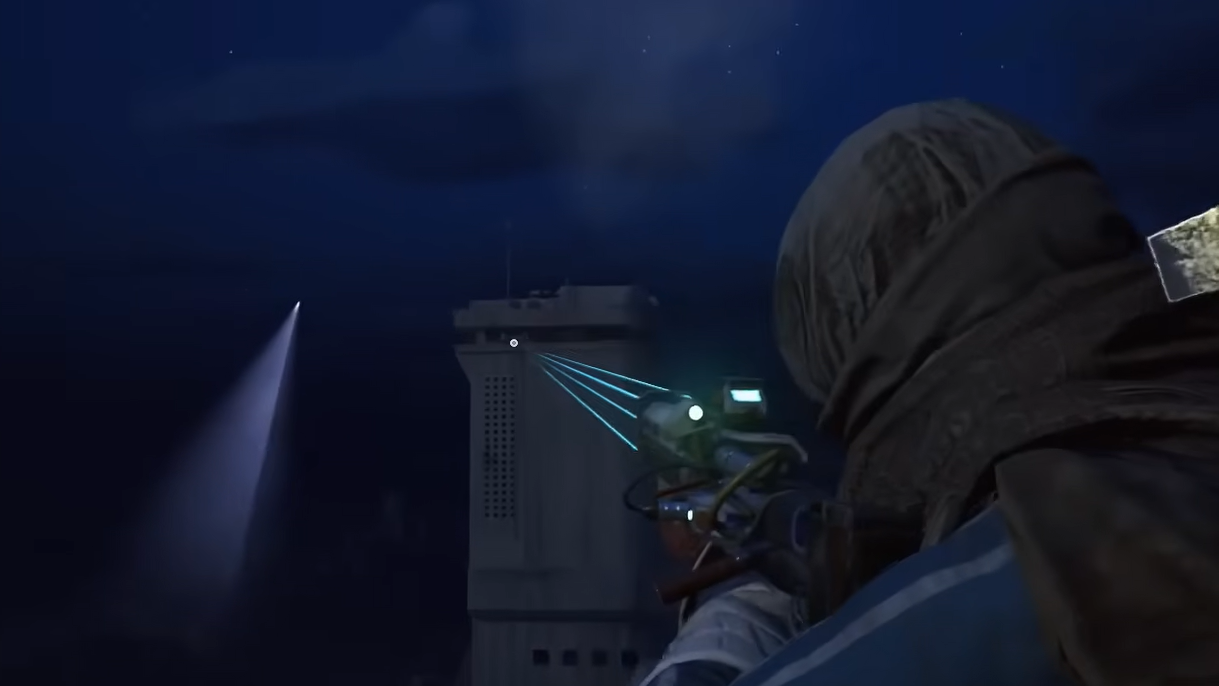
Spaceport miniboss loop
Spaceport during Electromagnetic Storm or Night Raid offers fast miniboss farming:
1. Spawn into Spaceport and move toward the Launch Towers.
2. Scan the surrounding sky and approaches for Rocketeers, Leapers, and Bastions.
3. Tag a target from range to pull it toward the stairs and corridors below the towers.
4. Fight in these confined spaces where you can break line-of-sight and funnel the ARC.
For each miniboss type:
- Rocketeers – Use Wolfpacks or concentrated heavy fire, aiming for thrusters and exposed core sections once armor breaks.
- Leapers – Use Blaze Grenades and heavy weapons while kiting them through chokepoints to limit their mobility.
- Bastions – Reuse the leg-joint and core-focused strategy from the Bastion Trial, optionally supported by Trailblazers.
Destroy two minibosses minimum; if you want to chase leaderboard scores, stay topside and continue killing Rocketeers, Leapers, and Bastions before leaving through the Central Elevator.
Suggested three‑match plan for fast 3‑star clears
You can complete all five Week 14 Trials in a small number of focused matches:
Match 1 – Spaceport (Night Raid or Electromagnetic Storm)
1. Prioritize hunting Bastions and other minibosses near Departure Building, Container Storage, and Launch Towers.
2. Finish both “Damage Bastions” and “Damage Rocketeers, Leapers, or Bastions” at 4,000 points each.
Match 2 – Buried City (Night Raid) or Stella Montis
1. Run an indoor-heavy route to farm Ticks, Fireballs, and Pops until the destruction Trial hits 4,000 points.
Match 3 – Spaceport or any Lush Bloom map
1. Focus purely on harvesting plants until the plant Trial is maxed.
2. If you have not yet finished the Wasp objective, combine it here on Spaceport by sniping Wasps as you move between plant clusters.
Always keep extraction in mind. Trial scores are only finalized when you successfully return to Speranza, so secure exits are just as important as raw damage or harvest counts.