
“Lost in Transmission” is a compact, timing‑sensitive task. All steps must be completed in a single round. The sequence is straightforward: reach Control Tower A6, get to the top, then establish a connection at the terminal without breaking the interaction.
| Item | Details |
|---|---|
| Constraint | Complete all objectives in one round |
| Objective 1 | Visit Control Tower A6 |
| Objective 2 | Reach the top of Control Tower A6 |
| Objective 3 | Establish a connection from the terminal |
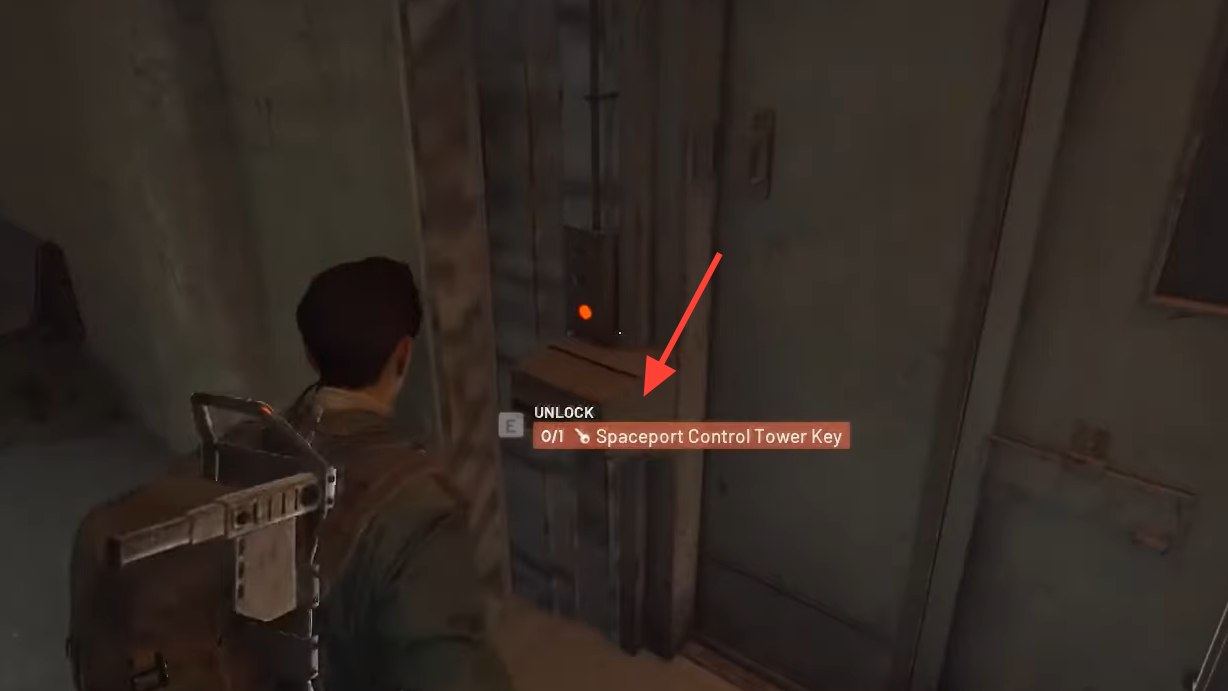
| Granted item | Spaceport Control Tower Key |
| Reward | Snap Hook (Quick Use) |
| XP | 0 XP |
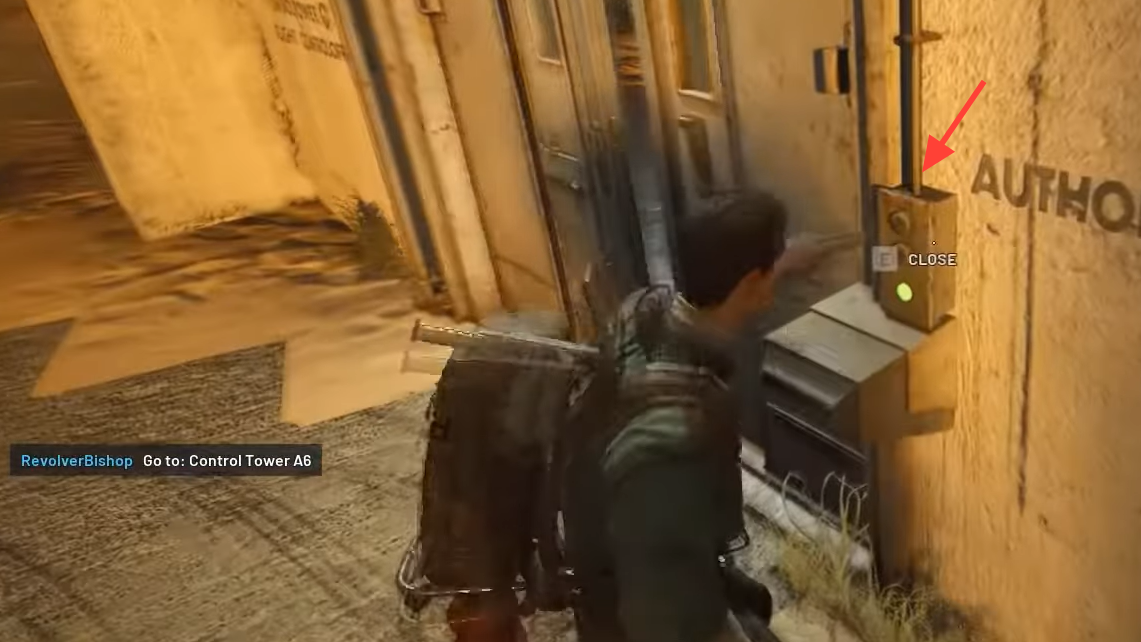
Reach Control Tower A6 and secure your approach
Open your map and set a route to Control Tower A6. Expect traffic—towers attract both players and patrols—so treat the approach like a contested objective rather than a quiet marker.
- Scout first: Pause outside the tower’s perimeter to listen for footsteps, gunfire, or zipline use before committing.
- Pick your entry: Favor covered lanes and stairwells over open catwalks. Identify a fallback route you can retreat to if a fight breaks out.
- If you’re in a squad: Assign overwatch and push roles. One player watches external angles while others clear the interior.
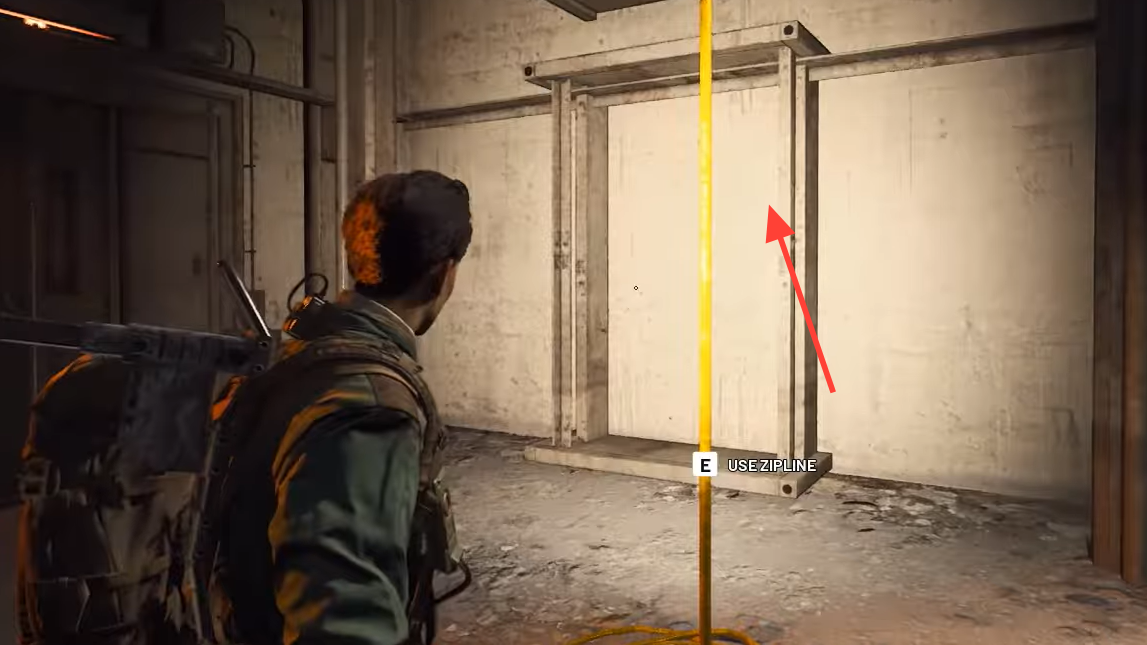
Climb to the top safely
The ascent is where most runs fail—tight angles and vertical movement make you predictable. Take it floor by floor.
- Clear as you go: Don’t sprint ladders or stairs blindly. Clear each landing, then move up.
- Use ziplines with intent: They’re fast but loud. If the tower is hot, ziplines announce your position.
- Mind fall risk: A stray push or misstep can end the run. Keep movement deliberate on exposed platforms.
If you take contact mid‑climb, drop to your last cleared level and re‑engage from cover. The objective won’t penalize backtracking as long as you remain in the same round.
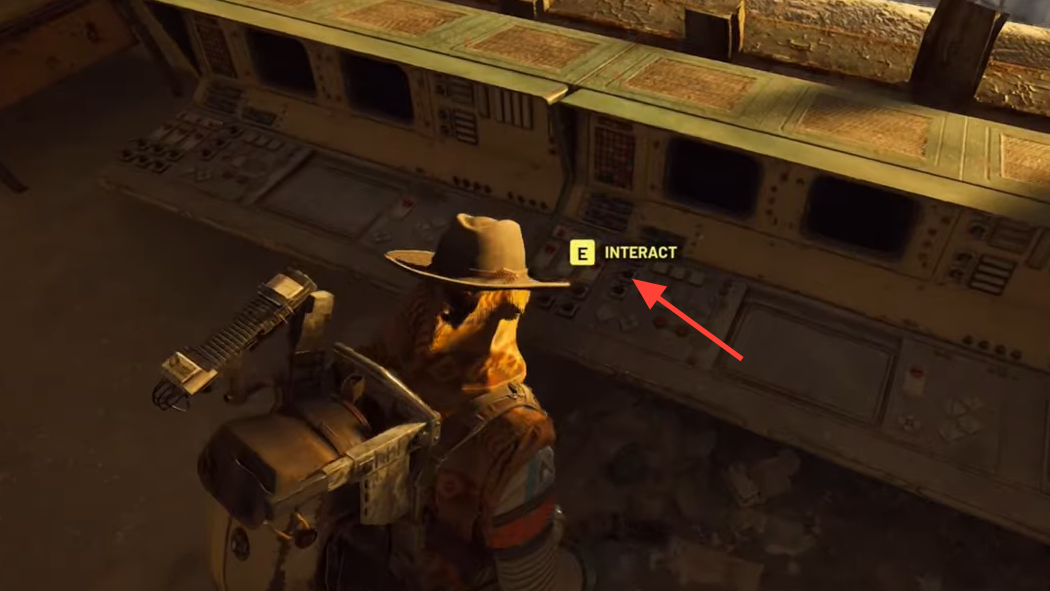
Establish the terminal connection without interruption
At the top, interact with the terminal to establish the connection. Treat the channel time as a hold point: any movement outside the interaction radius or taking damage can interrupt and reset the action.
- Hold the zone: Position with cover to your back, ideally with a teammate watching the approach.
- Do not strafe out of the radius: Small steps can break the interaction; stay planted until completion.
- Stagger utility: Use stuns, smokes, or deterrents before starting the interaction if you expect a push.
Once the connection completes, wait for the on‑screen confirmation that the objective has registered before repositioning.
Suggested loadout and squad roles
Build for mixed ranges and tight interiors.
- Primary: A stable mid‑ to long‑range rifle to control exterior approaches.
- Secondary or sidearm: A close‑quarters option for stairwells and ladders.
- Utility: Crowd control or area denial to secure the terminal window.
In a squad, designate:
- Point: Clears corners and initiates ladder/stair pushes.
- Anchor: Holds angles and covers flanks during the climb.
- Operator: Starts the terminal interaction while others defend.

Common issues and how to recover
- Connection fails mid‑interaction: This typically happens if you take damage or step out of the interaction zone. Re‑clear the top floor, stabilize, then restart the connection with proper cover.
- Heavy congestion at the tower: If multiple teams contest A6, break contact and rotate. Return later in the same round when pressure drops.
- Quest doesn’t update: If the round ends during registration or a step doesn’t tick, reattempt the objective chain in a fresh round and confirm each step in your quest log as you go.
When the terminal connection registers after reaching the top in the same round, the quest is complete and you’ll receive the Snap Hook. If you plan to chain other tower‑related tasks, consider timing your approach for quieter moments; the climb and the channel are the only real choke points here, and both are manageable with patience and a clean hold.