
Turrets in ARC Raiders are small indoor defense units that many players overlook until a quest asks for one. They are easy to kill once you spot them, but tracking a single unit down on demand can be surprisingly frustrating.
This breakdown focuses on what the turret actually is, how not to confuse it with other ARC defenses, and the most reliable places and patterns to find one when a mission requires it.
What the ARC turret is (and what it is not)
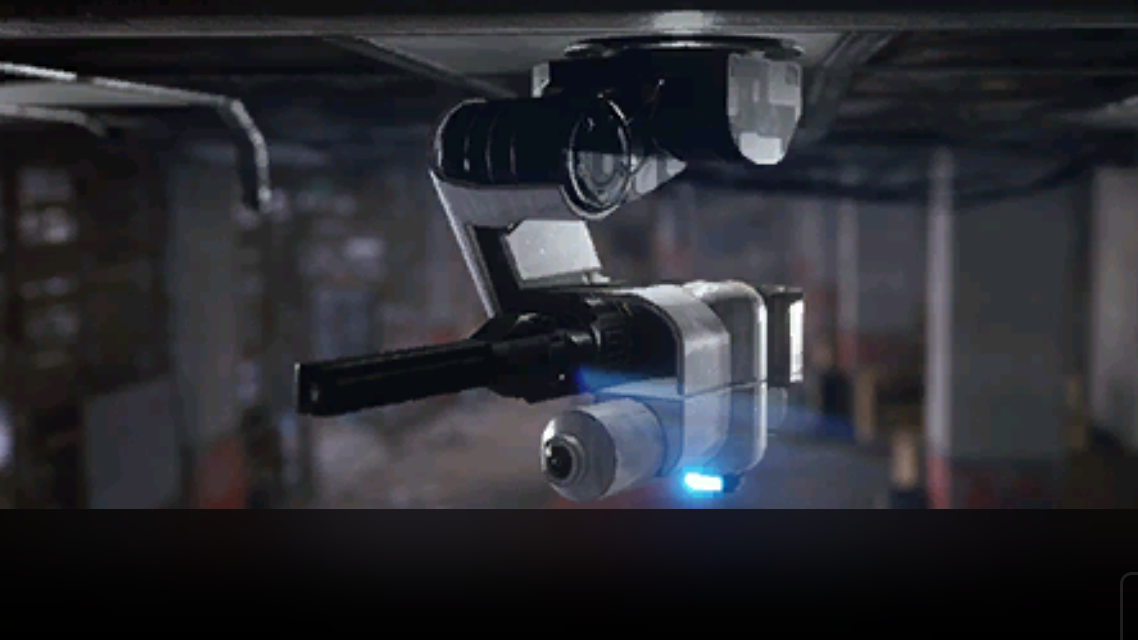
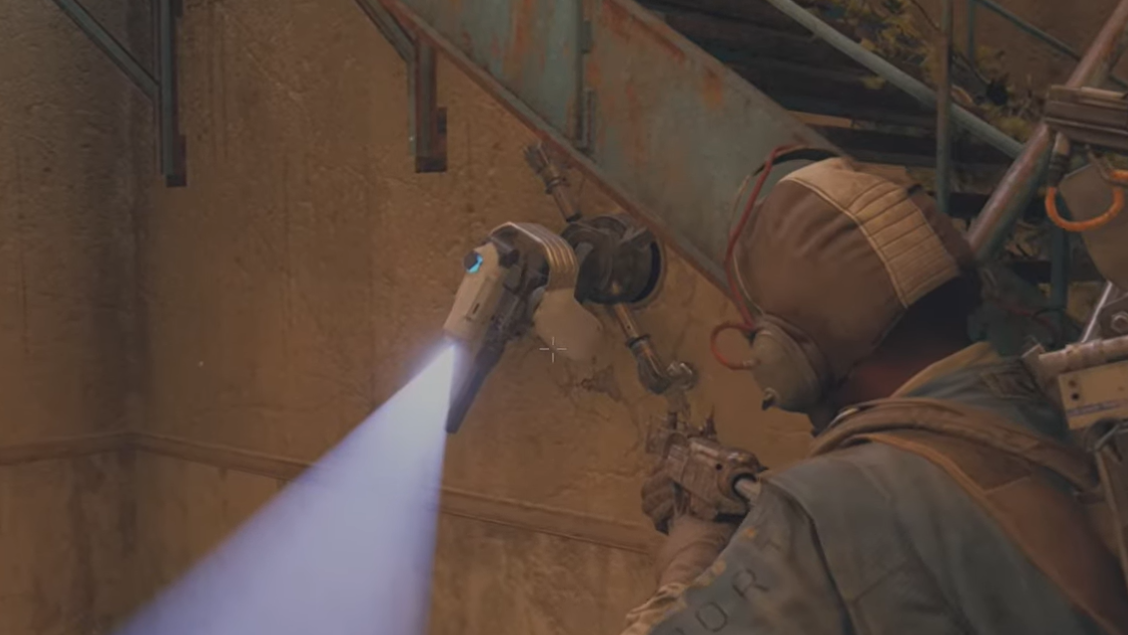
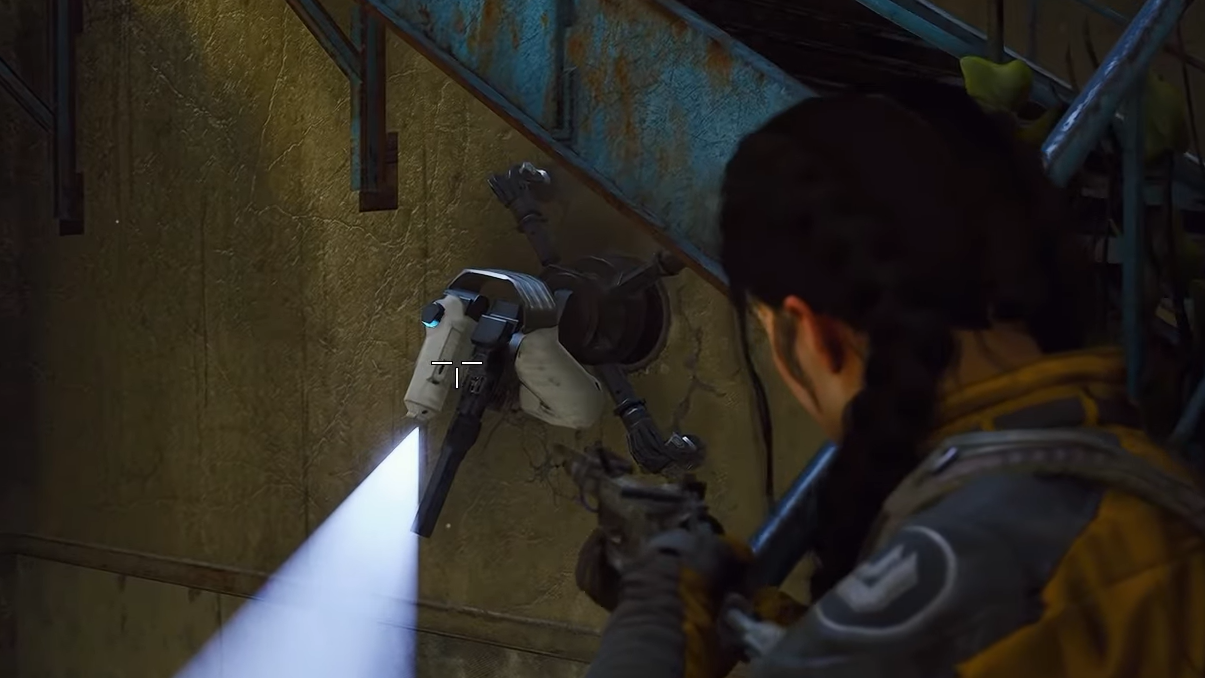
The standard ARC Turret is a small, stationary gun mounted on interior walls. It constantly sweeps the room with a visible scanner beam and fires a short, concentrated burst of projectiles as soon as it detects movement. It is designed for close-quarters defense inside buildings, not for long-range anti-air or area denial.
Key properties:
- Location type: Almost always indoors, attached to walls or interior structures.
- Armor: No armor plating. Any ammo type can damage it effectively.
- Health: Low; only a few bullets are needed when you shoot it before it locks on.
- Threat level: Moderate; dangerous in tight corridors, trivial in open sightlines with cover.
Do not confuse this unit with the large outdoor Sentinel-style turrets mounted on rooftops or structures around compounds. Those big exterior guns do not count for quests that explicitly ask you to “destroy a turret”, especially when the objective mentions grenades. Several players report wasting explosives on those larger guns with no quest progress.
How turret detection and attack patterns work
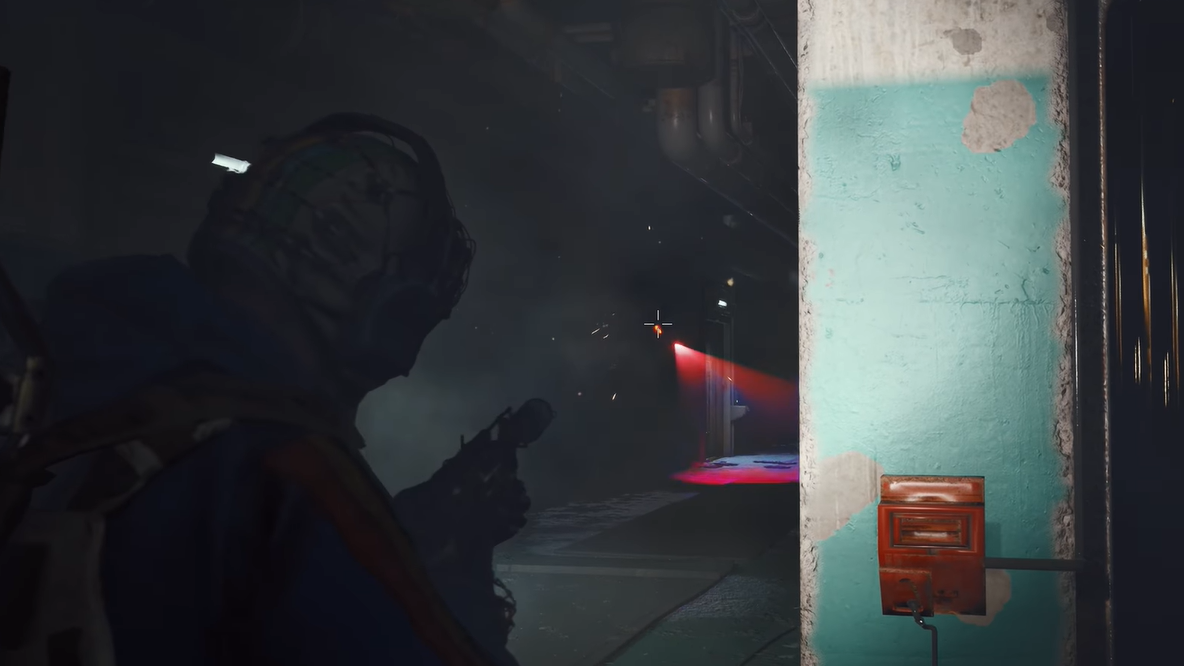
The turret’s scanner emits a visible beam as it sweeps across the room. If you watch the beam and time your movement, you can cross gaps or line up shots without being instantly targeted.
Once triggered, the turret:
- Snaps its aim to the last detected Raider position.
- Fires a continuous burst of bullets for a couple of seconds.
- Continues shooting at the last known position briefly, even if you drop out of sight.
Basic counter-play is simple:
- Peek from cover, fire a short burst, and duck back before its scanner sweeps to you.
- Engage from as far away as the room allows; distance gives you more reaction time.
- Use any primary weapon; there is no armor plating to work around.
Turrets often drop small amounts of ARC Alloy, Light Ammo, and Simple Gun Parts, but the main reason to hunt one deliberately early on is to complete quests tied to them.
Turret locations on Dam Battlegrounds (most reliable map)
Turrets can spawn across all major maps, but early quests that mention them tend to be completed most easily on Dam Battlegrounds. Several interior complexes on this map regularly host at least one turret.
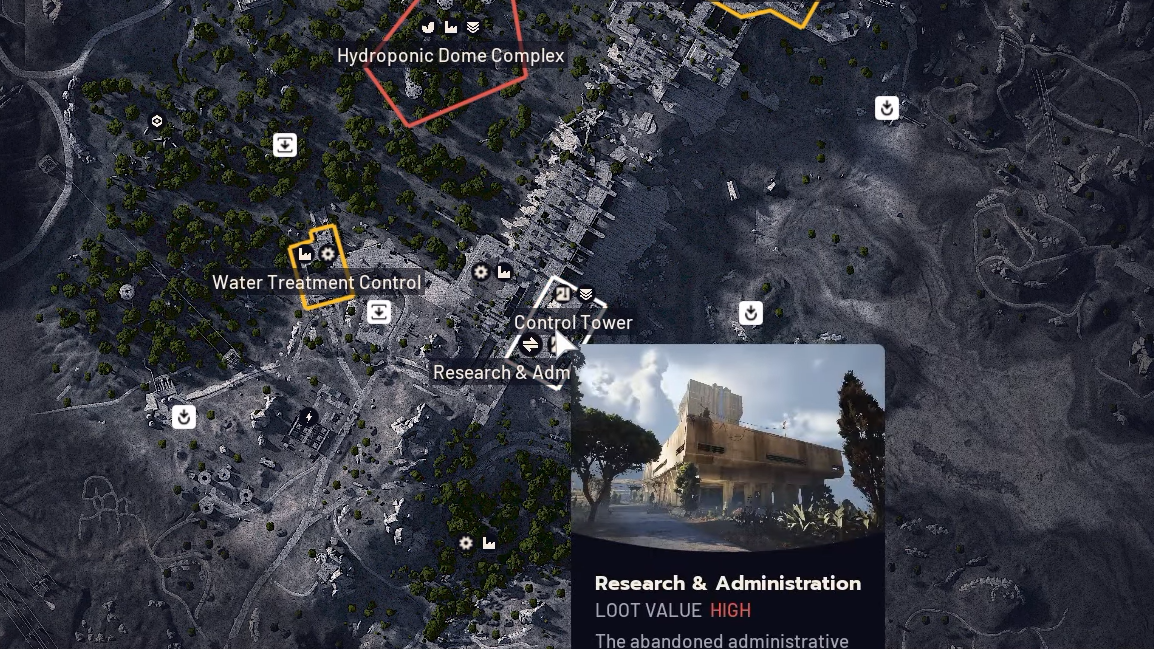
Dam Battlegrounds: Research & Administration
Research & Administration is a tall, distinctive building on Dam Battlegrounds that doubles as a high-value loot area and a common spawn for multiple ARC units, including turrets and Fireballs.
Why it’s useful for turret quests:
- Known for indoor ARC defenses, including turrets mounted on interior walls.
- Also hosts Fireball enemies, which helps for quests that require both a Fireball and a turret.
- Vertical layout with ziplines and interior corridors that frequently place you at eye level with wall-mounted units.
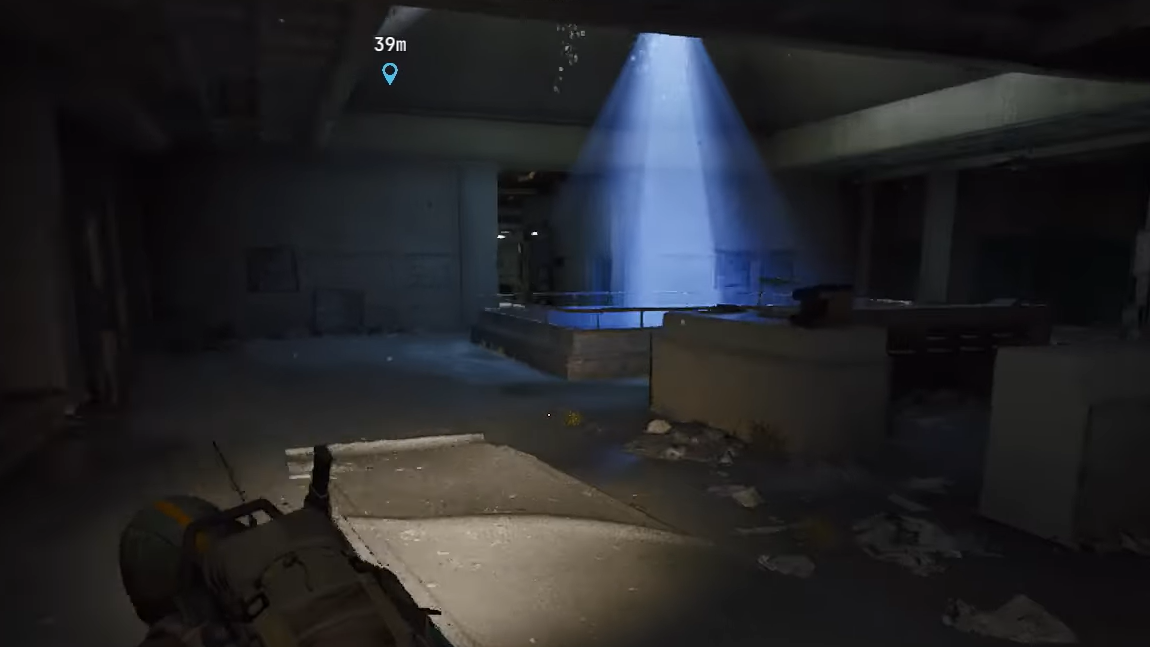
Once inside the complex, move through office corridors and lab-style rooms, watching for the sweeping light of the scanner. Turrets are often set up to cover stairwells, chokepoints between rooms, and elevated walkways where players naturally funnel through.
Dam Battlegrounds: Control Tower interior
The control tower on Dam Battlegrounds is another reliable place to check when you specifically need a turret. The structure splits into multiple levels with narrow interior rooms and a route that snakes upward.
Inside the tower:
- Follow the internal stairs and walkways upward instead of staying on exterior catwalks.
- Look for turrets set in corners or above doorways that oversee cramped corridors.
- Expect at least one unit to be positioned to punish players pushing higher into the tower.
Because this area is part of a quest flow for some missions, it attracts other players. Plan for PvP encounters around the stairs and landing points while you hunt for the turret.
Dam Battlegrounds: Medical lab on the south side of the dam
The medical lab on the southern side of the dam itself is another notable hotspot for indoor turrets.
When approaching this section:
- Enter the lab interior instead of skirting around the outside of the facility.
- Move carefully through treatment rooms and corridors; turrets are often mounted to watch over central hallways.
- Check intersections where multiple corridors meet, as these are prime positions for the small wall-mounted guns.
Because the medical lab also counts as a medical loot zone, it can double as progress for missions that require antiseptic, syringes, or other healing-related items while you search for a turret.
Dam Battlegrounds: Northern industrial complex with external stairs
Players also report turret spawns in an industrial-style complex northeast of the main dam, described as a tall structure that looks like a warehouse or multi-story car park.
When you reach this complex:
- Use the external steel staircases to climb between floors.
- Enter each level and sweep the central interior; turrets can appear mid-floor, covering the broader open space.
- Stay alert when moving through the middle of a level, where scanner beams are often easiest to spot.
This building’s layered floors make it easy to miss a turret if you rush directly up or down a single route. Taking time to clear each floor methodically increases your chances of finding one quickly.
Recognizing the correct turret model for quests
Many early missions ask you to “destroy a turret” or “destroy a turret with a grenade”. These objectives are tied to the small, indoor ARC Turret, not the large exterior defenses.
Visual and behavioral cues that you have the right unit:
- Compact body fixed to an interior wall or structural support.
- Single, short-range gun barrel oriented into the room.
- Constantly sweeping scanner beam that is clearly visible in low light.
- No heavy armor plating or massive support structure beneath it.
If you are shooting a huge multi-barrel gun mounted outside on a rooftop or above an entry gate, that’s a different ARC defense and will not satisfy turret-specific quest logic.
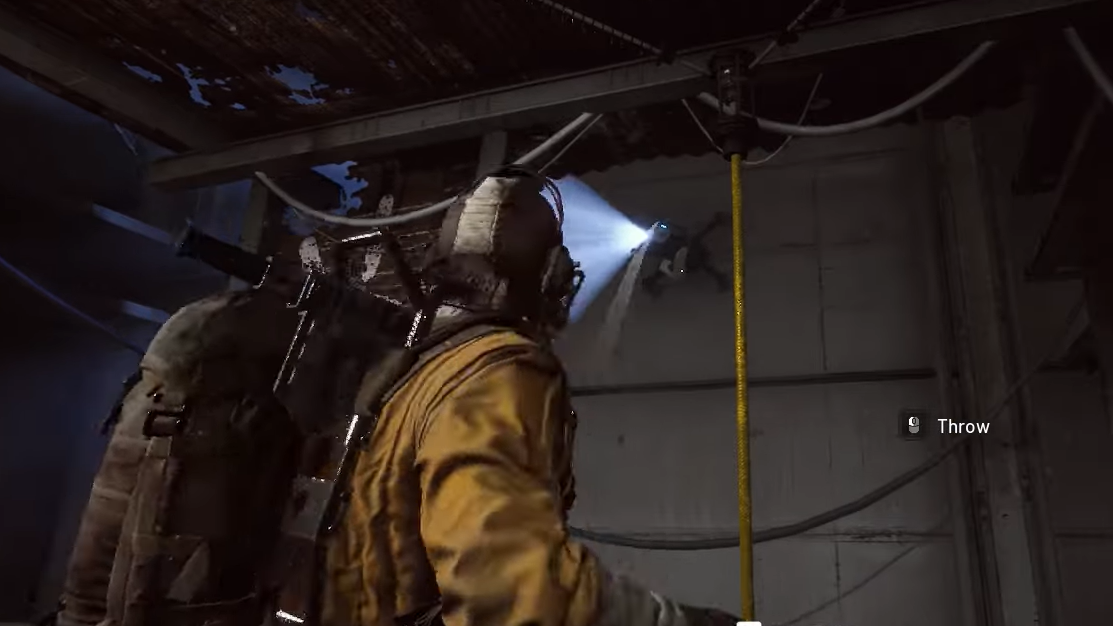
How to destroy a turret with grenades for quests
Several missions combine turret hunting with grenade use, creating two common pain points: finding the correct unit and using an explosive that actually registers for the objective.
General interaction rules:
- Impact-style grenades can be thrown directly onto the turret, detonating immediately on contact.
- Other grenades may need to explode very close to the base or wall mount to register damage correctly.
- Because the turret has low health and no armor, a single well-placed explosive is usually enough if the blast actually connects.
For quests that specify a certain grenade family, such as impact types or Ferro variants, use the labeled grenade class that matches the requirement. Several players report that destroying a turret with generic light grenades does not always advance objectives that are strictly coded for a specific grenade tier or category, even though the explosion clearly kills the unit.
To reduce wasted attempts:
- Confirm the grenade type in your inventory matches the quest text.
- Softening the turret with weapon fire is fine; the objective typically cares about the killing blow being from the correct grenade.
- Throw from cover, timing the toss between scanner sweeps to avoid being suppressed mid-throw.
Using turrets efficiently during “The Right Tool” and similar quests
One early mission, often encountered soon after starting out, asks you to destroy three ARC enemy types: a Fireball, a Hornet, and a Turret. All three can be found on Dam Battlegrounds without changing maps.
A practical loop for this kind of quest:
Step 1: Load into Dam Battlegrounds and head toward Research & Administration. This single complex can provide both Fireballs and indoor turrets, and sits in a heavily populated area for ARC enemies in general.
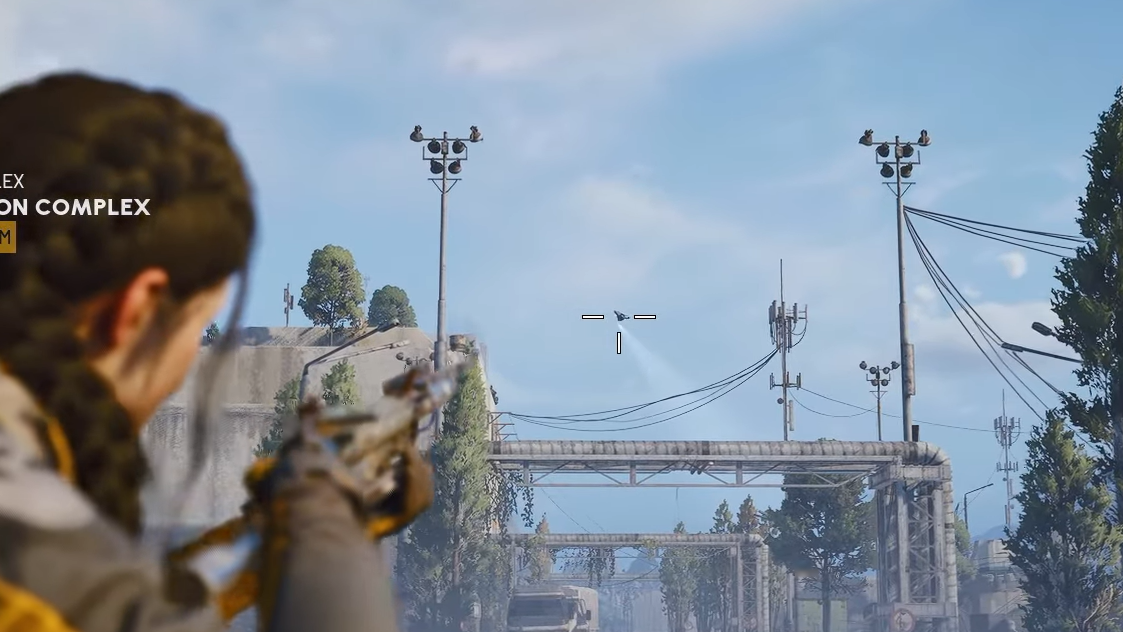
Step 2: As you approach, scan the skies for drones. Ping any flying ARC units; their names, such as “Hornet”, appear when highlighted, making it straightforward to identify a valid target for the Hornet requirement.
Step 3: Enter the Research & Administration building and move upward using ziplines and interior corridors. Look for Fireballs in open rooms and for turret scanner beams along walls and doorways.
Step 4: When you encounter the turret, step back behind cover, ready the grenade type the mission calls for, and either soften it up with gunfire or go directly for a grenade kill, ensuring the explosive is the final hit.
Step 5: Finish any remaining objectives, then extract safely so that quest progress is recorded cleanly.
This route concentrates all three required enemy types into a single run and leans on known building layouts where turrets reliably appear, instead of wandering open terrain hoping for spawns.
Turrets in ARC Raiders are deliberately unremarkable until you are asked to hunt one down. Treat them as indoor traps tied to high-value buildings: Research & Administration, the control tower interior, the south-side medical lab, and the tall industrial complex with exterior stairs on Dam Battlegrounds are the standout places to check first. Once you recognize the compact wall-mounted design and the bright scanning beam, spotting and deleting them—especially with the correct grenade—stops being a chore and becomes just another step in a predictable mission route.