
Week 5 in Arc Raiders swaps out gimmicks for raw PvE efficiency. All five Trials share the same core rule: only your best score from a single raid counts, and you need to extract for it to register. Hit the 3‑star threshold on any Trial and you’re guaranteed an Epic‑tier reward, with leaderboard rank feeding into long‑term promotions and cosmetics.
The Trials this week are:
| Trial | What it wants | Best solo condition | Rough 3‑star effort |
|---|---|---|---|
| Damage Rocketeers | Destroy or heavily damage Rocketeers | Night Raid / Electromagnetic Storm | Effectively 2 full Rocketeer kills |
| Download data during Hidden Bunker | Complete data downloads on bunker consoles | Hidden Bunker (Spaceport) | ~5 console downloads |
| Search First Wave husks | Loot static ARC husks in the world | Day or Night, any map | 8–10 husks of mixed sizes |
| Damage Snitches | Destroy or damage Snitches | Night Raid / Electromagnetic Storm | 7–8 solo Snitch kills |
| Damage ground-based ARC enemies | Damage or destroy ground ARC units | Night Raid / Electromagnetic Storm | ~2 Bastion/Bombardier‑level kills |
Major map conditions are doing most of the work here. Night Raid, Electromagnetic Storm, and especially Hidden Bunker double your Trial score and, in the bunker’s case, extend raid time to 40 minutes. Minor conditions like Lush Blooms and Harvesters don’t matter for Trials.
General Trial strategy for Week 5
A few global rules make these runs dramatically easier:
| Principle | Why it matters |
|---|---|
| Prioritize major conditions | Night, Storm, and Hidden Bunker apply a 2× score multiplier, effectively halving the work for 3 stars. |
| Play solo for 3‑stars | Solo lobbies tend to be less hostile and you keep all Trial points instead of splitting damage/credits. |
| Use extended‑time events | Hidden Bunker gives you 40 minutes instead of 30 to farm Rocketeers, Snitches, and ground ARC. |
| Time your first Trial run | Your first Trial of the week drops you into a random 100‑player bracket. Waiting a day or two often means less sweat. |
| Extract or it doesn’t count | Any progress is discarded if you die or leave via disconnect, no matter how high the score was. |
With that in mind, you can route these five Trials to either knock out quick 3‑star clears or chase leaderboard points.

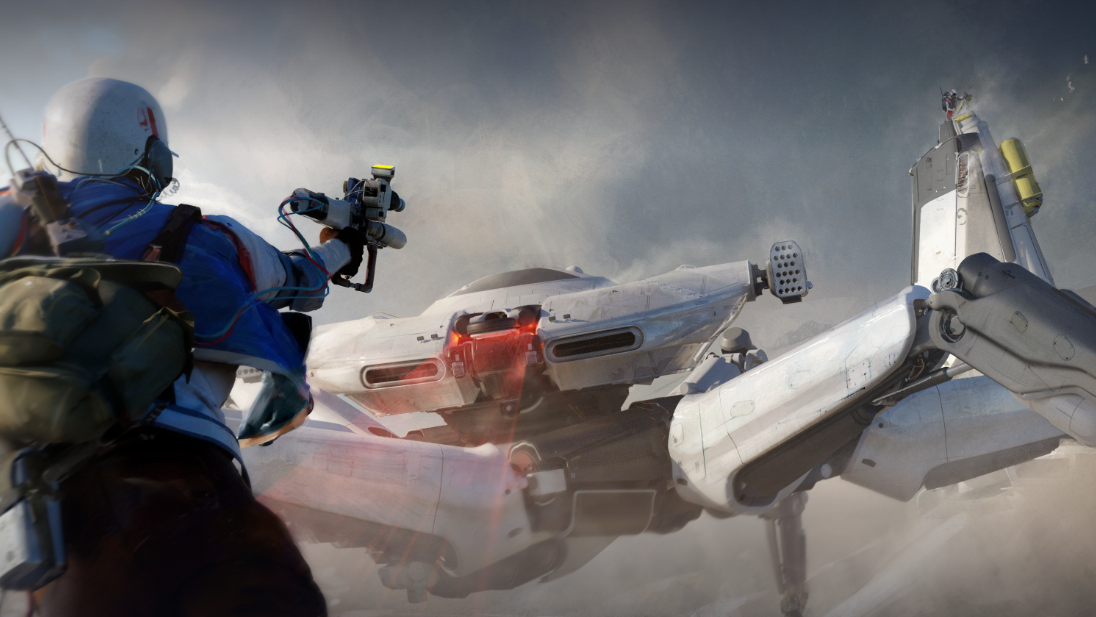
Damage Rocketeers Trial
Rocketeers are the flying gunships with multiple armored rotors and missile salvos. Trial scoring heavily rewards finishing blows, and numbers from this week line up with roughly 2,640 points per kill in a 2× condition when you use Wolfpack grenades. That makes two full Rocketeer kills enough to clear the ~4,000‑point 3‑star bar with room to spare.
| Target | Recommended map | Condition | Suggested gear |
|---|---|---|---|
| Rocketeers | Dam Battlegrounds or Spaceport | Night / Storm / Hidden Bunker | 3–4 Wolfpack grenades, Anvil or Osprey, blue shield + spare |
For a simple 3‑star clear, Dam Battlegrounds at Night is enough. Two Rocketeers often spawn close to each other in the northwest: near the North Complex Elevator and just south of the Hydroponic Dome Complex, with another pathing around Testing Annex. Throw one or two Wolfpacks at each ship from behind, ideally after stripping a rotor’s armor, and clean up with an Anvil if anything survives.
For higher scores, Hidden Bunker at Spaceport is the standout. Rocketeers spawn in large numbers, and you get 40 minutes to farm. A strong but aggressive position sits on the rafters one floor above the bottom of the launch tower: from there, you can see almost every Rocketeer on the map. It’s also under one of the hottest loot spots, with three ladders, three ziplines, and a staircase leading to you, so you need thorough trap coverage (Blaze traps, Jolt Mines, and deployable cover).
Two practical goals keep this Trial low‑stress:
- Bring at least three Wolfpacks in safe pockets to hard‑delete any Rocketeer that gets close.
- Engage from >200m for safe, slow approaches where Rocketeers barely fire back.
Download data during Hidden Bunker Trial
The Hidden Bunker event is locked to Spaceport and functions like a special major condition: hatches are disabled, the raid uses a 2× Trial multiplier, and the match lasts 40 minutes. The bunker Trial only progresses during this event.
| Objective | Where | How it scores | Safe approach |
|---|---|---|---|
| Download data from consoles | Hidden Bunker (Spaceport, southwest) | ~800 points per console, hard cap around 6,400 | Solo queue, focus on antennas early, then cycle consoles |
To open the bunker, the lobby must complete four rooftop antennas in the north, south, east, and west corners of Spaceport. Each antenna needs two interactions with a small Wasp/Hornet wave in between. Once all four relays are online, the bunker door southwest of Arrival opens.
Inside, there are eight computers: seven on the main floor and one up a staircase on the southwest side. Each console can be used for a download that takes about a minute and pays out Trial points when the light turns green.
- First run: hit as many distinct consoles as possible until they lock (red light).
- Then, wait a few minutes near any locked console; it will eventually reboot so you can run another download.
Console credit is per interaction, not per player in the area, and there’s a hard cap on how much score you can squeeze out. Roughly five downloads are enough to cross 3 stars, but you can safely keep cycling if the lobby stays calm.
Hidden Bunker is one of the few places in Arc Raiders where players tend to cooperate. Solo is usually the safest queue here: people need each other to finish antennas, and there’s no shared bonus from your teammates using consoles, so you aren’t giving up score by going in alone. Bring a Snap Hook and a couple of Zip Lines so you can reach antenna roofs without relying on keys.
Search First Wave husks Trial
First Wave husks are static, breachable ARC corpses scattered around the maps. They are not fresh kills, not probes, and not couriers. You’re looking for:
- Huge Baron husks roughly the size of a Queen
- Medium, grey cylindrical bodies similar in profile to a Rocketeer
- Small Wasp‑sized husks
Each husk searched grants a Trial score, with bigger bodies paying more. This week’s values hover around 800 points per husk, so 8–10 of mixed sizes is enough to cross the 3‑star mark in a normal daytime raid. Night and Storm reduce the number you need but aren’t required.
| Best solo map | Condition | Why it works | Notes |
|---|---|---|---|
| The Blue Gate | Any (Day is fine) | Southeast corridor between Ancient Fort and Warehouse Complex is a husk graveyard. | Great for quick, low‑investment 3‑star runs. |
| Spaceport | Night / Storm | About 26 lootable husks, especially along the outer walls. | Stronger for high‑score pushes. |
| Dam Battlegrounds | Night / Storm | ~22 husks, with dense clusters near Old Battlegrounds. | Good backup if Spaceport is contested. |
For a quick star grab, run a free kit at Blue Gate and sprint the southeast strip between Ancient Fort and Warehouse Complex, breaching every husk in sight. The area is very exposed and attracts PvP, which is why not risking real gear is appealing here.
For score chasing, Spaceport’s outer wall loops are stronger. Husk spawns chain together in near‑continuous runs around the perimeter, and the lack of central loot makes these lanes relatively quiet. Bring a stack of Adrenaline Shots so you can chain sprints between husks without stopping, and a Raider Hatch Key if you want a guaranteed extract when the clock runs down.
Important nuance: if someone has already looted a husk, you still get Trial credit for breaching it. Empty is fine; it’s the search action that counts.
Damage Snitches Trial
Snitches are the flier scouts that ping your location and can call in reinforcements. They’re fragile, but the Trial counts both damage and kills, with scoring tuned so that a solo player needs roughly 7–8 clean kills during a Night Raid or Storm to secure 3 stars. Partial credit gets messy when multiple players tag the same drone, so treating them as “your” targets is safer.
| Plan | Map & spot | Condition | Recommended weapons |
|---|---|---|---|
| Safe rooftop snipe | Spaceport – roof of Departure Building | Night / Hidden Bunker | Ferro, Renegade, Anvil, or Osprey |
| High‑chaos tower | Dam Battlegrounds – main Control Tower | Night / Storm | Osprey or Renegade with ample ammo |
| Trench tower farm | Hidden Bunker – south trench tower | Hidden Bunker | Renegade or Osprey sniper build |
At Spaceport, the roof of the Departure Building gives long sightlines across multiple Snitch patrol paths with only a couple of approaches to guard. Mine the ladders and zips, throw down deployable cover, and then just watch the sky. The Buried City Hospital or Grandioso Apartments roofs serve a similar role for that map if Spaceport isn’t in the rotation.
Hidden Bunker opens a different, safer option: the south trench tower. Zip to the top, trap the access route behind you, and camp there. That single perch sits next to three or four Snitch spawn routes. With a scoped Renegade or Osprey and enough repair and ammo budget to last 30–40 minutes, you can comfortably kill 20–30 Snitches in a single bunker raid for a huge score if you’re chasing promotions.
Two mechanical details matter here:
- The white armor panels on Snitches are their weak spots; hitting those drastically cuts time‑to‑kill.
- Lure grenades help if a Snitch starts to flee or has already called in a wave you need to control quickly.
Stella Montis, Blue Gate, and Buried City tend to have fewer Snitches or harsher sightlines, so they’re best avoided for this Trial unless you’re stacking it with other objectives.
Damage ground-based ARC enemies Trial
Ground‑based ARC in this context covers almost everything that isn’t flying: Fireballs, Poppers, Ticks, Leapers, Bastion, Bombardiers, and raid‑scale bosses like the Queen and Matriarch. Trial scoring heavily weights the big walkers. Small fodder like Fireballs barely moves the needle (around 32 points for a full kill), so farming them is only useful as last‑minute padding.
| Priority target | Why focus it | Where to find it | Recommended tools |
|---|---|---|---|
| Bastion | High, consistent score yield | Blue Gate tunnels north of Checkpoint; Spaceport Hidden Bunker roof spawns | Wolfpacks, Hullcracker, Anvil + Deadline Mines |
| Bombardier | Comparable to Bastion in points | Blue Gate south of Village; Spaceport Hidden Bunker roof spawns | Same as Bastion – explosives + heavy ammo |
| Leaper | Decent backup target with less score per kill | Dam Battlegrounds (Red Lake → Testing Annex → Water Treatment loop) | Blaze Grenades, Hullcracker to strip armor, Anvil finish |
On standard Night or Storm maps, Blue Gate is a clean option. A Bastion is almost always stomping around tunnels north of Checkpoint, and a Bombardier often patrols south of Village. If there’s no Queen or Matriarch active, you’ll often see another Bastion in the center. Two of these big kills at night are enough to push you past the 3‑star threshold, especially if you land most of the damage solo.
For top‑end scoring, Hidden Bunker at Spaceport has an almost broken synergy. In this condition, all Bastions, Bombardiers, and Leapers converge onto the bunker roof over the course of the raid. Standing on the Departure Building roof above the bunker with a trio, you can simply pull walker after walker into kill zones filled with blaze and Deadline Mines, stripping armor with Hullcracker shots, and then deleting weak points with Anvils. It’s realistic to hit double‑digit big‑ARC kills in one 40‑minute bunker match; even with solo players poaching, individual scores around 16,000 are very achievable.
A few practical rules:
- Use Hullcracker to tear off armor segments, then swap to Anvil or another heavy for efficient health damage.
- Plant Deadline Mines directly under Bastion/Bombardier legs; a clean trigger can one‑shot or nearly one‑shot them.
- Treat Fireballs, Pops, and Ticks as incidental padding only; don’t route around them.
Boss fights against the Queen or Matriarch technically qualify as ground‑based damage, but recent Hullcracker changes mean they aren’t especially point‑efficient. They’re also PvP magnets. Unless the event spawns right next to you with no other squads in sight, chasing two normal walkers is a calmer, safer path to 3 stars.
The throughline across all five Trials is simple: let major map conditions, safe solo positions, and a small set of high‑impact tools do the heavy lifting. Two Rocketeer kills, a loop of 8–10 husks, seven Snitch takedowns, a handful of bunker console downloads, and a couple of Bastion‑tier kills are all it takes to turn Week 5 from a leaderboard arms race into a short checklist of controlled raids.