
The Armorer’s Workbench is the core of Hytale’s armor system. Once it is placed, every serious defensive upgrade you make, from early copper gear to late-game Mithril sets, flows through this single crafting station.
What the Armorer’s Workbench does in Hytale
The Armorer’s Workbench is a specialized crafting station dedicated to defensive gear. It covers five categories:
- Helm
- Cuirass (chest armor)
- Gauntlets
- Greaves (leg armor)
- Shields
Each piece you make improves your defense and stats, and higher material tiers provide stronger protection. The workbench also acts as a gatekeeper: stronger armor recipes only appear once the bench is upgraded to the required tier.
Armor is organized into six material tiers:
- Copper
- Iron
- Thorium
- Cobalt
- Adamantite
- Mithril
A Tier 1 Armorer’s Workbench covers early materials like Copper and Iron. Higher tiers are required for Thorium, Cobalt, Adamantite, and Mithril.

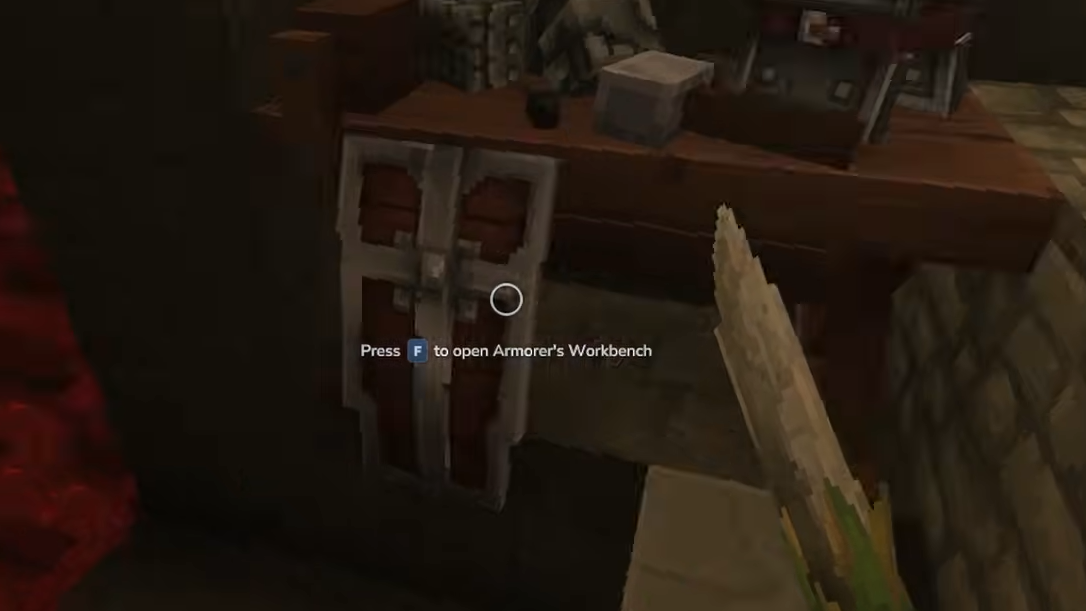
How to craft the Armorer’s Workbench
The first Armorer’s Workbench is crafted at a basic Workbench. Before you worry about armor recipes, you need this station in place.
Required materials:
- 2 × Copper Ingot
- 10 × Tree Trunk
- 5 × Stone
Each component comes from standard early-game activities:
- Copper Ingot is produced by refining Copper Ore in a furnace.
- Tree Trunk drops from chopping down trees.
- Stone is mined with a pickaxe in rocky terrain or underground.
Step 1: Gather enough Copper Ore, then smelt it in a furnace until you have at least 2 Copper Ingots ready in your inventory.
Step 2: Chop down trees until you have 10 Tree Trunks. Focus on nearby forested areas so you can collect enough wood quickly.
Step 3: Mine stone with a pickaxe until you reach 5 Stone. Any exposed rock face or shallow cave is usually sufficient.
Step 4: Go to a level 1 Workbench and interact with it. Locate the Armorer’s Workbench recipe and use your 2 Copper Ingots, 10 Tree Trunks, and 5 Stone to craft it.
Step 5: Place the Armorer’s Workbench on the ground, ideally in a base or safe area where you keep storage and other crafting stations.
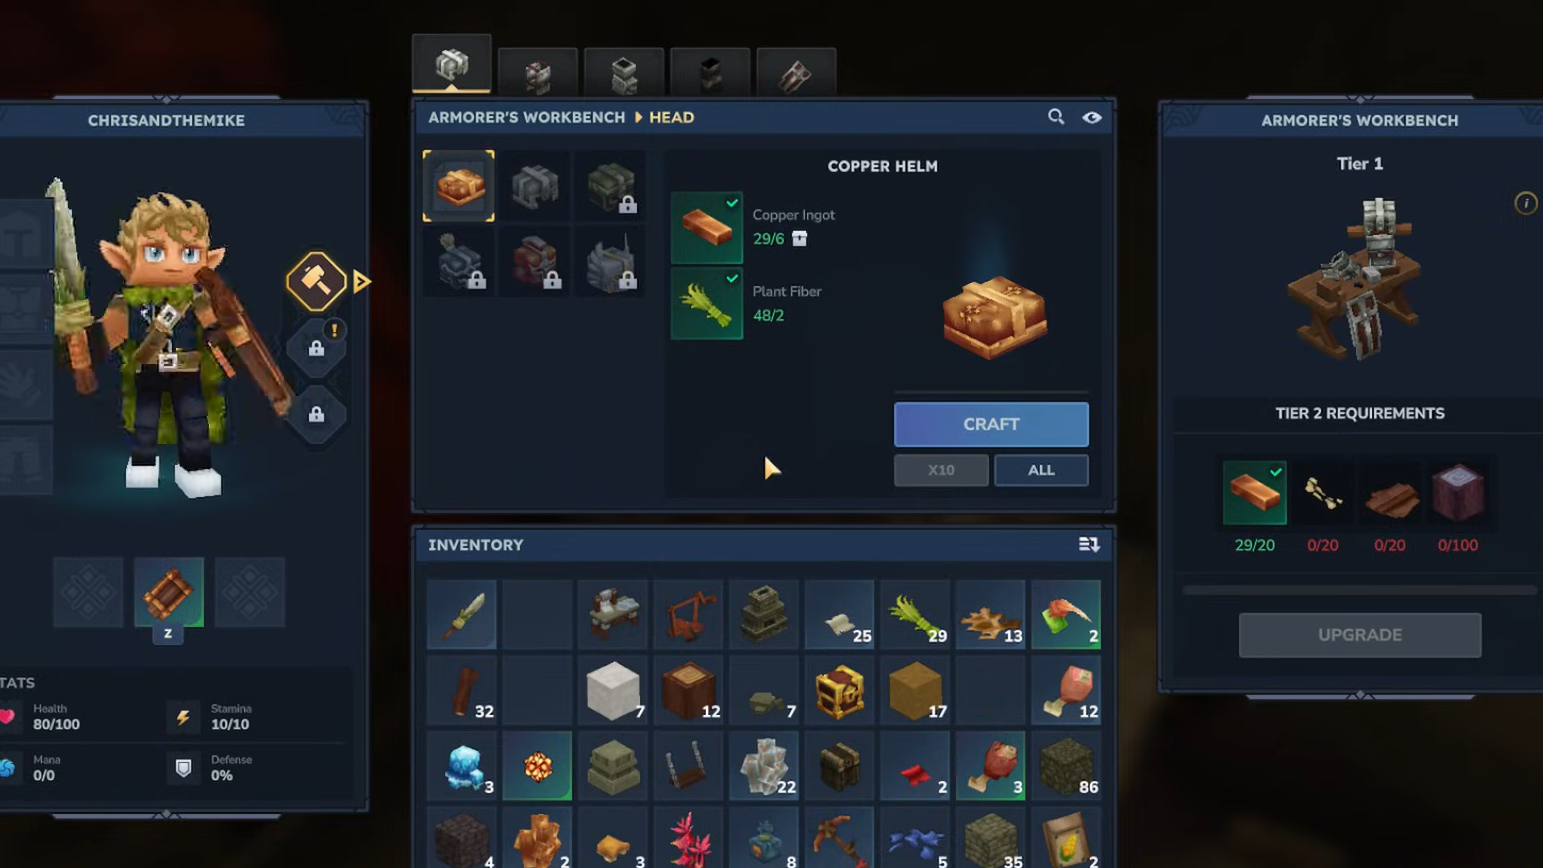
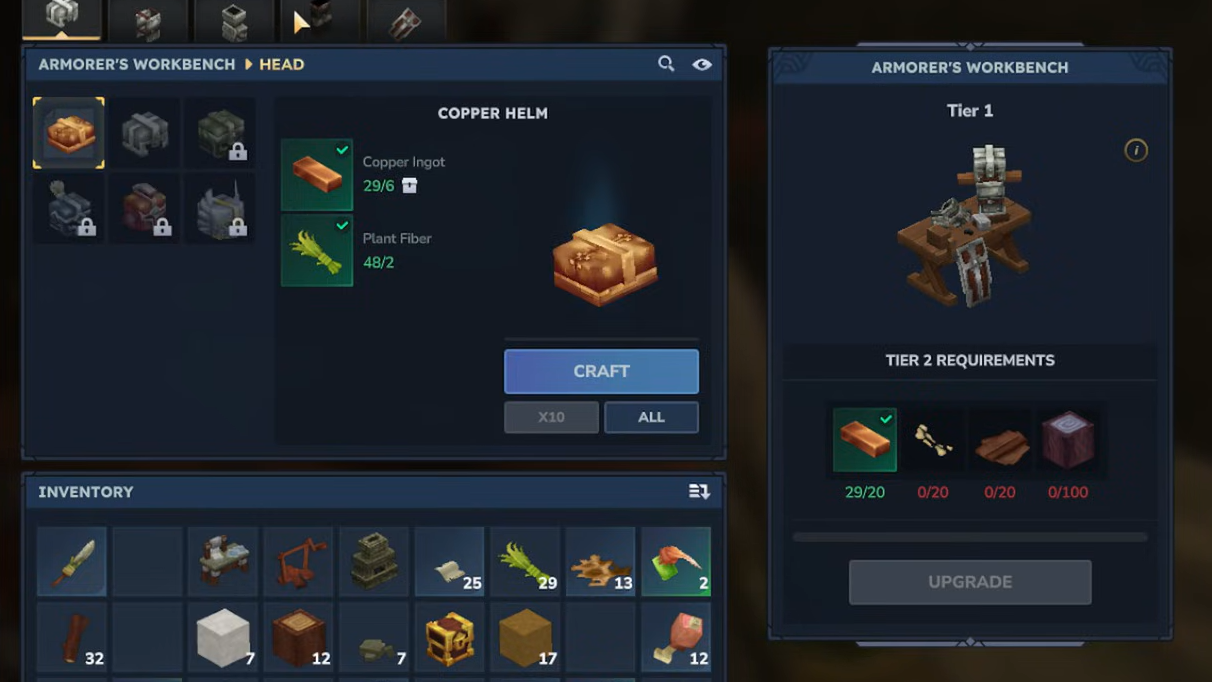
How to use the Armorer’s Workbench
Once placed, the Armorer’s Workbench behaves much like other crafting stations in Hytale. The main difference is its focus on armor and shields.
Step 1: Interact with the Armorer’s Workbench to open the armor crafting interface. The UI shows available equipment slots and the recipes you have unlocked.
Step 2: Select the gear slot you want to work on, such as Helm, Cuirass, Gauntlets, Greaves, or Shield. This filters the recipes to that type of item.
Step 3: Pick a specific armor recipe from the list. The interface will display all required materials and how many of each you currently hold.
Step 4: Make sure you have the required ingots, leather, fibers, and other components in your inventory, then hit the Craft button to produce the item.
Step 5: If your character’s corresponding armor slot is empty, the crafted piece equips automatically. If the slot is already in use, the new piece goes into your inventory so you can swap it manually.
Every armor recipe follows a similar pattern: a core of metal ingots, plus supporting materials like leather, cloth scraps, or special drops such as Venom Sacs and Essence of the Void. Higher tiers need more and rarer items.
Armor slots you can craft at the Armorer’s Workbench
The workbench enables full gear sets across four armor slots plus shields:
- Helm for head protection.
- Cuirass for torso defense.
- Gauntlets for arm and hand armor.
- Greaves for leg and lower body protection.
- Shields to block damage and improve survivability in direct combat.
Each slot has separate recipes per material tier, so a complete set at one tier usually involves crafting four armor pieces and possibly a matching shield.
Armor material tiers and workbench requirements
Not every armor recipe is available the moment you place the workbench. The game ties higher tiers to higher bench levels, which controls the pace at which you gain powerful gear.
| Armor Material | Typical Workbench Requirement | Notes |
|---|---|---|
| Copper | Available on Tier 1 | Basic early-game gear, uses Copper Ingots and Plant Fiber. |
| Iron | Available on Tier 1 | Stronger entry-level armor, adds Light Leather and Linen Scraps. |
| Thorium | Armorer’s Workbench Tier 2 | Mid-tier armor, often includes Venom Sacs alongside metal and leather. |
| Cobalt | Armorer’s Workbench Tier 2 | Uses Heavy Leather and Shadoweave Scraps for higher protection. |
| Adamantite | Armorer’s Workbench Tier 3 | High-end gear with large ingot requirements and Cindercloth Scraps. |
| Mithril | Armorer’s Workbench Tier 3 | Late-game sets that rely on Storm Leather and significant Essence of the Void. |
The exact process to upgrade the Armorer’s Workbench to Tier 2 or Tier 3 is not detailed here, but the tier requirements for recipes are fixed. If you cannot see a Thorium, Cobalt, Adamantite, or Mithril recipe you expect, the bench level is the most likely bottleneck.
Key armor recipes available through the Armorer’s Workbench
The table below summarizes major armor recipes across all four armor slots. Each row focuses on a specific piece, its workbench requirement, and the materials needed.
| Armor Piece | Workbench Requirement | Materials |
|---|---|---|
| Copper Helmet | None (Armorer’s Workbench placed) | Copper Ingot ×6, Plant Fiber ×2 |
| Iron Helmet | None | Iron Ingot ×9, Light Leather ×4, Linen Scraps ×3 |
| Thorium Helmet | Armorer’s Workbench Tier 2 | Thorium Ingot ×11, Medium Leather ×4, Linen Scraps ×4, Venom Sac ×2 |
| Cobalt Helmet | Armorer’s Workbench Tier 2 | Cobalt Ingot ×12, Heavy Leather ×4, Shadoweave Scraps ×4 |
| Adamantite Helmet | Armorer’s Workbench Tier 3 | Adamantite Ingot ×15, Heavy Leather ×5, Cindercloth Scraps ×4 |
| Mithril Helmet | Armorer’s Workbench Tier 3 | Mithril Ingot ×12, Storm Leather ×4, Essence of the Void ×40 |
| Copper Cuirass | None | Copper Ingot ×11, Plant Fiber ×4 |
| Iron Cuirass | None | Iron Ingot ×16, Light Leather ×7, Linen Scraps ×6 |
| Thorium Cuirass | Armorer’s Workbench Tier 2 | Thorium Ingot ×20, Medium Leather ×7, Linen Scraps ×7, Venom Sac ×4 |
| Cobalt Cuirass | Armorer’s Workbench Tier 2 | Cobalt Ingot ×24, Heavy Leather ×7, Shadoweave Scraps ×7 |
| Adamantite Cuirass | Armorer’s Workbench Tier 3 | Adamantite Ingot ×28, Heavy Leather ×8, Cindercloth Scraps ×7 |
| Copper Gauntlets | None | Copper Ingot ×5, Plant Fiber ×1 |
| Iron Gauntlets | None | Iron Ingot ×7, Light Leather ×3, Linen Scraps ×3 |
| Thorium Gauntlets | Armorer’s Workbench Tier 2 | Thorium Ingot ×9, Medium Leather ×3, Linen Scraps ×3, Venom Sac ×1 |
| Cobalt Gauntlets | Armorer’s Workbench Tier 2 | Cobalt Ingot ×8, Heavy Leather ×3, Shadoweave Scraps ×3 |
| Adamantite Gauntlets | Armorer’s Workbench Tier 3 | Adamantite Ingot ×12, Heavy Leather ×4, Cindercloth Scraps ×3 |
| Mithril Gauntlets | Armorer’s Workbench Tier 3 | Mithril Ingot ×8, Storm Leather ×2, Essence of the Void ×20 |
| Copper Greaves | None | Copper Ingot ×9, Plant Fiber ×3 |
| Iron Greaves | None | Iron Ingot ×13, Light Leather ×6, Linen Scraps ×4 |
| Thorium Greaves | Armorer’s Workbench Tier 2 | Thorium Ingot ×15, Medium Leather ×6, Linen Scraps ×6, Venom Sac ×3 |
| Cobalt Greaves | Armorer’s Workbench Tier 2 | Cobalt Ingot ×18, Heavy Leather ×6, Shadoweave Scraps ×6 |
| Adamantite Greaves | Armorer’s Workbench Tier 3 | Adamantite Ingot ×22, Heavy Leather ×7, Cindercloth Scraps ×6 |
| Mithril Greaves | Armorer’s Workbench Tier 3 | Mithril Ingot ×18, Storm Leather ×6, Essence of the Void ×60 |
Shields follow the same overall logic: metal ingots plus supporting materials, with higher tiers demanding rare resources and a higher-tier workbench. The exact shield recipes are structured around the same progression from Copper to Mithril.
Practical crafting flow for early and mid-game armor
Once the Armorer’s Workbench is down, the most efficient way to progress armor is to move tier by tier rather than skipping around.
Step 1: Use your Tier 1 Armorer’s Workbench to craft a full Copper set: Helmet, Cuirass, Gauntlets, and Greaves, plus a basic shield if materials allow. This stabilizes early survivability.
Step 2: As you gain access to more ore veins and animal drops, switch to Iron. Replace Copper pieces with Iron versions slot by slot. The recipes require more ingots and introduce Light Leather and Linen Scraps.
Step 3: After you unlock a Tier 2 Armorer’s Workbench, start targeting Thorium and Cobalt sets. Decide whether to upgrade every slot immediately or focus on critical pieces like Cuirass and Greaves first, which usually have the highest material cost but also the biggest defensive impact.
Step 4: With Tier 3 unlocked, plan your resource use carefully before crafting Adamantite and Mithril armor. These recipes demand large numbers of ingots and special components like Cindercloth Scraps, Storm Leather, and Essence of the Void, so crafting in a rush can deplete key materials needed elsewhere.

Once the Armorer’s Workbench is in place and upgraded, armor progression in Hytale becomes a predictable loop: mine and refine metal, hunt down leather and cloth drops, unlock new recipes at higher bench tiers, then convert those materials into specialized gear. Treat the bench as a long-term investment, and it will quietly dictate how far you can push into the game’s tougher regions and encounters.