
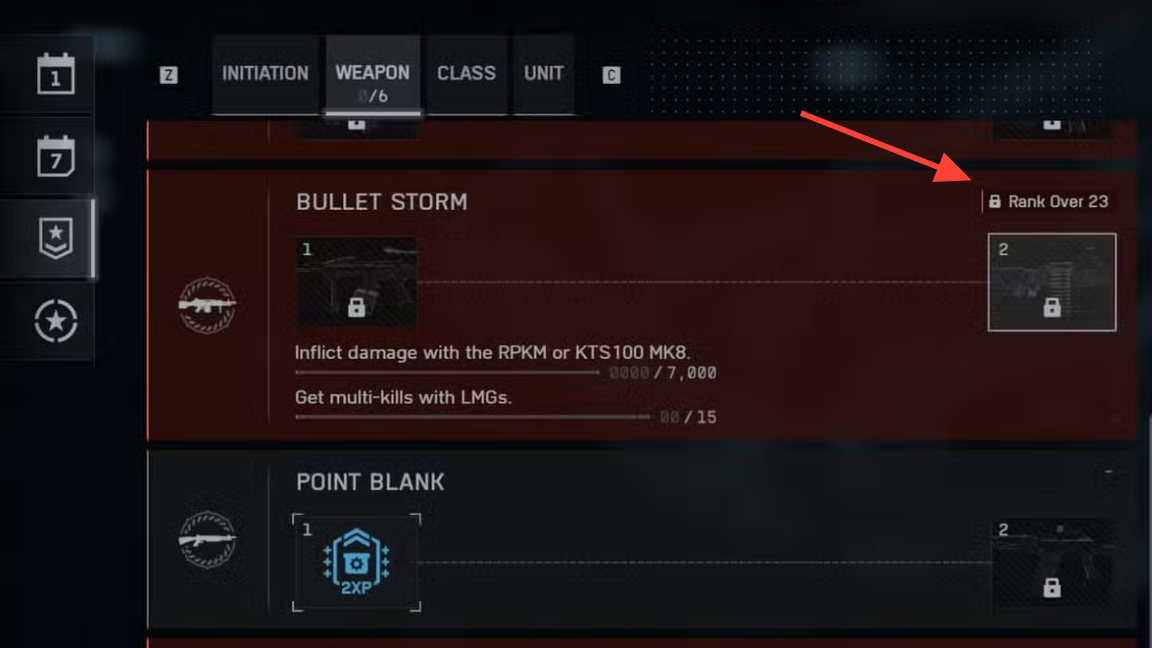
Bullet Storm is a two-part set of multiplayer assignments that unlocks two top-tier LMGs. The first challenge grants the KTS100 MK8; the second awards the M240L and an Enforcer player card title. Neither assignment is complex once you understand what the game counts for suppression, hip-fire damage, and multi-kills.
Start requirement: reach Rank 23 (multiplayer)
Progress toward Bullet Storm does not begin until you hit Rank 23. If you’re below that threshold, play normally and level up first; any LMG stats earned before Rank 23 won’t count toward these assignments.
Bullet Storm challenges at a glance
| Challenge | Requirements | Unlocks |
|---|---|---|
| Bullet Storm 1 |
|
KTS100 MK8 (LMG) |
| Bullet Storm 2 |
|
M240L (LMG) and Enforcer player card title |
Bullet Storm 1: suppression and hip-fire damage (LMGs)
This first step is about volume of fire, not precision. The suppression counter increases when you fire near enemy players without landing shots. Sustained bursts into enemy positions—windows, doorways, or headglitches—will reliably apply suppression to anyone in the line of fire. LMGs excel here thanks to long effective range and large magazines; keep your crosshair close to targets and let the weapon do the rest.
For the hip-fire requirement, you must deal 10,000 damage without aiming down sights. Close and midrange fights are where hip-fire damage stacks fastest. Push with your squad, pre-fire corners, and keep moving between cover to stay alive during long sprays. You don’t need to optimize a special build; simply avoid ADS and use the LMG’s magazine to your advantage.
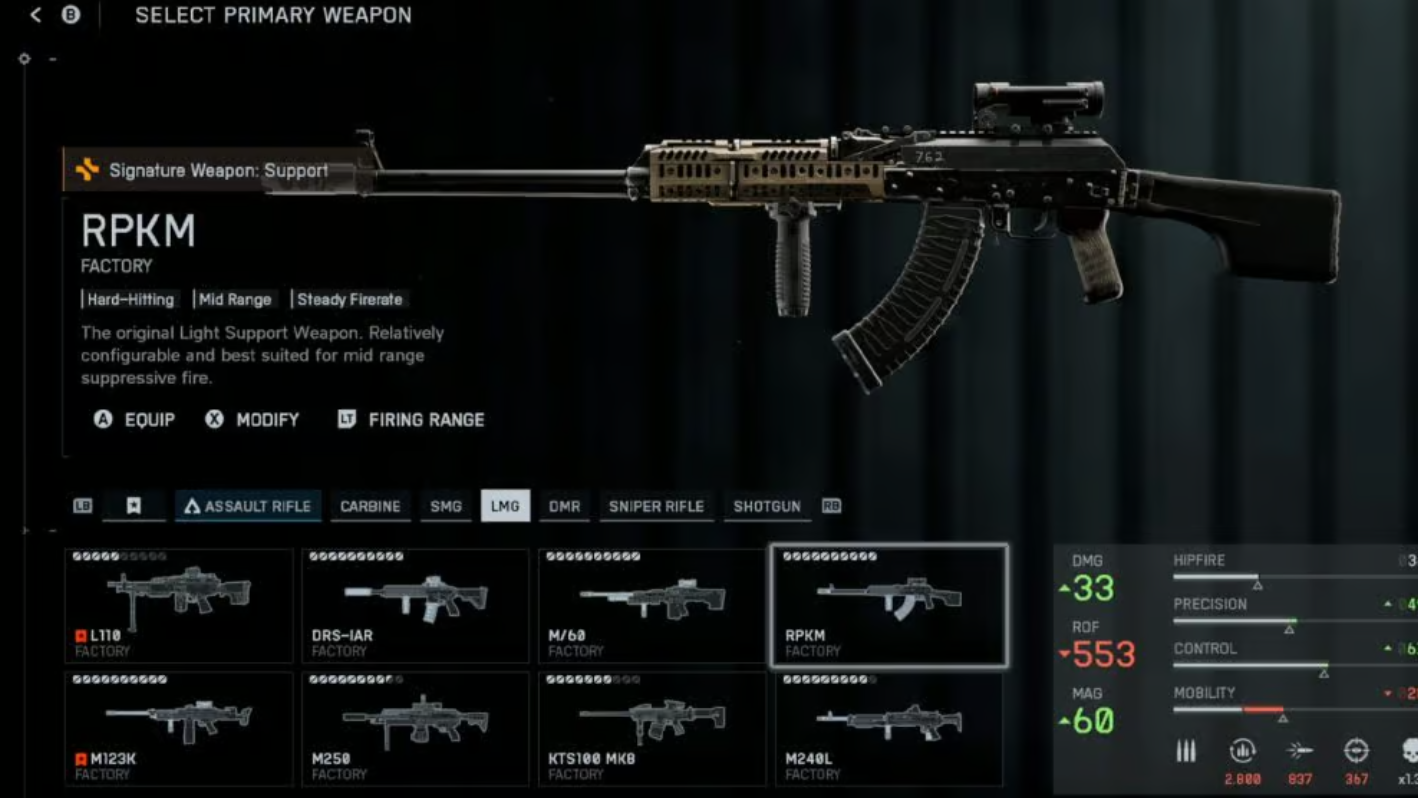
Bullet Storm 2: damage with KTS100 MK8 or RPKM, plus LMG multi-kills
Once the KTS100 MK8 is unlocked from Bullet Storm 1, you can use it—or the RPKM—to reach the 7,000-damage target. If you don’t have the RPKM yet, it unlocks at Rank 30. The KTS100 MK8 is slow-firing but very accurate, making it dependable at medium range; the RPKM hits hard and suits a more aggressive, flexible approach. Either path works, and the damage threshold is achievable in a short session if you stay active around objectives.
For the 15 LMG multi-kills, look for moments where enemies cluster—choke points and objectives are ideal. Multi-kills register when you eliminate multiple opponents in quick succession, so commit to full bursts and track transitions between targets. The goal is consistency: take positions that let you pre-aim likely routes and hold the trigger through two or more enemies.
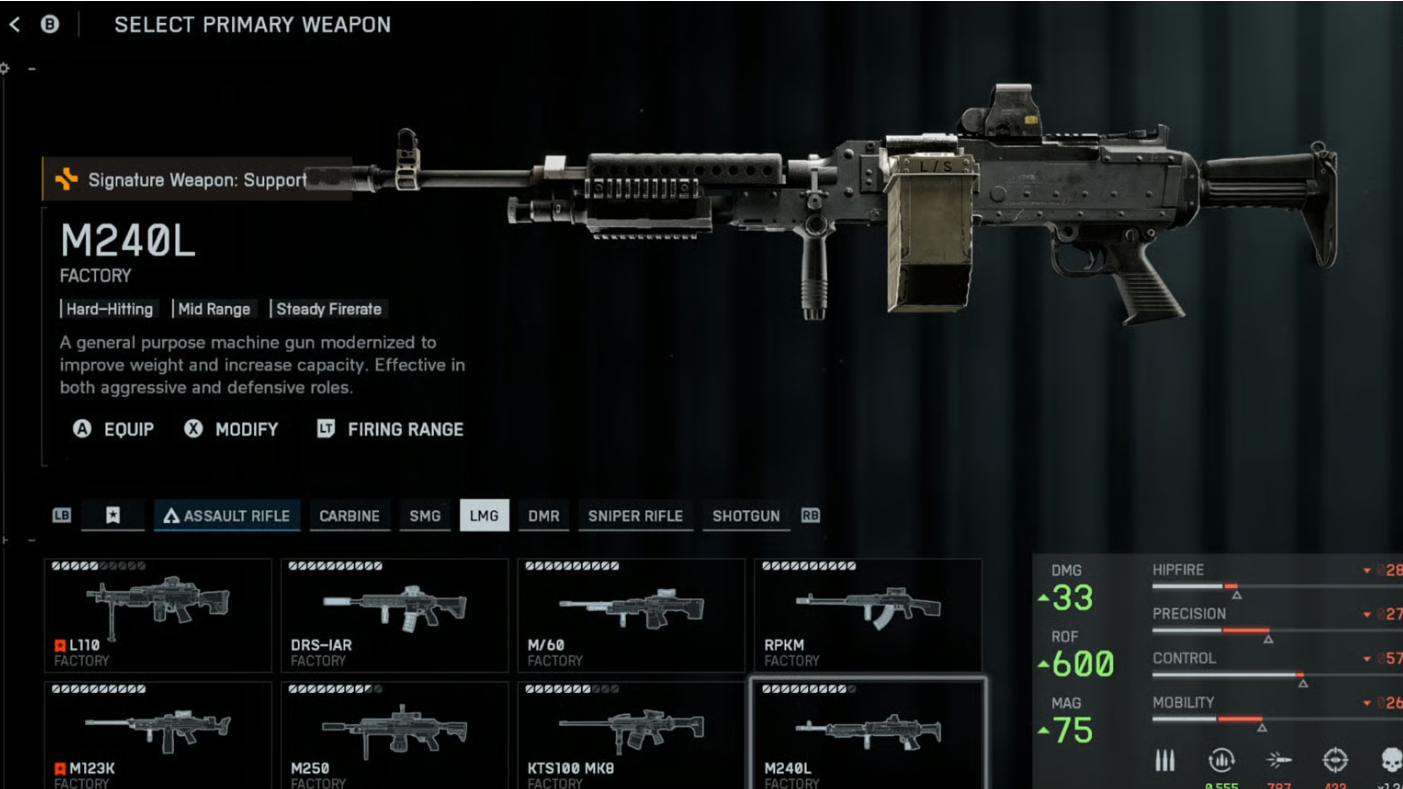
What you unlock (and why it’s worth it)
Finishing both challenges adds the KTS100 MK8 and M240L to your loadouts. The MK8 rewards controlled fire with excellent accuracy. The M240L delivers high damage in a versatile package that fits most maps and objective modes. Both are strong fits for Support players who want dependable lane control and sustained pressure.
Treat Bullet Storm as two simple loops: lay down fire to suppress and stack hip-fire damage, then pivot to focused LMG engagements to rack up multi-kills and weapon-specific damage. With the right pacing, both assignments can be cleared quickly while playing the objective.