
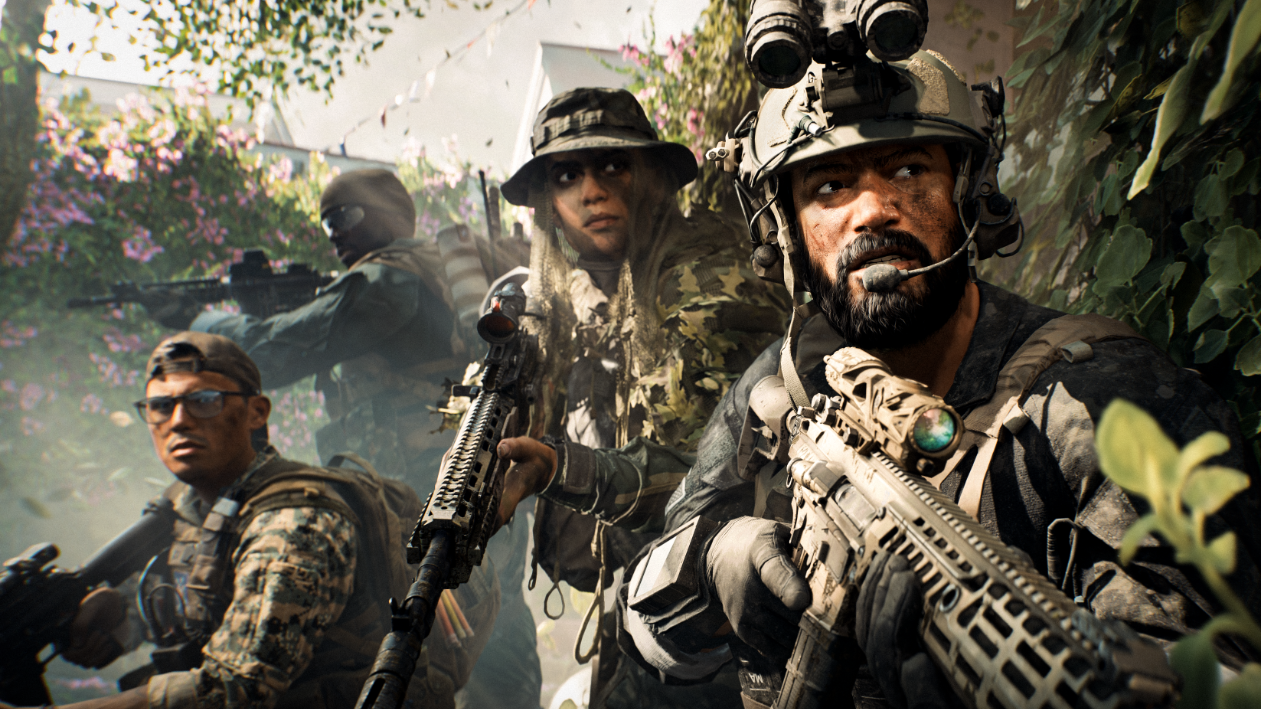
Battlefield 6 puts the class system back at the center of its multiplayer. Four roles—Assault, Support, Engineer, and Recon—each bring unique traits, weapon proficiencies, and gadgets that shape how squads attack, hold, and recover objectives. There isn’t one class that dominates every map and mode, but some are broadly useful across more scenarios. This ranking prioritizes team impact in typical ground warfare, not just raw kills or K/D.
| Rank | Class | What it does best | Signature edge | Standout gadgets |
|---|---|---|---|---|
| 1 | Assault | Leads pushes, clears buildings, anchors spawns | Assault rifle perks, enhanced mobility, optional second primary | Adrenaline Injector, Grenade Launcher, Deploy Beacon, Assault Ladder, Breach Launcher, Incendiary shotgun |
| 2 | Support | Revives fast, heals and resupplies, sustains fights | LMG proficiency, faster revive when stationary | Defibrillator, Supply Bag/Pouch, Smoke Launcher, Deployable Cover, Intercept System, Portable Mortar, Airburst Launcher |
| 3 | Engineer | Repairs friendly armor, destroys enemy vehicles | SMG perks, explosive damage resistance | Repair Tool, Rocket Launchers, AV Grenade, AV Mine, EOD Bot, Acoustic Sensor AV Mine, Vehicle Supply Crate |
| 4 | Recon | Long‑range denial, intel, countersniping | Sniper rifle stability and cycle perks, aim‑spotting | Motion Sensor, Drone, Tracer Dart, C4, Sniper Decoy, Anti‑Personnel Mine |
How this ranking weighs classes
This list emphasizes objective impact in common ground warfare scenarios: taking flags, holding zones, and maintaining momentum. Flexibility and squad value are rated higher than raw dueling potential. Map and lobby context still matter—vehicle‑heavy or sniper‑friendly layouts elevate Engineer and Recon. On smaller or chaotic infantry maps, Assault and Support generally produce the most consistent team value.
Assault class (rank 1): frontline flexibility and squad anchor
Assault’s toolkit is built to take ground and keep it. Enhanced mobility perks reduce fall penalties and smooth transitions into fights, while assault rifle proficiencies make it the most reliable class for close‑to‑mid engagements. The ability to carry an extra primary weapon adds real loadout flexibility—pair a mid‑range rifle with a CQB option and you can immediately adapt when a fight moves indoors.
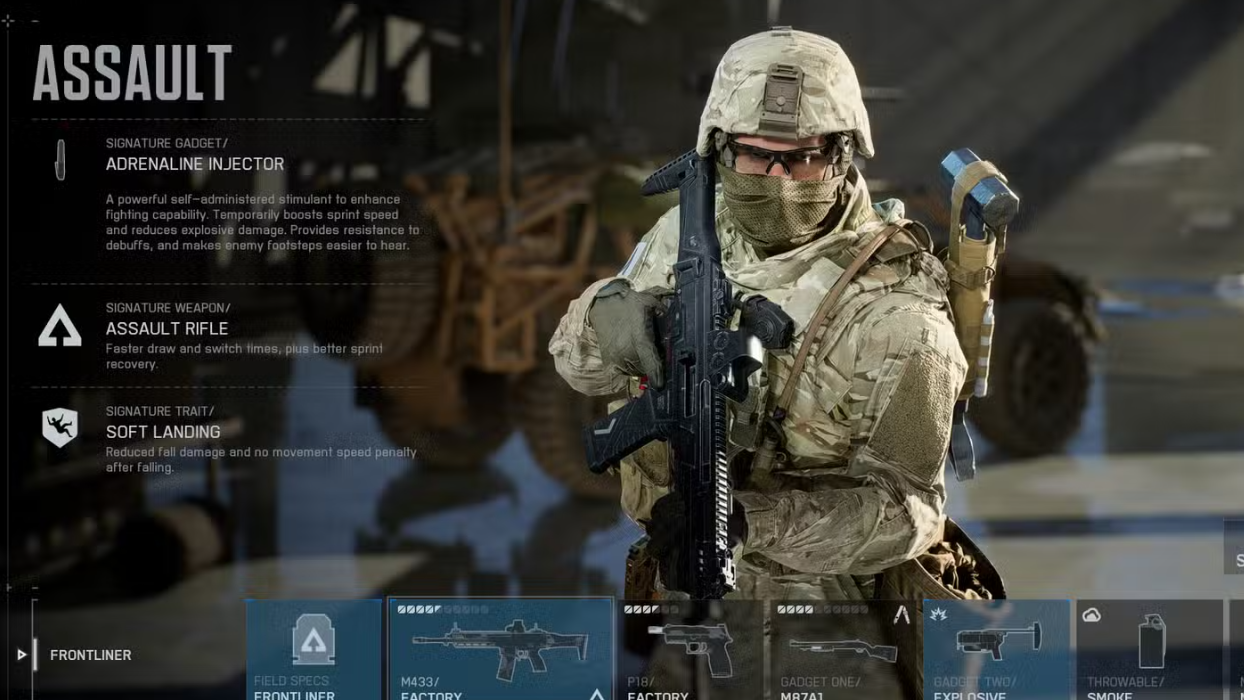
Gadgets give Assault control over space and tempo: the Adrenaline Injector bolsters survivability and sprinting through chaos; grenade launchers crack entrenched positions; the Deploy Beacon keeps your squad spawning on the objective; the Assault Ladder opens unexpected angles; breaching rounds carve instant entrances; and the incendiary shotgun deters pushes and forces repositioning. Whether you’re breaking a deadlock or holding a stairwell, Assault has an answer without needing another class to bail it out.
- Best on: tight urban points, interior caps, mixed‑range maps where fights swing from street to room.
- Primary value: initiates pushes and sustains them by enabling fast re‑entries via beacons.
- Tradeoffs: weaker hard anti‑vehicle tools; relies on teammates to finish armor.
Support class (rank 2): the ticket saver and push extender
Support sustains fights that other classes start. Faster revives when stationary stabilize a line, and the defibrillator lets you chain revives without a cooldown or charges—if someone survives the immediate reprisal, you can keep them in the fight. Combined with Supply Bags/Pouches that restore health, ammo, and gadget uses, Support compresses downtime across your squad and stops tickets from bleeding out.
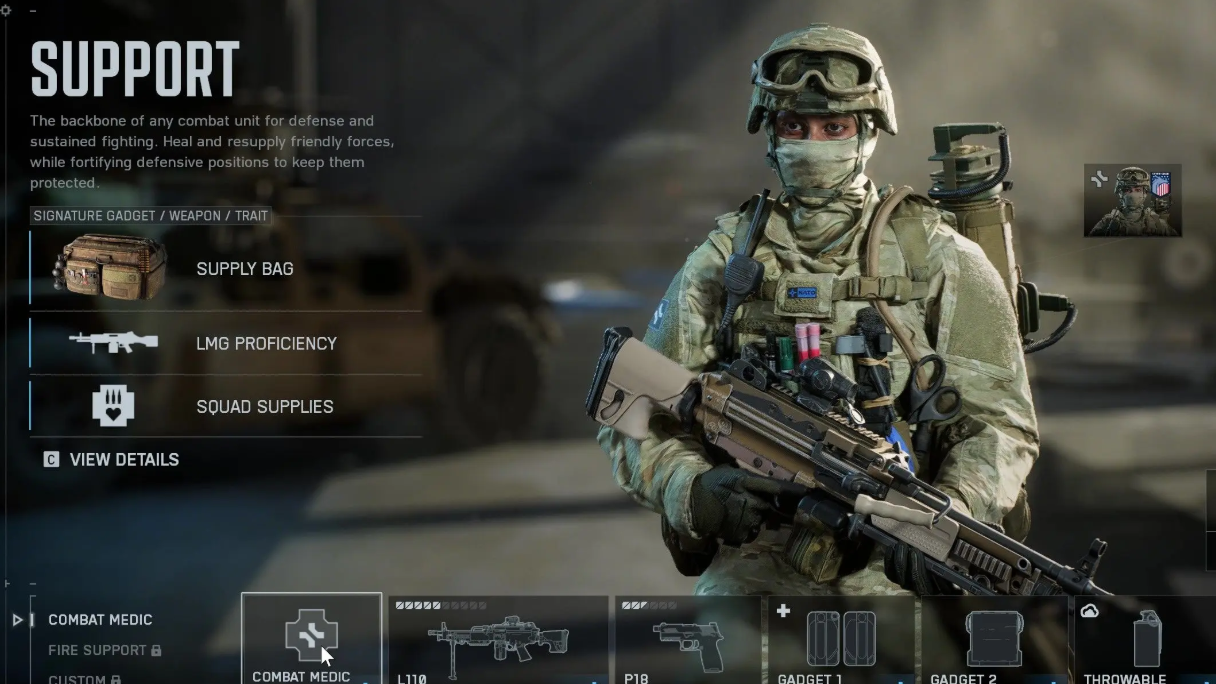
Utility is the other half of the kit. Smoke grenade launchers cover revives and crossings; deployable cover creates ad‑hoc angles or blocks chokepoints; the Intercept System disrupts grenades and missiles; portable mortar and airburst options punish clusters and soft cover. LMG proficiencies keep Support viable in longer holds and lane control. It’s not the highest fragger on paper, but the net swing from revives and resupplies often decides objectives.
- Best on: contested capture points, open approaches where smoke and cover matter, modes that reward attrition.
- Primary value: compresses respawn cycles and sustains ammo/gadget uptime for the whole squad.
- Tradeoffs: limited hard breaching tools; mobility is average during revive setups.
Engineer class (rank 3): vehicle control and area denial
Engineer is essential whenever armor or air dictates the pace. Explosive damage resistance helps you survive splash while repairing under fire. With rocket launchers, anti‑vehicle grenades and mines, and the EOD Bot, you can systematically disable or finish enemy vehicles—and keep your own rolling with the repair tool. The acoustic sensor AV mine adds top‑down threat coverage in lanes even when you’re elsewhere.
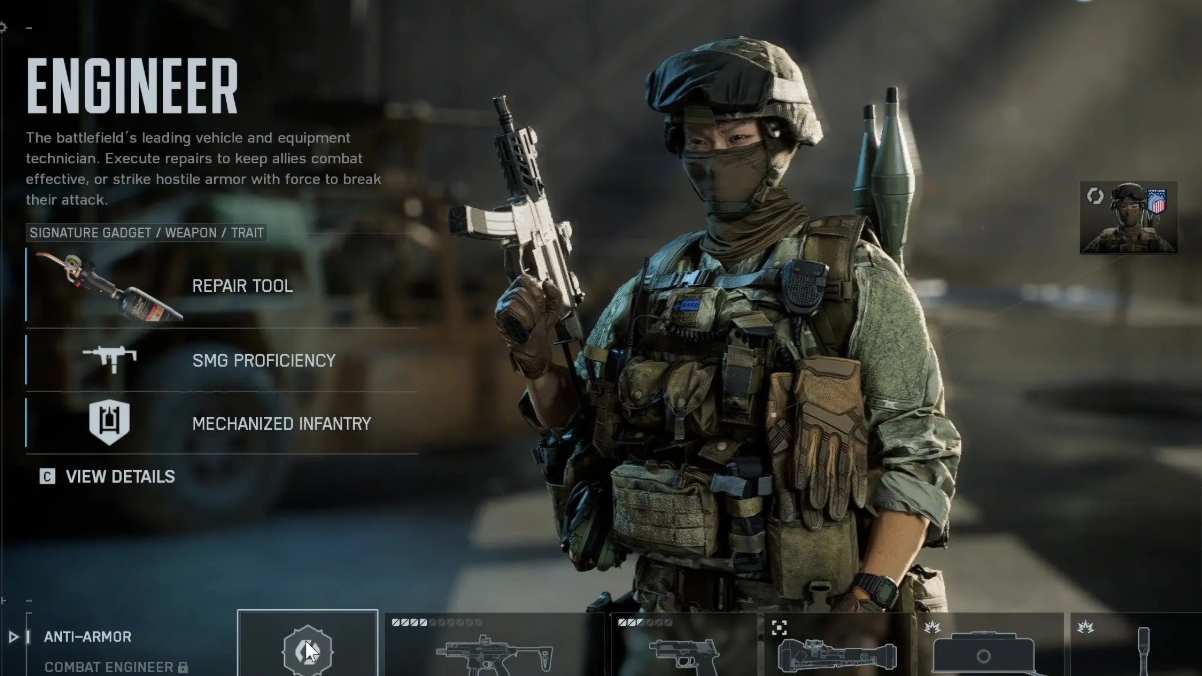
The class shines in coordinated squads—riding shotgun on a friend’s tank, watching lanes with stacked mines, or timing disables with others. In solo play, Engineers can still swing a match by shutting down a problem helicopter or halting a flank with smart mine placement. SMG proficiencies help in close quarters, but in straight infantry duels on open ground, Assault and Support typically have the edge.
- Best on: vehicle‑heavy maps, open sectors with armor lanes, objectives exposed to air power.
- Primary value: flips vehicle advantage and keeps friendly armor on the field longer.
- Tradeoffs: lower infantry dueling strength in mid‑to‑long range; value dips on vehicle‑light maps.
Recon class (rank 4): sightline control and information
Recon controls when and where enemies can safely move. Sniper rifle perks—reduced sway, better breath‑hold stability, and faster bolt cycling—help lock down long lanes. Aim‑spotting automatically marks targets you ADS on, feeding intel to the team. Motion sensors reveal nearby movement on the minimap; drones extend reconnaissance; tracer darts set up lock‑ons for Engineers; decoys misdirect scope glint; C4 and anti‑personnel mines punish greedy pushes or careless vehicles.
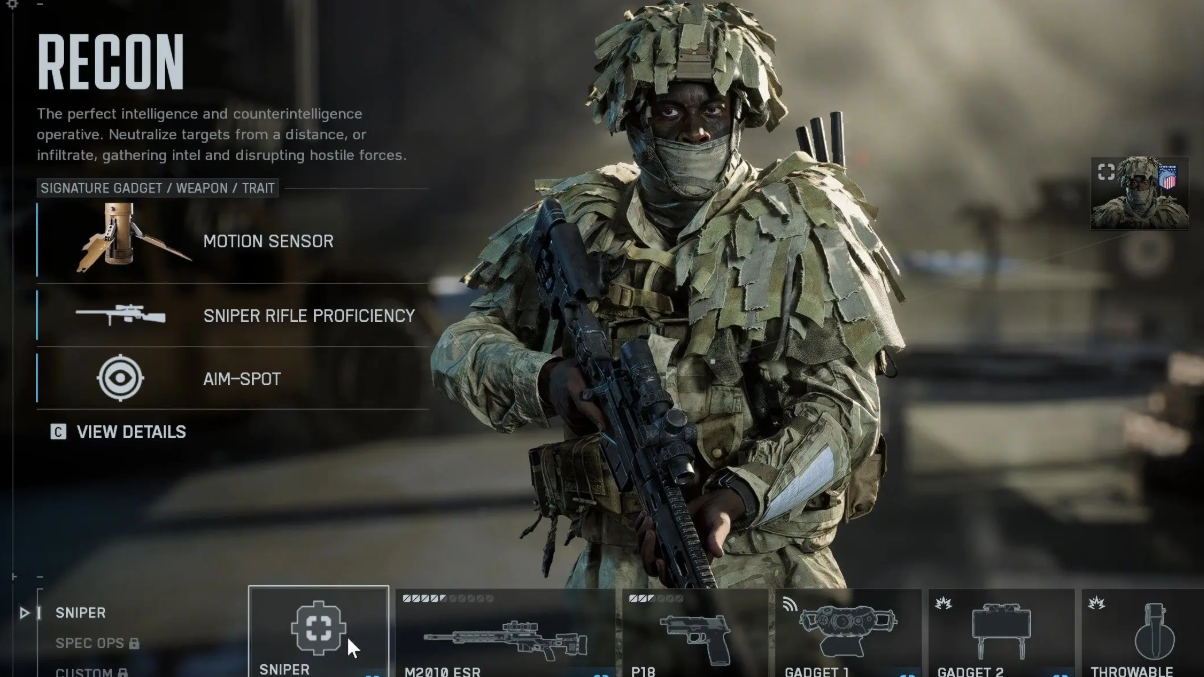
The tradeoff is pace and proximity. Without a vantage point or long line of sight, Recon’s output dips, and it’s easier to get stranded away from the objective. On maps with roof access or dominant ridgelines, Recon can choke approaches and countersnipe effectively; on cramped layouts, you’ll spend more time relocating than directly affecting caps.
- Best on: large maps with long lanes, vertical sightlines, or predictable approaches.
- Primary value: denies crossings, supplies spotting, and neutralizes enemy snipers.
- Tradeoffs: lower objective presence; dependent on positioning and air control to reach perches.
When to switch classes mid‑match
- Armor or air is farming spawns: swap to Engineer for rockets, AV grenades/mines, and repair support.
- Team wipes are stalling pushes: add Support for defib chains, supplies, and smoke corridors.
- Snipers pinning approaches: go Recon to countersnipe and spot, or Assault to breach and clear flanks.
- Indoor stalemates: lean into Assault’s breaching rounds, grenade launcher, and deploy beacon pressure.
Signature weapons, traits, and what they mean in fights
Each class has a signature weapon category and trait that quietly shifts how engagements play out. Assault rifle perks give Assault faster swaps and fluid entry into gunfights; LMG perks let Support sprint without the usual penalty, keeping heavy guns viable on the move; SMG perks tighten Engineer hip‑fire for tight quarters around vehicles; sniper perks stabilize Recon’s long‑range control. The trait layer—enhanced mobility and extra primary for Assault, faster revive for Support, explosive resistance for Engineer, aim‑spotting for Recon—defines the class’s job even before gadgets come into play.
The fastest path to more wins is balance. Assault breaks lines and holds the point, Support keeps everyone in the fight, Engineer dictates the vehicle game, and Recon decides who gets to cross a lane. Start with one or two Assaults and a Support as your baseline; add Engineer or Recon based on the map and what’s actually stopping your team. Swap when the lobby tells you to.