
The PW7A2 is Battlefield 6’s MP7 by another name: a blistering 947RPM submachine gun that stays remarkably flat while you hold the trigger. That combination makes it lethal for tight angles, fast flanks, and point holds where reaction time decides fights. Below are three grounded builds—an all‑rounder for aggressive players, a low‑level starter set, and a high‑level stealth setup—plus class and gadget pairings that complement the gun’s strengths.
Best PW7A2 loadout (aggressive flanker)
This build leans into the PW7A2’s near-zero recoil and high hip-fire reliability, prioritizing speed and close‑range consistency without overspending on handling that’s already excellent.
| Slot | Attachment | Points | What it does for you |
|---|---|---|---|
| Muzzle | Single‑Port Brake | 5 | Minor recoil trim without heavy penalties. |
| Barrel | 180mm Standard (Basic) | 10 | Snappy ADS; no need to chase heavier barrels here. |
| Underbarrel | Slim Angled | 20 | Lower initial kick and faster ADS transition. |
| Magazine | 30RND Magazine | 5 | Keep mobility high; the gun’s TTK covers the smaller mag. |
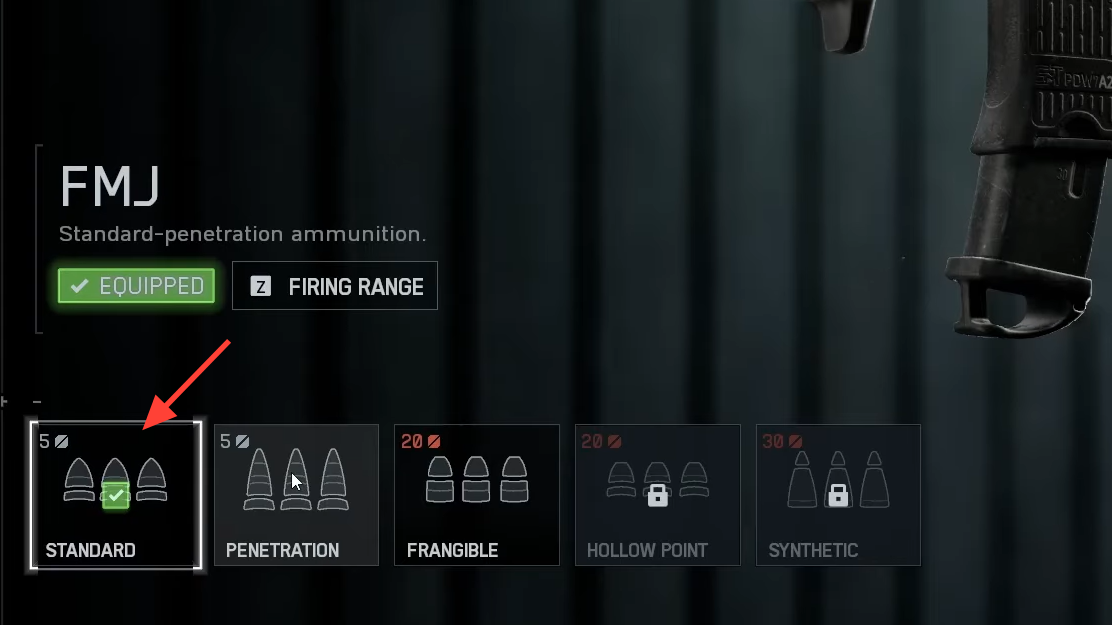
| Ammunition | Hollow Point | 20 | Slight headshot damage boost; can shave a bullet off close‑range kills. |
| Optic | Mini Flex 1.00x | 10 | Clean sight picture for snap shots in CQC. |
| Accessory | 120MW Blue | 30 | Big hip‑fire accuracy gain; stronger confidence while sliding or shoulder‑firing. |

Notes:
- Use the Alloy Vertical underbarrel until Slim Angled unlocks at Mastery 17.
- The Heavy 180mm Prototype barrel unlocks at Mastery 14, but you don’t need it for this role.
- If you prefer a larger magazine, free points by dropping the muzzle or optic, or by using a lower‑power laser. Expect a mobility hit on bigger mags.
Best PW7A2 loadout (low‑level starter)
All pieces in this set arrive early in Mastery, so you can level the gun without bad compromises. It keeps recoil predictable, improves hip‑fire for panic fights, and gives you a tidy 1x sight.
| Slot | Attachment | Purpose |
|---|---|---|
| Muzzle | Linear Comp Converter | Stabilizes climb and helps keep the dot on target. |
| Barrel | 180mm Standard (Basic) | Fast ADS; ideal for room‑to‑room clears. |
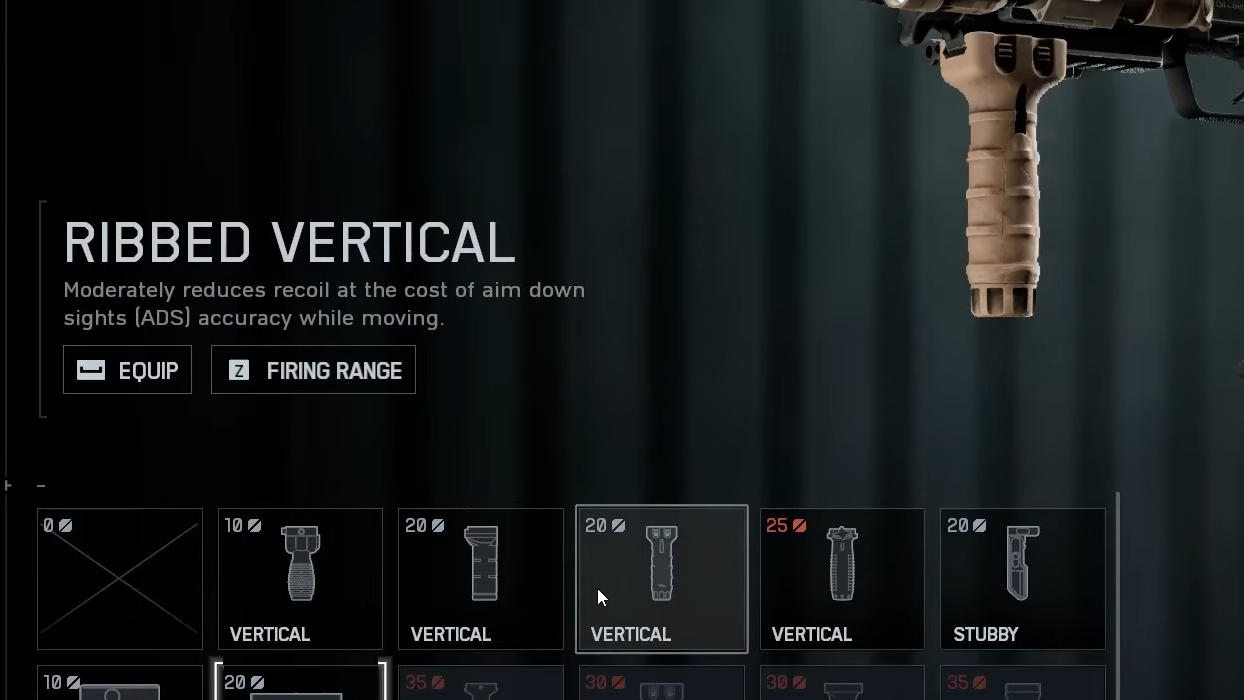
| Underbarrel | Ribbed Vertical | Simple, reliable recoil control while ranking up. |
| Magazine | 30RND Mag | No early mobility penalties; reload often between skirmishes. |
| Ammunition | Standard FMJ | Baseline damage profile; no point overhead. |
| Left Accessory | Flashlight | Utility in dark interiors; be mindful of visibility. |
| Right Accessory | 5 MW Red Laser | Hip‑fire tightening for reactive shots. |
| Optic | Mini Flex 1.00x | Clear reticle for close‑quarters tracking. |
Best PW7A2 loadout (high‑level stealth and sustain)
Built for players who live in the enemy backline. You trade a touch of raw snappiness for suppression, steadier strings, and more bullets before a reload.
| Slot | Attachment | Purpose |
|---|---|---|
| Muzzle | Standard Suppressor | Softens your firing signature to support flanks and stay unannounced. |
| Barrel | 180mm Prototype Heavy | More composure during longer bursts and mid‑range taps. |
| Underbarrel | Ribbed Vertical | Consistent vertical control for extended sprays. |
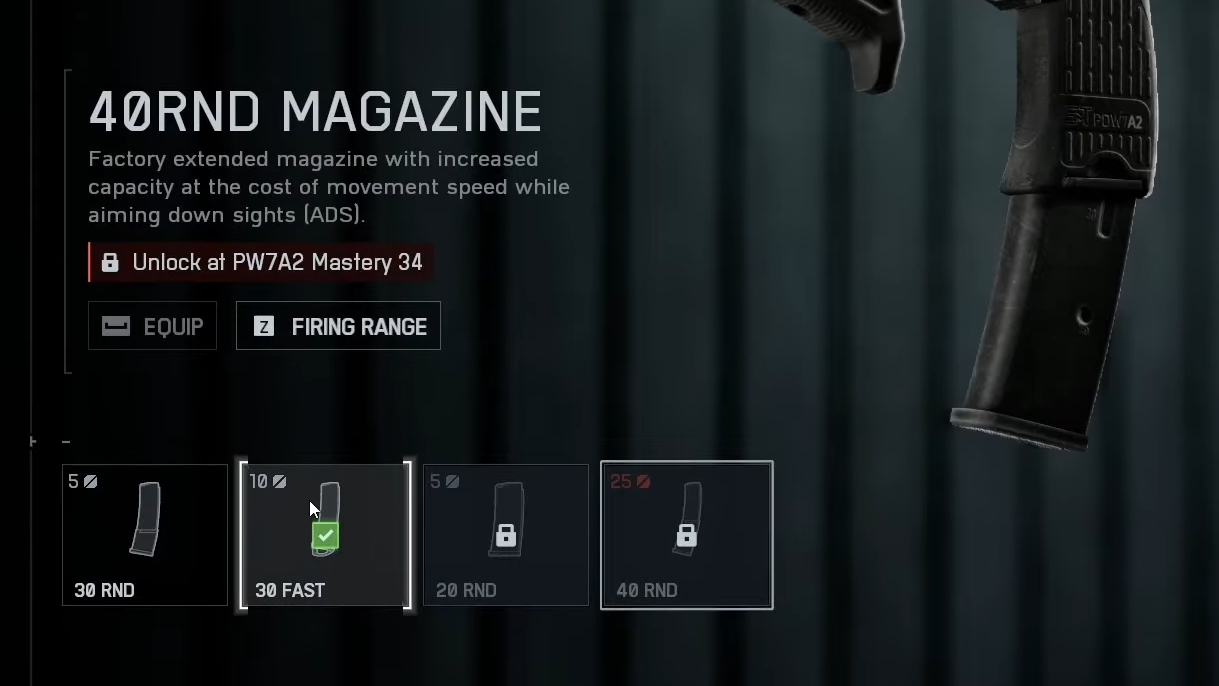
| Magazine | 40RND Magazine | Extra leeway for multi‑kills and missed shots. |
| Ammunition | Standard FMJ | Solid baseline; save points for the suppressor and mag. |
| Right Accessory | 5 MW Green Laser | Hip‑fire and strafe ADS steadiness in aggressive pushes. |
| Optic | Mini Flex 1.00x | Uncluttered 1x for fast target acquisition. |
Trade‑off: The heavier barrel and larger mag cost a bit of mobility and ADS speed. If you start losing opening peeks, swap back to the Basic barrel.
Alternate PW7A2 loadout (range‑leaning control)
If your fights stretch into short‑to‑mid corridors, this setup tightens recoil even further and smooths transitions between ranges.
| Slot | Attachment | Points | Intent |
|---|---|---|---|
| Muzzle | Convertor | 10 | Cleaner recoil profile for controlled bursts. |
| Barrel | Basic | 10 | Keeps ADS quick while you contest mid halls. |
| Underbarrel | Alloy Vertical | 20 | Stability for brief two‑ to three‑round taps. |
| Optic | OSA‑7 1.00x | 10 | Simple dot for precise micro‑adjustments. |
| Ammunition | Synthetic | 30 | Points investment aimed at consistency beyond point‑blank. |
| Magazine | 30RND Fast Mag | 10 | Faster reload cadence to sustain pressure. |
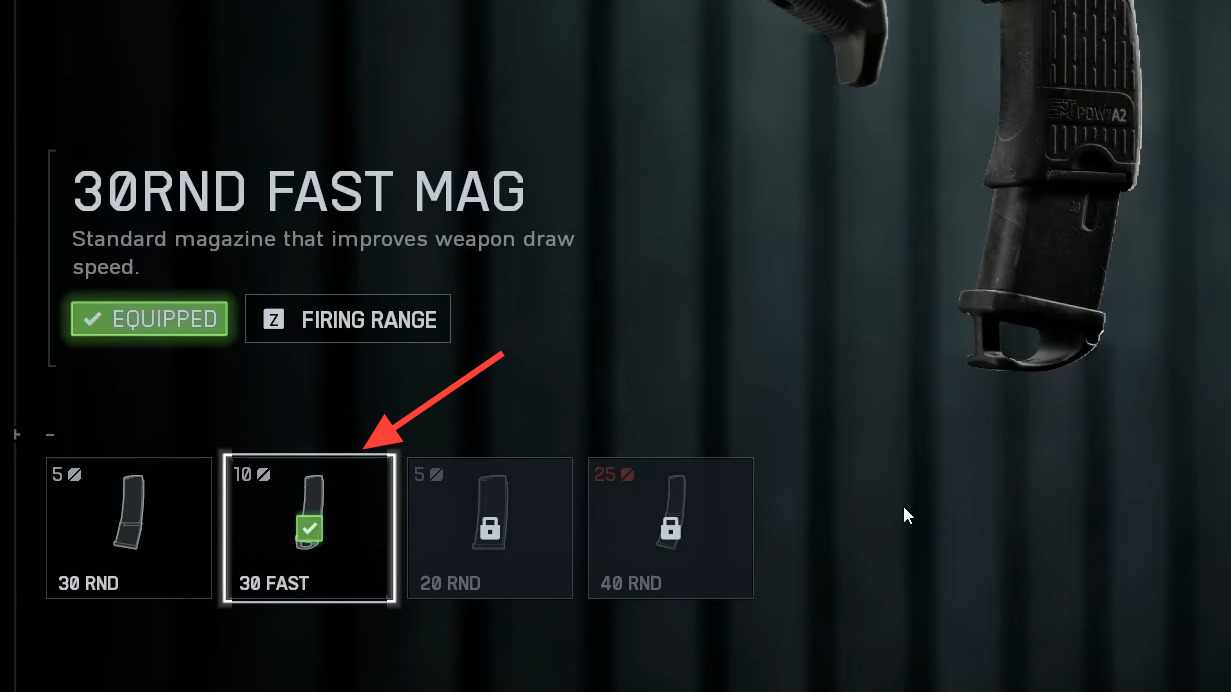
If you struggle with getting caught mid‑reload, the Fast Mag can be more valuable than a bigger mag’s extra ten rounds, especially on objective churn.
Ammo, mags, and laser trade‑offs
- Hollow Point slightly raises headshot damage and can reduce shots‑to‑kill up close. It costs points—use it when you’re reliably landing headshots.
- 40‑round magazines reduce mobility and ADS speed. On smaller maps, the standard 30 can be faster overall if you reload between engagements.
- High‑power lasers greatly tighten hip‑fire but are more conspicuous. If you’re getting chased after opening shots, step down to a lower‑power laser or go optic‑only.
Best class and gadgets to pair with the PW7A2
The Engineer class complements this SMG’s identity. Improved hip‑fire control fits the PW7A2’s strengths, and Anti‑Armor field specs let you contribute against vehicles without switching away from an aggressive primary. A practical Engineer kit:
- Secondary: a fast‑handling sidearm (e.g., P18) to clean up during reloads.
- Gadget 1: RPG‑7V2 for reactive anti‑vehicle pressure.
- Gadget 2: AV Mine to trap predictable vehicle lanes near contested points.
- Throwable: Frag to flush stairwells and corners before committing.
On infantry‑only modes or maps with few vehicles, Assault is a strong alternative purely for the sling utility—carry a carbine/DMR for lanes where the PW7A2 falls off, or a shotgun to double down on close‑quarters control.
The throughline across all of these builds is simple: let the PW7A2’s recoil profile work for you. Keep your attachments lean, prioritize quick ADS and hip‑fire confidence, and spend points where they actually change fight outcomes—mag size for multi‑kills, a suppressor for flanks, or Hollow Point if your headshots are on demand.