
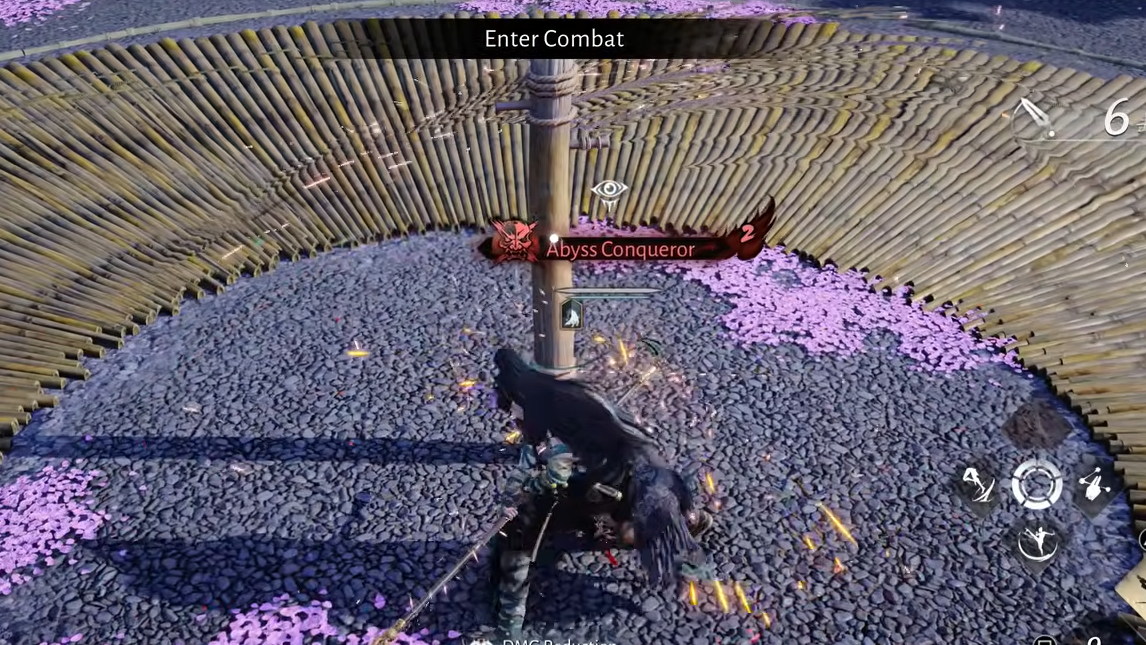
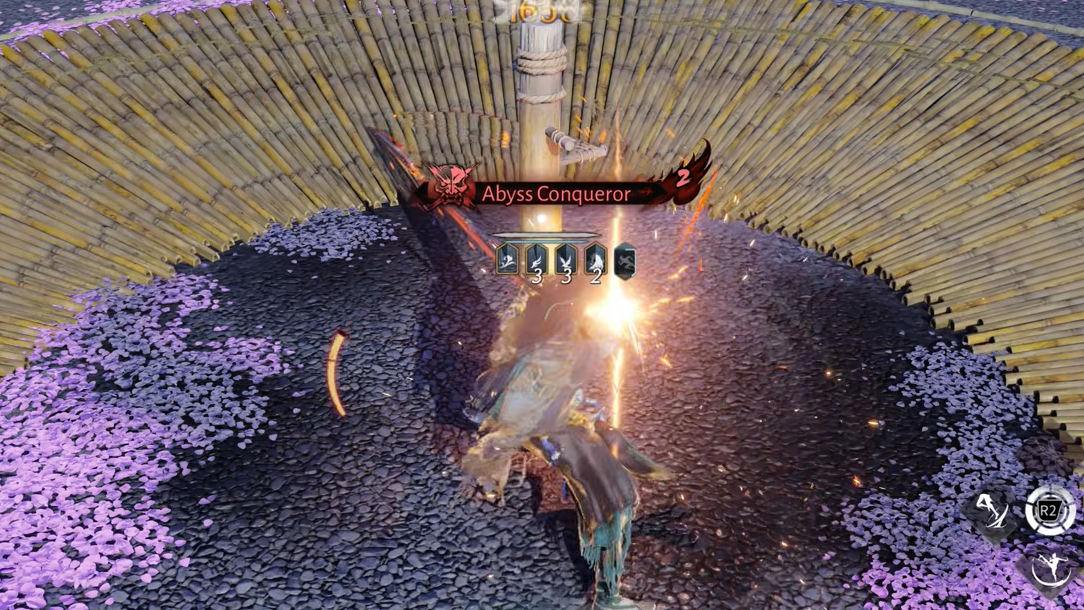
The Bellstrike Umbra path in Where Winds Meet pairs the Strategic Sword with the Heavenquaker Spear to create a damage-over-time (DoT) build that stacks bleed, amplifies burst windows, and rewards precise buff management. This combination excels at sustained damage output in both solo and group content, with strong performance in raids and PvP when executed correctly.
Quick answer: Apply 5 bleed stacks with Strategic Sword's Inner Track Slash, swap to Heavenquaker Spear to cast Sober Sorrow and charge attack for Soul Shaken stacks, then return to Strategic Sword to detonate bleed with Inner Balance Strike III and Crosswind Blade during active buffs.
Build Overview and Role
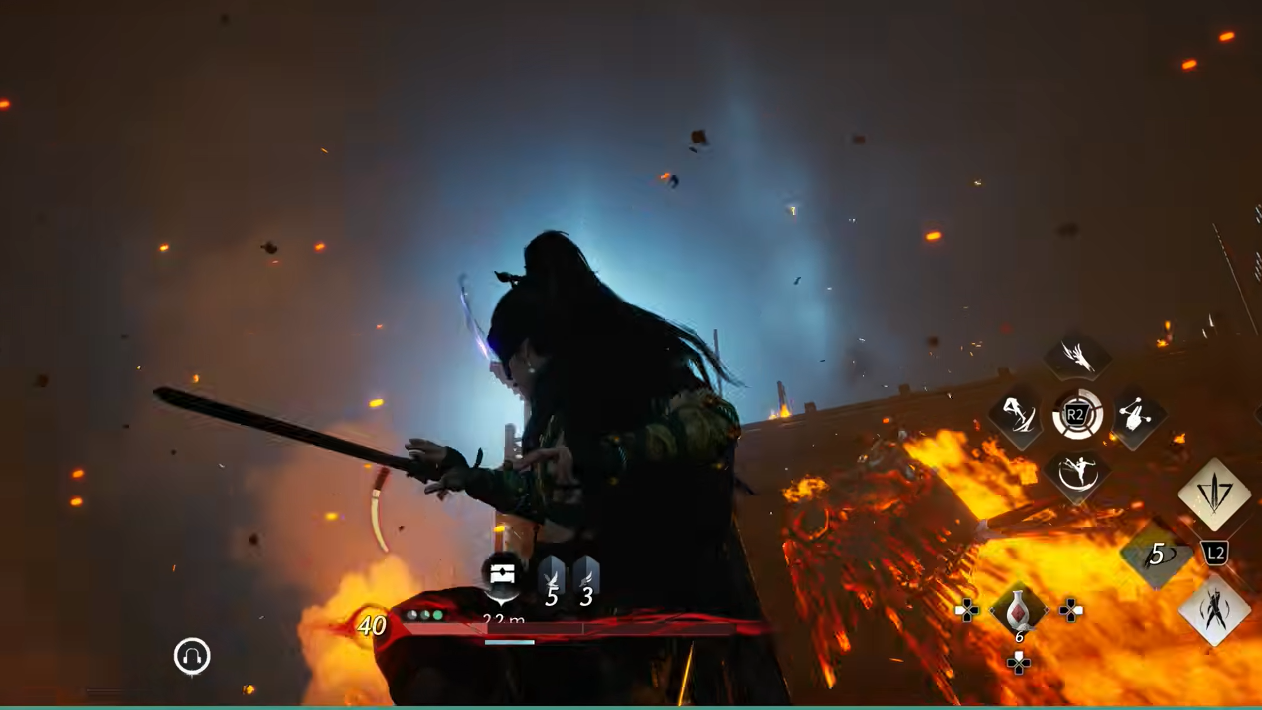
Bellstrike Umbra focuses on applying bleed status effects to trigger frequent damage ticks, then increasing your own damage multiplier to eliminate targets faster. The build retains decent mobility but trades control and survivability for raw DPS. Your primary weapons are the Strategic Sword and Heavenquaker Spear, both following the Bellstrike Umbra path.
Strategic Sword applies bleed stacks quickly and detonates them for high burst damage. Heavenquaker Spear provides self-buffs and additional DoT amplification through Soul Shaken stacks. Together, they create tight burst windows where your damage output spikes significantly.
Martial Arts Skills and Weapon Rotation
Strategic Sword and Heavenquaker Spear each contribute specific skills to the rotation. Understanding when to swap weapons and which skills to prioritize is essential for maintaining uptime on buffs and maximizing bleed detonation damage.
Strategic Sword Skills
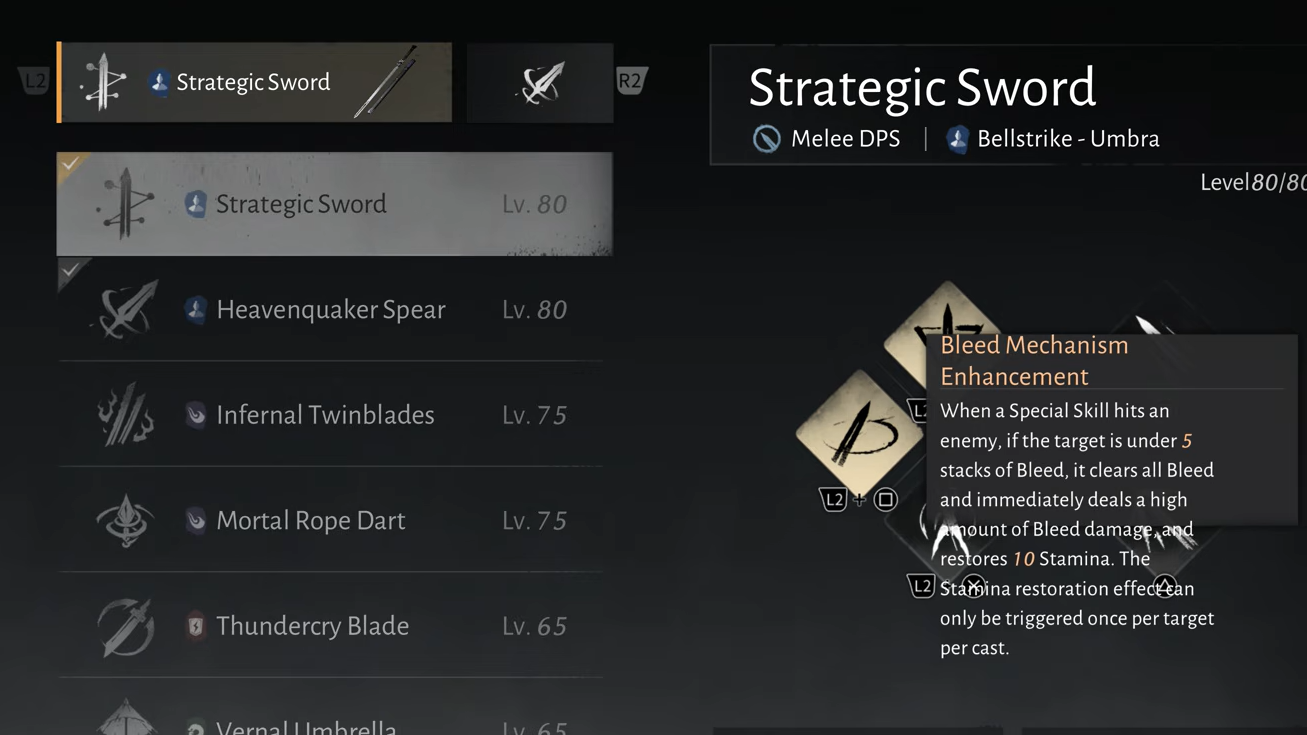
The Strategic Sword's second stage of Inner Track Slash applies all 5 bleed stacks in one cast, making it the fastest way to set up your burst. Inner Balance Strike III is your primary damage skill during buff windows, and it pairs with Crosswind Blade for additional burst. The weapon's talent, Bleed Mechanism Enhancement, clears all bleed stacks when you hit an enemy at 5 stacks with a Special Skill, dealing high bleed damage and restoring 10 stamina. Bleed Penetration Enhancement increases your bleed damage calculation by adding penetration based on max Physical Attack, up to 15 points.
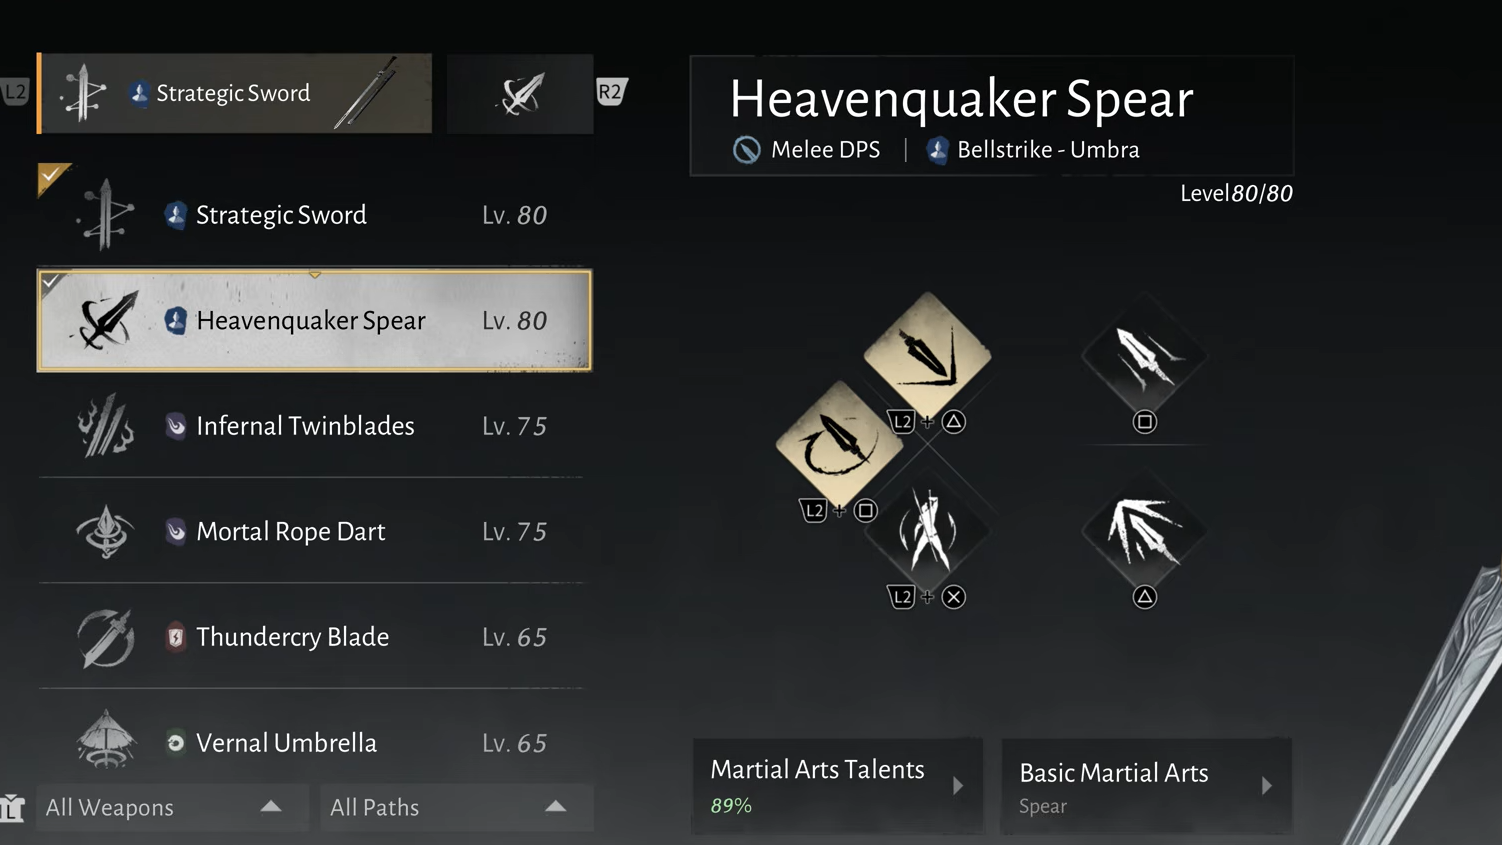
Heavenquaker Spear Skills
Heavenquaker Spear's Sober Sorrow grants Riverflow, a 20% HP damage buff. The charged attack applies Soul Shaken stacks, which increase all DoT damage by 10% per stack for 15 seconds, stacking up to 5 times. Soul Shaken also increases high bleed damage taken by the target by 10%. Drifting Thrust and Sweep All provide additional damage options, though Sweep All is slow and less commonly used in optimized rotations.
Weapon Swap Timing
Swap between weapons manually rather than using the dual-weapon skill, which wastes time. Start with Strategic Sword to apply bleed, swap to Heavenquaker Spear to activate buffs and apply Soul Shaken, then return to Strategic Sword for your main damage loop. Animation-cancel the Heavenquaker Spear's Sober Sorrow by pressing parry after reaching around 10 combo hits to secure Riverflow and Flowing River buffs without overcommitting to the full animation.
Inner Ways (Talents)
Inner Ways provide passive bonuses and active effects that synergize with your weapon skills. The Bellstrike Umbra path recommends four core Inner Ways, with optional alternatives for PvP.
Sword Horizon (Tier 2)
After casting Strategic Sword's Martial Art Skill, Special Skill, or Charged Skill, press the skill button at the perfect timing during the ending phase to cast Crisscrossing Swords and unleash follow-up attacks. If the target has 5 stacks of bleed, this removes all bleed stacks and deals high bleed damage once. Breakthroughs increase Affinity Rate, high bleed damage, and allow you to retain bleed stacks. Upgrade Sword Horizon first because it directly increases high bleed damage and guarantees Affinity hits through Crosswind Blade Spirits, improving damage consistency and burst reliability.
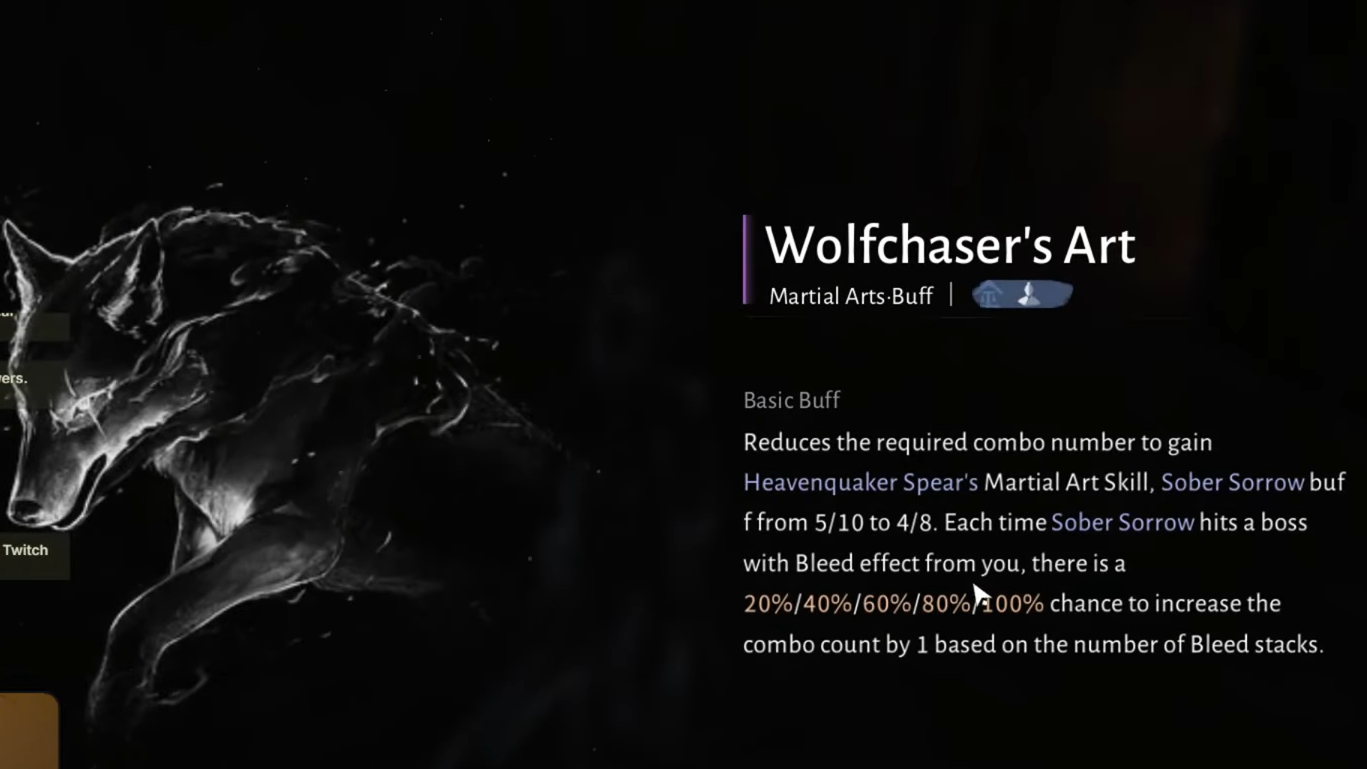
Wolfchaser's Art (Tier 2)
This Inner Way reduces the required combo count for Heavenquaker Spear's Sober Sorrow buff from 5/10 to 4/8. Each time Sorrow Without Wine hits a boss with your bleed effect, there is a 20%/40%/60%/80%/100% chance to increase the combo count by 1 based on the number of bleed stacks. Breakthroughs improve Affinity Rate and Affinity DMG Bonus. This talent accelerates buff uptime and makes it easier to maintain Riverflow and Flowing River during extended fights.
Morale Chant (Tier 2)
Morale Chant gives you an 80% chance to gain one stack of Yi River when attacking or healing. Yi River increases Physical Penetration by 2 and damage and healing by 1% for 8 seconds, stacking up to 5 times. The chance to gain Yi River is calculated once every 2 seconds. Breakthroughs increase Direct Critical Rate and add additional attacks at max stacks, providing consistent damage scaling throughout the fight.
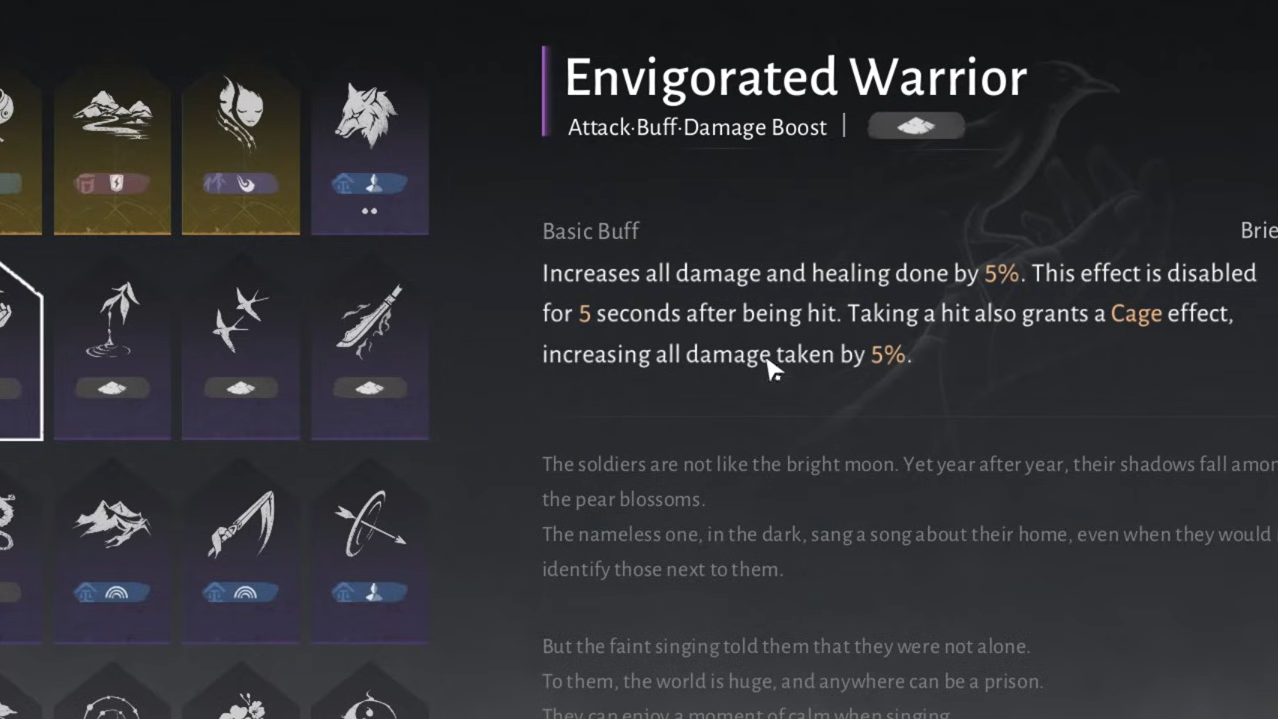
Envigorated Warrior (Tier 2)
Envigorated Warrior increases all damage and healing done by 5%. This effect is disabled for 5 seconds after being hit, and taking a hit also grants a Cage effect that increases all damage taken by 5%. This talent is strong in PvE, where you can avoid damage, but in PvP, the increased damage taken becomes a liability. Consider replacing it with Adaptive Steel in PvP scenarios.
Alternative Inner Way for PvP: Adaptive Steel (Tier 1)
Adaptive Steel grants a Martial Art effect based on your current blade weapon. The Sword effect has a 10-second cooldown, while Dual Blades has a 25-second cooldown. For Sword, you gain a 100% chance to apply one stack of bleed to the target when dealing Affinity DMG. This provides more consistent bleed application in PvP without the survivability penalty of Envigorated Warrior.
Optional Inner Ways
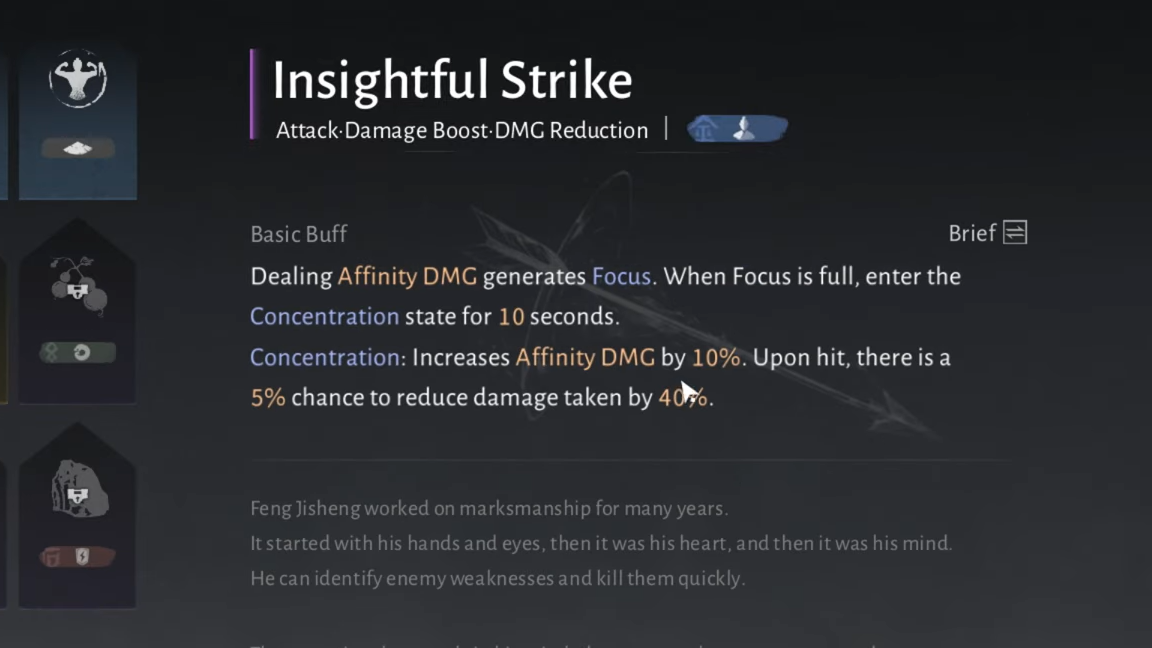
Insightful Strike (Tier 2) generates Focus when dealing Affinity DMG, entering a Concentration state that increases Affinity DMG by 10% and reduces damage taken. Tier 3 increases Affinity Rate by 3% while in Concentration. Fivefold Bleed (Tier 4) adds a 10% chance to apply Weeping Blood DoT, which deals piercing damage at 5 stacks. Bitter Seasons (Tier 3) has a 10% chance to apply Poison, reducing the target's Physical Defense by 1.2% for 10 seconds, stacking up to 5 times. These are situational and less commonly used than the core four.
Mystic Skills
Mystic Skills provide additional damage, control, and utility. The build uses different skill sets for PvE and PvP, with some overlap in the core offensive skills.
Core PvE Mystic Skills
Dragon's Breath (Tier 4): Drink to enter Intoxicated. Breathe fire with Qi, dealing damage over 2 hits plus Ignition. Gain 7.5% Damage Reduction and Fortitude. Intoxicated lasts 30 seconds, and Dragon's Breath can be used without drinking once Intoxicated. Ignition causes the target to take damage every 0.5 seconds for 8 seconds. Use Dragon's Breath after Heavenquaker Spear's charged attack to apply burn, then animation-cancel with parry once the skill hits the enemy.

Drunken Poet (Tier 4): Drink deeply to enter the Intoxicated state, imitating the drunken grace of the Poet Immortal. Cast repeatedly for up to 5 strikes, each consuming 6 Vitality. Intoxicated lasts 30 seconds. Drunken Poet can be used without drinking once Intoxicated. Pre-drink before using Dragon's Breath, and spam Drunken Poet when you are low on endurance, and Soaring Spin is on cooldown, especially if the boss is burning and you still have Heavenquaker Spear buff active. Drunken Poet turns burn into explosive bonus damage.
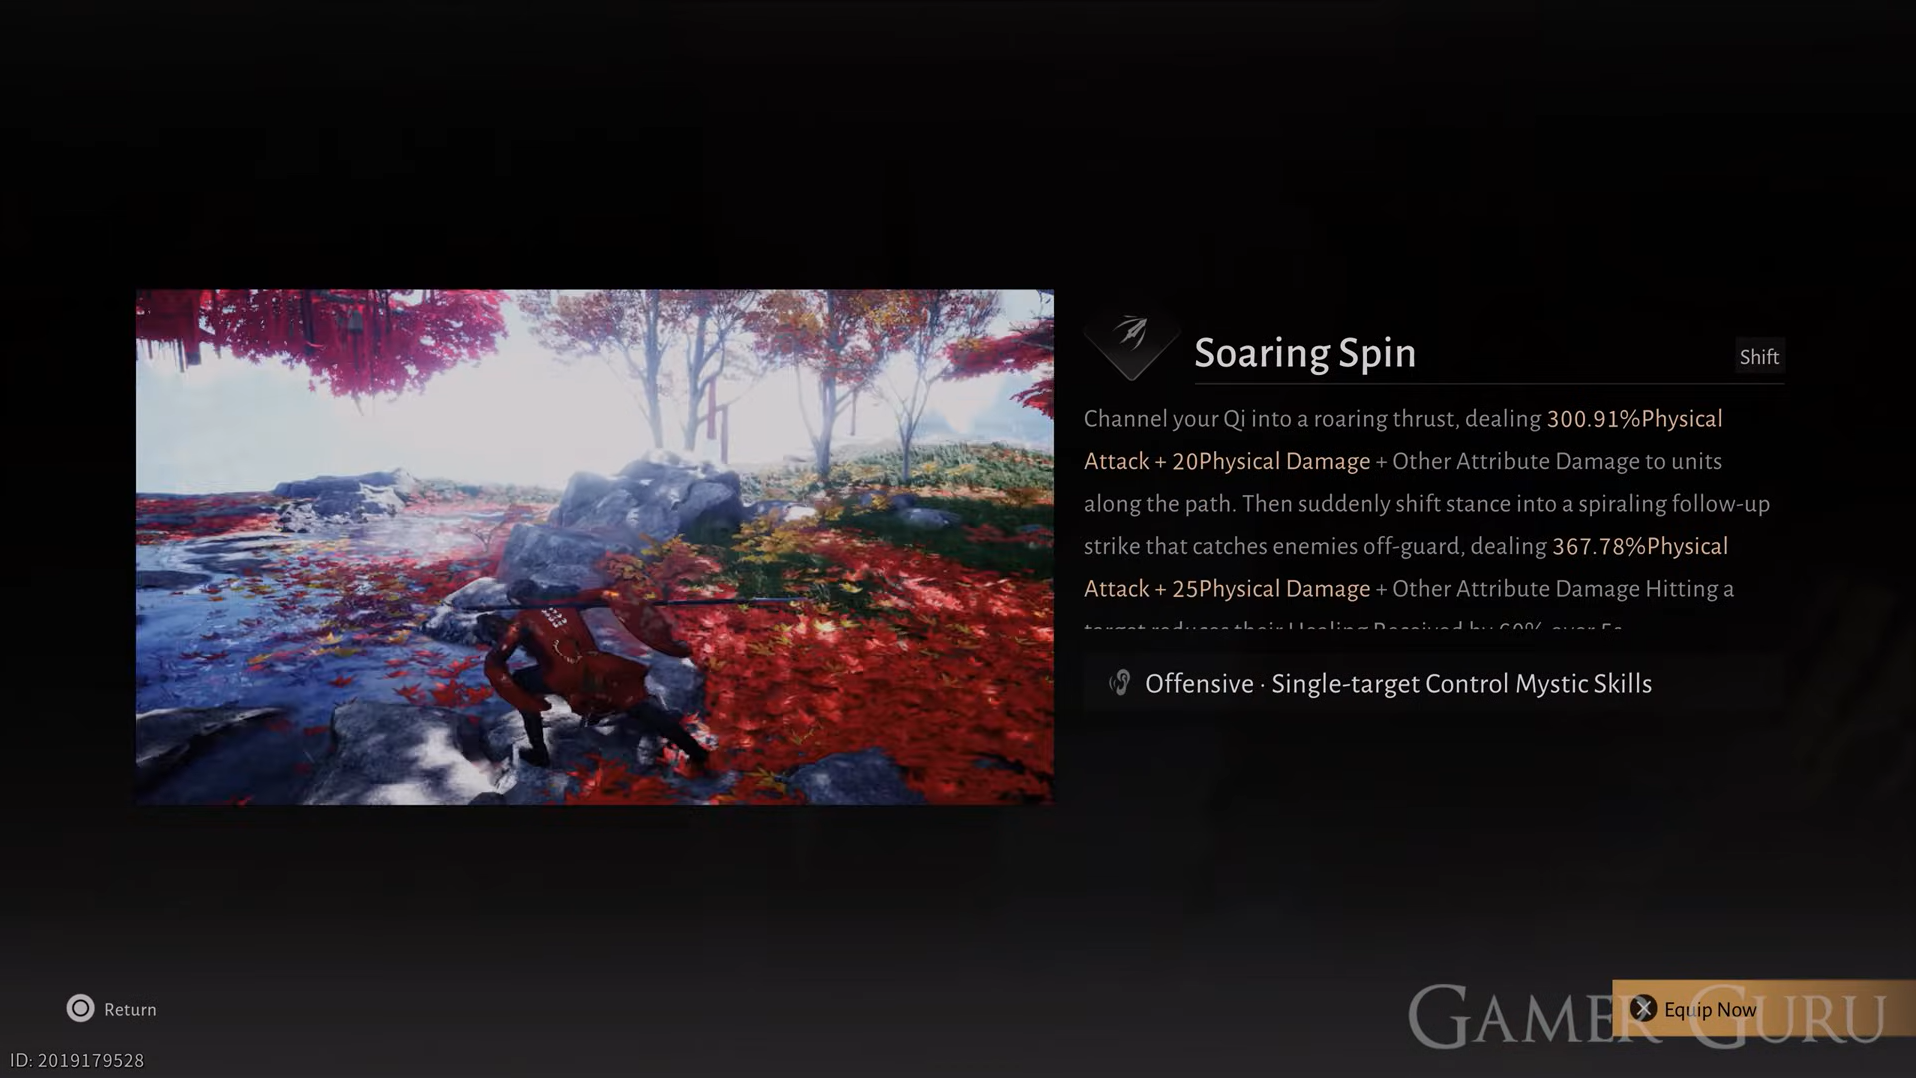
Soaring Spin: Channel your Qi into a roaring thrust, dealing damage to units along the path, then suddenly shift stance into a spiraling follow-up strike. Hitting a target reduces their Healing Received by 60% over 5 seconds. Use Soaring Spin when your endurance is low to close the distance and reposition yourself. This is the highest damage Mystic Art in the rotation.
Cloud Steps: Stomp on an enemy's shoulder to deal Physical Damage and other Attribute Damage effective against Cavalry and other units with Unstable Poise. Cloud Steps is useful for gap closing and securing free damage on targets, especially enemies on mounts.
Additional PvE Mystic Skills
Golden Body provides a defensive option for mistakes in raids and can be swapped to Tai Chi during exploration. Meridian Touch and Celestial Seize are useful for perception skills against certain bosses, such as the lion boss. Ghost Bind is effective against hordes of enemies. Flaming Meteor (Tier 2) charges ahead, stomping the earth to leap into the air, then crashes down like a meteor, granting 15% Damage Reduction and Super Armor during the skill. This is good for AoE and Guild Wars.
Core PvP Mystic Skills
Drunken Poet: In PvP, Drunken Poet gives tenacity while you are attacking with it, allowing you to start your true combo without worrying whether the enemy will be faster. The combo is Drunken Poet two times, then do your true combo. If you are on Heavenquaker Spear, use Sober Sorrow (Q). If you are on Strategic Sword, use light attack three times, then Q immediately as the third light attack hits. You can feint with Drunken Poet through your opponent's Serene Breeze. If they are burning, Drunken Poet explodes and deals massive Qi damage for a quick finisher, followed by another Dragon's Breath.

Dragon's Breath: In PvP, Dragon's Breath gives both tenacity and 40% damage reduction, applies DoT to the opponent, and can be used after a finisher when the opponent cannot do anything about it.
Leaping Toad: Use Leaping Toad for a combo after two heavy attacks of Strategic Sword. Parry-cancel after the toad jumps, and you can continue the combo.
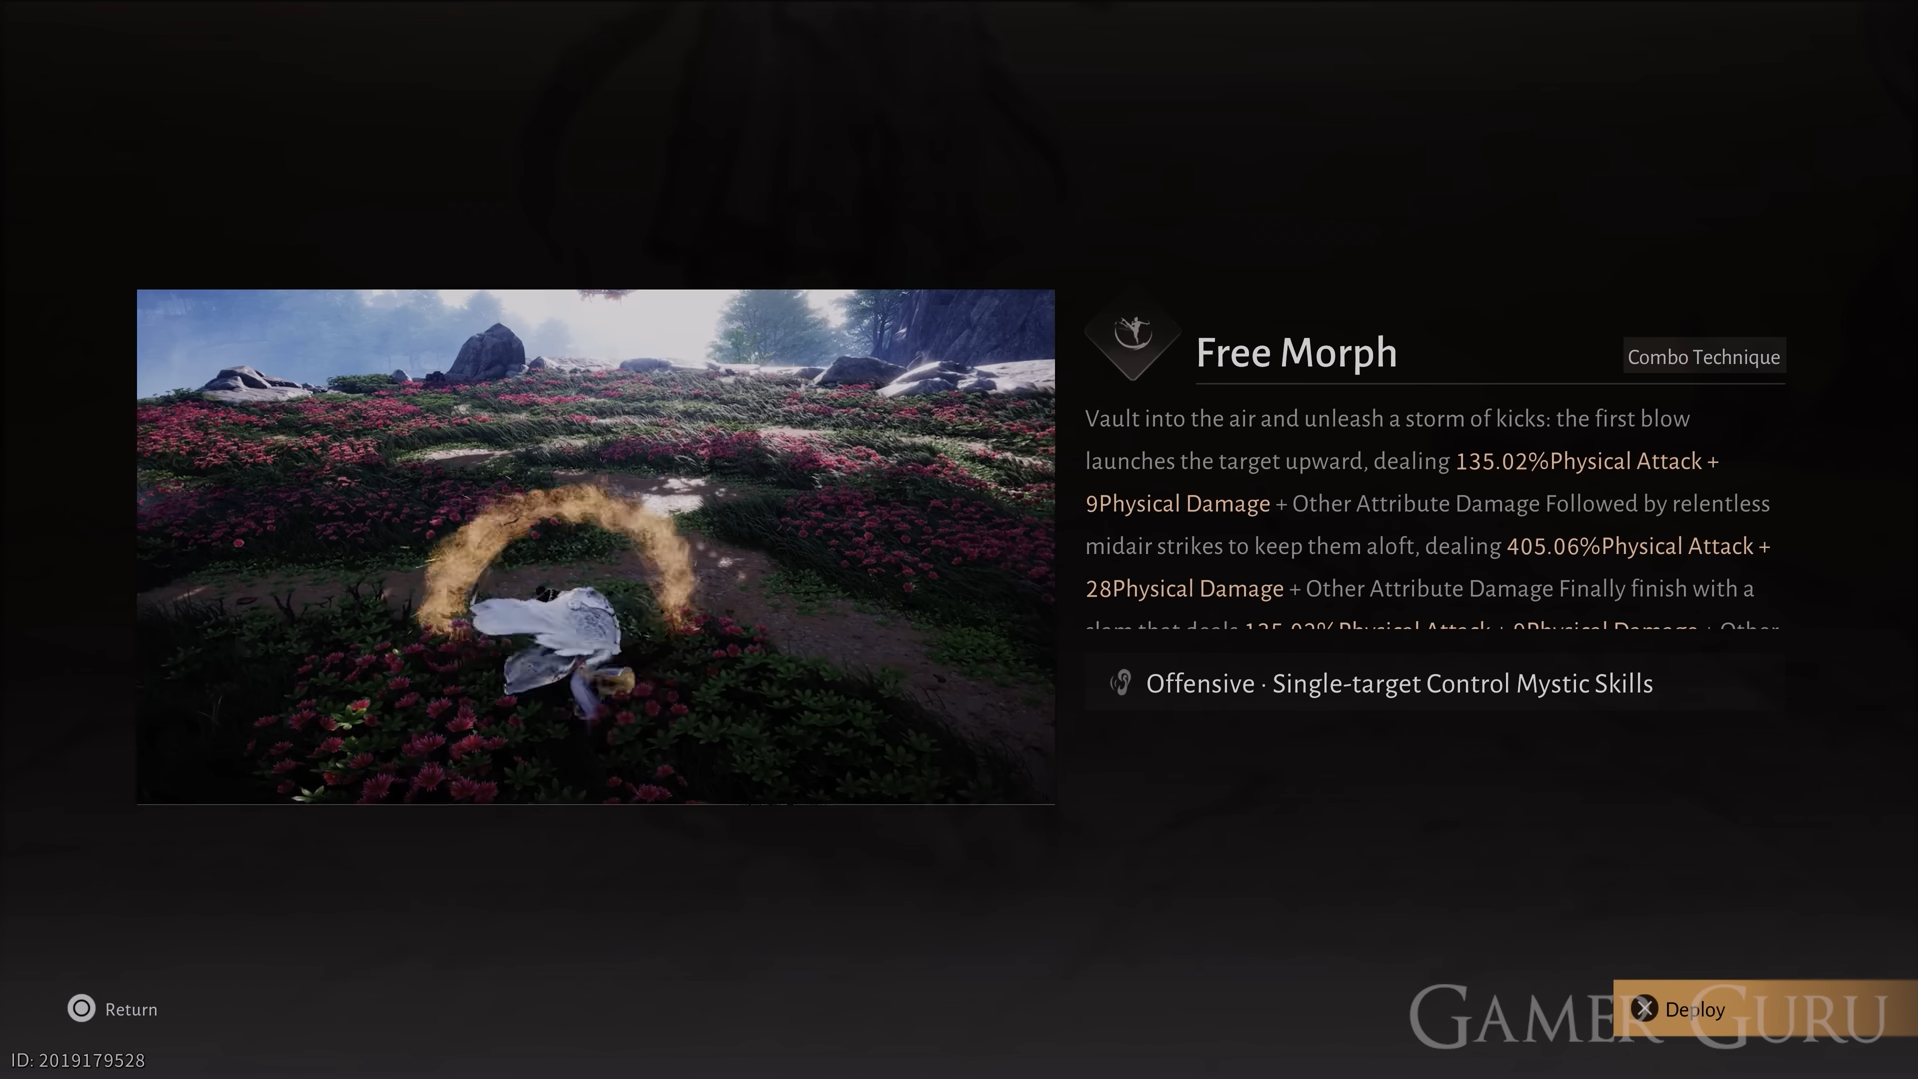
Free Morph: Use Free Morph after Strategic Sword Q to kick the opponent up. Immediately parry-cancel, switch to Heavenquaker Spear, and charge attack. This is a true combo; the enemy cannot escape.
Additional PvP Mystic Skills
Serene Breeze channels Qi into your body to clear blockages in the veins. It can be used while under attack or control effects, and on hit, reduces the target's Endurance recovery by 50% and deals damage for 8 seconds. Use Serene Breeze whenever you are caught in an enemy's combo to break free and regain control.
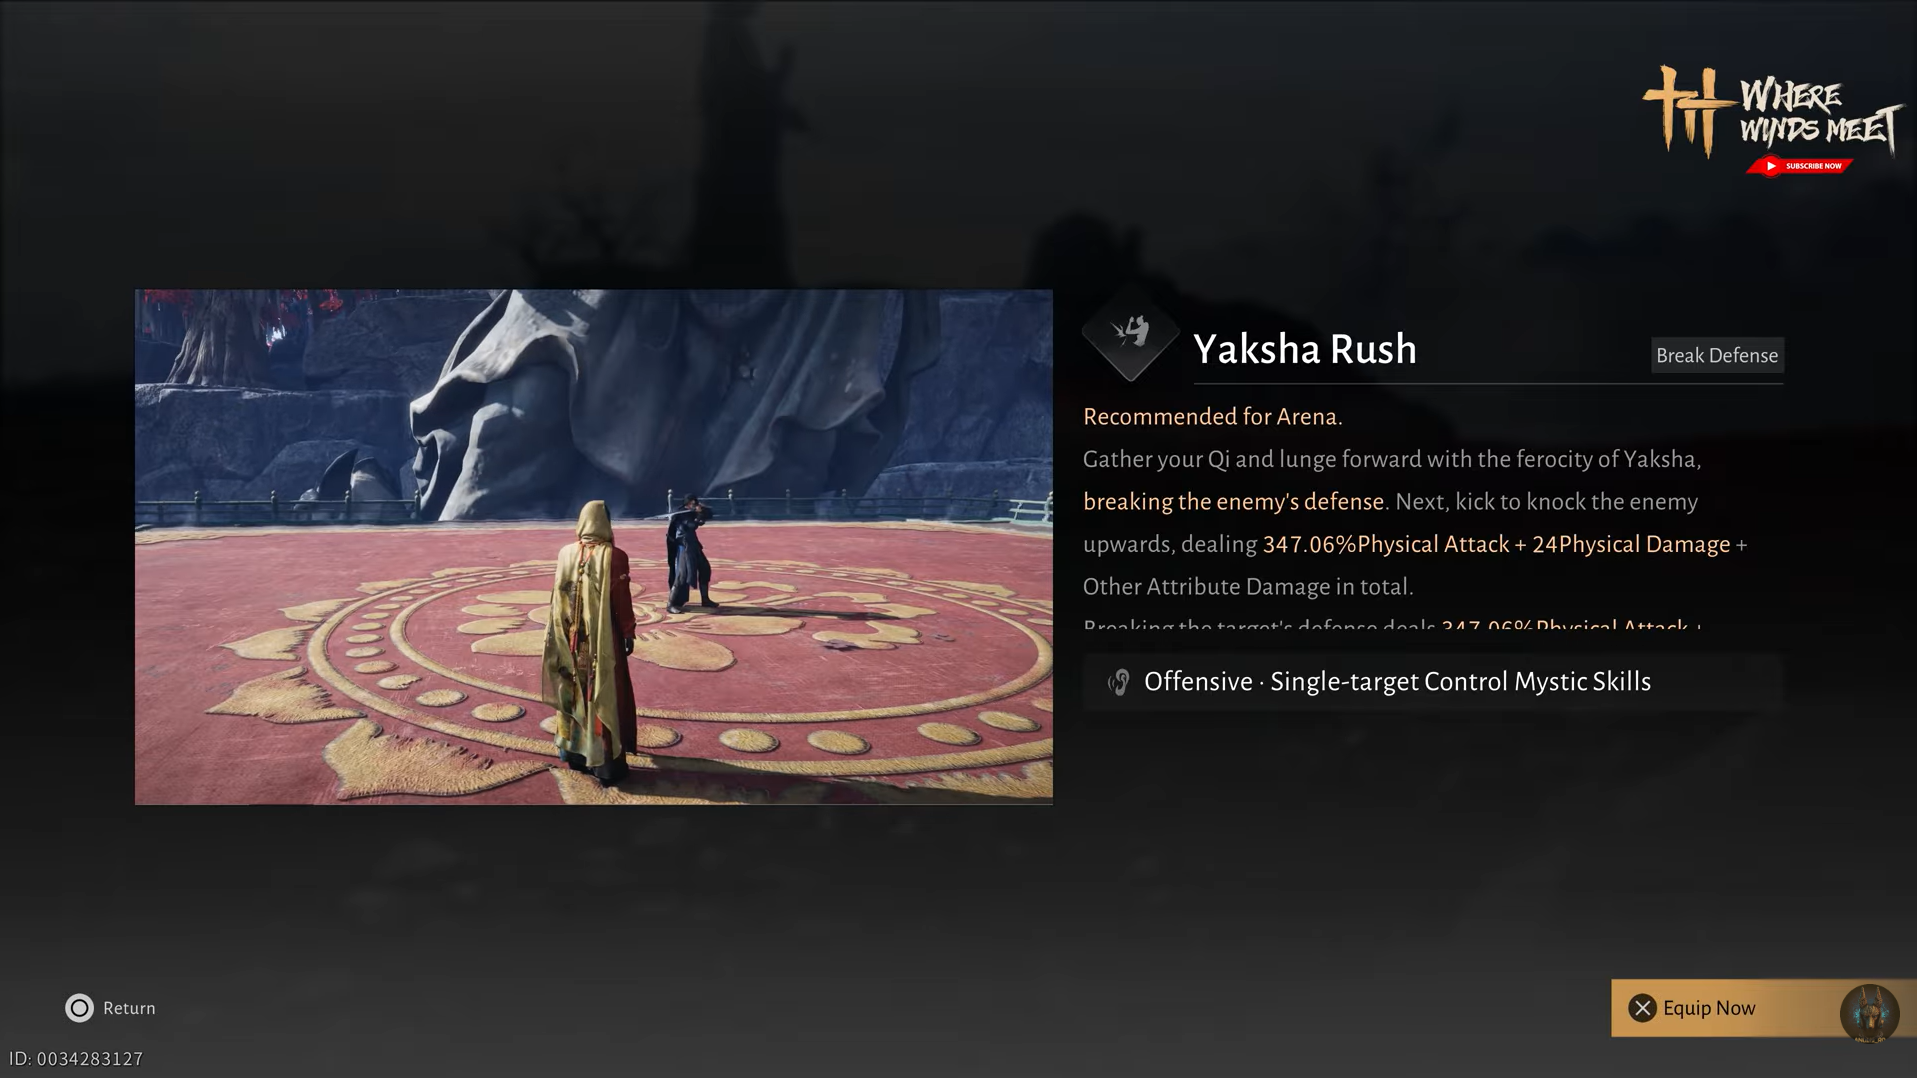
Yaksha Rush breaks guards, kicks the opponent up, and allows you to change to Heavenquaker Spear and charge attack as the opponent falls down. Meridian Touch is a poke that teleports to the enemy, acts as a gap closer when they are trying to run away with depleted Qi, and can be pressed while spamming finishers. Wolflike Frenzy is high damage and useful in both PvE and PvP. Use it after a parry to knock enemies down and up, then finish with Guardian Palm in the air. However, the setup animation is long, and in high-rank PvP, players can parry every Wolflike Frenzy if they spam deflection.
Gear Sets and Stat Priorities
Gear sets provide significant bonuses that amplify your damage and survivability. The Bellstrike Umbra build recommends Hawkwing for weapons and Eaglerise for armor.
Hawkwing Set (Weapons)
The Hawkwing Set increases Affinity Rate with 2 pieces. With 4 pieces, when any of your damage triggers Affinity, you gain Hawkwing: Increases Physical Attack by 2% for 5 seconds, stacking up to 5 times. This set provides the most value due to high affinity bonuses, helping you deal more damage with the amount of hits you inflict. The build's DoT nature means you often fight high HP enemies before bursting them with bleed's amplified DoT effect, letting you capitalize on the damage bonus even more. Hawkwing pieces can be obtained from the Still Shore campaign, Gleaming Abyss campaign, Sword Trial, and Group Dungeon.
Eaglerise Set (Armor)
The Eaglerise Set increases Physical Defense by 1 with 2 pieces. With 4 pieces, dealing damage over time or healing grants 1 stack of Eaglerise: Reduces damage taken by 1.2% for 10 seconds, stacking up to 5 times. At max stacks, you receive an Eagle Guard effect that reduces the next incoming damage within 10 seconds by 90% (halved when the damage comes from a boss). This effect can only trigger once every 30 seconds. Eaglerise is an easy slot-in because you can quickly apply DoT and keep the effect of Eagle Guard as much as possible. Treat Eagle Guard as a free hit you can take now and then, but avoid getting hit because the effect has a 30-second cooldown. Eaglerise pieces can be obtained from the Still Shore campaign, Gleaming Abyss campaign, Halo Peak campaign, Sword Trial, and Group Dungeon.

Stat Priority
Affinity Rate is your top priority, followed by Power, Max Physical Attack, Physical Penetration, and Max Bell Strike Attack. Affinity Rate increases your chance to trigger Affinity damage, which activates Hawkwing stacks and synergizes with Adaptive Steel and other Inner Ways. Power scales your overall damage output, while Max Physical Attack directly increases your bleed damage calculation. Physical Penetration helps bypass enemy defenses, and Max Bell Strike Attack boosts your Bellstrike path damage.
PvE Rotation and Execution
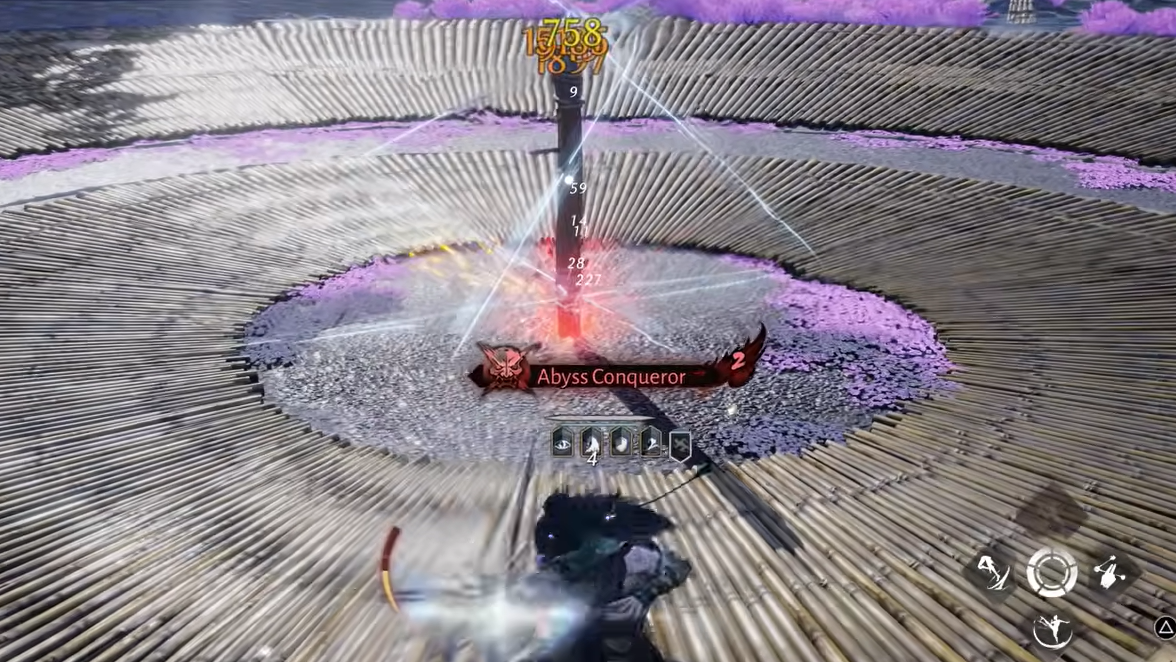
The PvE rotation focuses on stacking bleed, applying buffs, and detonating bleed during buff windows. The build's identity does not rely on raw damage per hit but rather on stacking up bleed and amplifying it for a huge burst of damage during the combo's final stage.
Step 1: Start with Strategic Sword and use Inner Track Slash (second stage) to apply 5 stacks of bleed. This is your fastest bleed application method.

Step 2: Swap to Heavenquaker Spear and cast Sober Sorrow. Build combo to around 10 hits, then animation-cancel by pressing the parry button to secure Riverflow and Flowing River buffs without overcommitting to the full animation.
Step 3: Use Heavenquaker Spear's Charged Heavy (first charge stage) to apply Soul Shaken. Stack it to 5 and cancel once the stacks are applied. You only need 5 stacks for the buff.
Step 4: Cast Dragon's Breath to apply Burn. Immediately press the parry button once the skill hits the enemy to animation-cancel. Optionally, spam Drunken Poet until you get 10 stacks of Ignition if you have the Vitality.
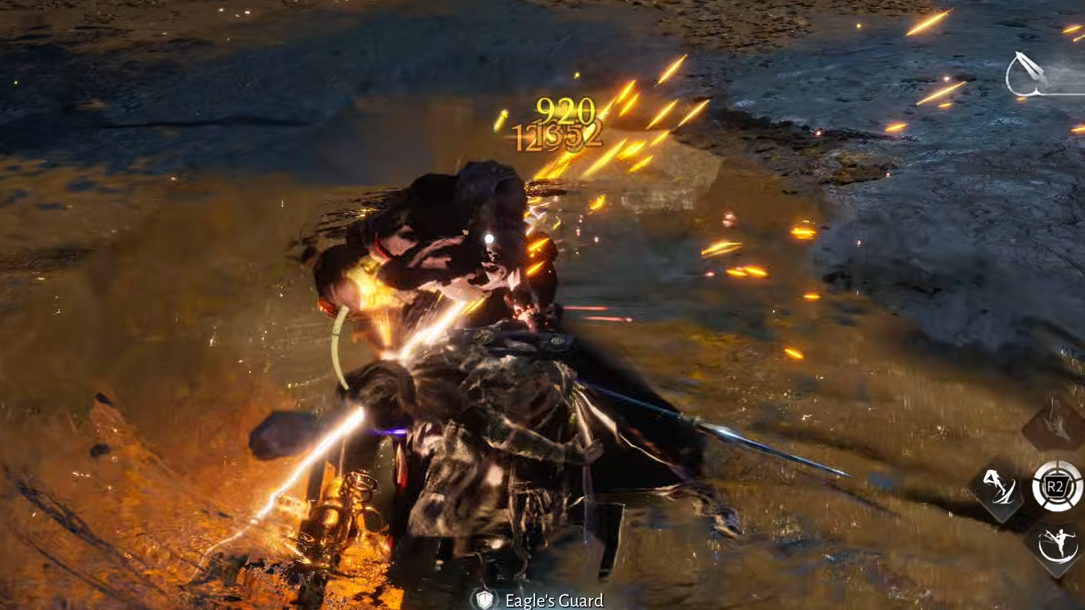
Step 5: Swap back to Strategic Sword and begin your main damage loop: Inner Balance Strike III (Special Skill), then immediately follow with Crosswind Blade. Use parry to cancel the Crosswind Blade dash as soon as you go through your target. Otherwise, you can end up a good distance away and force yourself to reposition.
Step 6: Repeat the Inner Balance Strike III + Crosswind Blade combo 3 to 4 times while buffs are active. This is your highest damage window.
Step 7: Reset the rotation once Soul Shaken or Riverflow is about to expire, and repeat from the beginning. Use Soaring Spin to close the distance and reposition yourself when your endurance is low.
During this rotation, your damage output spikes significantly when all buffs are active. Focus on maximizing the number of Inner Balance Strike III + Crosswind Blade loops you can execute before buffs expire. Avoid using Sweep All in optimized rotations because the attack is slow, and the bulk of your damage comes from bleed detonation.
PvP Tips and Execution
In PvP, a full rotation is often unrealistic. Prioritize key skills like Inner Track Slash, Sober Sorrow, and high bleed procs to maximize damage within shorter windows. Focus on stacking bleed quickly and detonating it during buff windows to make every opportunity count.
Use animation-canceling whenever necessary. Take your time and bait out enemy cooldowns before committing to your combos. After staggering them with tools like Cloud Steps, commit to your combo and weave in Meridian Touch between exchanges to chip them down and keep their Qi from recovering.
Some weapons require more careful handling. Bait out Thundercry Blade's Suncrush Gale, or deal with Vernal Umbrella users by parrying its Spring Away shots until they land, or using Cloud Steps to bring them down. Do not hesitate to retreat after a bad trade, recover safely, bait out their cooldowns again, then look for a clean stagger and combo. This build rewards aggressive play and proper combo execution after you create an opening.
Use Dragon's Breath and Drunken Poet right after an execution, and consider animation-canceling Dragon's Breath when necessary. Use Serene Breeze whenever you are caught in an enemy's combo to break free and regain control. Use Cloud Steps to close gaps quickly and secure free damage on your target. Use Soaring Spin as a gap closer and apply strong healing-reduction debuff if your opponent utilizes healing.
Divinecraft and Additional Enhancements
Divinecraft provides consumable buffs that increase your damage output. Divinecraft - Poison consumes Toxic Powder to increase HP damage by 1.0% and Qi damage by 5%, inflicting poison status. Divinecraft - Fire consumes Fire Oil to increase HP damage by 1.5% and apply Burn to the combat. Use these consumables in high-tier raids and PvP matches to maximize your damage potential.
The Bellstrike Umbra build is one of the strongest DoT-focused builds in Where Winds Meet when executed correctly. Mastering the weapon swap timing, buff management, and animation-canceling techniques will significantly improve your performance in both PvE and PvP content.