
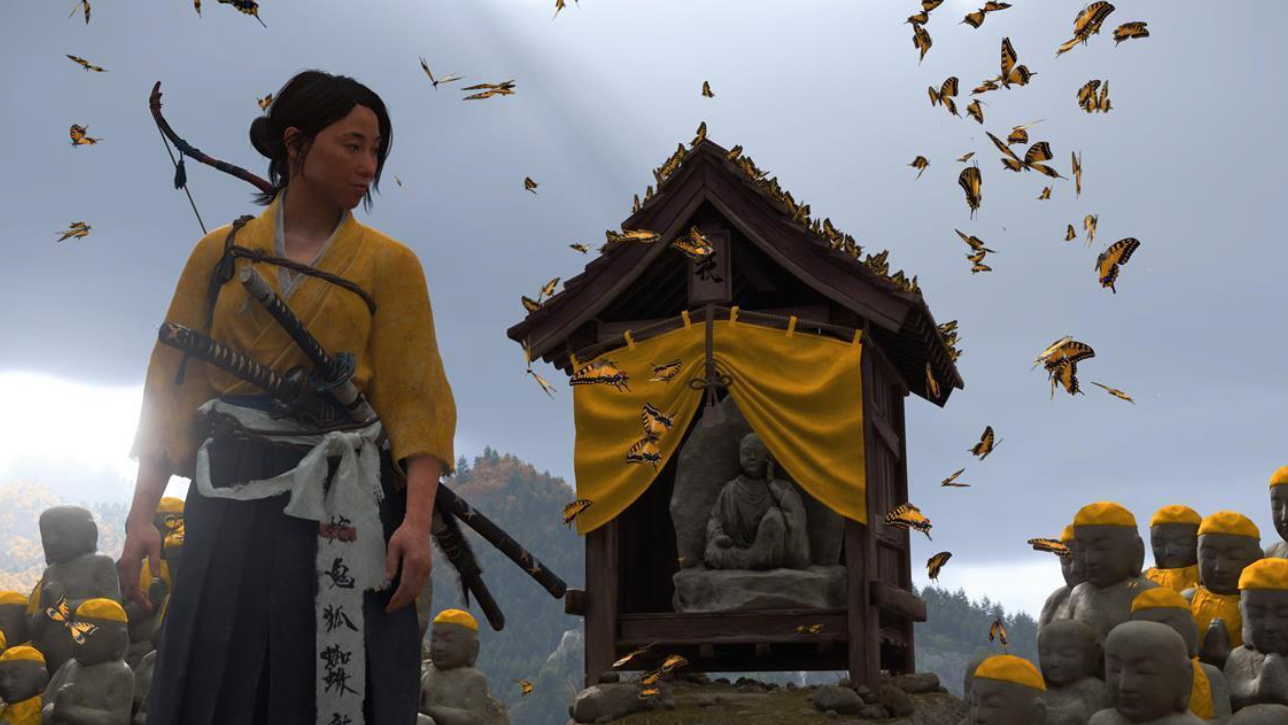
Progression in Ghost of Yotei is tied to Altars of Reflection, not traditional XP, and there’s no respec. Because every selection is permanent, a deliberate early pick order will noticeably improve survivability, crowd control, and stealth consistency.
How skill unlocks work (Altars of Reflection)
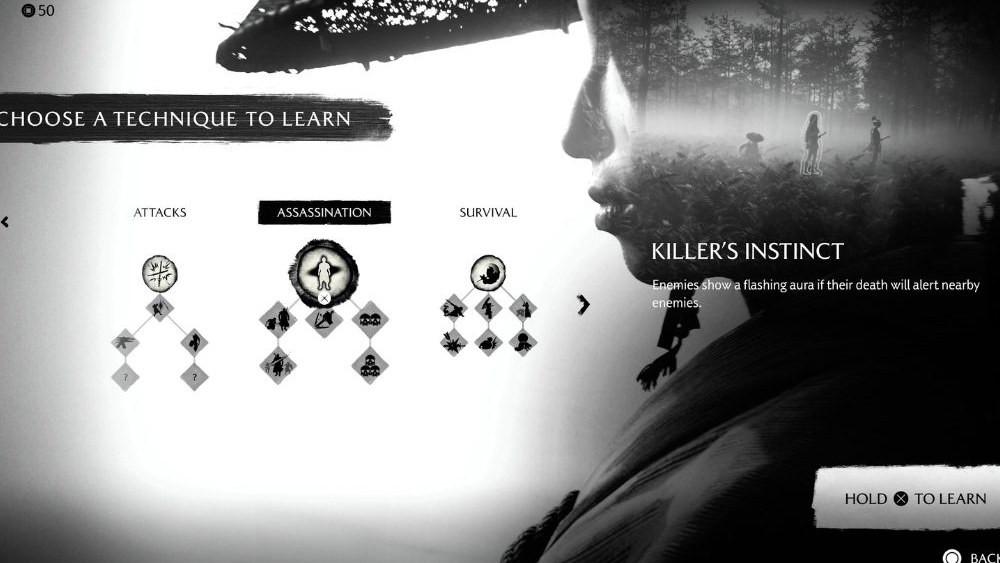
Step 1: Locate an Altar of Reflection in the world and bow to it to open the Growth screen. Each successful visit lets you choose exactly one new skill.
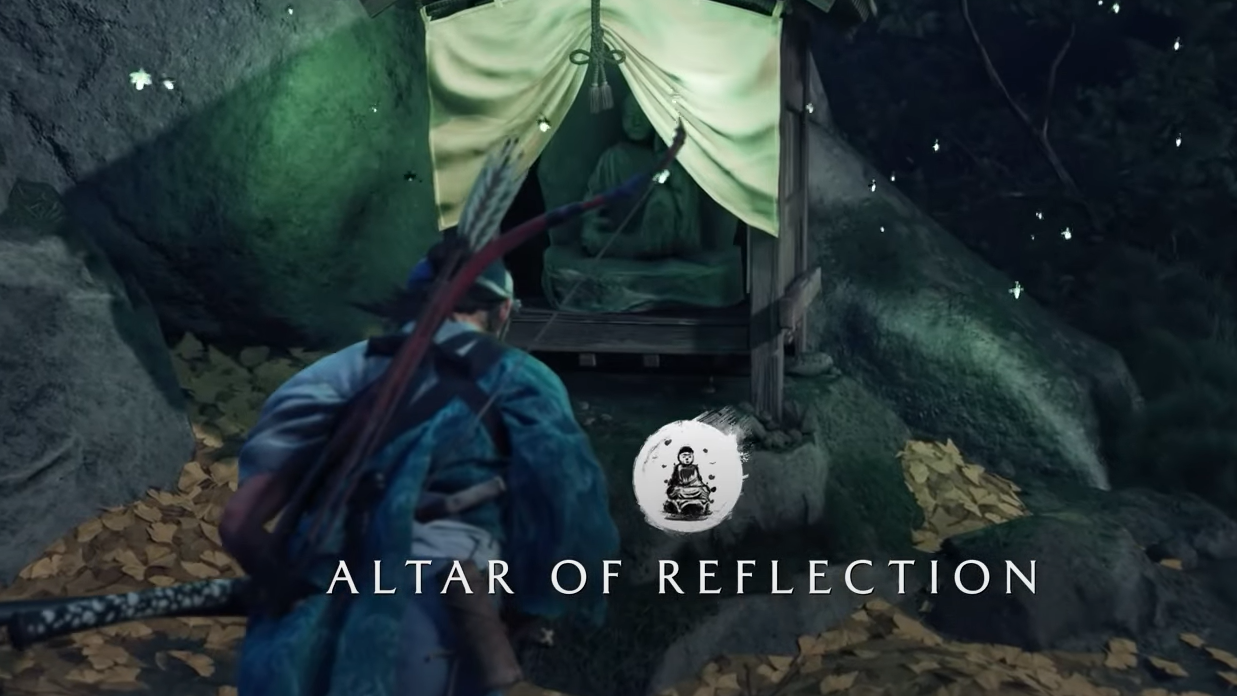
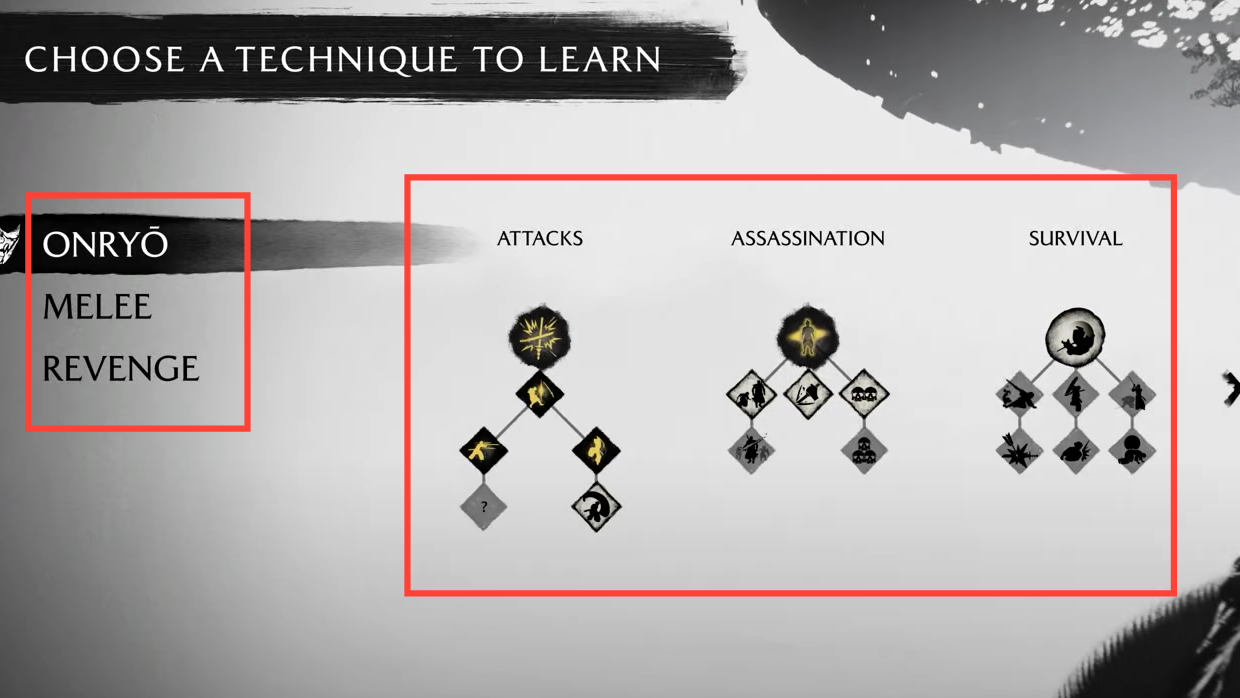
Step 2: Select a perk from any available tree provided you meet prerequisites (earlier nodes and, in some cases, specific quest gates). One altar equals one skill—plan ahead to avoid dead-ends.
Step 3: Use the environment to find more altars. Golden Birds can lead you to nearby shrines, and Cartographer’s Maps let you mark their locations for targeted routing.

Step 4: Expect a challenge before the reward. Altars are often guarded or tucked behind traversal tests; clear the encounter to claim your pick. This guide focuses on Atsu’s trees; the Wolf companion has a separate skill track.
Core combat priorities (for every player)
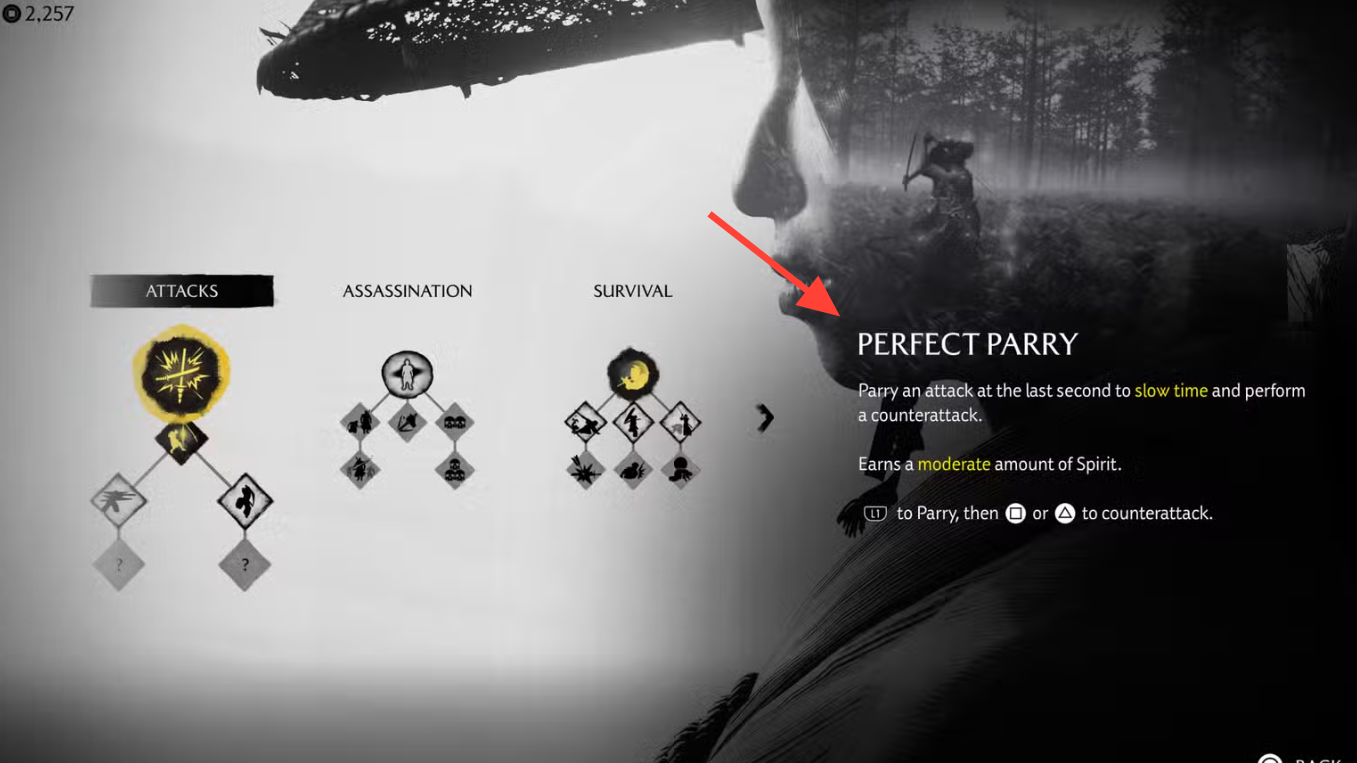
Step 1: Unlock Perfect Parry (Onryo — Attacks). Timing L1 just before impact briefly slows time, guarantees a follow-up, and generates Spirit. Press Square or Triangle during the window to counter.
Step 2: Unlock Roll (Onryo — Survival). Press Circle twice while moving to create space more reliably than a standard dodge and to extinguish fire on Atsu. It’s also a fast way to reach a dropped weapon if you’re disarmed.
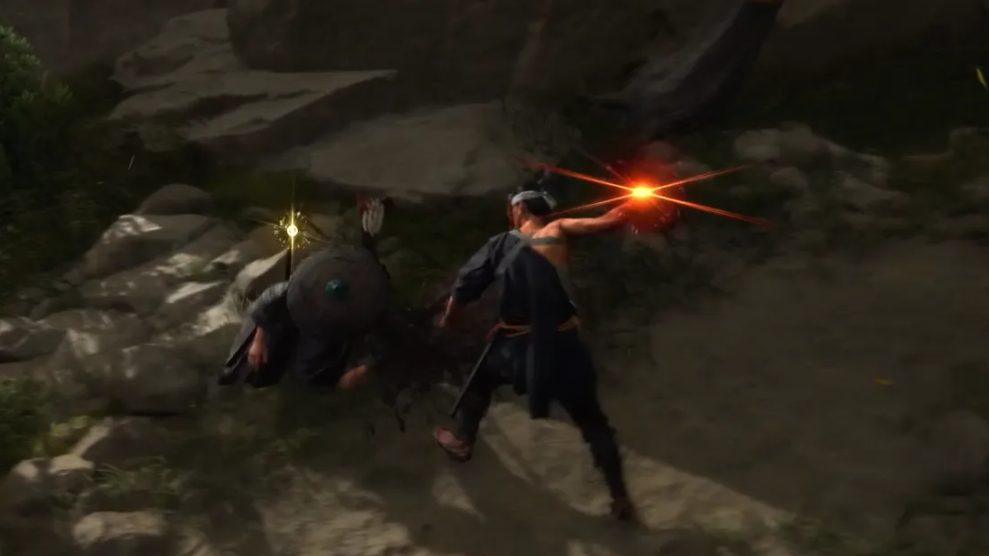
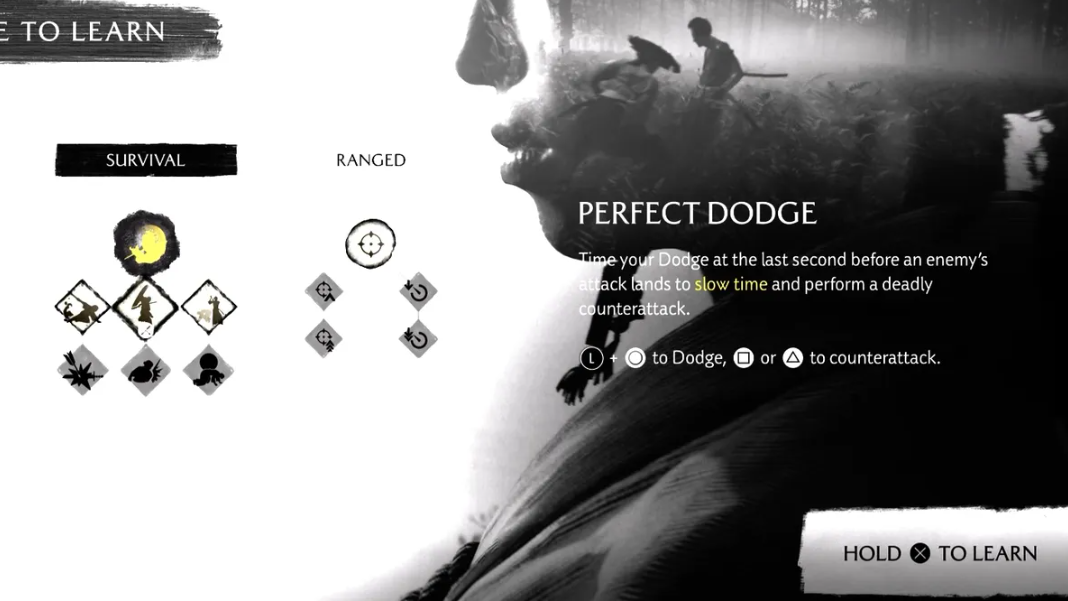
Step 3: Unlock Perfect Dodge (Onryo — Survival). Dodging at the last moment with Circle triggers a brief slow‑mo and a safe counter. Use this against red-glint attacks, which cannot be parried.
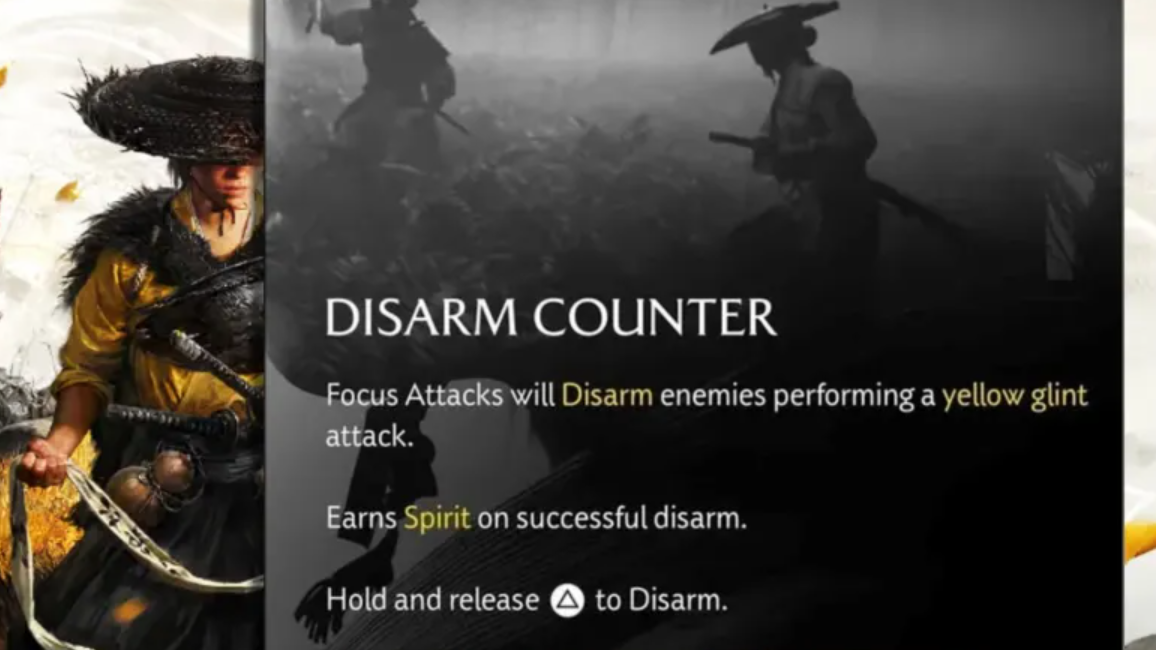
Step 4: Unlock Disarm Counter (Onryo — Attacks). When enemies telegraph a yellow disarm, charge a heavy and release as they enter range to strip their weapon instead. You can immediately grab the dropped weapon for a fast throw to stagger or finish.
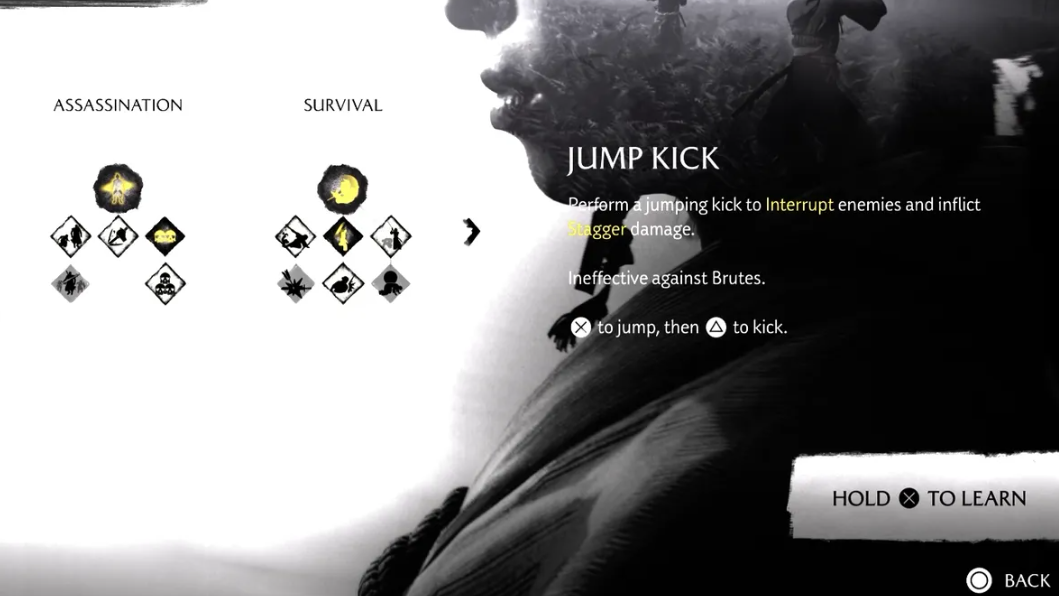
Step 5: Unlock Jump Kick (Onryo — Attacks). A quick kick interrupts most enemies and builds stagger, which is valuable against shield users and crowd pressure. It won’t topple big Brutes, but it reliably buys time when surrounded or unarmed.
Stealth-first priorities (Assassination tree)
Step 1: Unlock Killer’s Instinct. Enemies that are being watched gain a clear visual indicator, helping you avoid alerting nearby guards during takedowns. This reduces guesswork in tall grass or cluttered sightlines.
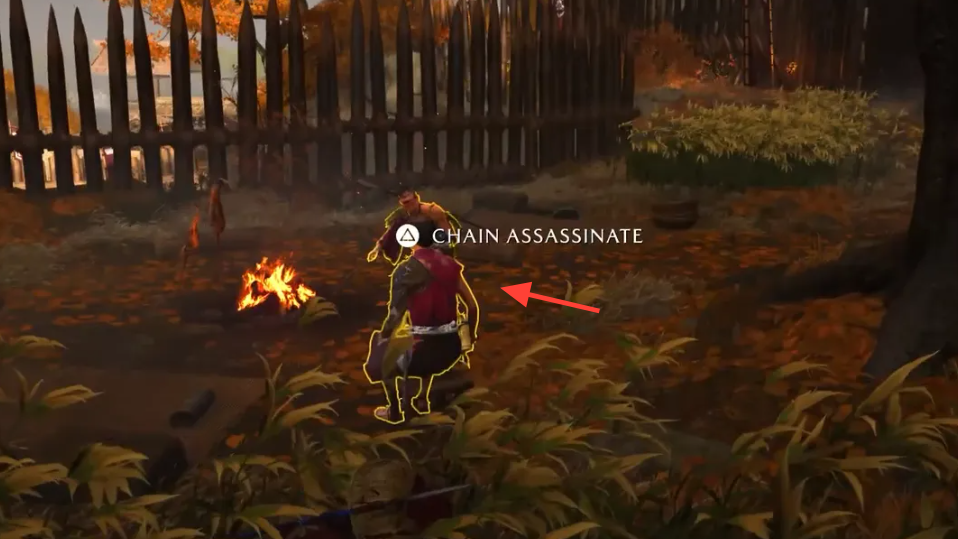
Step 2: Unlock Chain Assassination. Perform two stealth kills in immediate succession on clustered targets; nudge R to direct the second takedown if needed. This is the cleanest answer to the game’s frequent paired patrols.
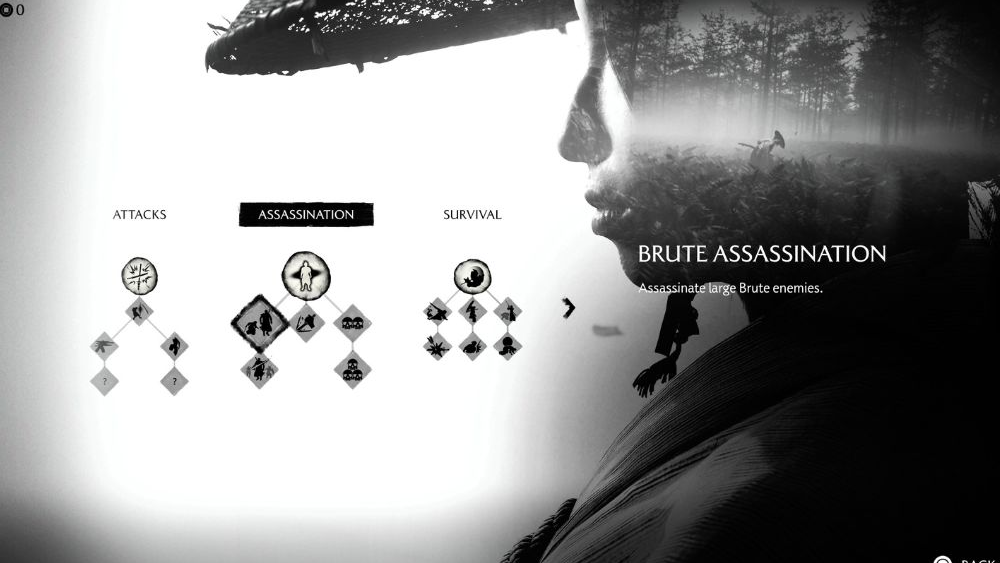
Step 3: (Optional but strong) Unlock Brute Assassination. This lets you quietly remove large Brutes that otherwise force open combat, preserving a full silent clear path.
Ranged setup (bow and situational picks)
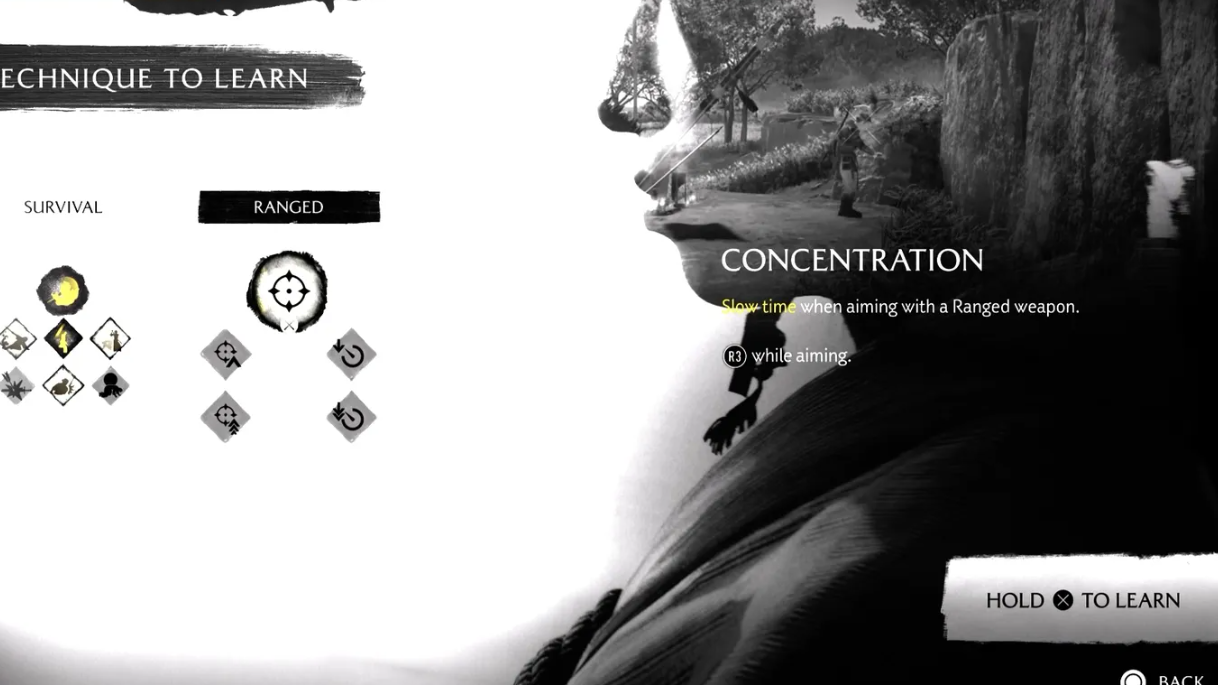
Step 1: Unlock Concentration (Ranged). While aiming with R2, time slows briefly, making headshots easier and letting you target hazards like lanterns during melee scrums. This is especially useful for picking off distant archers mid-fight.
Step 2: If you lean on the bow, invest in Concentration’s follow-ups for longer slow time and a shorter cooldown. This keeps your ranged windows available in back-to-back engagements.
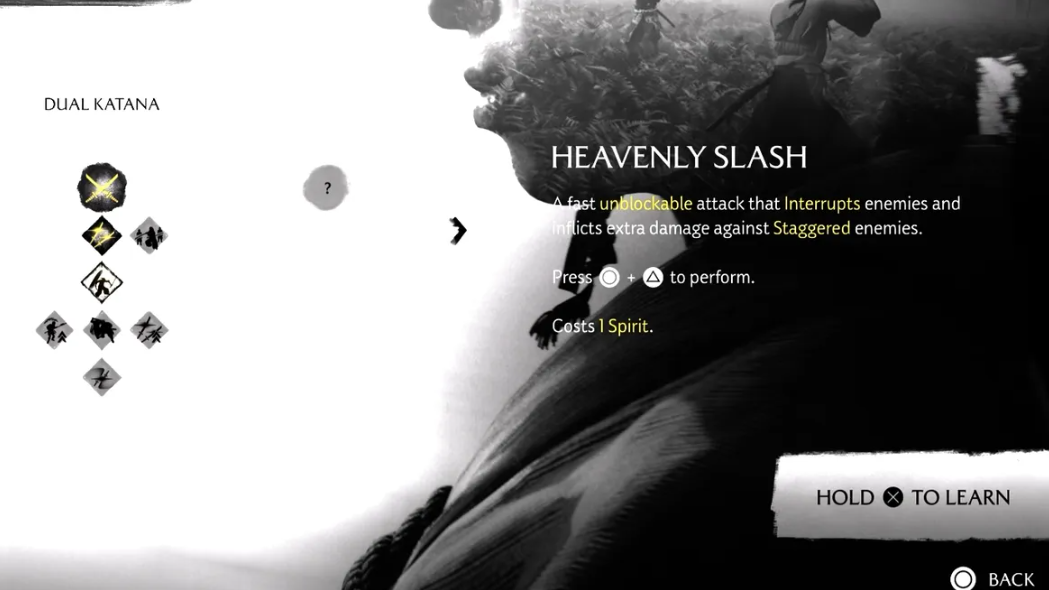
Katana must-haves (Melee — Katana)
Step 1: Unlock Heavenly Slash. This fast, unblockable dash strike interrupts enemies, hits harder on staggered targets, and costs 1 Spirit. Use Circle + Triangle to perform it and quickly regain initiative when pressured.
Step 2: Unlock Iaidō. Hold a heavy and release after a short beat to deliver a sheathed draw cut that deals solid damage and fills stagger on guarding foes. Consider its upgrades (Iai Storm and Iai Lightning Storm) if katana remains your primary weapon.
Optional safety net (Survival): Onryo’s Will
Step 1: Unlock Onryo’s Will if you want a second chance in tough duels. When downed, press Down D‑Pad to revive at the cost of 3 Spirit.
Step 2: Use it intentionally. The Spirit cost competes with healing and Heavenly Slash usage, so treat this as an insurance policy rather than a default recovery.
Two sample early-game pick orders
Use these to structure your first several altar visits based on preferred playstyle. Each step is a single unlock.
Balanced path (general combat and utility)
Step 1: Perfect Parry.
Step 2: Roll.
Step 3: Perfect Dodge.
Step 4: Disarm Counter.
Step 5: Killer’s Instinct.
Step 6: Chain Assassination.
Step 7: Heavenly Slash.
Step 8: Concentration.
Step 9: Iaidō.
Step 10: Jump Kick.
Stealth-first path (silent clears with contingency)
Step 1: Killer’s Instinct.
Step 2: Chain Assassination.
Step 3: Brute Assassination.
Step 4: Perfect Parry.
Step 5: Roll.
Step 6: Perfect Dodge.
Step 7: Concentration.
Step 8: Onryo’s Will.
Find more Altars of Reflection quickly
Step 1: Follow Golden Birds when you hear or see them. They reliably lead to secrets and shrines, including altars.
Step 2: Buy Cartographer’s Maps and place markers for altars. This turns passive discovery into a planned route so you can bank reliable skill gains between story missions.

Step 3: Come prepared for resistance. Many altars are guarded or tucked behind parkour—clear the encounter, then bow to unlock the Growth choice.

Step 4: Check prerequisites in the Growth screen before committing to a route. This avoids reaching an altar only to find your target node is still locked behind earlier skills or quest requirements.
With these picks, your first several altars will noticeably improve survival, control in crowds, and stealth reliability. As new weapons arrive, revisit the Melee tree to round out your preferred kit.