
Augments sit at the center of Black Ops 7 Zombies. They power up every perk, ammo mod, and field upgrade, and fully researching them lets you slot a second minor augment on each “enhancement” (perk, mod, or upgrade). The catch: the grind is slow, especially for the final three augments on each track.
Researching efficiently is mostly about two things: understanding how the menu gates progress, and routing your XP into the highest‑yield setups on Ashes of the Damned and Vandorn Farm Survival.
How augment research unlocks in Black Ops 7 Zombies
Augment Research is not available from the start of Zombies. It unlocks after a small amount of progression, and then expands as you complete more augment nodes.
| Requirement | What it unlocks |
|---|---|
| Reach player level 11 | Augments menu and the ability to start Research on eligible perks, ammo mods, and field upgrades |
| Research 3 augment nodes (anywhere) | Quick Revive research tree |
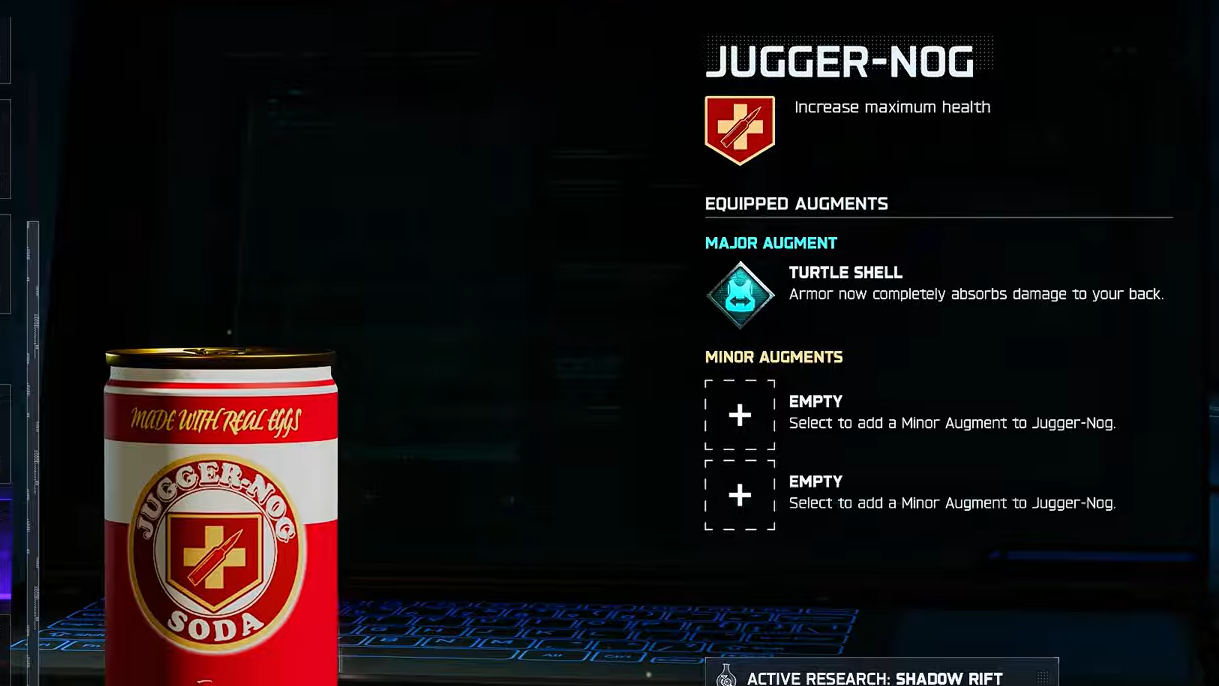
| Research 6 augment nodes (anywhere) | Jugger‑Nog and Cryo Freeze research trees |
| Research 9 augment nodes (anywhere) | Melee Macchiato, Fire Works, and Dark Flare research trees |
| Research 12 augment nodes (anywhere) | Speed Cola, Vulture Aid, Brain Rot, and Toxic Growth research trees |
| Research 15 augment nodes (anywhere) | PhD Flopper, Death Perception, and Healing Aura research trees |
| Research 18 augment nodes (anywhere) | Double Tap, Deadshot Daiquiri, and Shadow Rift research trees |
| Research 21 augment nodes (anywhere) | Wisp Tea, Elemental Pop, and Aether Shroud research trees |
Augment Research from Black Ops 6 carries over into Black Ops 7. Any nodes completed there count toward both your unlock thresholds and your usable augments here. The three new augments added for each enhancement sit on the “back half” of the tree and are the most XP‑hungry.

Where to find the research menu and how progress is tracked
Augment Research lives in the same place as your loadout tools.
- From the main menu, open Weapons and then select Augments.
- Choose a category: Perk-a-Colas, Ammo Mods, or Field Upgrades.
- Select any unlocked enhancement, then choose Research Augments.
Only one enhancement can be actively researched at a time. While research is active, every bit of in‑match XP also feeds into that track as augment XP. Fill a node’s XP bar, and it unlocks permanently.
Each node costs more augment XP than the last on that same enhancement. Early nodes fill quickly; the final three are where most of the grind sits. This is why spreading research across many tracks early is more efficient than maxing one track from 0–100% straight away.
Perk augment research unlock order and priorities
Perk trees unlock strictly off your total number of researched nodes, no matter which category they came from.
| Perk | Augment research unlock requirement |
|---|---|
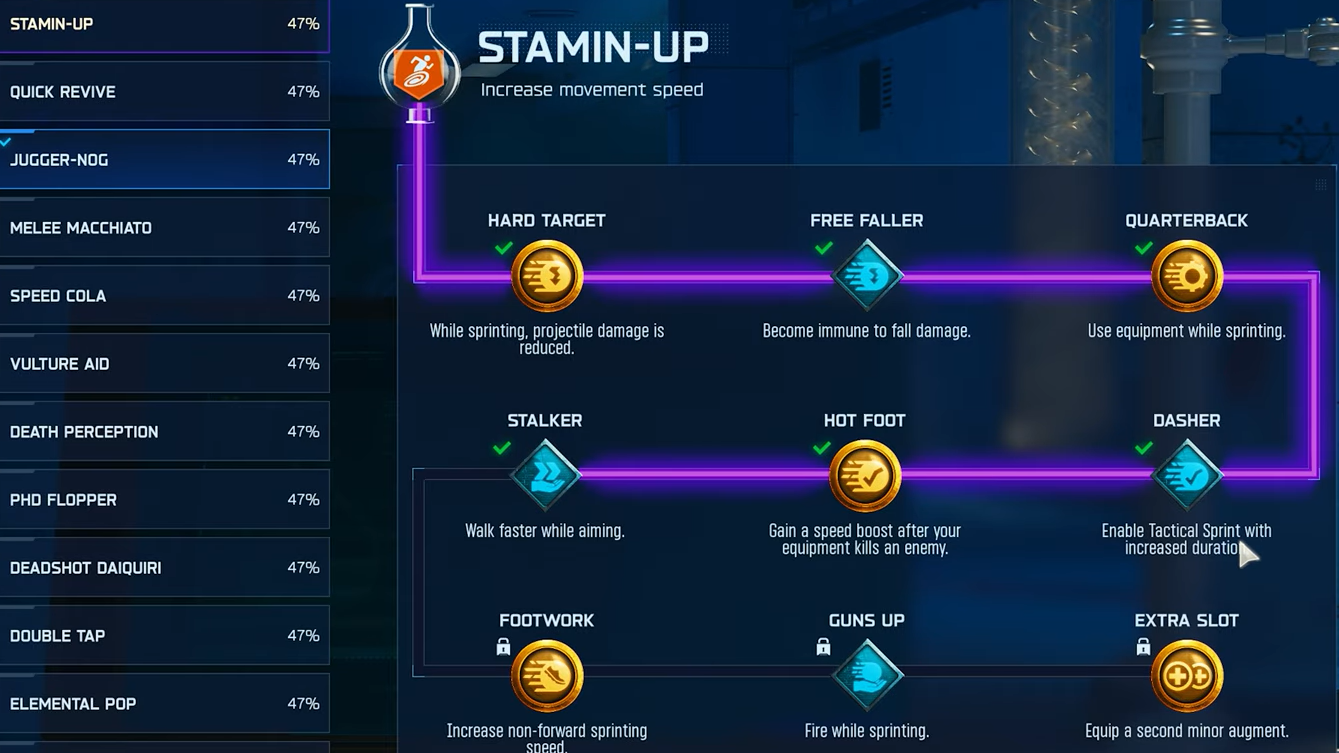
| Stamin‑Up | Available immediately at level 11 |
| Quick Revive | 3 total augment nodes researched |
| Jugger‑Nog | 6 total augment nodes researched |
| Melee Macchiato | 9 total augment nodes researched |
| Speed Cola | 12 total augment nodes researched |
| Vulture Aid | 12 total augment nodes researched |
| PhD Flopper | 15 total augment nodes researched |
| Death Perception | 15 total augment nodes researched |
| Double Tap | 18 total augment nodes researched |
| Deadshot Daiquiri | 18 total augment nodes researched |
| Wisp Tea | 21 total augment nodes researched |
| Elemental Pop | 21 total augment nodes researched |
Early on, Jugger‑Nog is the standout priority. Its augments add extra ways to stay alive, including armour‑focused builds like hardened and durable plates or shield‑style damage absorption from behind. Double Tap lands later but is one of the largest raw damage spikes for bullet weapons; its augments add fire‑rate boosts and extra bullet penetration.
For most players, an efficient early spread looks like this:
- Unlock and grab 2–3 nodes in Stamin‑Up (movement tech).
- Unlock Quick Revive, pick up 1–2 survivability nodes.
- Move into Jugger‑Nog and take the tankiest options you can reach.
That spread quickly hits the first few global thresholds, letting you open Ammo Mod and Field Upgrade trees without sinking all your XP into a single perk.
Ammo mod augment research unlock order
Ammo Mods are gated by both overall research and your account level.
| Ammo Mod | Research unlock requirement | Player level needed |
|---|---|---|
| Dead Wire | Available immediately | Available immediately |
| Cryo Freeze | 6 total augment nodes researched | Level 12 |
| Fire Works | 9 total augment nodes researched | Level 18 |
| Napalm Burst | 3 total augment nodes researched | Level 35 |
| Shadow Rift | 18 total augment nodes researched | Level 44 |
| Brain Rot | 12 total augment nodes researched | Level 51 |
Dead Wire is live as soon as Augments unlock and is one of the strongest options in practice: its lightning‑chain major augment plus cooldown and spread nodes turns it into a reliable horde clearer. Napalm Burst is also a standout once you hit level 35; the Fire Bomb and Incendiary augments create chain‑reaction fire that can wipe out full trains in tight spaces.
Fire Works currently sits in a very strong spot. Its early augments can kill an entire horde with a single proc, and its “Big Game”‑style augments chunk elite enemies hard. If you are focusing on boss melts or high‑round survival, pushing into Fire Works early is a smart route once it’s unlocked.
Field upgrade augment research unlock order
Field Upgrade research unlocks in a similar way, with a mix of total node count and level gates.
| Field Upgrade | Research unlock requirement | Player level needed |
|---|---|---|
| Energy Mine | Available immediately | Available immediately |
| Dark Flare | 9 total augment nodes researched | Available immediately |
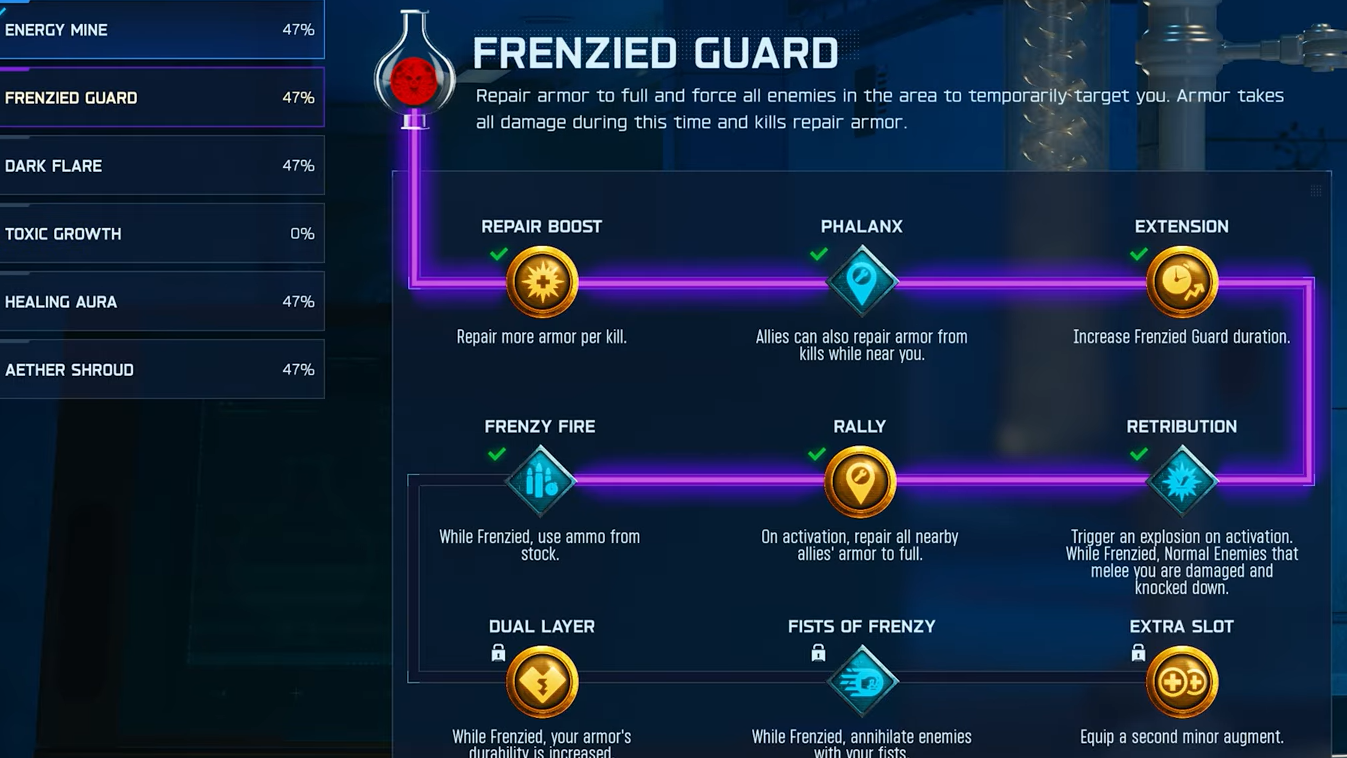
| Frenzied Guard | 3 total augment nodes researched | Level 8 |
| Healing Aura | 15 total augment nodes researched | Level 17 |
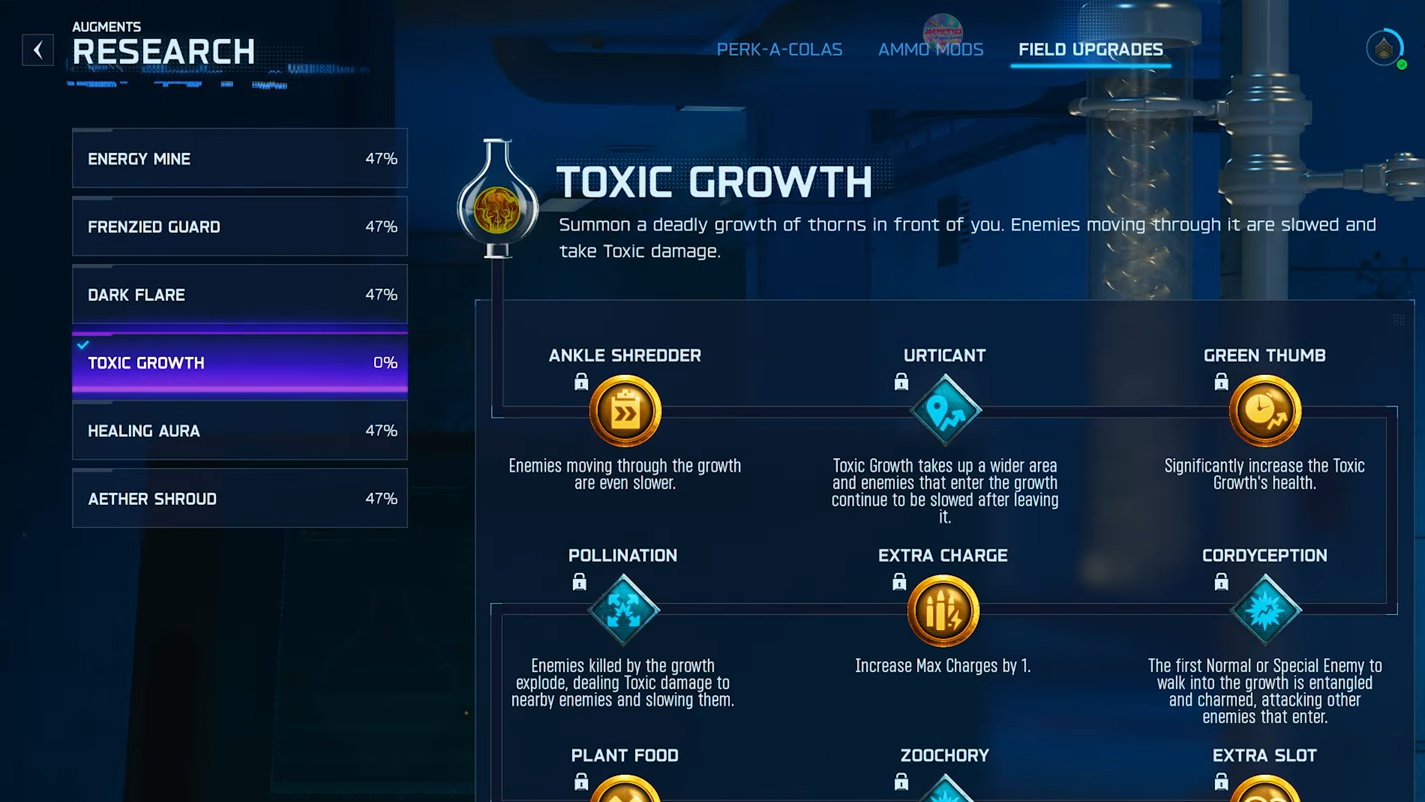
| Toxic Growth | 12 total augment nodes researched | Level 29 |
| Aether Shroud | 21 total augment nodes researched | Level 48 |
Energy Mine is the first researchable upgrade and a solid baseline option. Toxic Growth returns as a powerful control tool: with extra charges and health on the bushes, it can shut down chokepoints and make special rounds trivial in the right spot. Aether Shroud remains the panic button of choice for many players; its augments add extra charges, longer duration, and offensive twists like damage pulses and clones that distract enemies.
Frenzied Guard is another strong early pick. Its “no reload” augment and extended duration make horde fighting safer, especially on cramped maps or during objective phases.
Why the last three augment nodes feel so slow
Each enhancement has a shared XP bar that climbs as you clear individual nodes. Those final three nodes (the new major, the extra minor, and the second minor slot) consume a disproportionate amount of that bar. Players grinding from 50–100 percent on a single track report multiple hours of focused play, even with efficient setups.
There are also fewer passive XP sources than in Black Ops 6. Equipment usage and some elemental debuff medals no longer award score or XP, which removes a layer of background progress that made the earlier system feel faster. That change, combined with the higher XP cost on the last nodes, is why players who did not bring forward BO6 progress feel especially behind.
In practice, that means the optimal early game is not “max Jugger‑Nog, then move on”, but “skim the strongest two or three nodes on multiple tracks to hit 21 total augments researched” so that every perk, mod, and upgrade tree is at least open. The deep grind into 100 percent completion can wait until your core kit is unlocked.
XP and augment grinding strategy on Ashes of the Damned
On Ashes of the Damned, the most efficient augment research setup uses a semi‑fixed pile‑up exploit and a Wonder Weapon.
- Upgrade the Ol’ Tessie truck with Abomination Heads.
- Obtain the Necrofluid Gauntlet Wonder Weapon.
- Drive Tessie to Janice Towers Plaza and line it up on the low ramp toward Monolithic Forest so zombies pile beneath the truck rather than in front.
From that position:
- Fire the Gauntlet spikes into the ground where the horde stacks, then retract them to trigger explosions.
- Use the Gauntlet’s melee to instantly kill any zombies that make it up onto the truck.
- On higher rounds, place a Toxic Growth bush on the side where zombies can still climb to slow and soften them.
The main threat is the Zersa bear. It can shove the truck out of position and open the front of Tessie. Time your spike detonations so the Zersa walks into the kill zone, and, in the 40s and beyond, use Decoys or Casmir grenades to peel the horde away while you finish it. With that under control, the setup supports very high rounds with relatively low risk and extremely strong XP per minute.
This method is ideal when the goal is raw prestige XP and augment progress. It takes 20–30 minutes to set up, so it is inefficient for weapon XP or camo challenges compared to Vandorn.
Weapon XP, headshots, and augments on Vandorn Farm Survival
Vandorn Farm Survival has two different high‑value spots: one for almost hands‑off headshot grinding, and one for fast XP and augment progress.
Vandorn balcony corner: low‑effort headshot and XP farm
- Turn on power, then go to the second floor of the farmhouse.
- Stand on the very outer corner of the balcony just past the Wonderfizz machine.
From this exact corner, zombies and Ravagers spawn below and are forced to mantle directly into your line of sight. Rampage Inducer can stay on; it speeds up their movement, but it does not speed up their jump animation. You can keep your crosshair at head height and farm an enormous number of critical kills with minimal tracking.
Limitations:
- Zersa and flying specials can still hit you here.
- Scrap drops below; you need to hop down occasionally to collect it.
- This spot will feed XP and augment research, but it is outpaced by the shotgun + Toxic Growth setup in the Pack‑a‑Punch room for pure leveling.

Vandorn Pack‑a‑Punch room: fast XP and augment research
For pure account XP and augment progress, the back of the Pack‑a‑Punch room on Vandorn Farm is the standout option.
- Load into Vandorn Farm Survival.
- Bring a full‑auto shotgun (the final shotgun unlock is a strong choice) with an ammo mod like Napalm Burst.
- Equip Toxic Growth as your field upgrade.
Once power and Pack‑a‑Punch are active, move to the rear of the upstairs room that houses the machine. From there:
- Place two Toxic Growth bushes in front of you, at the choke where zombies enter.
- Let zombies push into the bushes so they’re slowed and damaged, then finish them with your shotgun.
- Use Molotovs into the doorway and on the front panel to accelerate kills.
Executed cleanly, this setup can reach round 35–36 in under 30 minutes. The growth bushes effectively wall off Laboos during their special rounds; with at least one bush active, you can stand still in the center of the room and ignore them. Zersa bears often die before reaching you when Napalm Burst or other strong ammo mods are active; if one does push through, kite it outside, reset your bushes, and resume.
For augment grinding, the most efficient loop is:
- Run the strategy to round 35–36.
- Take the Exfil for the bonus XP.
- Restart rather than pushing into very high rounds where XP per minute falls off sharply.
Using rampage and challenges to amplify augment XP
Augment XP scales with your standard match XP, so anything that boosts XP indirectly speeds up research.
- Rampage Inducer dramatically increases spawn rate. On controlled setups like the Vandorn balcony or Pack‑a‑Punch room, it is almost always worth enabling.
- Daily and prestige challenges pay out large flat XP chunks, often 10,000 or more. Completing these while a high‑value enhancement is active in Research effectively “injects” a chunk of progress into that tree.
- Camo grinding and mastery badges layer extra kill requirements on top of normal play, adding more medals and XP without changing what you’re doing in‑match.
- Double XP tokens now apply correctly to Zombies rank XP. When active, they double both your level gains and the augment XP you push into your currently researched enhancement.
Augments now carry so much weight that your “what should I research?” decisions often matter more than the specific gun you’re leveling. The best middle ground is usually to keep one core enhancement (Jugger‑Nog, Dead Wire, Toxic Growth, or Aether Shroud) selected for Research while you rotate weapons and perks to clear camo and challenge goals.

Augment Research in Black Ops 7 Zombies is intentionally long‑term, and for anyone starting fresh without Black Ops 6 progress, the curve can feel punishing. The pressure eases once you hit 21 total augment nodes; at that point, every perk, ammo mod, and field upgrade tree is open, and you can focus on the handful that actually shape how you play. Combine that priority list with the Ashes truck setup or Vandorn Pack‑a‑Punch grind, and the slowest parts of the research ladder start to feel a lot more manageable.