
Ironwall Resolve is one of six late‑game Order Bunkers in Borderlands 4. It’s tucked inside Dominion’s Terminus District and culminates in the Directive‑0 fight with a small pool of valuable Legendary assault rifles. Below is a focused route: the prerequisites to open the door, a clean path through its split wings, what spawns inside, and how to handle the boss.
Location and prerequisites
• Region: Dominion, Terminus District
• Nearby fast travel: Frantic Scrawl
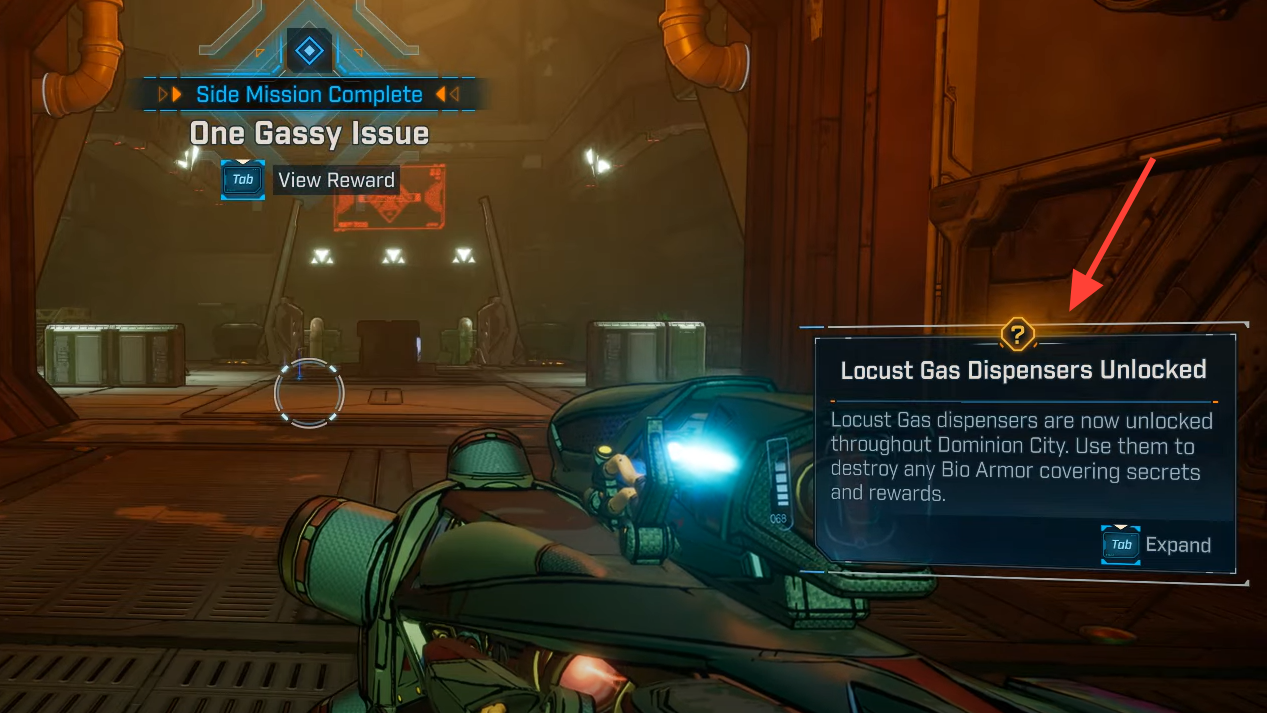
Order Bunkers begin appearing after the main mission “One Fell Swoop.” For Ironwall Resolve specifically, the nearby Locust station is disabled until the side mission “One Gassy Issue” is complete. Finish that quest to bring the corrosive canister dispensers online in Dominion.
Open the Ironwall Resolve door (Locust canister)
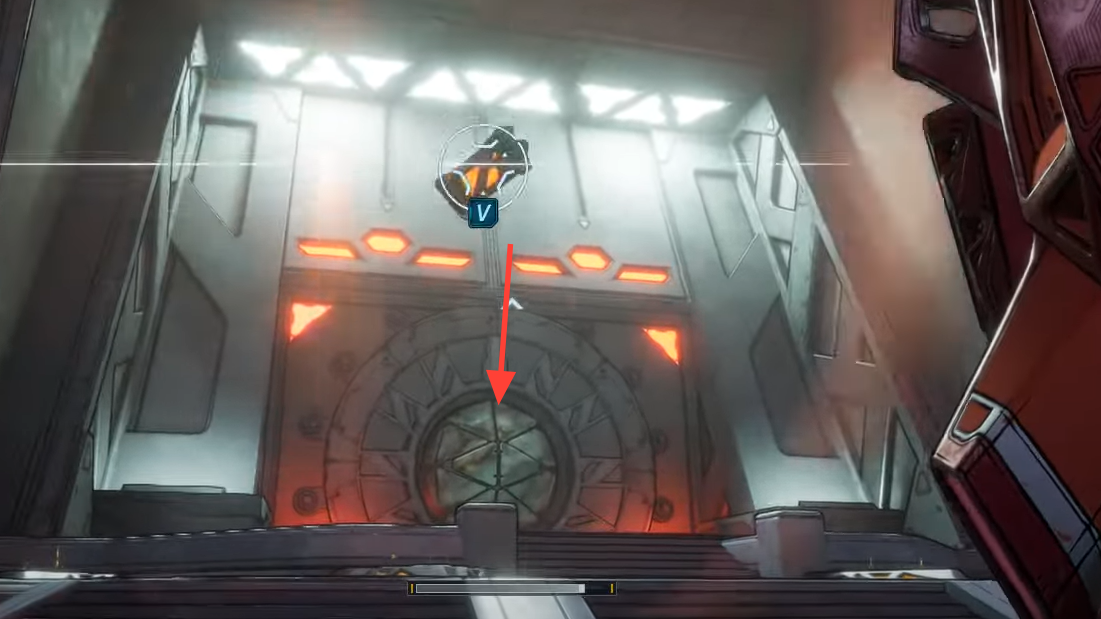
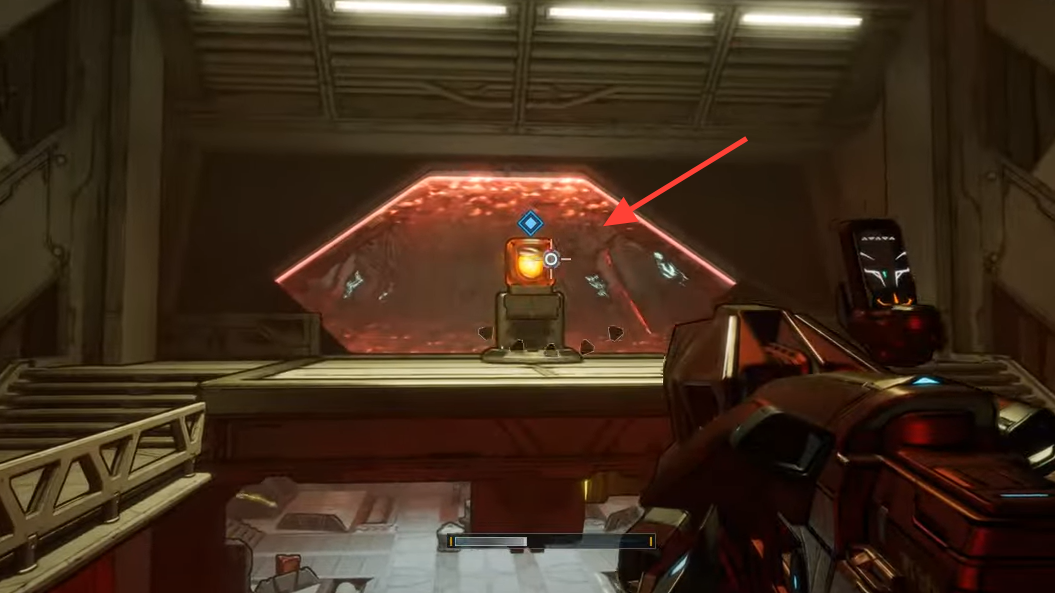
Set a waypoint for Ironwall Resolve and travel to Frantic Scrawl. The bunker sits at the top of a staircase. Stand with your back to the sealed door, go down the stairs, and head right into a small plaza. The Locust station rests on a pile of trash next to a building; pull a canister and hustle back to the door. Throw the canister at the bio‑armored seal to melt it open.
Route through the bunker (left wing, right wing, center)
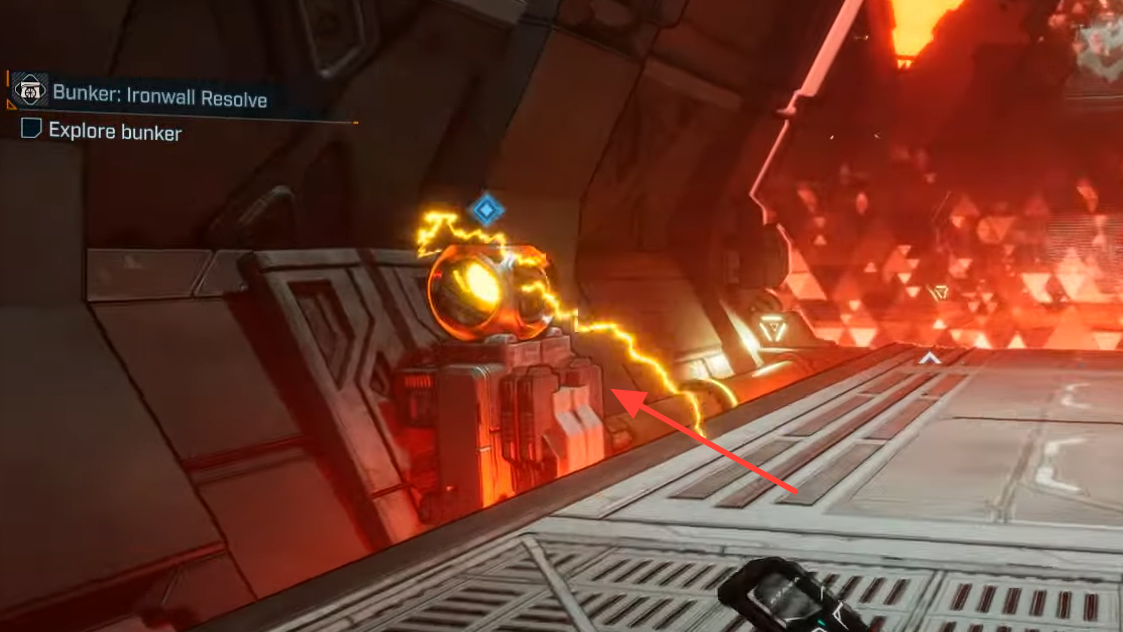
Inside, a glowing power core sits to your left. Shoot it to drop the first barrier and reach a three‑way junction. The center is blocked for now; clear the left and right wings to unlock it.
- Left wing: Expect Wardens, Armatures, and Overwatchmen. A Seneschel Hammerhead can bubble a domed shield—either break it or reposition. Follow the objective marker to a grappling node, climb to a high room, and destroy the left‑side power core. Exit and clean up the add wave.
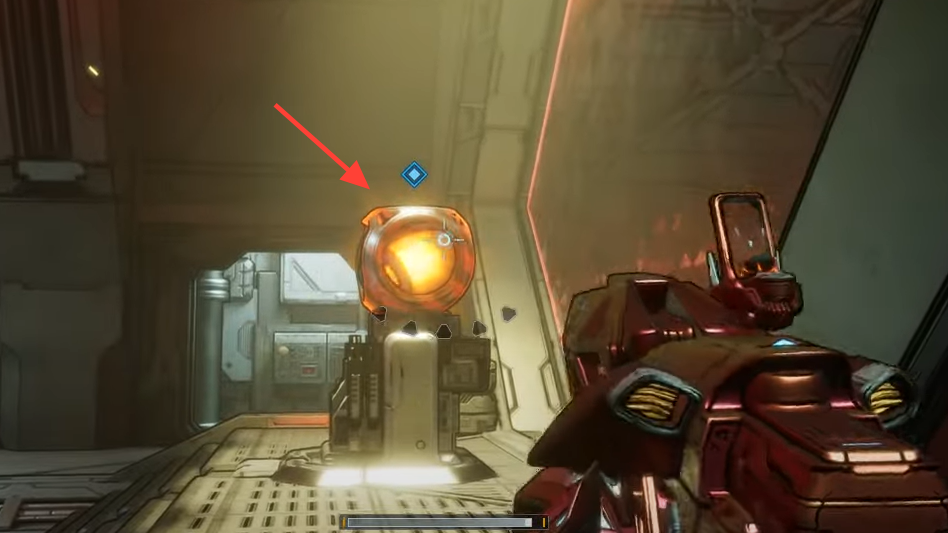
- Right wing: Follow the corridor to a ladder, climb up, and destroy the right‑side power core. Another add wave spawns—clear it.
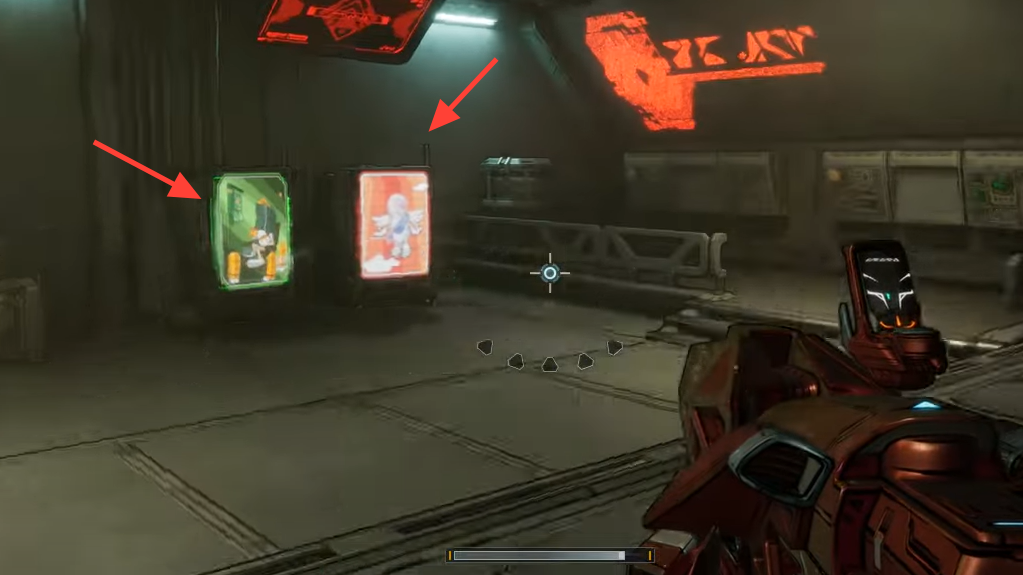
With both side cores down, the center path opens. Hit the vending machines to restock; the boss arena is ahead.
What spawns inside
Enemy mix before the boss includes:
- Wardens, Armatures, Overwatchmen
- Seneschel Hammerhead (projects a dome shield)
In the boss arena, Engines and Bulkheads can flood the space quickly. Keep mobility options open and use adds as Second Wind insurance if you go down.
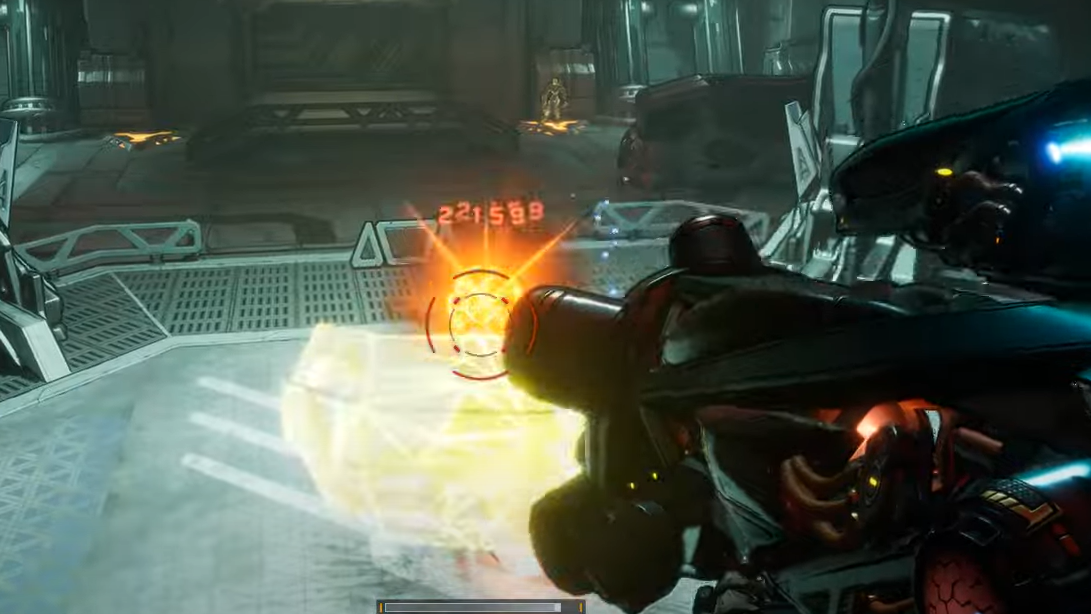
Boss: Directive‑0 (elements, weak points, moves)
Directive‑0 runs on a shield followed by armor. Bring Shock for the first bar and Corrosive for the second. Its weak point is the head—prioritize crits. The arena periodically fills with tough adds; clearing them on sight keeps the pressure manageable.
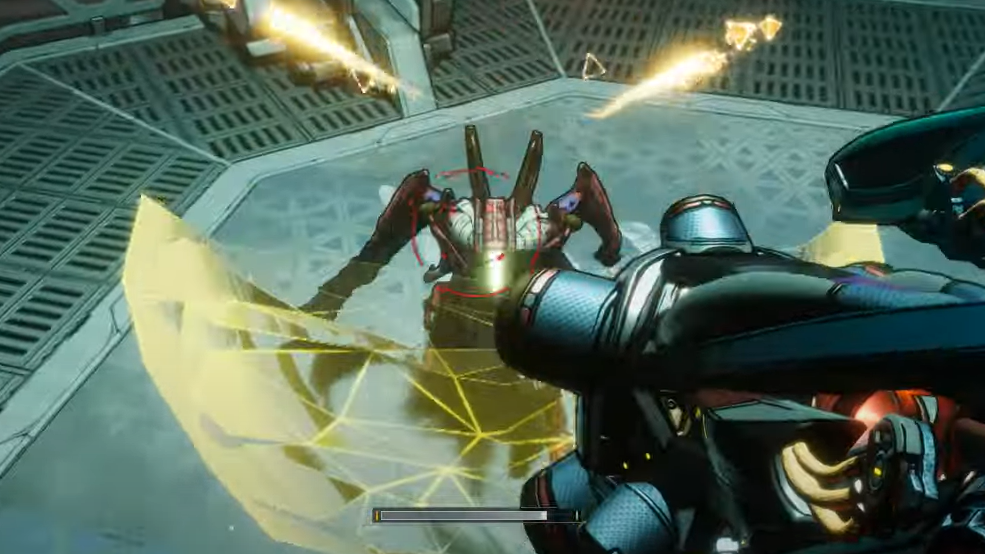
| Attack | What it looks like | How to avoid or counter |
|---|---|---|
| Front barrier | A forward shield blocks incoming fire | Wear it down with sustained fire or sidestep to shoot from the side/back where it doesn’t cover |
| Spark blast | Random arcs of sparks and projectiles | Keep moving; short lateral dashes and strafes mitigate the spread |
| Red bombs | Lobbed explosives in small clusters | Watch the arc and step out; use jumps/dodges to clear overlapping blasts |
Directive‑0 Legendary drops
Directive‑0’s dedicated loot pool skews toward assault rifles. Expect repeat runs to land ideal parts and passives.
| Item | Type | Signature effect | Manufacturer |
|---|---|---|---|
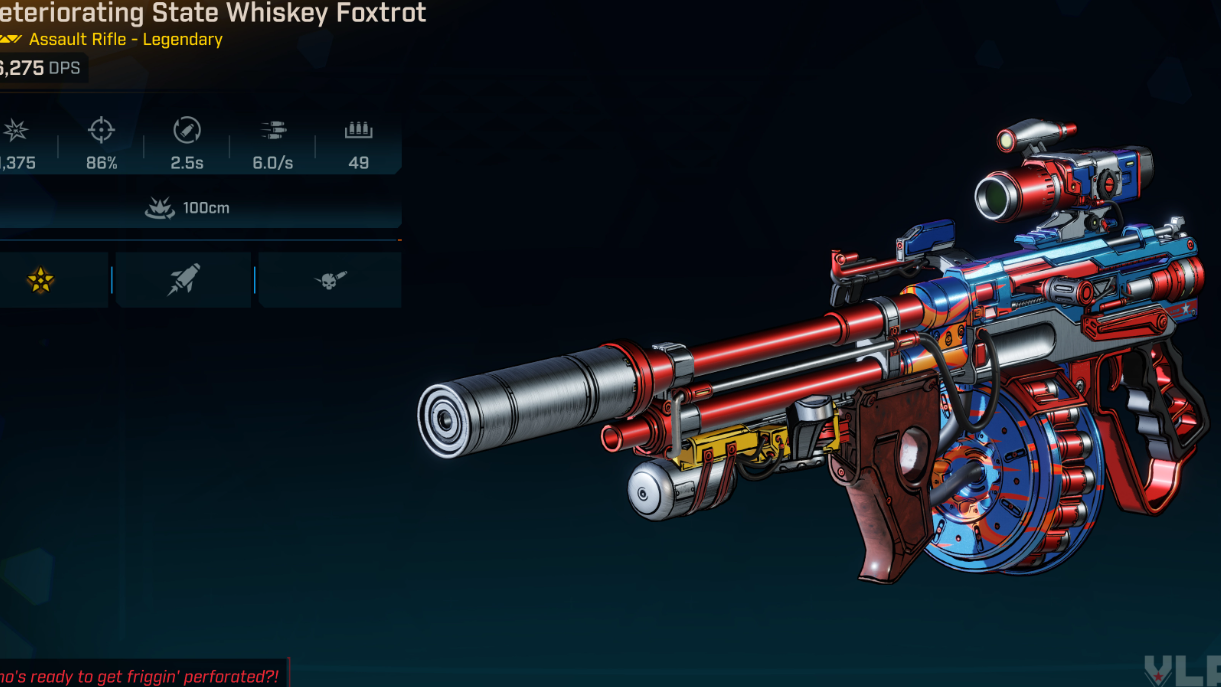
| Whiskey Foxtrot | Assault Rifle | Overdrive: swaps to a secondary magazine that fires full‑auto | Vladof |
| Bonnie and Clyde | Assault Rifle | Pair of Thieves: on kill, grants +100% damage to the other fire mode and refills its magazine | Jakobs |
| Rowan’s Charge | Assault Rifle | Stalker: shots have a chance to crit; refund 2 ammo on crit | Jakobs |
Quick checklist
- Finish “One Gassy Issue” to power the nearby Locust station.
- From the bunker stairs, go down and right to the canister pile.
- Inside: shoot the first core, clear left wing (grapple up, destroy core), clear right wing (ladder, destroy core).
- Restock in the center, then fight Directive‑0 with Shock and Corrosive ready; aim for the head and manage adds.
- Farm for Whiskey Foxtrot, Bonnie and Clyde, or Rowan’s Charge.
Once Ironwall Resolve is cleared, the loop is simple: restock, re‑enter, and keep runs tight for efficient Legendary farming. If you’re working through the set, the other Order Bunkers follow similar open‑and‑core patterns with their own bosses and drop tables.