
Start by dialing back the heaviest graphics options, turn on the right upscaler for your GPU, and keep playing for ~15 minutes so shaders can recompile after changes. On current builds, the official targets are 1080p/30 on Low for minimum spec and 1440p/60 on Medium for recommended spec, and shader changes do not fully apply until they finish compiling.
Refer to the official guidance for expectations and driver setup, including NVIDIA’s Game Ready driver recommendations and the reminder to allow time for shader recompilation after any settings change: Borderlands 4 NVIDIA Optimization Guide. General troubleshooting (drivers, shader cache, file verification, overlays, HAGS on Windows 10) is documented here: PC Troubleshooting & Optimization.
Method 1 — In‑game settings that deliver the biggest gains
Step 1: Enable an upscaler that matches your GPU. Select DLSS on NVIDIA, FSR on AMD, or XeSS on Intel. Start with Quality (or Balanced at 1440p/4K) for clean image quality and a sizable FPS uplift. Upscaling shifts work off the raster pipeline, which steadies frame time spikes without a large image tradeoff at 1440p and higher.
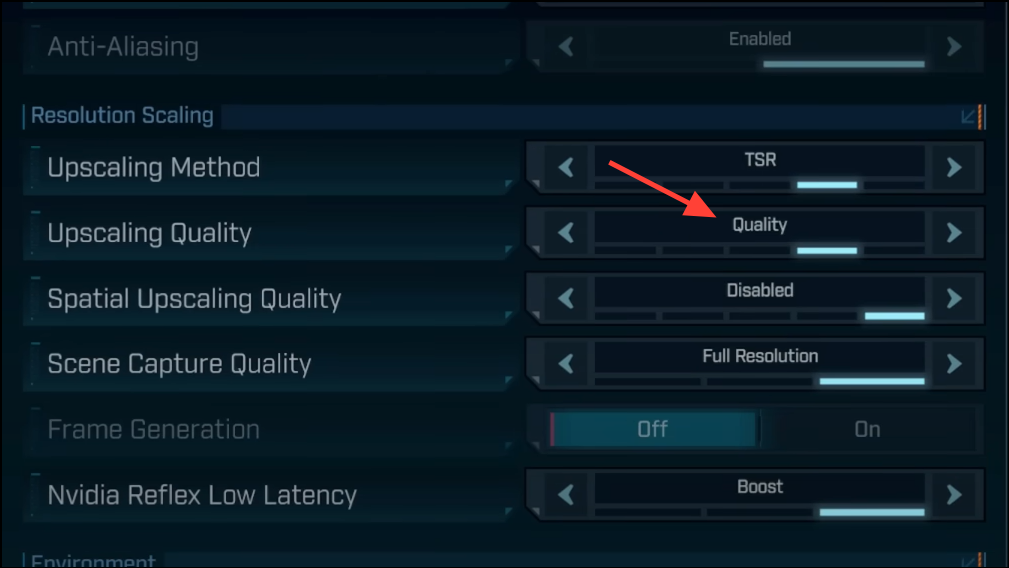
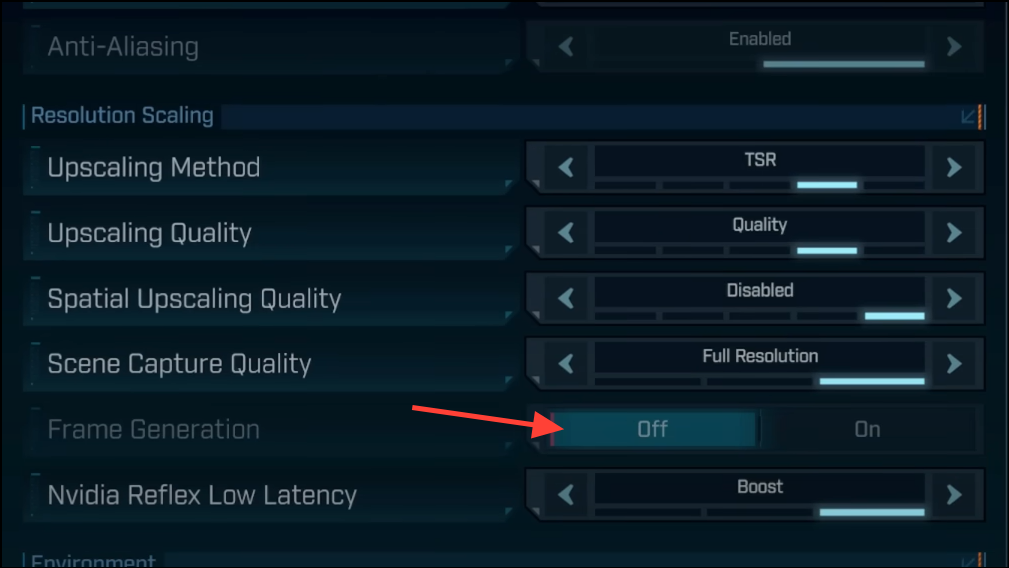
Step 2: If your GPU supports Frame Generation, turn it on, then set NVIDIA Reflex to On to mitigate added input latency. Frame Generation increases displayed FPS; Reflex shortens the render queue so mouse/keyboard input remains responsive. If you dislike the feel, keep Reflex On and turn Frame Generation back off.
Step 3: Lower Volumetric Fog and Volumetric Clouds by one or two steps. These two settings are among the most expensive. Dropping them typically recovers double‑digit FPS and reduces traversal stutter in large outdoor zones while keeping the overall look intact.
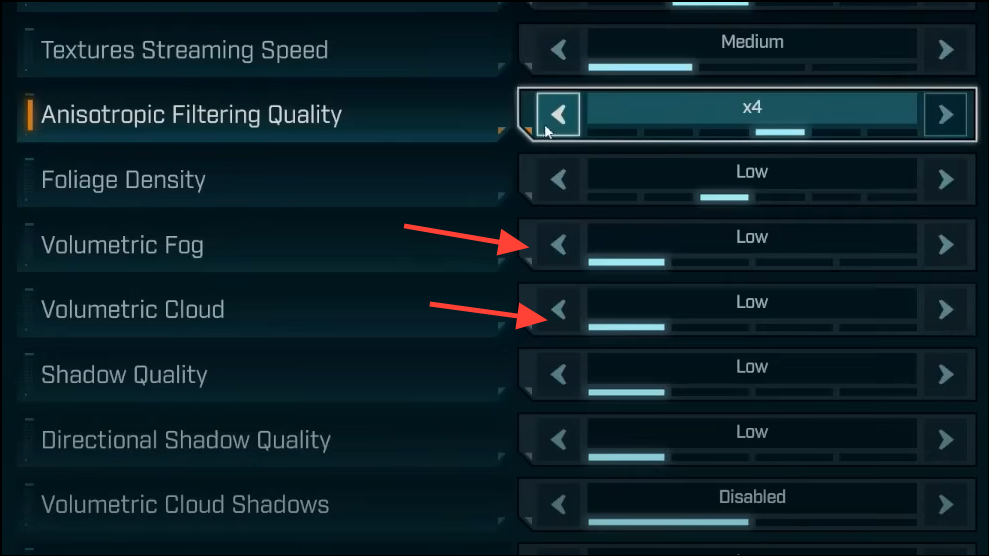
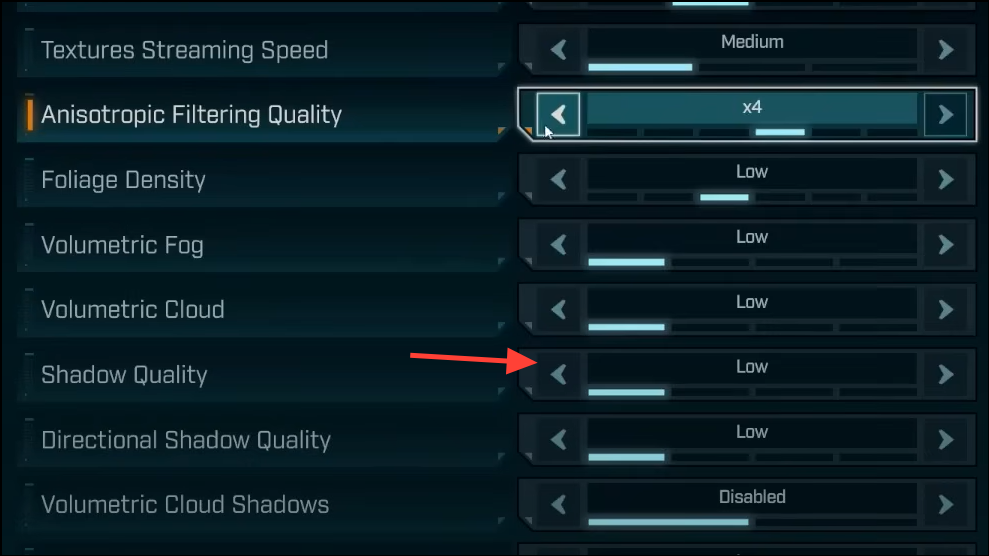
Step 4: Reduce Shadow Quality one tier (keep Directional Shadows consistent), and keep Texture Quality as high as your VRAM allows. Shadows are a major GPU cost; textures mostly affect VRAM. If VRAM is near the limit, step textures down to avoid streaming hitches.
Step 5: Set Display Mode to Fullscreen. Turn VSync Off and, instead, cap FPS to your display’s refresh rate using the in‑game limiter or your driver. This improves frame pacing and avoids the latency penalty of VSync while preventing runaway clocks and fan noise.
Step 6: Disable cosmetic post‑effects that add blur or haze. Set Motion Blur, Film Grain, Chromatic Aberration, and Vignette to Off. You’ll get a sharper image, clearer edges on targets, and a few free frames.

Step 7: After changing settings, play for 10–15 minutes. Shaders will compile in the background and performance will settle only after this “warm‑up” period. This is expected behavior and called out in the official guidance.
Method 2 — NVIDIA‑only: reduce traversal stutter by enlarging shader cache
On some systems, traversal stutter stems from shaders being evicted from a too‑small cache. Increasing the shader cache budget can reduce or nearly eliminate these hitches on NVIDIA GPUs.
Step 1: Open NVIDIA Control Panel. Go to Manage 3D settings and locate Shader Cache Size. Set it to 100 GB, then click Apply. This raises the eviction threshold so the game reuses cached shaders instead of rebuilding them during play.
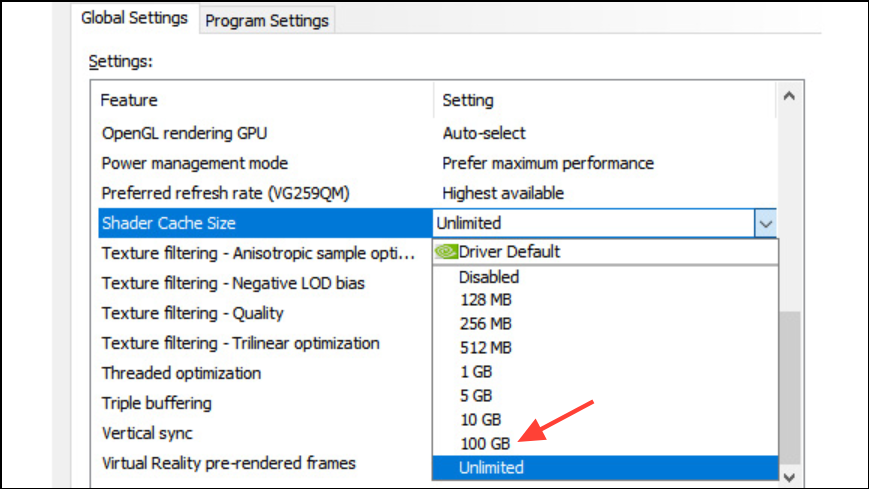
Step 2: Fully close and relaunch the game. As you play, the cache will grow on your fastest drive. Expect the %LOCALAPPDATA%\NVIDIA\DXCache folder to increase in size. You can set the cache back to default once the game is stable for you.
Step 3: If stutter returns after heavy tuning, clear the shader cache (see Method 4) and let the game rebuild it with your current settings.
Method 3 — Optional (advanced): disable heavy effects and toggle Lumen via Engine.ini
This section uses Unreal Engine config overrides. They can improve clarity and recover performance but may also alter the game’s intended look or cause visual seams at the horizon in certain scenes. Values below are binary (0/1); there is no half‑strength fog via INI.
Step 1: Create or open the file at this path:
C:\Users\%USERNAME%\Documents\My Games\Borderlands 4\Saved\Config\Windows\Engine.iniStep 2: Paste the block below under a new line that reads [SystemSettings]. This disables fog and several post‑effects and exposes hardware Lumen toggles.
[SystemSettings]
r.fog=0
r.VolumetricFog=0
r.MotionBlurQuality=0
r.DepthOfFieldQuality=0
r.LensFlareQuality=0
r.Shadow.Virtual.Enable=1
r.Lumen.HardwareRayTracing=1
r.Lumen.Reflections.HardwareRayTracing=1
r.Lumen.ScreenProbeGather.HardwareRayTracing=1
r.LumenScene.DirectLighting.HardwareRayTracing=1
Step 3: Save, then mark Engine.ini as Read‑only in file properties. This prevents the game from overwriting your changes on launch. Remove Read‑only before installing game updates to avoid patching issues.
Step 4: If you use an older or lower‑tier GPU, or an AMD GPU that struggles with hardware RT, delete the four lines beginning with r.Lumen.*HardwareRayTracing. Software Lumen (default) may perform more consistently on some hardware.
Step 5: If you notice pixelated cloud edges or a faint horizon seam after disabling fog, raise Volumetric Cloud Quality in the in‑game menu to Medium or higher. This typically clears edge artifacts while keeping the INI changes in place.
Step 6: If the game crashes after edits, revert to using only the two fog lines, confirm stability, then add additional lines one at a time. Some systems may not accept all overrides together.
Method 4 — Rebuild or clear shaders to settle new configs
Step 1: After any major graphics change, keep playing for 10–15 minutes so shaders can compile and cache with the new settings. Stutters usually subside as the cache fills.
Step 2: To clear stale shader data on NVIDIA, delete large files inside:
%LOCALAPPDATA%\NVIDIA\DXCacheOn AMD, open Adrenalin, go to Gaming > Graphics, and use Reset Shader Cache. Clearing forces a clean rebuild and can resolve recurring hitching after many tweaks.
Step 3: Reboot Windows, then launch the game and give it another 10–15 minutes of play to repopulate the cache.
Method 5 — System checks that prevent avoidable stutter
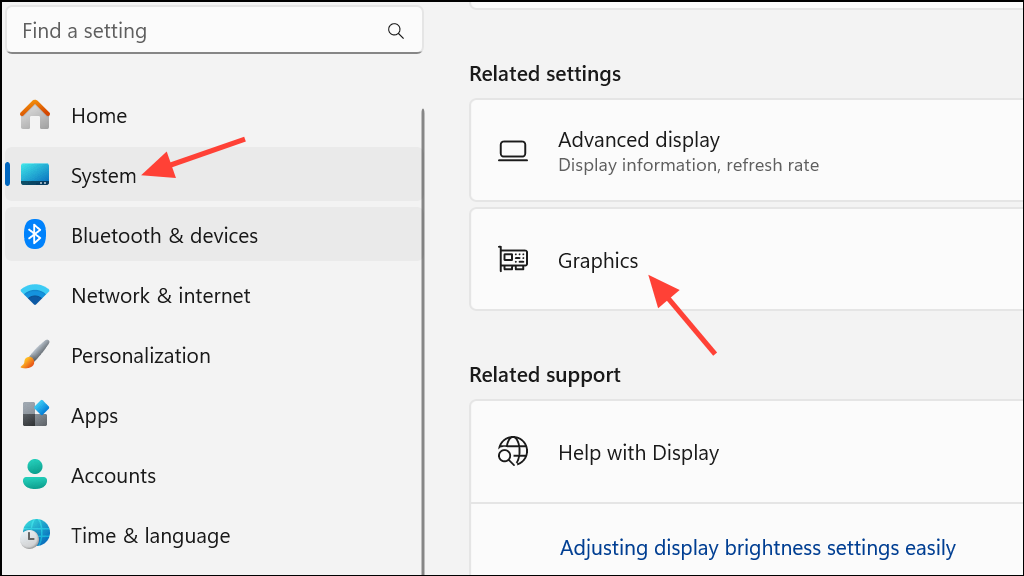
Step 1: Update GPU drivers and, on Windows 10, enable Hardware‑accelerated GPU Scheduling. Open Settings > System > Display > Graphics > Change default graphics settings and toggle HAGS On. Reboot afterward. This is required to use some upscalers on Windows 10.
Step 2: Verify game files to rule out corrupted assets. On Steam, open the game’s Properties > Installed Files and select Verify integrity of game files. This replaces missing or damaged content that can cause crashes or stutter loops.

Step 3: Disable overlays (Steam, Discord, GeForce Experience, third‑party FPS/OC tools). Overlays inject into the render path and can add hitching or cause device resets during area transitions.
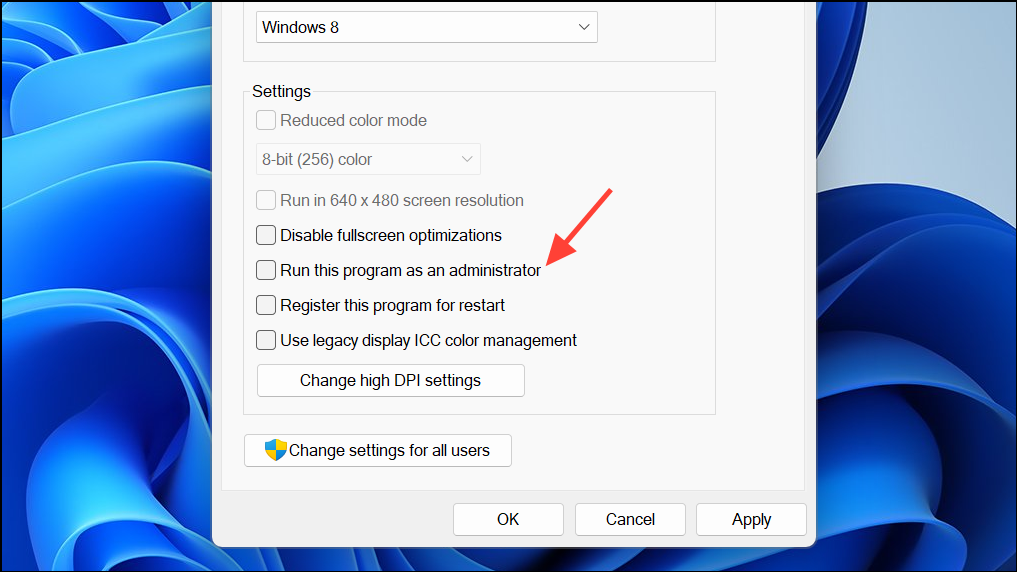
Step 4: Run the game as administrator for a quick test. Right‑click the executable and choose Run as administrator to eliminate permission issues with caches and config writes.
Step 5: Install and run the game from an SSD. The streaming system expects SSD‑class throughput; HDDs will exhibit long loads and frequent micro‑hitches when moving through the open world.
Official steps and notes for these items, including driver links and cache locations, are consolidated here: PC Troubleshooting & Optimization.
What to expect by hardware target
The official performance targets set expectations for each preset: minimum spec aims for 1080p at 30 FPS on Low, while recommended spec aims for 1440p at 60 FPS on Medium. Use the steps above to reach those targets sooner and with fewer spikes, and keep shaders compiling after changes per the official guidance.
- Low/older GPUs: keep Volumetric Fog/Clouds Low, Shadows Low, use FSR/DLSS on Performance or Balanced, and avoid Frame Generation if it feels sluggish.
- Mid‑range GPUs: run upscaling on Quality, lower Fog/Clouds one notch, Shadows Medium, cap FPS to refresh rate for steadier pacing.
- High‑end GPUs and 4K: use DLSS Balanced/Performance, enable Frame Generation with Reflex On, and reduce Fog/Clouds one step to stabilize heavy combat scenes.
Quick fixes for common oddities
Step 1: Engine.ini keeps resetting. Mark Engine.ini as Read‑only after making changes. Remove Read‑only before patching the game so updates apply correctly.
Step 2: Pixelated outlines around objects with dark skies. Lower the upscaler’s aggressiveness (e.g., from Performance to Balanced/Quality) or increase Volumetric Cloud Quality to Medium or higher to reduce temporal artifacts.
Step 3: Want “some” fog via INI. The INI switches are binary; use the in‑game Fog setting for partial fog. If you disable fog in INI and dislike the look (busy distant scenery, flatter depth), restore r.fog=1 and r.VolumetricFog=1.
Two things consistently improve results: pick the right upscaler with sensible fog/clouds and let shaders recompile after each change. If you’re still seeing persistent hitches, try the shader‑cache method and, if you’re comfortable, the targeted INI edits—both can make a visible difference.