
Kilo’s second TASK job is straightforward once you know where to go and in what order to hit the pod controls. This guide covers the unlock requirements, the exact route to the Order pod in the Hungering Plain, what to clear before you start, and the full input sequence with the timing quirks that trip players up.
Mission at a glance
| Item | Details |
|---|---|
| Quest type | Side mission (TASK chain) |
| Unlock requirements | Complete The Kairos Job and Free for the TASKing |
| Pickup | Talk to Kilo at The Launchpad (southeast of The Howl) |
| Objective | Find and open the Order pod in the Hungering Plain |
| Rewards | XP, Cash, Eridium, and a random weapon from the pod chest |
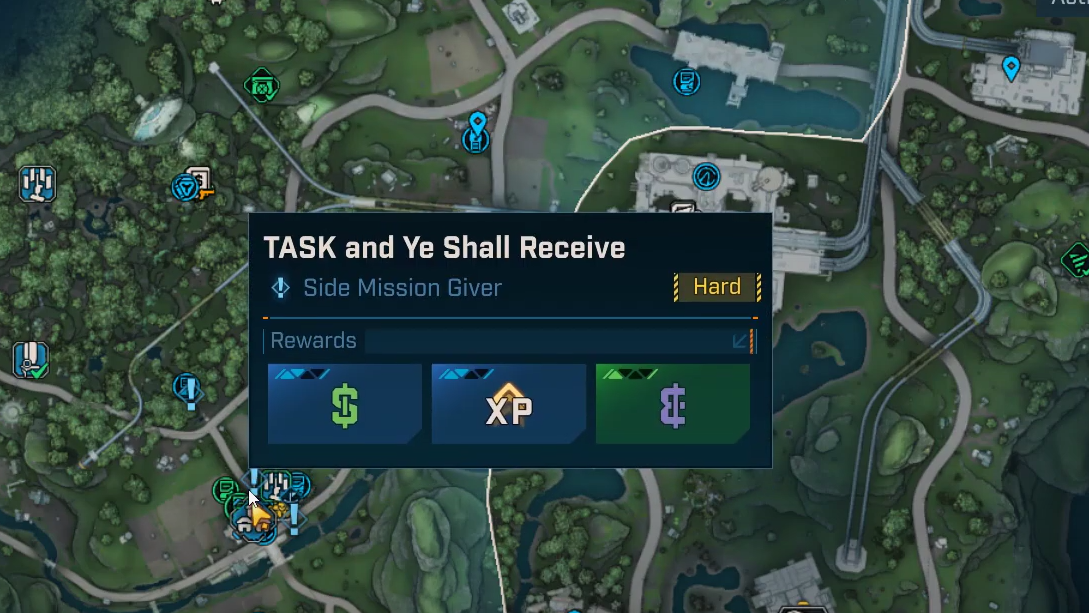
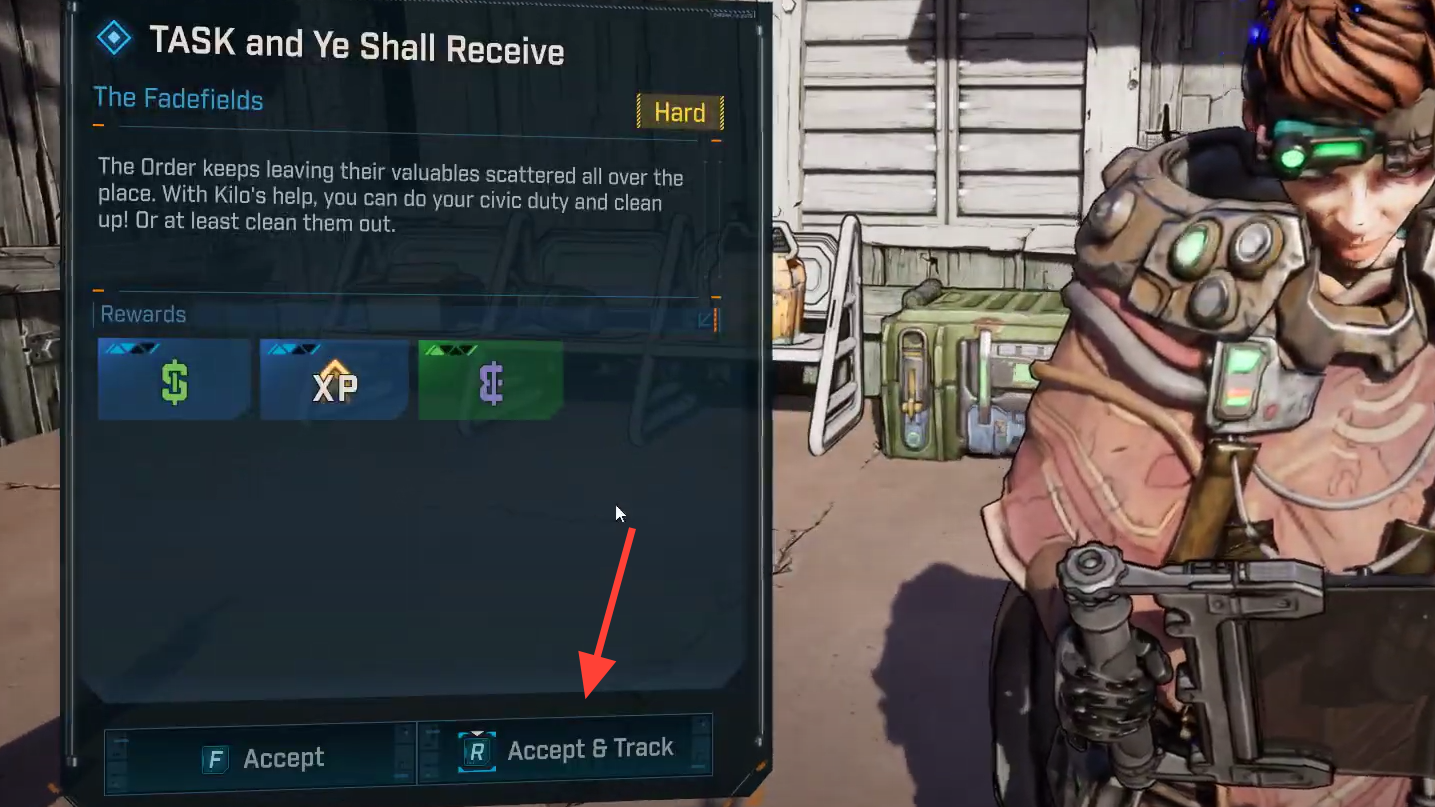
Unlock TASK and Ye Shall Receive
This mission sits in the same TASK pod-breaking chain. If you haven’t already, finish The Kairos Job, then Free for the TASKing. Once those are done, head to The Launchpad and speak with Kilo; she’s typically near the house on the northern side of the area.
Travel to the Hungering Plain pod (and what to expect on the way)
Set a course for the southeast, past The Flarewell, into the Hungering Plain. There isn’t a convenient nearby safehouse or silo for this one, so plan on driving or running the whole leg.
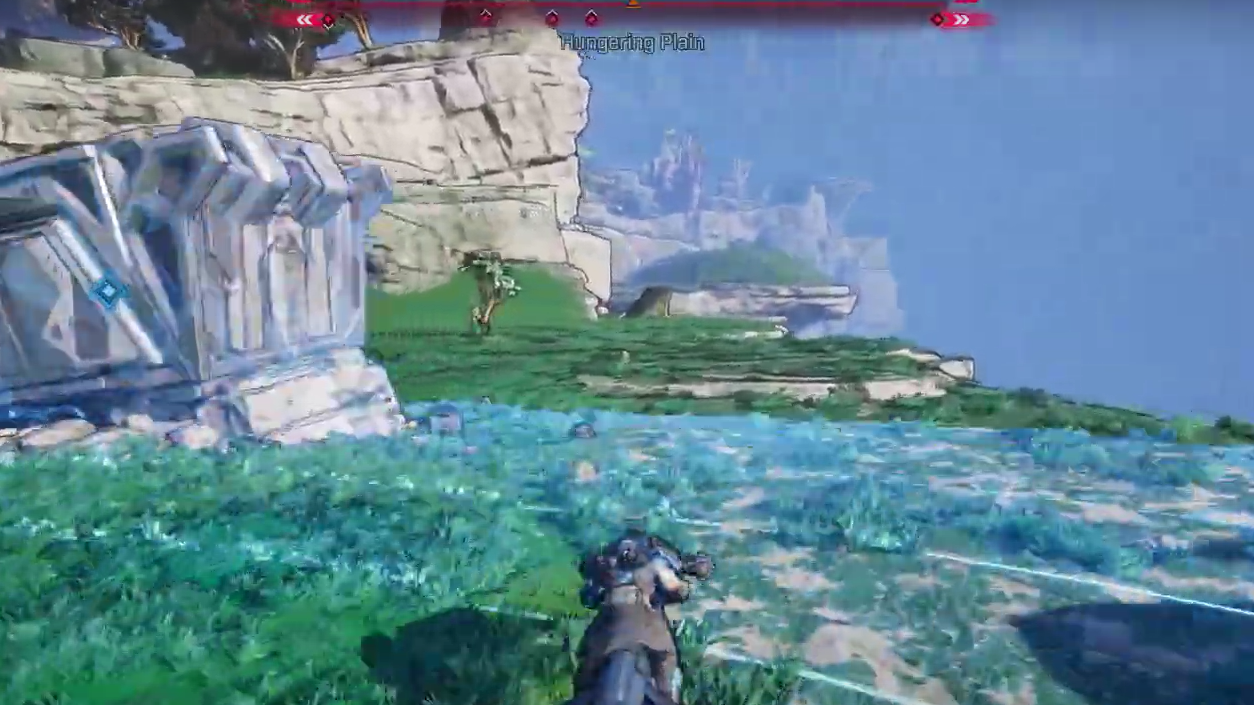
You’ll need to cut through The Flarewell’s Order depot en route. Expect a fight with Order patrols there before you can continue. At the destination, look for the pod near a lake’s edge in the eastern part of the region (below a cliff).
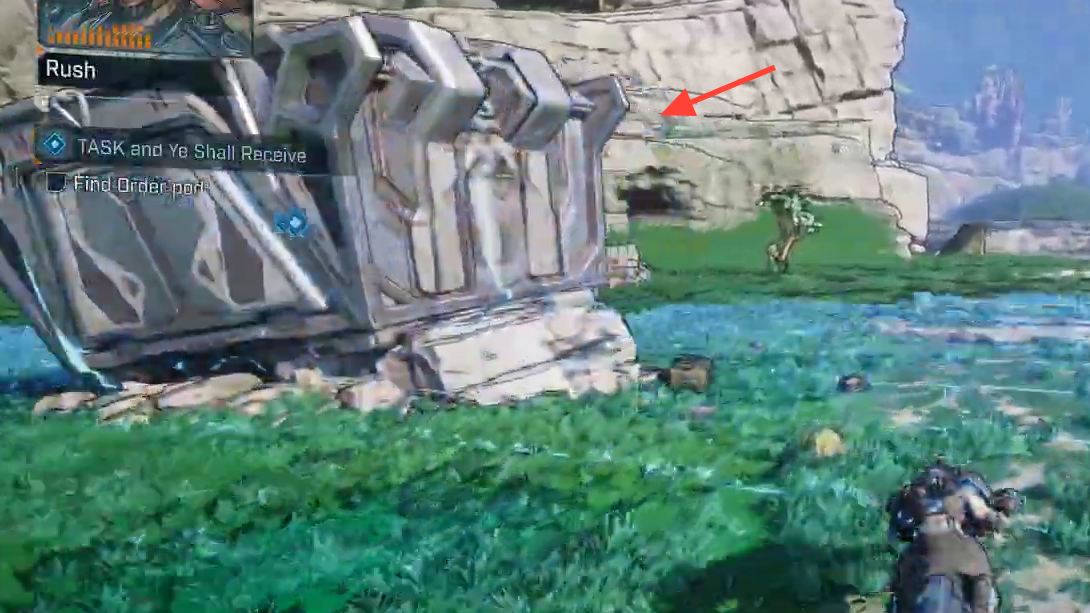
Before you touch the panel, clear out the local wildlife. Manglers will spawn from nearby dens and can interrupt the sequence. Wipe them out so you’re not forced to restart.
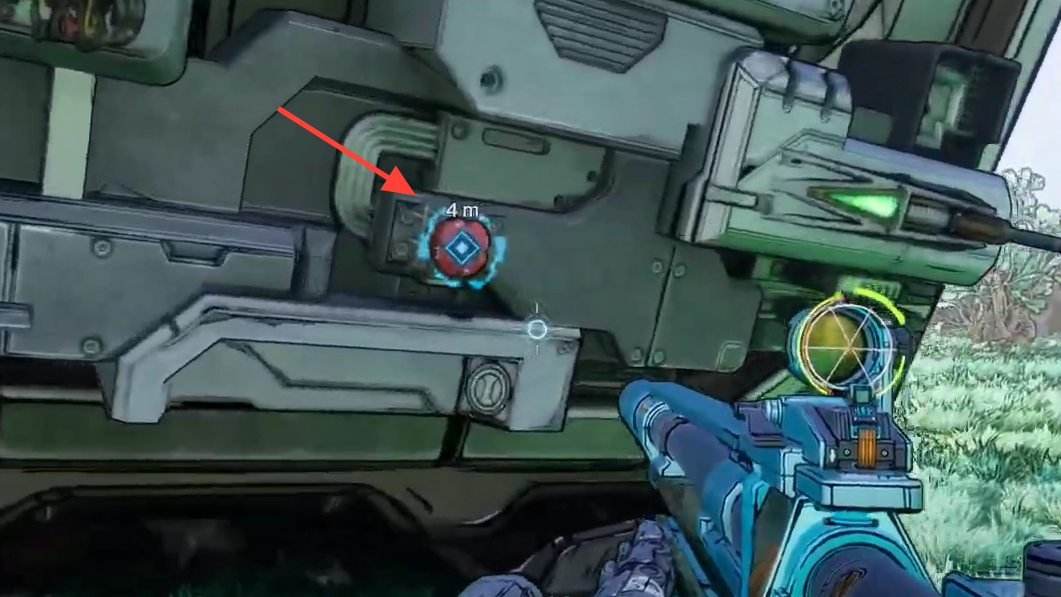
How the Order pod panel works (timers, “don’t” traps, and input types)
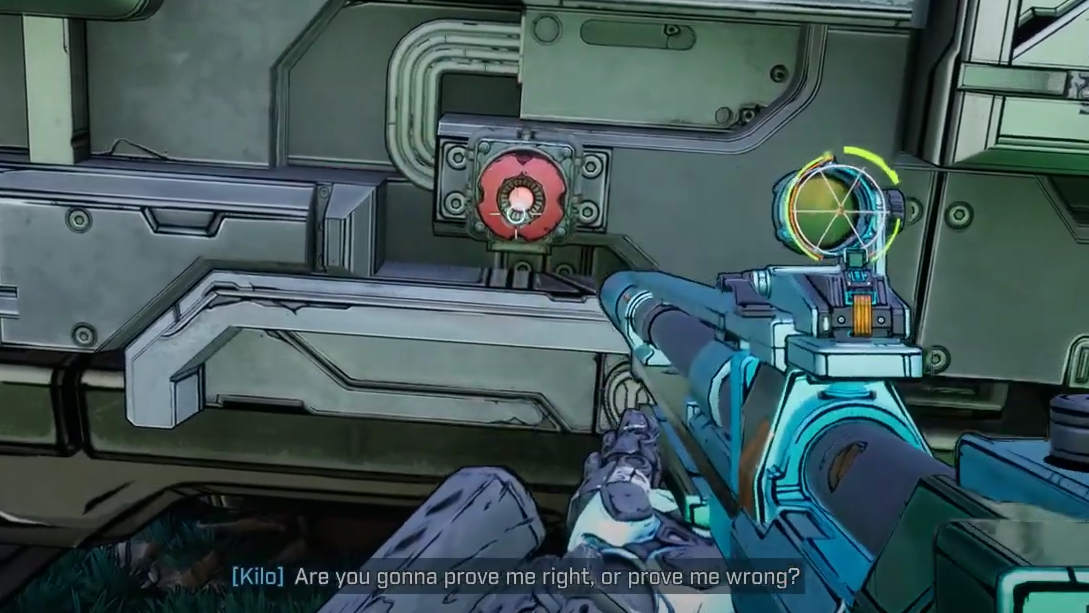
The pod uses the same control cluster you saw in the previous TASK mission: a flip switch, a lever, a red button, and a shootable panel. Interacting with the panel has a small twist this time—Kilo will mix in commands that tell you to not perform an action. When she says “don’t pull the lever,” you must literally do nothing and wait for the next instruction.
- Start the sequence by meleeing the red button when prompted.
- Each instruction has a short timer (roughly four to six seconds). Be ready to act immediately.
- “Press” vs “smack” the button are different: press is a normal interact, smack is a melee hit.
- “Shoot panel” means fire at the designated panel on the control face; any reliable, accurate weapon works.
Exact input sequence (in order)
Kick things off by meleeing the red button when Kilo says to begin. Then follow these inputs in order. If a line says “don’t…,” wait out the timer and do nothing.
1. Flip switch
2. Pull lever
3. Don't flip switch
4. Press button
5. Melee button
6. Shoot panel
7. Flip switch
8. Pull lever
9. Shoot panel
10. Melee button
11. Press button
12. Don't pull lever
13. Flip switch
14. Shoot panel
15. Flip switch
16. Flip switch
17. Press button
18. Shoot panel
19. Shoot panel
20. Shoot panel
21. Press button
22. Press button
23. Press button
24. Smack button
25. Don't pull lever
26. Flip switch
If you miss an instruction or act during a “don’t” prompt, the sequence fails and you’ll need to restart from the first step.
Open the pod and collect rewards
Complete the sequence and the pod unlocks, revealing a weapon chest. Grab any items you want; the mission wraps on pickup and awards XP, Cash, and Eridium alongside whatever you pull from the chest.
From here, Kilo’s final TASK job becomes available. Expect a longer trip and an expanded puzzle in that follow-up.