
CODE VEIN II’s PC performance swings hard depending on a small cluster of settings, especially Global Illumination and your frame cap, with upscaling choices often deciding whether 4K is playable.
Quick answer: If you’re getting drops or stutter, lower Global Illumination from ultra to high (or lower) and set a lower frame rate cap (some players report that 30 fps stabilizes performance).
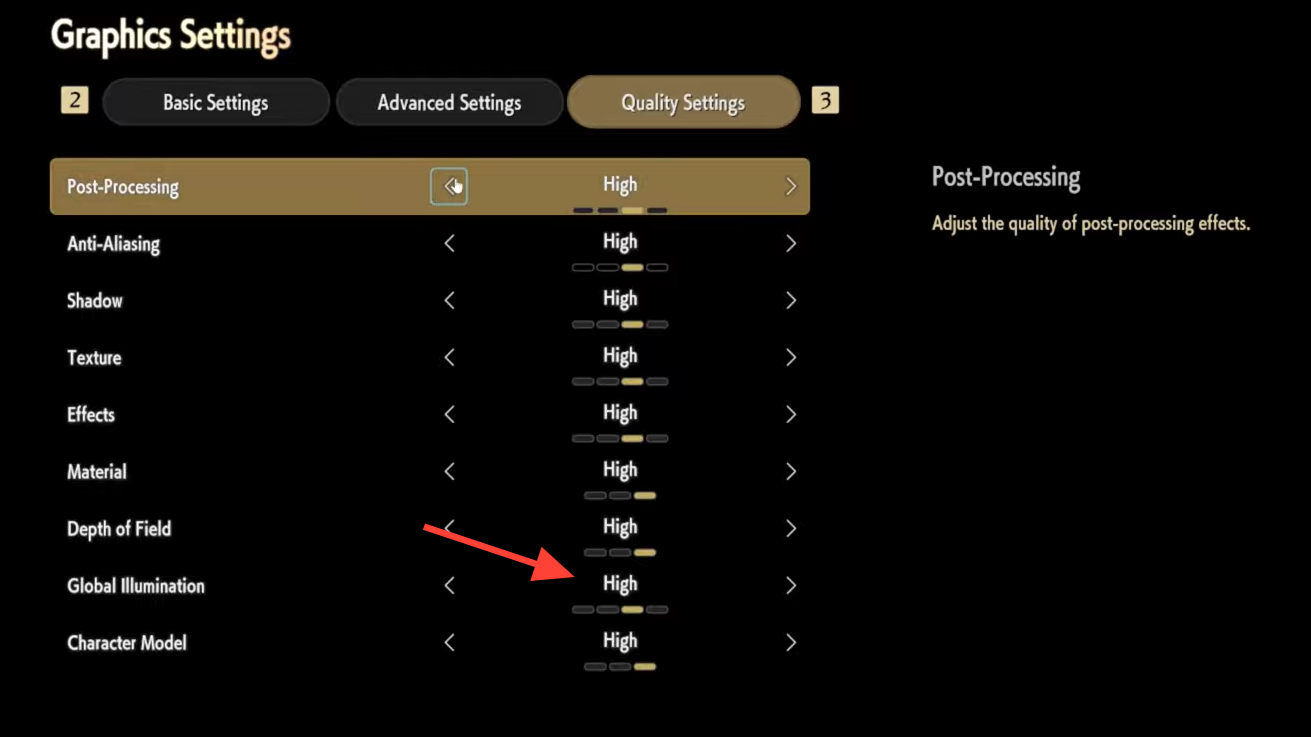
Global Illumination is the first setting to check
Across a range of GPUs, Global Illumination is one of the most consistently “expensive” settings. On a Radeon RX 6750 XT at 1440p, the most notable dips under 60 fps were tied to pushing Global Illumination to ultra. Other reports describe Ultra Global Illumination behaving as if it enables ray-tracing-like workload in some capacity, which would explain the sharper performance hit compared to nearby settings.
If you want a single change that often improves stability without rewriting the whole preset, Global Illumination is the most defensible starting point because it’s repeatedly associated with sudden drops rather than small, steady losses.
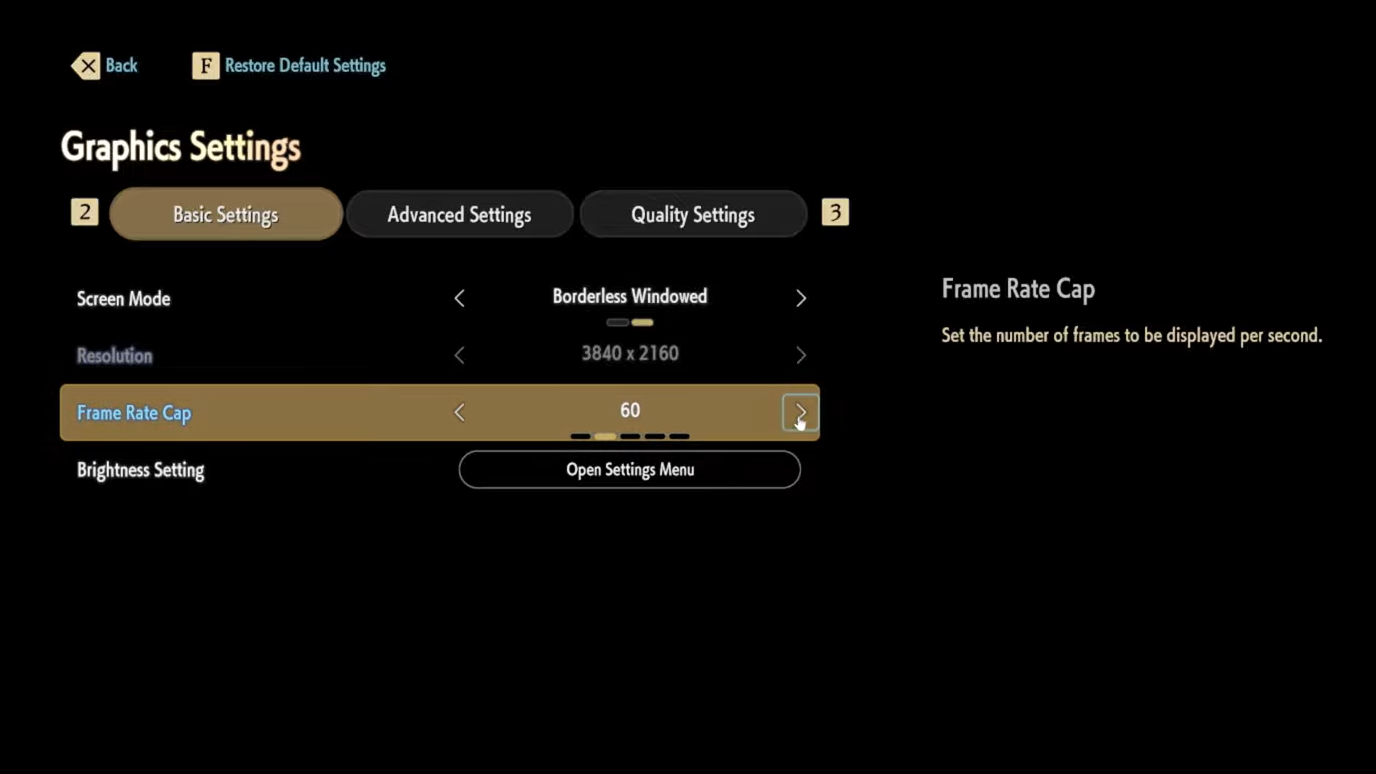
Frame rate caps can trade smoothness for consistency
One recurring pattern in performance complaints is “runs fine until it doesn’t,” with periodic drops that feel worse than a lower but stable frame rate. In at least one case, setting the frame cap to 30 fps reportedly eliminated constant drops that made the game feel “like junk.” That’s not a universal fix, but it’s a clear mechanical lever: a tighter cap reduces how often the engine tries (and fails) to hit higher instantaneous frame targets.
Verification is straightforward: if the fix works, the frequent drops stop, and frame pacing becomes consistent even if the peak frame rate is lower.
Upscaling choice can be the difference between 60 fps and 30 fps at 4K
Players running high-end GPUs at 4K report large differences between DLAA and DLSS. One 4K setup with “everything maxed” reported roughly 60–65 fps with DLAA, while DLSS Quality landed closer to 95–100 fps. Another 4K configuration with an RTX 3070 and DLSS Quality still reported 40–60 fps at max settings, showing that “DLSS on” is not a guarantee of high frame rates, but it can materially shift what’s achievable.
On AMD hardware, a Ryzen 7600X plus Radeon 7800XT report shows how dramatic scaling can be at 4K: max settings were described as 27 fps (99% lows around 25), while minimum settings reached 120–140 fps (99% lows around 90). That same user’s “usual” compromise kept most settings high while lowering AA, shadows, effects, and illumination, plus running render scale at 95, producing about 37 fps at 4K and around 80 fps at 1440p (with higher lows than the max preset).

Render resolution and render scale can quietly change your “1080p” result
Not all “1080p” reports mean native 1920×1080 rendering. One PC with a Core i5-12400F and GTX 1070 Ti described a steady 60 fps at “1080p” while running 60% render resolution, with default settings generally set to high. That’s a reminder that render scale can be doing a lot of the work, especially on older GPUs that are otherwise unlikely to sit at a stable 60 fps on high at native resolution.
If your performance doesn’t match someone else’s “same resolution” claim, check whether you’re both using the same render scale and the same upscaler mode (TSR/DLSS/FSR) before assuming the hardware comparison is meaningful.
Performance can vary by area and scene complexity
Some reports show a clear split between hub areas and more open spaces. A Ryzen 5 9600X with a “9070 XT” at 1440p described 80–85 fps in a hub area and 60–65 fps in an overworld area at very high settings, including shadows. Another user noted a specific “scene 2 in appearance editor” scenario with wind and weather where performance dropped (on Linux via Proton), while returning to a base area improved frame rate substantially with the same settings.
This matters mechanically because it changes how you validate a tweak. If you test in a lightweight area, you can miss the stutter or drops that show up in heavier scenes. The change “worked” when the troublesome scene stops dipping below your target cap (or stops stuttering) rather than when an easy scene looks faster.
Steam Deck and low-power setups are more likely to show stutter than low fps
On an LCD Steam Deck, reports describe micro-stuttering and frame drops on default settings, with “playable” performance on low settings but continued stutter when entering new areas. One experience mentions using DLSS Ultra Performance with all settings at their lowest and still seeing micro-stuttering, while moving to medium settings caused severe stutter during area transitions before settling.
That pattern points less to average fps and more to traversal and streaming behavior. In practice, you know you’ve improved it when entering a new area no longer causes repeated hitching, not when the frame counter climbs in a static scene.
System requirements exist, but real-world results can look very different
Minimum requirements are framed around 1080p at 30 fps on low settings: Windows 11 (64-bit), an Intel Core i5-9600K or AMD Ryzen 5 3600, 16GB RAM, and a GeForce GTX 1660 Super / Radeon RX 5700 / Intel Arc B570, plus DirectX 12 and 70GB of storage with an SSD recommended. In real play reports, hitting stable targets often comes down to the same handful of levers regardless of GPU tier: heavy lighting settings (notably Global Illumination), a realistic frame cap, and an upscaler mode that fits your resolution.
Common reasons the “one big change” doesn’t help
- You’re not testing in the same scenario that stutters. Some dips show up in specific areas or weather-heavy scenes.
- Render scale or upscaling mode differs from what you think you’re running. “1080p” can be a 60% render resolution case.
- Global Illumination is still on ultra. Multiple reports link ultra GI to the biggest stability problems.
If you need a fast baseline that tends to hold up in heavier scenes, start by lowering Global Illumination, then set a frame rate cap you can sustain in your worst-performing area. Once those two are stable, upscaling and render scale become the main tools for moving from “stable” to “stable at a higher resolution.”