
Minecraft and Hytale both use block-based worlds, which makes it possible to carry over structures such as castles, hubs, or cities rather than starting from zero. Instead of rebuilding every wall and tower by hand, you can export a portion of your Minecraft world into a schematic file and turn it into a Hytale prefab.
Conversion focuses on structures, not on entire infinite worlds. Terrain generation, biomes, and gameplay systems differ too much between the two games to reproduce a full Minecraft world one-to-one. The realistic goal is to transfer specific builds you care about and then embed them naturally into Hytale’s worlds.
Minecraft schematic formats supported for Hytale conversion
Hytale-focused tools work with the same structure formats many Minecraft builders already use. The main file types are:
- .schematic – the classic format used by tools like WorldEdit.
- .litematic – the format created by the Litematica mod.
- .schem – the newer WorldEdit format used on recent setups.
All three formats store a selection of blocks and related data from a Minecraft world. They are ideal for copying individual buildings, spawns, or themed areas instead of exporting everything.
For cleaner results and smaller files, select only what you need: the structure itself plus a small margin of surrounding terrain if necessary. Very large selections increase conversion time and make in-game placement harder.
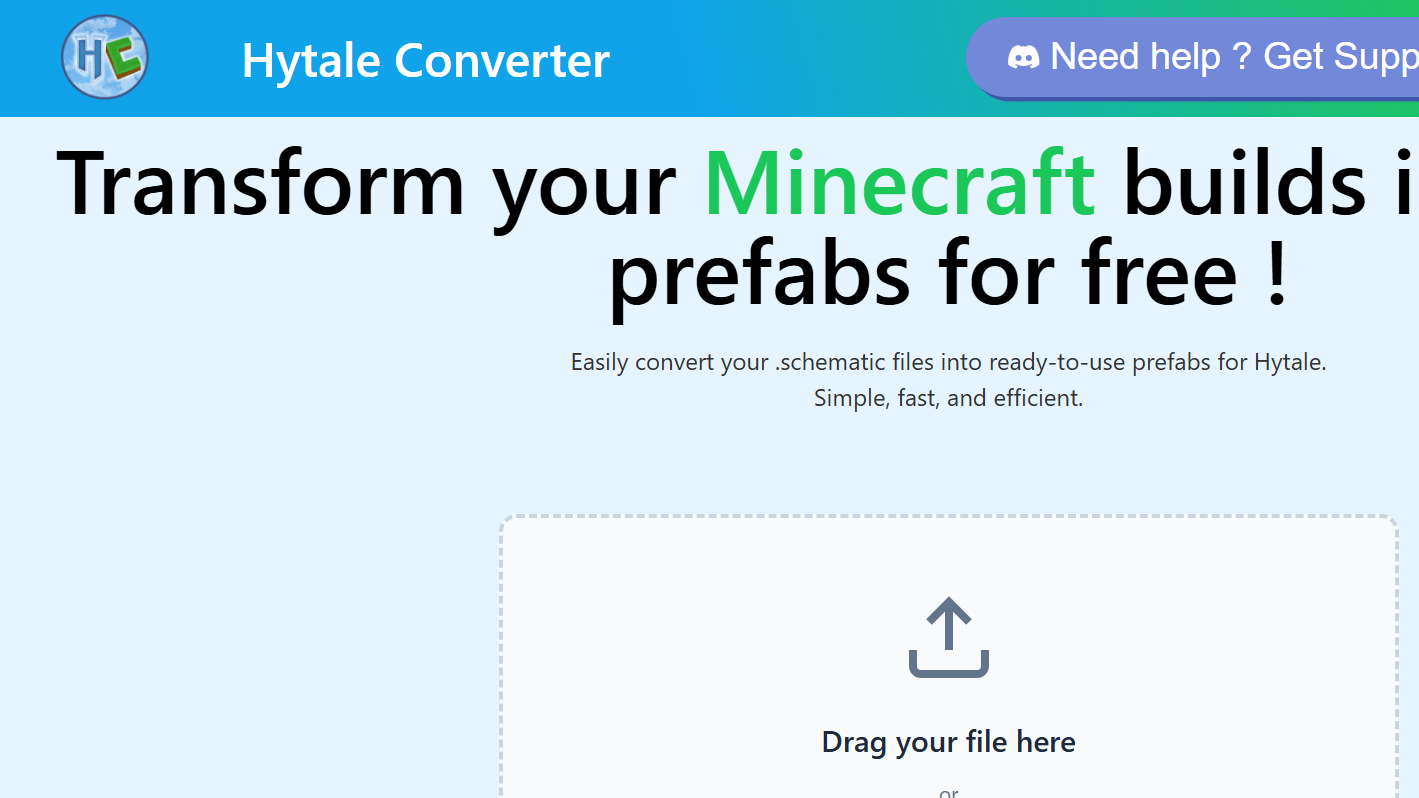
Convert the schematic with Hytale Converter
Step 1: Open the Hytale Converter web tool at https://hytale-converter.com. Keep your exported Minecraft file (.schematic, .litematic, or .schem) accessible on your computer.
Step 2: Drag your schematic file onto the upload area, or use the file picker to select it. The tool validates the file type and prepares it for processing.
Step 3: Start the conversion using the button provided on the page. The converter analyzes the Minecraft blocks and replaces them with appropriate Hytale blocks, textures, and models where equivalents exist.
Step 4: When processing finishes, download the generated Hytale prefab file. Store it somewhere easy to find, as you will move it into the Hytale folders in the next steps.
Once downloaded, the prefab is ready for installation on either a local Hytale world or a server, depending on where you want to use the build.
Install the prefab on a Hytale PC world
Hytale creates its internal prefab folders automatically the first time you generate a prefab from inside the game. This avoids path issues and ensures the directory structure matches the game’s expectations.
Step 1: In Hytale, open one of your worlds and create any simple prefab using the in-game tools, even if it is a tiny test structure. This forces the game to generate the correct prefabs directory for that world.
Step 2: Close the game, then open your file explorer and navigate to the save folder for the world where you created the test prefab. The standard path on a Windows PC is:
C:\User\[Name]\AppData\Roaming\Hytale\UserData\Saves\[WorldName]\prefabsReplace [Name] with your Windows user name and [WorldName] with the exact name of the Hytale world.
Step 3: Copy the prefab file you downloaded from Hytale Converter into this prefabs folder. Do not rename or modify the file contents.
Step 4: Launch Hytale again and load the same world. Open the in-game editor; the converted prefab appears in the prefab list for that world, ready to be placed, rotated, and edited like any other structure.
From there, you can position the build where it fits the terrain, make cosmetic adjustments, or combine it with Hytale-native blocks and decorations.

Install the prefab on a Hytale server
Servers use a slightly different layout, but the principle is the same: prefabs live in a dedicated folder that the game reads when loading content.
Step 1: Start the server once and create or load a world that will host your converted build. This allows the server to initialize its folder structure, including the prefab directory.
Step 2: Stop the server cleanly, then open the server root directory in your file manager. Look for the prefabs directory at this path:
\hytale\Server\prefabsStep 3: Place the prefab file produced by Hytale Converter into this prefabs folder. If multiple worlds share the same server files, ensure you keep track of which prefabs belong to which project.
Step 4: Restart the server. When you connect with a client who has access to the in-game editor, the converted prefab is available for placement in the appropriate world or zone.
Server owners can use this method to bring over hubs, arenas, adventure maps, or thematic regions originally built in Minecraft and reuse them as Hytale content for players.
How block conversion behaves and common limitations
The conversion process focuses on structural elements rather than complex game logic. In practice, that means:
- Standard blocks such as stone, wood, glass, and basic decorative blocks map cleanly to similar Hytale materials.
- Special or modded blocks often lack direct equivalents and may be replaced by a generic block or omitted, depending on how the tool interprets them.
- Redstone and mechanisms do not carry over as working systems. Circuits, command blocks, and logic devices usually need to be rebuilt with Hytale’s own mechanics.
- Lighting and ambience differ between the two games, so interiors may feel brighter or darker after conversion and can benefit from manual lighting tweaks.
Structural fidelity is generally good: walls, floors, roofs, towers, and major silhouettes remain recognizable. Plan for a short polishing pass after import to replace any odd-looking blocks, refine materials, and take advantage of Hytale’s decorative options.
Choosing what to convert from Minecraft to Hytale
Because these tools work on schematics rather than entire worlds, it is efficient to think in terms of modules. Large projects can be split into separate selections such as the main castle, the surrounding village, the bridge network, or individual arenas.
Smaller, focused schematics reduce conversion time, make troubleshooting easier, and give more flexibility when arranging content inside Hytale. You can mix converted builds with native Hytale constructions, redesign surrounding terrain, and gradually phase in your favorite Minecraft creations without overwhelming new worlds.
For players with years invested in long-running Minecraft worlds, this approach preserves the most meaningful builds while still embracing Hytale’s different look and gameplay.

Other community approaches
Beyond web-based conversion, community developers have experimented with mods that read Minecraft schematic formats directly inside Hytale and let players map blocks interactively. One example is a “Hytale schematic importer” mod that exposes an in-game command such as /hsi schematic, lists available schematics, and allows manual pairing between Minecraft blocks and Hytale items through a search interface.
These mod-based solutions are useful for advanced users who want very granular control over how each block type translates, or who prefer working entirely inside Hytale rather than using an external converter. They usually involve installing a mod file into the game’s mods folder and enabling it per world through configuration or a world-specific mod menu.
For most builders, the Hytale Converter workflow remains the simplest path: export a schematic, convert it once, and place the resulting prefab wherever it is needed.
Migrating favorite Minecraft builds into Hytale keeps past work relevant while opening up new creative possibilities. By exporting key structures as schematics, converting them with Hytale-focused tools, and installing the resulting prefabs into local worlds or servers, long-term builders can bridge the gap between the two games and continue evolving their projects in a new environment.