
Nano11 Builder is an experimental PowerShell script that streamlines a Windows 11 image by removing built-in apps, core services, many drivers, languages, and more. The output is a very small ISO (often around 2.3–2.5 GB) intended for test VMs and disposable installs, not daily use. It uses Microsoft’s Deployment Image Servicing and Management (DISM) and the oscdimg ISO utility to do the work. The resulting OS cannot receive Windows updates, add features, or install language packs.
Before you start (read this first)
This process creates a non-serviceable Windows 11 image that strips Windows Update, Microsoft Defender, the component store (WinSxS), many services (including audio), Search, BitLocker, Biometrics, accessibility features, and numerous inbox apps. You won’t be able to add them back later. Use in VMs or isolated test scenarios only.
What you need:
- A Windows 11 ISO from Microsoft for x64 devices. Download from Microsoft’s Windows 11 download page.
- The Nano11 Builder script from its repository: https://github.com/ntdevlabs/nano11.
- Windows PC with administrator rights and adequate free disk space to mount, modify, and export images.
- Recommended: use en-US x64 media. Other languages/architectures may require manual adjustments.
Part 1 — Download the official Windows 11 ISO
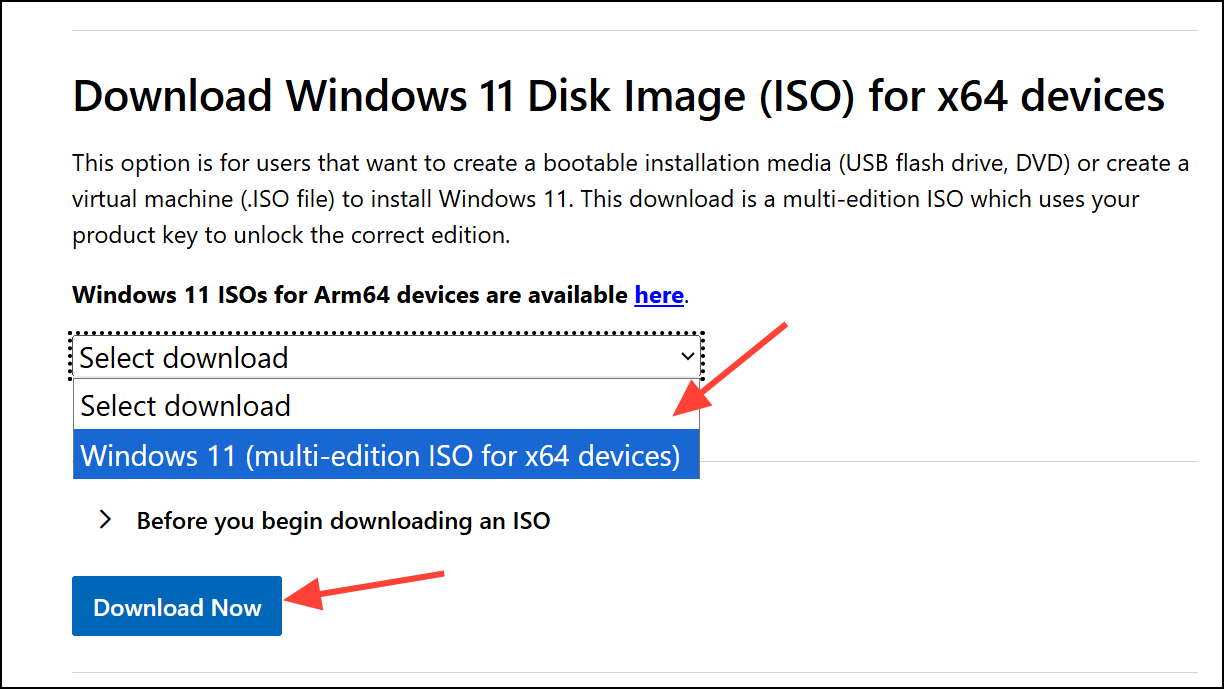
Step 1: Open Microsoft’s Windows 11 download page and locate “Download Windows 11 Disk Image (ISO) for x64 devices.” Select Windows 11 from the list.
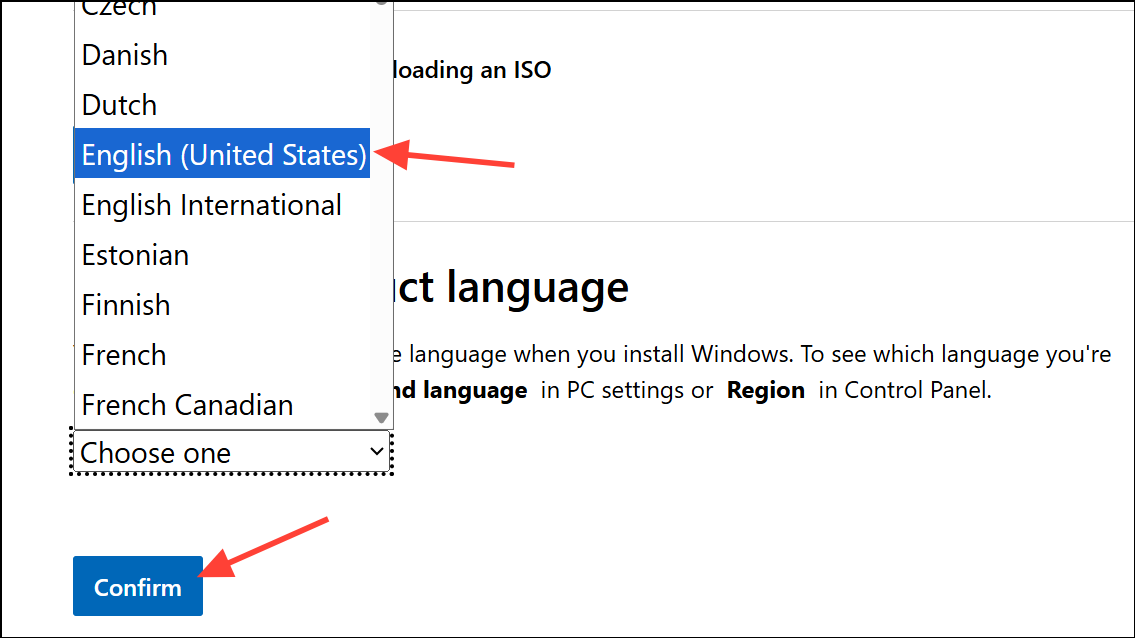
Step 2: Choose your language in the prompt and confirm. This ensures the ISO matches your preferred language for setup.
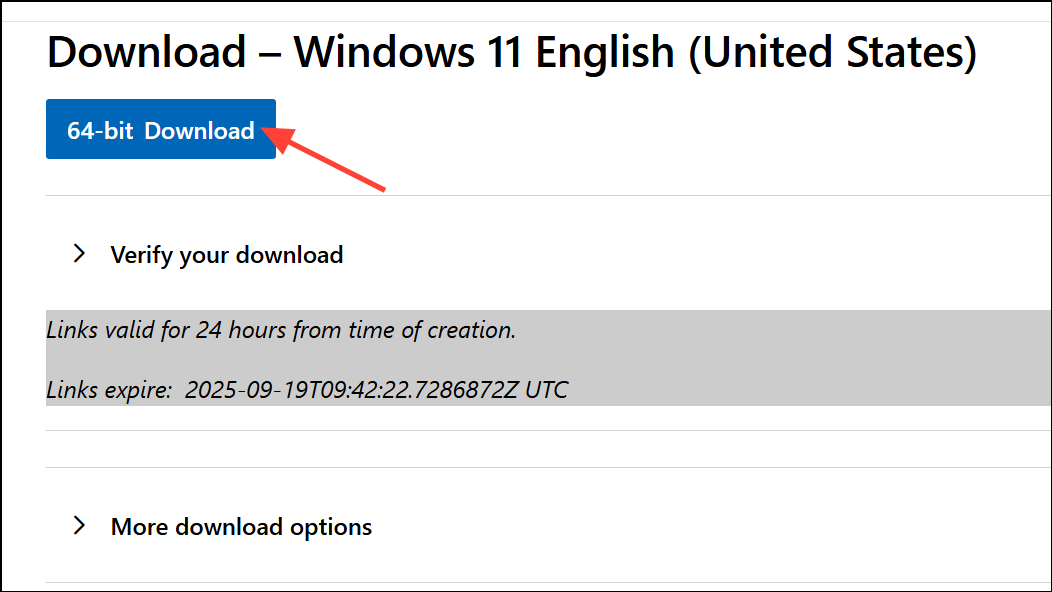
Step 3: Click the 64-bit download button to save the ISO locally. Note the folder path; you will mount this ISO shortly.
Part 2 — Get the Nano11 Builder script
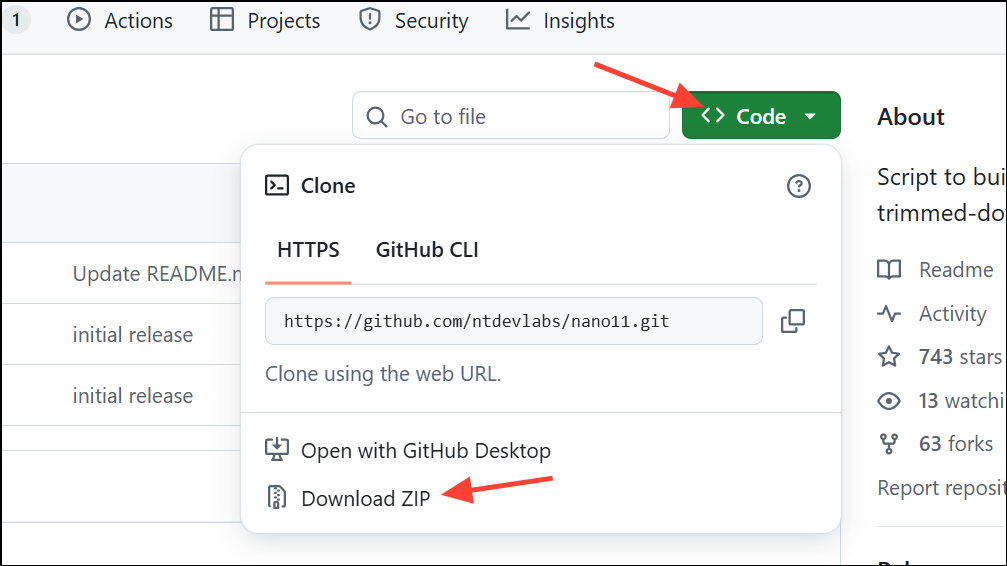
Step 1: Visit the project repository at https://github.com/ntdevlabs/nano11. Click “Code” then choose “Download ZIP” to get the script bundle.
Step 2: Extract the downloaded ZIP (for example, it may appear as nano11-main.zip) into a working folder you control, such as C:\Tools\nano11\.
Part 3 — Build the Nano11 ISO
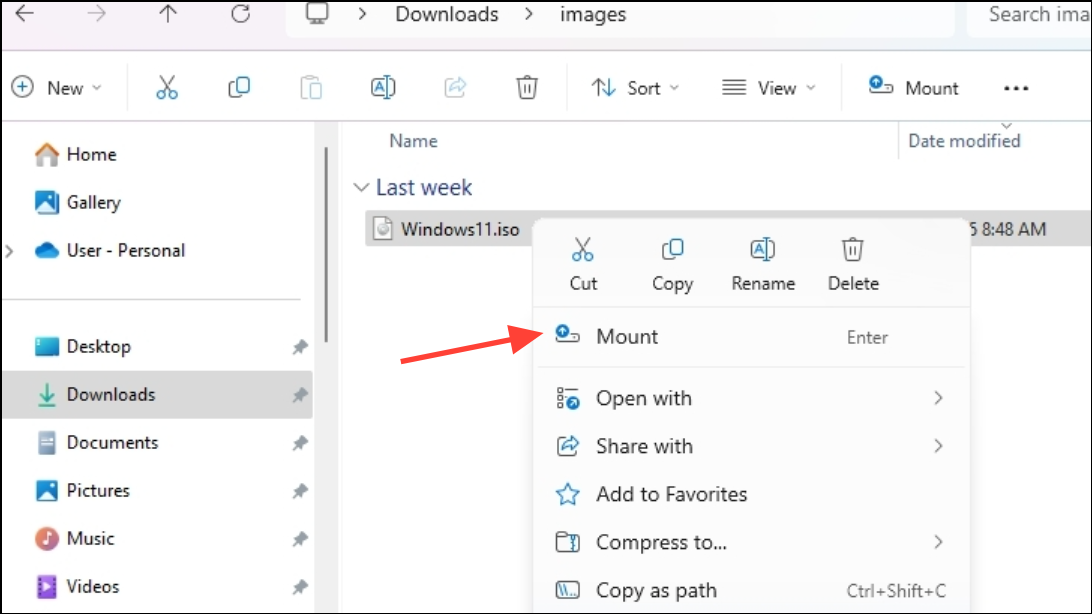
Step 1: Mount the Windows 11 ISO. In File Explorer, right-click the ISO file and select “Mount.” If “Mount” is not present, choose “Open with” → “Windows Explorer.” Note the drive letter assigned (for example, D:).
Step 2: Open PowerShell as an administrator. Press Start, type “PowerShell,” right-click Windows PowerShell, and select “Run as administrator.” This is required for image servicing tasks.

Step 3 (recommended): Allow script execution for this session only using a safe, temporary policy bypass. This avoids changing the machine-wide policy.
Set-ExecutionPolicy Bypass -Scope Process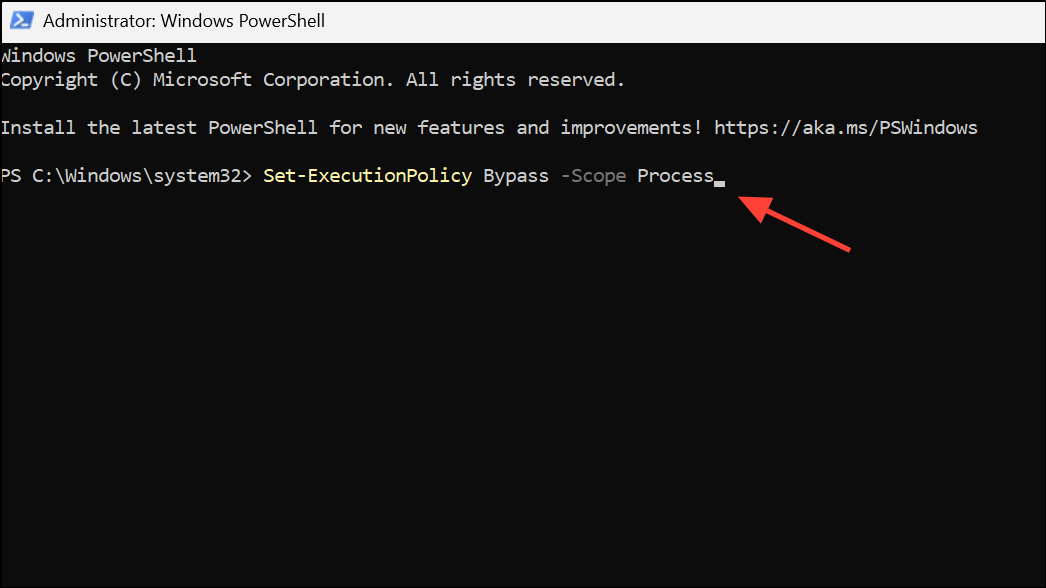
Step 4: Run the builder script from its folder. Replace the path below with your actual extraction path.
& "C:\Tools\nano11\nano11builder.ps1"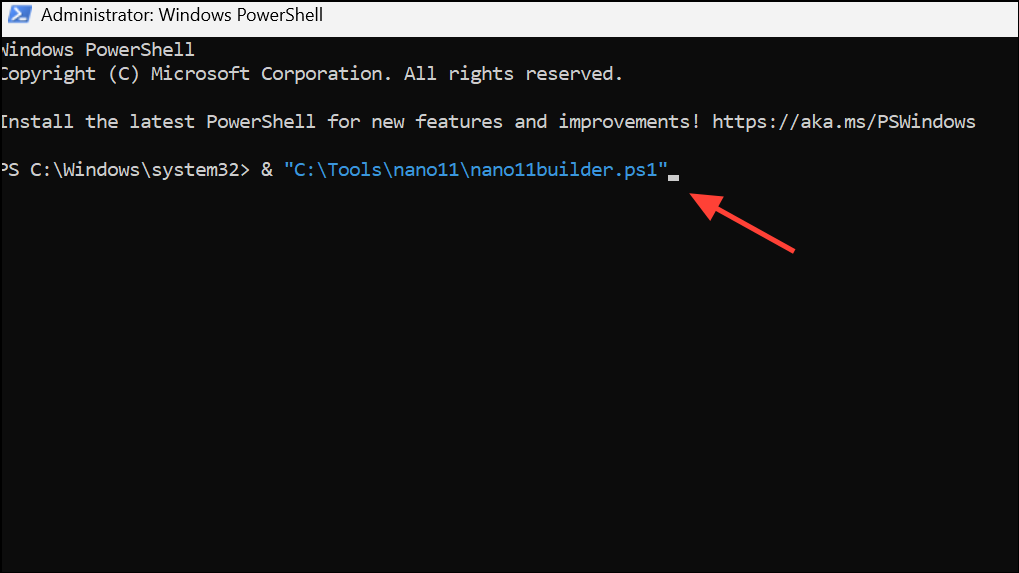
Step 5: When prompted, type R (to run) and then Y (to confirm). This acknowledges that the script will modify the image aggressively.
Step 6: Enter the drive letter of the mounted Windows 11 ISO (for example, D) when asked. The script uses this as the source media.
Step 7: Select the edition index to process. Typical indexes are 1 for Home and 6 for Pro, though this can vary by ISO. The script will list available indexes.
Step 8: Wait for the process to complete. The script will remove components, export the modified image, and generate a bootable ISO using oscdimg. Build time depends on your CPU and disk speed.
Step 9 (if you used Unrestricted): If your environment required a broader policy change, restore it now. For example, to reset to the default restrictive policy:
Set-ExecutionPolicy Restricted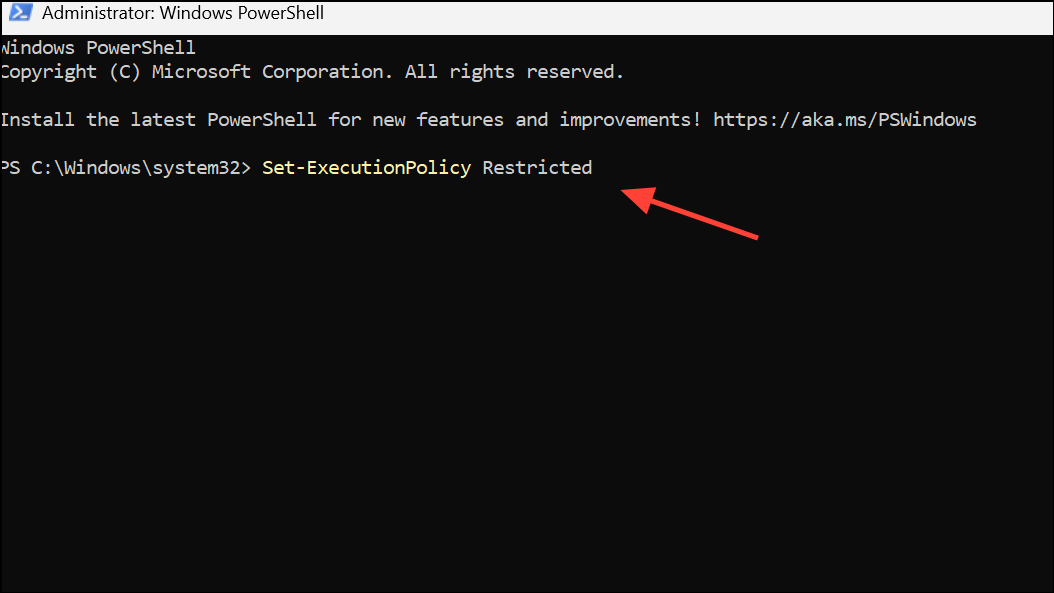
Output and where to find it:
- The new ISO is written to the same folder as the script, named
nano11.iso. - A log file,
nano11.log, is also created in that folder with details of the run. - Resulting ISO sizes commonly land around 2.2–2.5 GB, depending on the source edition, language, and drivers.
Part 4 — Install from the Nano11 ISO (optional)
Step 1: Use your preferred tool to create bootable media, such as a USB installer, from nano11.iso. Standard USB creation tools work as they do with any Windows ISO.
Step 2: Install in a VM or on non-critical hardware. Expect a minimal Windows 11 environment: no Windows Update, no Defender, limited drivers, and many services disabled by design.
What Nano11 removes and key limitations
Expect a highly minimal OS with the following characteristics:
- Core servicing removed: Windows Update and the component store (WinSxS) are gone. The OS cannot receive cumulative updates or add features later.
- Security stack removed: Microsoft Defender and related services are uninstalled.
- Services reduced: many background services are disabled or removed, including audio. Search, BitLocker, Biometrics, and accessibility features are not present.
- Apps removed: numerous inbox UWP apps and associated components (for example, Clipchamp, Xbox, Solitaire, Office Hub, News, Weather) are skipped or uninstalled.
- Drivers trimmed: non-essential drivers are removed; basic graphics, networking, and storage support remain the focus.
- Browsers/cloud clients removed: Microsoft Edge and OneDrive are uninstalled; legacy Internet Explorer and Tablet PC Math are removed.
Typical outcomes:
- ISO size commonly around 2.3–2.5 GB; sometimes near ~2.2 GB with certain sources.
- Installed footprint often ~2.8–3.2 GB, depending on edition, language, drivers, and compression settings.
- Intended usage: quick, compact testbeds and lightweight VMs where a static environment is acceptable.
Compatibility notes
The script can process multiple Windows 11 SKUs (for example, Home, Pro, LTSC). The developer targets en-US x64 by default; other languages or architectures may require manual tweaks. It has been demonstrated on Windows 11 version 25H2, 24H2, and earlier releases.
Troubleshooting and tips
Mount option is missing on the ISO. Right-click the ISO, select “Open with,” then choose “Windows Explorer.” If another archive utility is the default handler, temporarily set Windows Explorer as default for ISO files.
Execution policy errors. Use a process-scoped bypass to avoid system-wide changes:
Set-ExecutionPolicy Bypass -Scope ProcessIf Group Policy blocks this, temporarily set a broader policy as an administrator and restore it after the build:
Set-ExecutionPolicy Unrestricted
Set-ExecutionPolicy Restricted
Edition index is unclear. The script prints available indexes. Commonly, index 1 is Home and index 6 is Pro, but verify the list presented for your specific ISO.
Result size varies. Differences in edition, language, and driver payloads influence final ISO and install footprints. Using LTSC and aggressive compression typically produces the smallest results.
Use only in safe contexts. The image is not updatable and lacks key features. Keep it offline or air-gapped for testing, development, or embedded VM scenarios.
Why the script works (brief technical context)
Nano11 automates DISM-based component removal from a mounted Windows image and rebuilds a bootable ISO using oscdimg. An unattended answer file is injected to streamline setup, including bypassing the Microsoft account requirement and opting into compact installation. Aggressive trimming and compression reduce both the distribution size (ISO) and on-disk footprint after installation.
With a few careful steps, you can assemble an ultra-compact Windows 11 ISO tailored for fast test deployments. Just keep it to labs and VMs where a static, minimal OS is the goal.