
Kailok the Hornsplitter is the boss encounter that caps off Chapter II of Crimson Desert, and he represents a sharp difficulty spike compared to everything before him. He's fast, aggressive, and capable of ranged Wind Slash attacks that punish passive play. Many players hit a wall here because Crimson Desert's combat system handles differently from other action RPGs — tapping buttons feels sluggish, while holding inputs produces smoother, more responsive actions. Once you internalize that distinction and adopt a patient, defensive approach, Kailok becomes far more manageable.
Quick answer: Keep your shield up at all times (L1 / LB), block or parry Kailok's melee chains, then use Force Palm (R3) to stun him and follow up with two heavy attacks (R2 / RT). Manage your stamina carefully and heal with cooked food between his combos.

Preparation Before the Fight
The small camp just before the Goldleaf Guildhouse has both a Bonfire and an Anvil. Use the Bonfire to cook food — even simple, single-ingredient recipes that restore 80–100 HP work well here. Stock up generously, because you will need to heal multiple times during the fight. On PS5, tap Right on the D-pad to consume food, or hold it to switch between equipped food items. On PC, tap F3 to eat and hold F3 to select a different dish.
At the Anvil, reinforce your armor. This provides a significant defense boost on top of any new armor pieces you may have purchased from a merchant. If you haven't upgraded your skill tree yet, invest in three or four levels of Health Upgrades and push Armed Combat to level 2, which unlocks the Evasive Slash ability. Putting points into Stamina is equally important — this fight drains it fast through constant blocking and dodging.
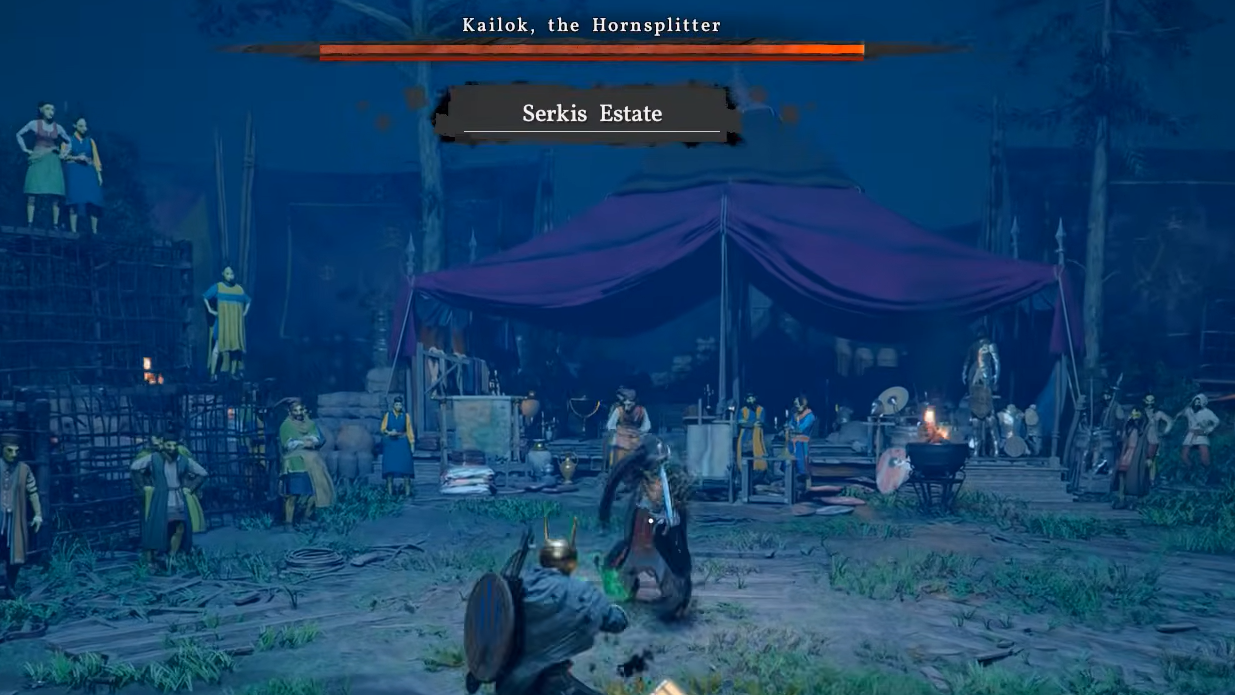
Reaching Kailok at the Goldleaf Guildhouse
Kailok waits at the top of Unicorn Cliff. Follow the path south of Nas River until you see a large camp surrounded by cloth walls — that's the Goldleaf Guildhouse. The front approach is heavily guarded, and fighting through the sentries risks burning through your food supply before the boss even starts. A better option is to sneak around to the left side and approach the back of the guildhouse. Strike one of the wooden posts with your sword to break it down, walk through the gap, and a cutscene will trigger the boss fight.
Core Strategy: Shield Up, Block, Punish
Unlike many action RPGs, Crimson Desert does not slow your stamina regeneration while your shield is raised. This is the single most important thing to understand about this fight. Keep your shield up for the entire encounter. Kailok's attacks will bounce off your block, and your stamina will recover even while you're guarding.
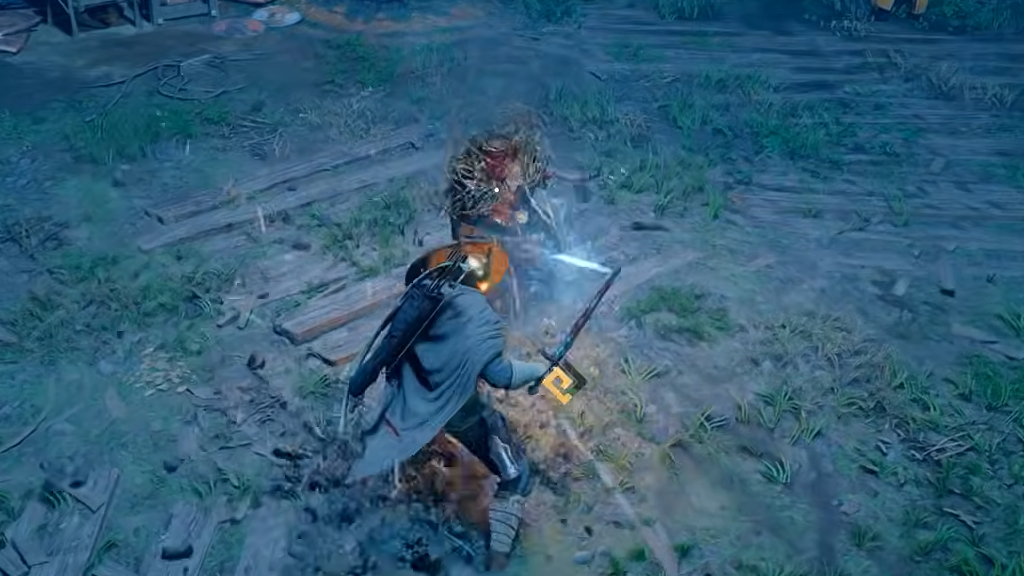
The basic loop works like this: block or parry one of Kailok's melee attack chains, then immediately hit him with Force Palm to stun him, and land two heavy attacks before he recovers. Don't get greedy — two heavy swings is the safe window. After that, raise your shield again and wait for his next combo. This is a block-and-punish fight through and through. Chasing Kailok or trying to trade hits with him will get you killed, because most of his attacks will interrupt yours.
Be aware that one of his chains is deceptive: three quick hits, a brief pause, then a fourth strike. If you drop your guard or try to Force Palm after the third hit, that delayed fourth swing will catch you. Wait for the full chain to finish before retaliating.
Learning the Evasive Roll
Early in the fight, Kailok will perform an Evasive Roll — the screen takes on a blue tint when he does it. After he uses it a second time, Kliff learns the technique as well. The Evasive Roll only activates after you dodge an incoming attack; it won't trigger if you try to use it when no attack is present. It's a powerful repositioning tool, especially for escaping Kailok's more dangerous combo finishers.
A key note on dodging in general: holding the dodge button produces a full roll, while tapping it gives a short sidestep that often isn't enough to clear Kailok's wide swings. Get in the habit of holding inputs rather than tapping them. This applies to attacks as well — held inputs feel noticeably more fluid than quick taps throughout Crimson Desert's combat system.
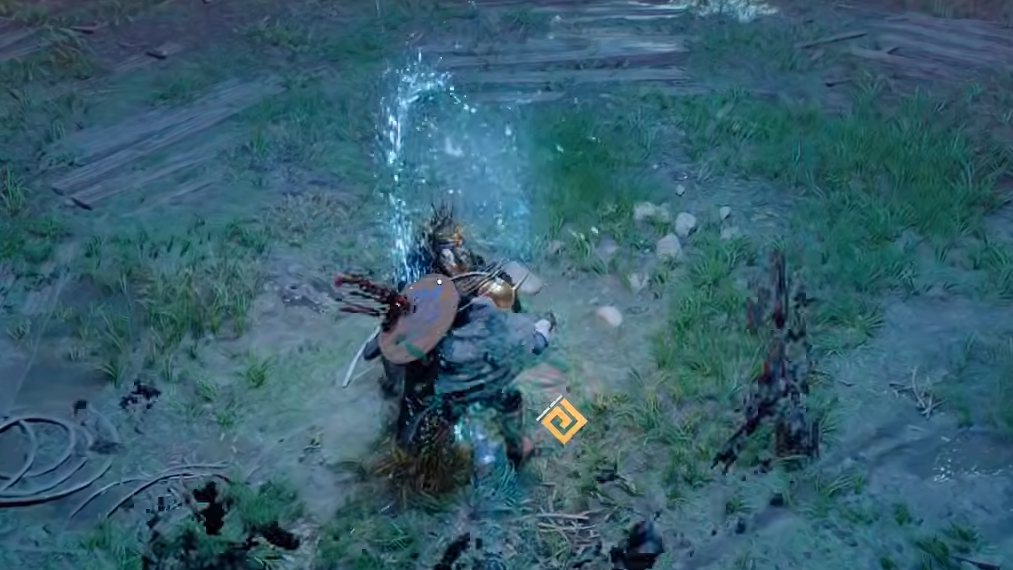
Kailok's Wind Slashes and Ranged Pressure
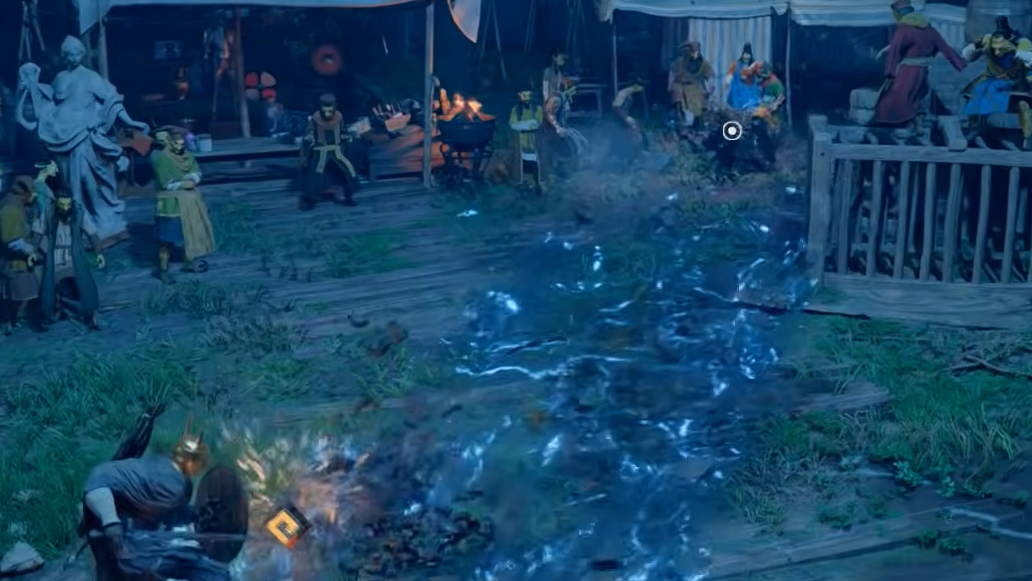
Kailok opens the fight with two ranged Wind Slash attacks and returns to them frequently throughout. These projectile waves cannot be fully blocked or parried — you'll take chip damage through your shield. The safest response is to dodge sideways to avoid them entirely. Some players report success jumping over them, but the timing is tight and inconsistent, so side-dodging is the more reliable option.
When Kailok is at range, don't chase him. Let him come to you. He typically fires one or two Wind Slashes and then closes in for a melee combo. That melee approach is your opening to parry and punish.
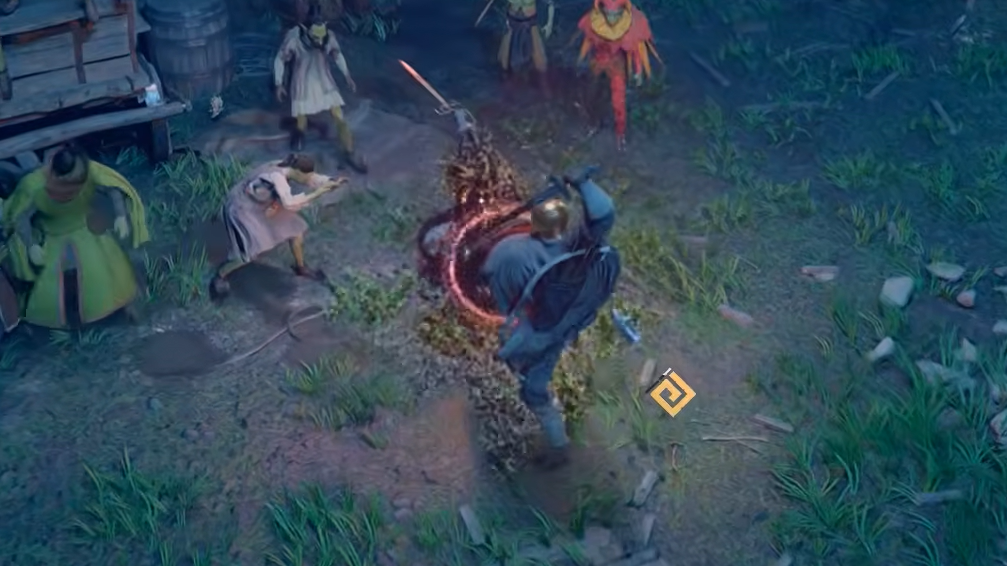
Kailok's Red Glint Combos
Kailok has three distinct Red Glint combos, each telegraphed by the position of his sword and the visual effects surrounding it. During the windup of any Red Glint attack, Kailok gains a protective shield that makes him immune to weapon strikes and powers — do not attempt to Force Palm him during these moments.
| Combo Name | Tell | Attack Pattern | Best Response |
|---|---|---|---|
| Front Sword Red Glint | Sword held in front, red glow | Jumps back, launches two Wind Slashes, then dashes toward you | Dodge the Wind Slashes sideways, parry the closing dash attack |
| Back Sword Red Glint | Sword held behind him, red glow | Aerial overhead strike, jumps back, fires a Wind Slash | Stay defensive and dodge all three parts — this combo is too fast to punish mid-sequence |
| Red Glint Ranged Flurry | Screen dims, red glow plus white light on sword | Five Wind Slash attacks; the fifth launches three waves, and earlier slashes may include double waves | Dodge side to side continuously; save your Evasive Roll for the final triple-wave attack |
Charged Dash Combo
Outside of the Red Glint attacks, Kailok has a Charged Dash that begins with him crouching low with his sword at his side. He'll rush forward with a dash strike followed by a leaping overhead slash. You can dodge out of the way, use Evasive Slash if you've unlocked it, or — ideally — parry both hits. A successful parry here opens a window for a couple of free swings before he resets his guard.
Filling the Stun Meter (Yellow Bar)
Beneath Kailok's health bar sits a yellow meter. Parrying his melee attacks and landing Force Palm strikes both fill this bar. Once it's completely full, Kailok staggers and becomes vulnerable for several seconds. Use this window to unload heavy attacks. Try to trigger the stun when your stamina is near full so you can maximize your damage output before he recovers.
Force Palm is also useful for pushing Kailok toward the edge of the arena and into the surrounding crowd. When he's knocked out of bounds, he takes a few seconds to jump back in, giving you additional free hits. Just be mindful of your Spirit gauge — Force Palm costs Spirit, and when it's empty, you'll need to create distance and use R3 + L3 together to meditate and recover it.
Additional Combat Tips
The Stab attack (thrust) deals strong damage and applies a bleed effect that ticks away at Kailok's health while you're dodging and repositioning. If you've purchased a Longsword from a merchant, its heavier strikes can corner Kailok more effectively than the default weapon. Some players also find success with dual-wield swords combined with power attacks and Force Palm stuns.
If you're struggling with parry timing, don't force it. Blocking with your shield is perfectly viable for the entire fight — you'll just need more food to offset the chip damage from Wind Slashes. Brute-forcing the encounter with a large food supply and revive stones is a legitimate path to victory. It won't be elegant, but it works.
Rewards for Defeating Kailok
Beating Kailok triggers a cutscene that ends Chapter II and begins Chapter III: Howling Hill. You'll also unlock the Abyss Gears system, which lets you slot special items infused with Abyss Energy into your equipment for stat buffs and new abilities.
| Reward | Details |
|---|---|
| Sword of the Lord | 13 Attack, Level 2 Attack Speed, grants Wind Slash ability |
| Seal of Greed | Goldleaf Merchant Guild seal |
| Iron Ore | Crafting material |
| Copper Ore | Crafting material |
The Sword of the Lord's Wind Slash ability fires a ranged projectile on every third standard melee attack, which is particularly useful against archers and distant enemies. It also activates on any attack that follows a successful parry. Note that the third-hit Wind Slash may not launch if that strike connects with an enemy at melee range, making it somewhat inconsistent in close-quarters group fights.
With Kailok down and the Sword of the Lord in hand, your next objective is to investigate the back alleys of Hernand. The combat lessons learned here — patience, shield discipline, and stamina awareness — carry forward into every boss encounter that follows.