
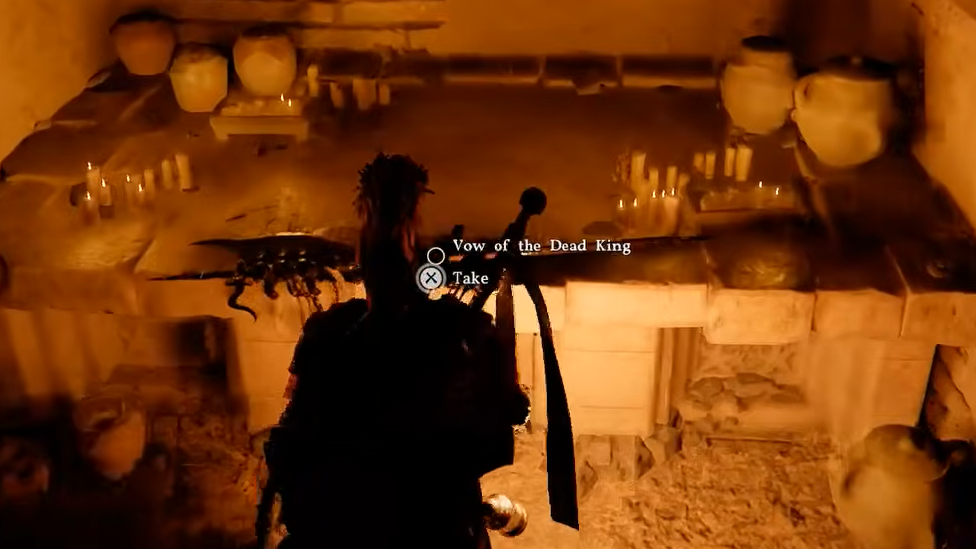
The Vow of the Dead King is one of the strongest two-handed weapons you can pick up early in Crimson Desert, and it's completely unrelated to any quest. It sits at the bottom of a dungeon inside the Frostveiled Castle Ruins in northern Pailune, guarded not by a boss but by environmental hazards, a swarm of bandits, and a pair of dangerous rock worms. If you know the route and can manage your stamina, the entire run takes around 10 to 15 minutes.
Quick answer: Travel to the Frostveiled Castle Ruins near Silverwolf Mountain in northern Pailune, clear the bandits on the surface, descend the staircase, navigate spike traps, a gap, and fire traps, then light the unlit lantern beside the barred chamber at the end of the hall to lower the gate and claim the weapon.
Vow of the Dead King Stats and Abyss Gear
| Attribute | Value |
|---|---|
| Weapon type | Two-handed halberd |
| Base Attack | 16 |
| Critical Rate | Level 3 |
| Refinement level | 2 |
| Abyss Gear bonus | +4% damage to humanoids, walkers, and mighty foes |
The real selling point is the Abyss Gear bonus. A flat 4% damage increase against humanoids alone would be worthwhile since they are the most common enemy type throughout the game, but the bonus also covers walkers and mighty foes. That triple coverage keeps the weapon relevant well past the point where its base attack might otherwise fall behind. Refining the halberd as soon as you can will bring its raw damage in line with other two-handed options you'll find later.
Where to Find the Frostveiled Castle Ruins
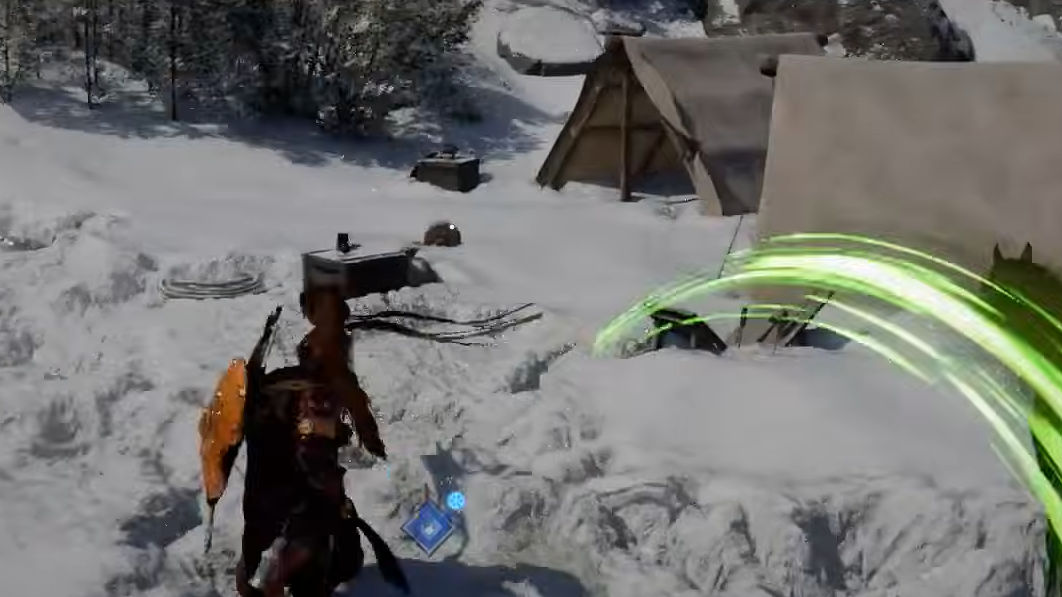
The Frostveiled Castle Ruins sit in the northern region of the Tribal State of Pailune, nestled between several peaks near Silverwolf Mountain and just east of the Wayward Woods. On the map, look for a large ruined stone structure surrounded by mountains. You'll need to ride north from the plains of Hernand and push through the Wayward Woods to reach it.
Two things make the journey harder than it looks. First, wolf packs and ambush enemies patrol the Wayward Woods and the mountain paths. You can ride past nearly all of them, and doing so is strongly recommended if you're still early in the game. Second, the cold weather in this zone drains stamina significantly faster than normal. That accelerated drain makes climbing rocky terrain risky, so pause on flat ground whenever possible to let your stamina refill before continuing upward.

Clearing the Bandit Camp
Before you can enter the underground portion of the ruins, you need to deal with several dozen bandits occupying the castle surface. Individually, they go down quickly, but their numbers can overwhelm a lower-level character who stands still. The encounter is manageable around the midpoint of Chapter 3 without much difficulty.
Once every bandit is down, locate the staircase that leads underground. This is your entry into the dungeon proper.
Dungeon Walkthrough — Traps, Gaps, and Worms
Equip your lantern before descending. The ceiling in the first corridor is unstable, and falling rocks will hit you if you don't react. Your lantern glows red right before debris drops. When you see that red warning, immediately reverse direction to avoid the impact.
Step 1: The first obstacle is a series of spiked floor sections that block the hallway. You cannot walk through them. Instead, climb onto either wall and shimmy across the gap. The torches mounted on the walls are harmless and won't burn you. The only risk here is running out of stamina mid-shimmy, so don't rush.
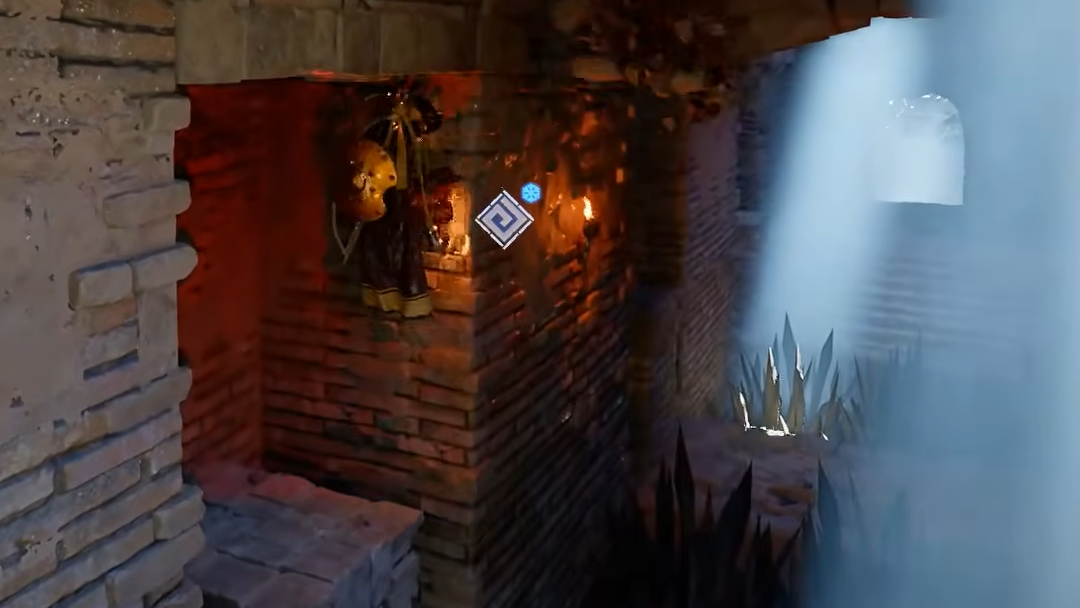
Step 2: Continue descending past more falling rocks until you reach a gap with a broken floor. Perform a double jump by pressing R3 after your initial jump to launch higher into the air, then glide across to the doorway on the opposite side. The jump-and-glide combination covers the distance comfortably, even without any special traversal upgrades.
Step 3: The next corridor contains two flame traps. The first shoots fire at roughly chest height, so duck under it. The second fires lower, and you can clear it with a running jump. If you'd rather not bother with the timing, sprinting straight through both traps is a viable option — the fire damage is surprisingly low, especially if you have any fire resistance gear equipped.

Step 4: You'll enter a room containing two large rock worms. These are far more dangerous than the bandits above. Their swipe attack deals heavy damage and knocks you down, and fighting them at a low level is a genuine risk. The safest approach is to skip the fight entirely by immediately turning right when you enter the room and passing through the door on that side. If you do want to fight, play defensively — wait for a worm to commit to an attack, land a few hits during its recovery window, then back off before the next swing.
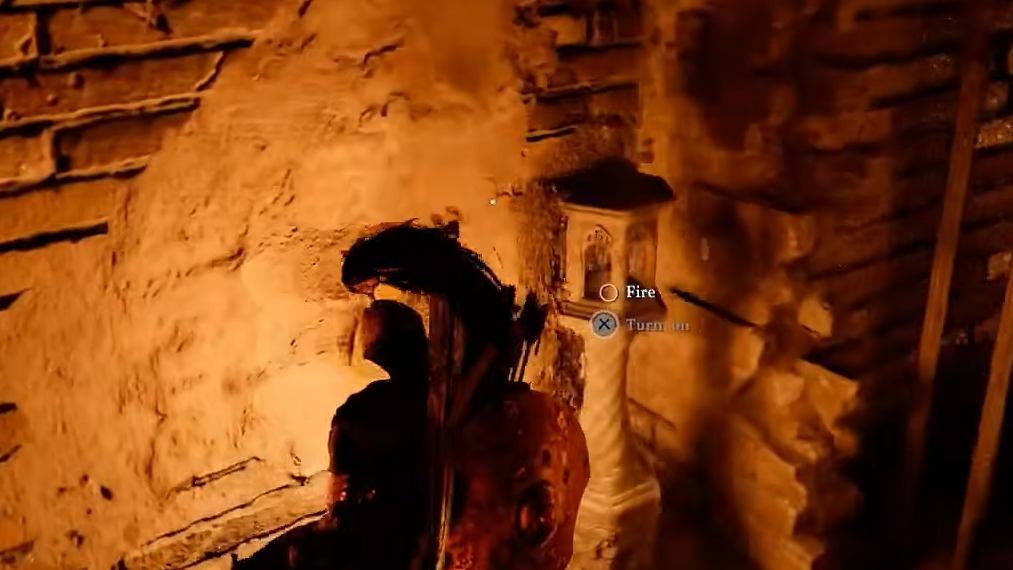
Step 5: At the end of the final hallway, you'll find an unlit lantern positioned next to a set of metal bars. Approach the lantern and hold the interact button to light it. The grate lowers, revealing the chamber behind it. Walk in and pick up the Vow of the Dead King. You can equip it immediately.
Is It Worth the Early Detour?
For most players, yes. The dungeon tests traversal and patience rather than raw combat power, which means you don't need to be overleveled to complete it. The Abyss Gear bonus against humanoids stays useful for a large portion of the game since humanoid enemies appear constantly. The high Critical Rate (level 3) also gives the weapon strong burst potential that pairs well with heavier, more defensive builds.
The main trade-off is attack speed. As a two-handed halberd, the Vow of the Dead King swings slower than one-handed alternatives. Players who lean toward fast, aggressive combat styles will feel the difference. Pairing it with stamina-focused builds or heavy armor sets helps offset the slower rhythm by letting you absorb hits between swings and commit to fewer, harder-hitting attacks. Refine the weapon early to push its base damage higher and keep it competitive as you progress through the mid-game.