
Microsoft Office Upload Center (processes such as MSOUC.EXE and MSOSYNC.EXE) manages uploads of Office files to services like OneDrive and SharePoint. On Office 2010–2016 it often starts with Windows and adds a tray icon even if you never use these features. There are several ways to disable it or hide it, depending on how much you want to remove.
Quick comparison of methods
The options below apply to Office 2010, 2013, and 2016 on supported Windows versions.
| Method | What it does | Office versions | Windows versions | Skill level |
|---|---|---|---|---|
| Turn off OneDrive Office sync | Stops Upload Center starting with Windows and disables Office/OneDrive co‑authoring. | 2013, 2016 | Primarily Windows 10 | Easy |
| Disable scheduled sync task | Prevents the Microsoft Office sync task from launching MSOSYNC.EXE. |
2013 (and some 2016) | Windows 7, 8, 8.1, 10 | Intermediate |
| Remove startup entry in Registry | Stops Upload Center from auto‑starting for the current user. | 2010, some 2013/2016 setups | Windows 7, 8, 10 | Advanced |
| Hide tray icon only | Removes the notification area icon but keeps the feature available. | 2010, 2013, 2016 | Windows 7, 8, 10 | Easy |
| Rename or uninstall components | Prevents executables from running or removes the feature (MSI installs only). | Mainly 2010–2016 MSI installs | Windows 7, 8, 10 | Advanced |
Method 1 – Disable Office file syncing in OneDrive (Office 2013/2016)
Disabling Office integration in OneDrive is the cleanest way on systems where OneDrive is tied to Office, such as Office 2016 on Windows 10.
Step 1: Locate the OneDrive cloud icon in the Windows notification area (system tray) near the clock. If it is hidden, click the small up‑arrow to show hidden icons and look for the white or blue cloud icon.
Step 2: Right‑click the OneDrive icon and select Settings. This opens the OneDrive settings dialog.
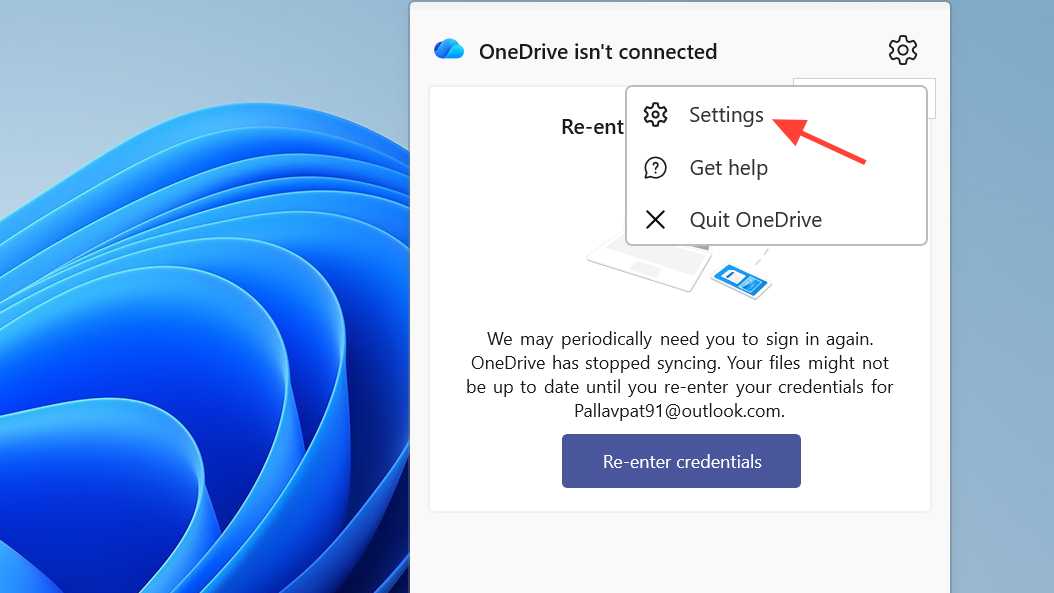
Step 3: In the OneDrive settings dialog, go to the Office tab. On some builds, it may be named with wording about using Office to work on files with other people.
Step 4: Clear the checkbox that controls Office integration. Typical labels include:Use Office to sync Office files that I open
orUse Office to work on files with other people at the same time.
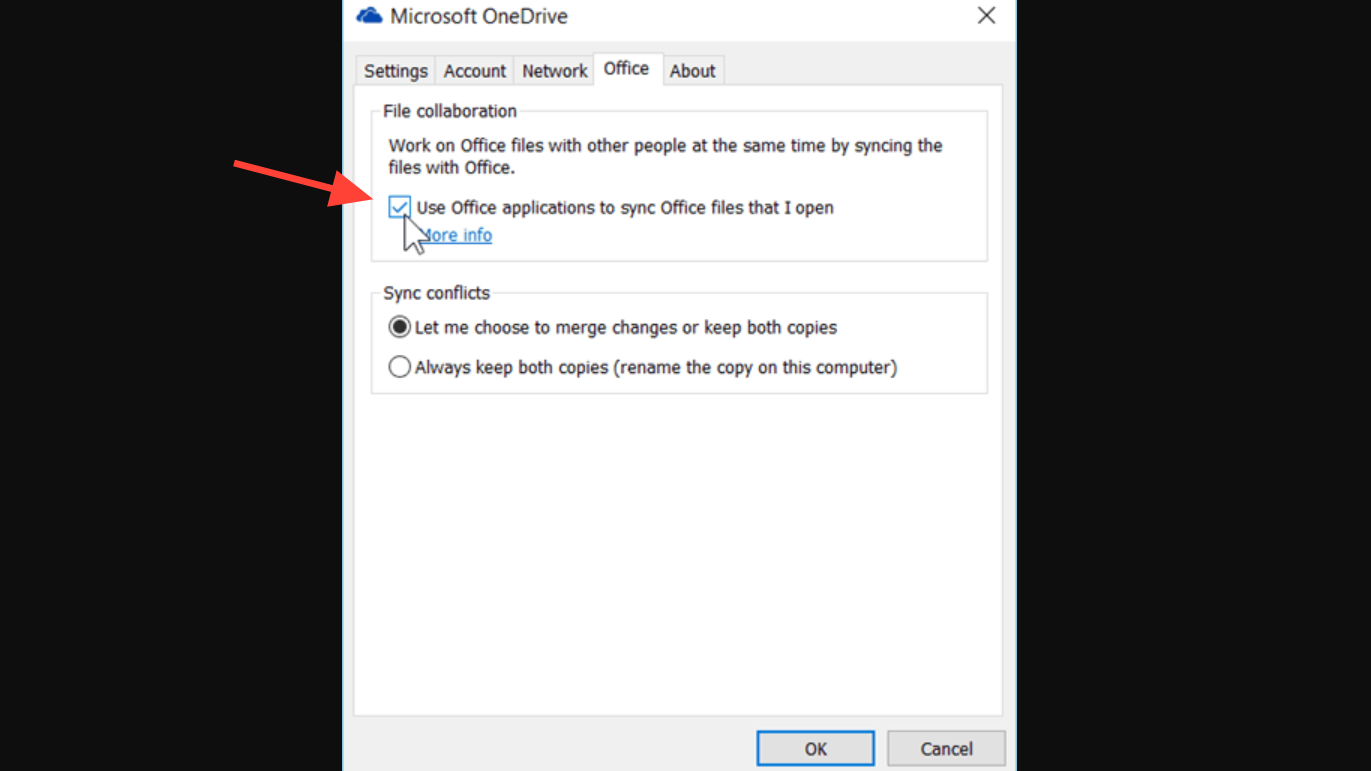
Step 5: Click OK to save settings, then restart Windows. After reboot, the Microsoft Office Upload Center should no longer start automatically with Windows in this configuration.
This method also disables real‑time co‑authoring of Office documents stored in OneDrive, so keep that in mind if you rely on that feature.
Method 2 – Disable the Microsoft Office sync task in Task Scheduler
On many Office 2013 installations, Windows Task Scheduler launches the Upload Center through a scheduled task named “Microsoft Office 15 Sync Maintenance”. Disabling this task stops automatic startup.
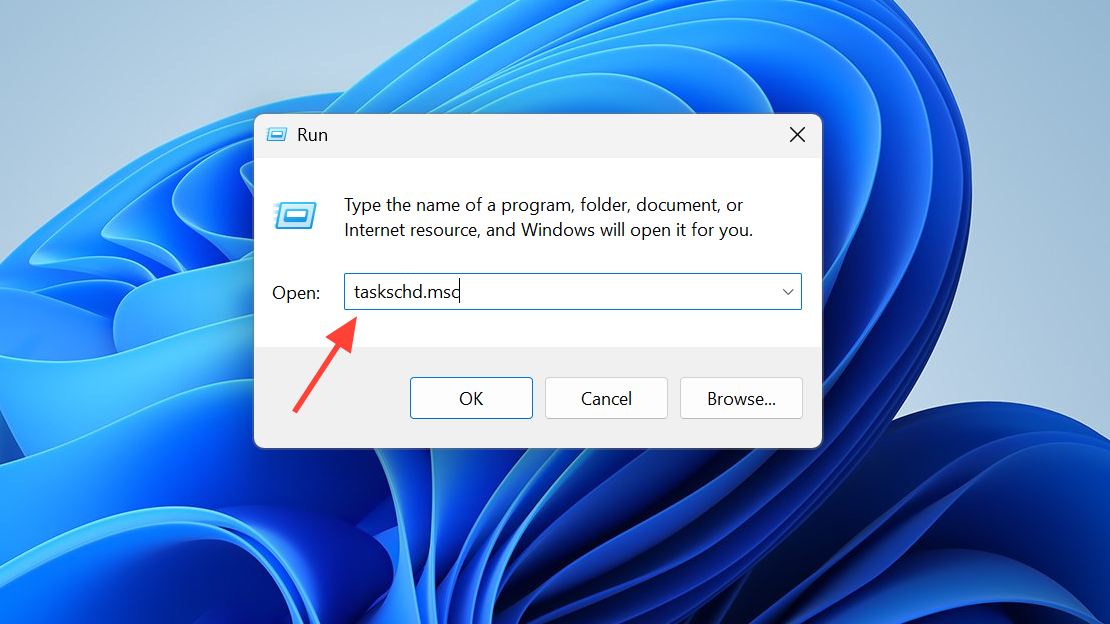
Step 1: Open Task Scheduler. Press Windows + R, type taskschd.msc, and press Enter. This opens the Task Scheduler management console.
Step 2: In the left pane, click the top‑level Task Scheduler Library. Do not expand into sub‑folders yet; the task is often listed directly under the root library.
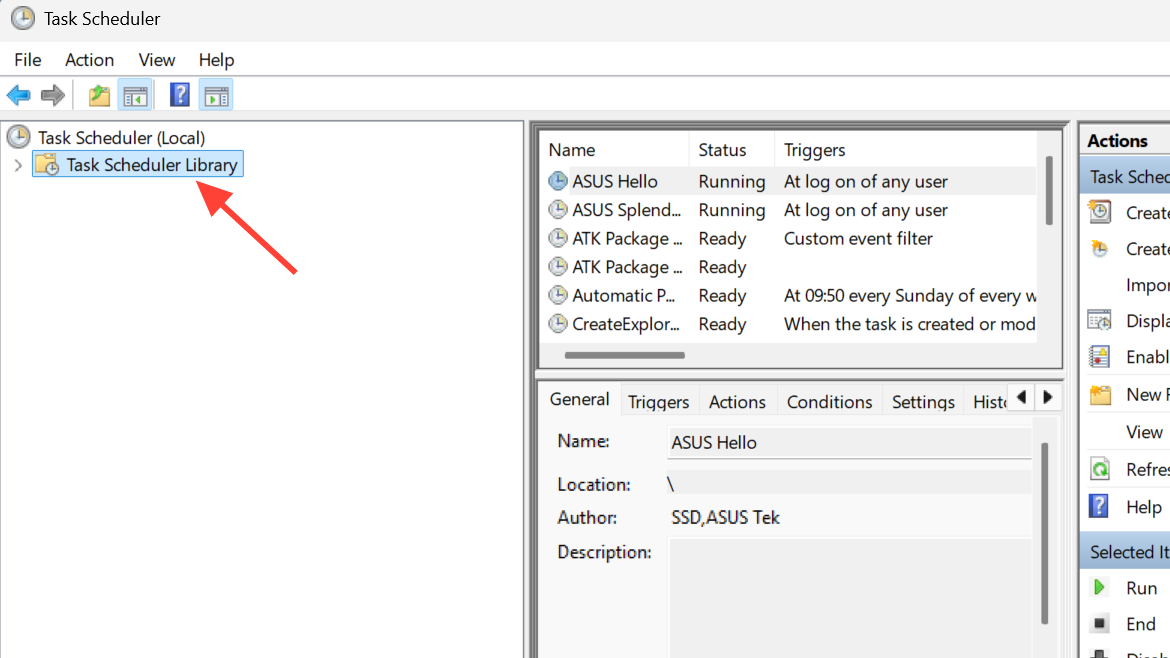
Step 3: In the middle pane, scroll through the list of tasks and look for a task with a name similar to:Microsoft Office 15 Sync Maintenance for <USERNAME>.
The exact wording may vary slightly, but it typically includes “Office 15 Sync Maintenance” and your user name.
Step 4: Confirm that this task launches the sync executable. Select the task, then check the Actions tab at the bottom. The action path usually points to:C:\Program Files\Microsoft Office 15\Root\Office15\MSOSYNC.EXE
or a similar MsoSync.exe path.
Step 5: With the correct task selected, right‑click it in the list and choose Disable. This prevents Windows from triggering the Upload Center at login or on its scheduled interval.
Step 6: Close Task Scheduler and restart Windows. After you sign in again, check the system tray to confirm the Upload Center icon no longer appears. If it still appears, verify that no other Office or OneDrive tasks in Task Scheduler are starting MSOSYNC.EXE.
Method 3 – Remove the Upload Center startup entry from the Registry (Office 2010 and some 2013/2016)
Office 2010 commonly registers the Upload Center to start via a Run key in the Windows Registry. Removing that entry stops it from launching at user logon.
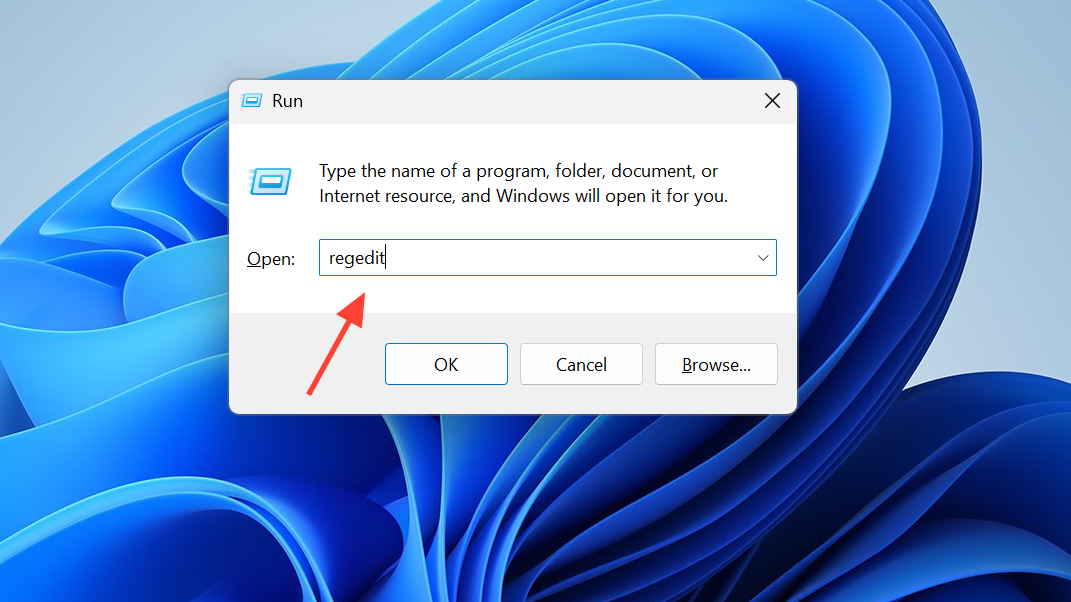
Step 1: Open Registry Editor. Press Windows + R, type regedit, and press Enter. If prompted by User Account Control, approve the elevation.
Step 2: In Registry Editor, navigate to the following key in the left pane:HKEY_CURRENT_USER\Software\Microsoft\Windows\CurrentVersion\Run.
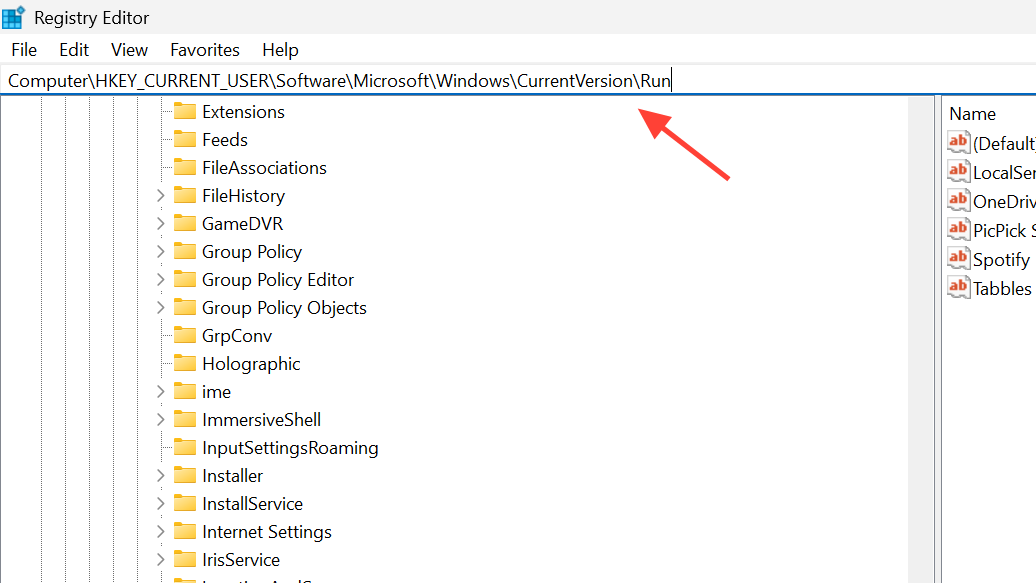
Step 3: With the Run key selected, look in the right pane for an entry that points to MSOSYNC.EXE or has a name similar to OfficeSyncProcess. The value data typically includes the full path to the Office sync executable.
Step 4: Before deleting, export a backup of the key. Right‑click the Run key in the left pane, select Export, choose a location, and save the .reg file. This lets you restore the original values if needed.
Step 5: Right‑click the specific value that starts the sync process (for example, OfficeSyncProcess) and choose Delete. Confirm the deletion when asked.
Step 6: Close Registry Editor and restart Windows. After reboot, check Task Manager and the system tray to ensure MSOSYNC.EXE and the Upload Center icon are no longer started automatically. If you experience any unexpected behavior, you can double‑click the backup .reg file to restore the original Run entries.
Method 4 – Hide the Upload Center icon in the notification area
On Office 2010, 2013, and 2016, the Upload Center can be left installed but hidden from the notification area. This does not stop the process from running, but removes the visual distraction.
Step 1: Click the Upload Center icon in the system tray (it usually looks like an orange circle with an up arrow or a similar symbol). If it is in the hidden icons area, click the up‑arrow and then click the icon.
Step 2: Right‑click the Upload Center icon and choose Settings. This opens the Microsoft Office Upload Center window, usually showing a list of pending or recent uploads.
Step 3: In the Upload Center window, click the Settings button in the toolbar. This opens the Microsoft Office Upload Center Settings dialog.
Step 4: In the Display Options section of the settings dialog, clear the checkbox named Display icon in notification area so that it no longer has a check mark.
Step 5: Click OK to apply the change. Then close the Upload Center window by clicking the X button in the top‑right corner. The tray icon should disappear and will not appear again unless the Upload Center needs to notify you or the setting is changed back.
This approach is useful when you still want Office to manage online document caching but do not want a persistent icon in the taskbar.
Method 5 – Block or remove Upload Center executables (advanced)
For stricter setups where the Upload Center must never run, administrators sometimes block or remove the executables that power it. This is more intrusive and should be used with care, as Office updates may restore files and Office may log errors if it expects them.
5.1 Rename the executables
Step 1: Close all Office applications. Check the Task Manager and end any running MSOSYNC.EXE, MSOUC.EXE, or related processes like CSISYNCCLIENT.EXE.
Step 2: Open File Explorer and navigate to the Office program folder for your version. Common paths include:C:\Program Files\Microsoft Office\Office14\ (Office 2010)C:\Program Files\Microsoft Office\Office15\ (Office 2013)
orC:\Program Files\Microsoft Office 15\root\Office15\ (Click‑to‑Run layouts).
Step 3: Locate the Upload Center executables:MSOSYNC.EXE.
MSOUC.EXE
Step 4: Rename each file to something that Windows will not treat as an executable, for example:MSOSYNC.EXE_.
MSOUC.EXE_
You may be prompted for administrator permission; confirm to proceed. Renaming prevents Windows from launching these files under their original names.
Step 5: Optionally check the shared Office components folder (for example, C:\Program Files\Common Files\Microsoft Shared\OFFICExx, where xx matches the Office version like 14, 15, or 16) for related executables such as CSISYNCCLIENT.EXE and treat them the same way if needed.
Step 6: Restart Windows and verify that the Upload Center no longer appears and that Office applications still open and save local documents as expected. If Office reports errors about missing files, you can revert the renaming by restoring the original filenames.
5.2 Uninstall the Upload Center feature (MSI installs of Office 2016)
On some Office 2016 installations deployed via MSI (not Click‑to‑Run), the Upload Center is installed as a distinct feature that can be removed by running the Office installer with a specific command.
Step 1: Confirm that your Office 2016 installation is MSI‑based, not Click‑to‑Run. In an Office app such as Word, open File > Account and look at the product information. MSI setups typically show “Microsoft Office Professional Plus 2016” without “Click‑to‑Run” wording in the update information.
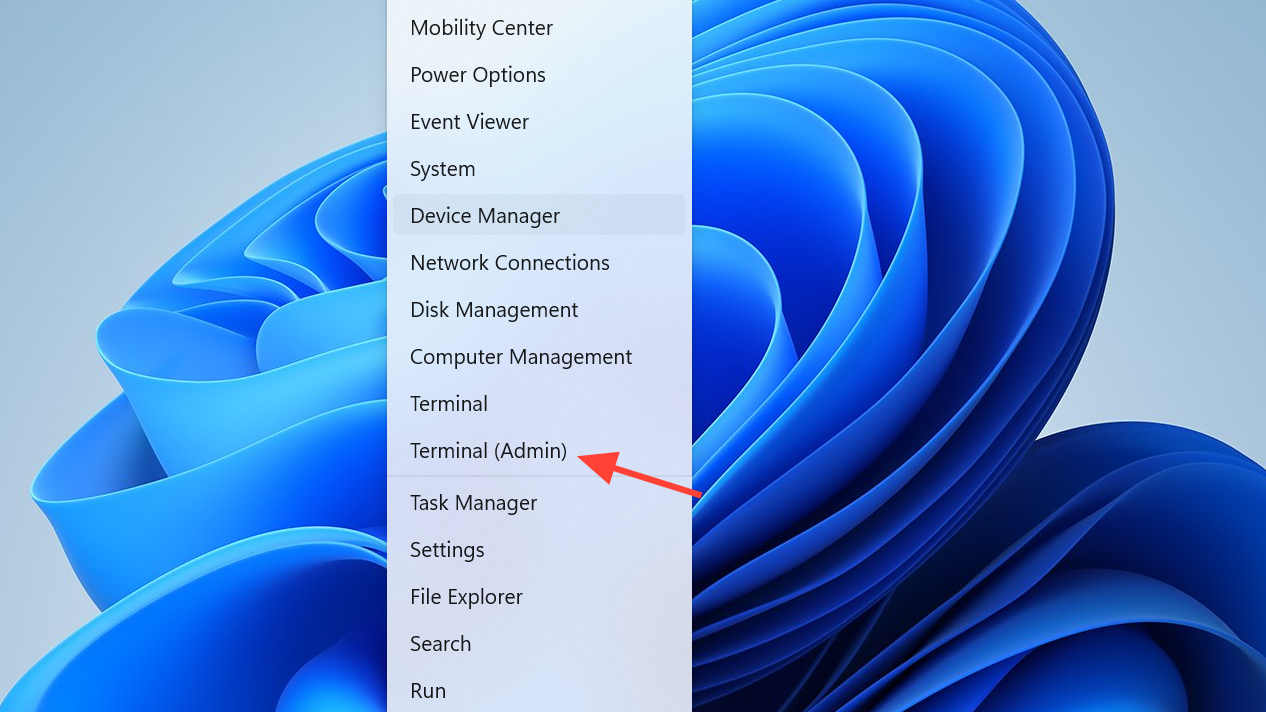
Step 2: Open an elevated Command Prompt. Press Windows + X and choose Command Prompt (Admin) or Windows PowerShell (Admin), depending on your menu.
Step 3: Run the Windows Installer command that targets the Upload Center component. A documented example for Office 2016 is:
C:\Windows\System32\msiexec.exe /i {90160000-0011-0000-0000-0000000FF1CE} REMOVE=WxpFiles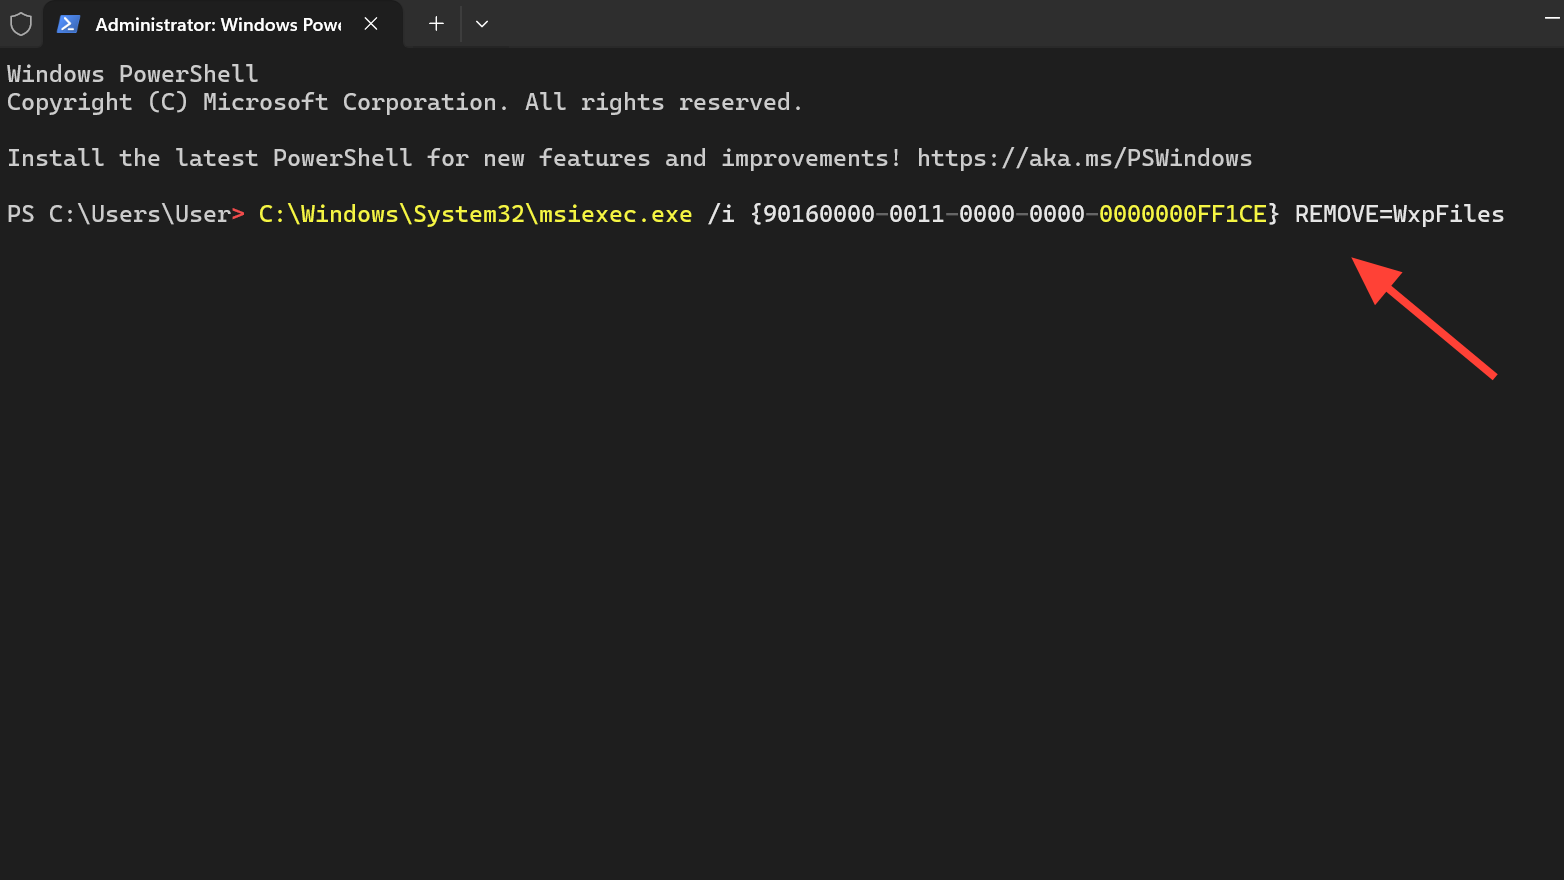
This command invokes the Office 2016 Upload Center package identified by product code {90160000-0011-0000-0000-0000000FF1CE} and removes the feature named WxpFiles. On supported MSI installations, this removes the Upload Center without uninstalling the rest of Office.
Step 4: Let the installer complete, then restart Windows. After the reboot, check that the Upload Center shortcut is gone from the Start menu and that no related executables start with Windows.
This approach is specific to MSI‑based Office packages. Click‑to‑Run installations do not use this mechanism and generally cannot remove the Upload Center as a separate feature using msiexec.
Method 6 – Use Windows startup app controls as a workaround (Windows 10)
On some systems, Upload Center appears in the Windows startup apps list, allowing you to disable it like any other startup item.
Step 1: Open Windows Settings with Windows + I, then go to Apps, and select the Startup section in the left pane (on Windows 10) or equivalent startup panel.

Step 2: Scroll through the list and look for entries named “Microsoft Office Upload Center”, “Microsoft Office Document Cache”, or similar wording. Each entry includes a toggle to control whether it starts when you sign in.
Step 3: Turn the toggle Off for any Upload Center-related entries. This tells Windows not to start them automatically at login.
Step 4: Restart Windows to confirm that the Upload Center process and icon no longer start. This method does not uninstall anything, but it is a simple and reversible way to stop automatic startup when the app appears in this list.
Once you pick the method that matches your Office version and comfort level—hiding the icon, disabling scheduled tasks, removing the Registry entry, or fully blocking the executables—you can stop Upload Center from constantly appearing and using background resources while still keeping the parts of Office you actually rely on.