
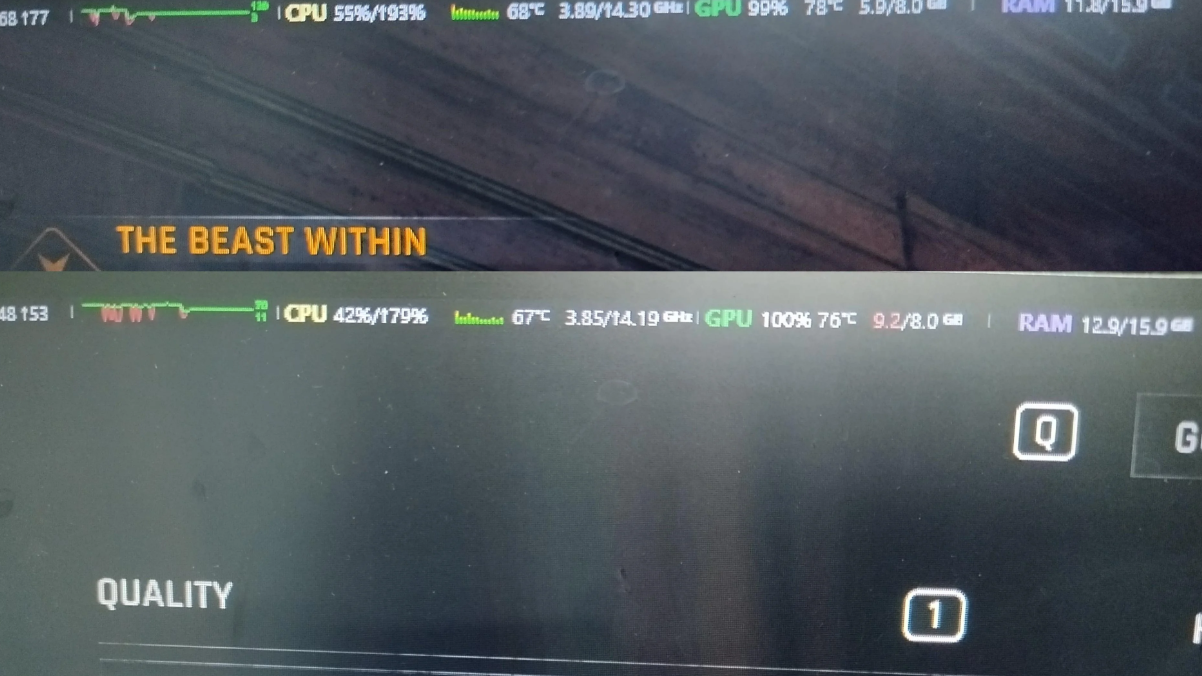
PC players are reporting a consistent pattern in Dying Light: The Beast: video memory (VRAM) starts at a reasonable level, then climbs the longer the game runs, with performance gradually degrading. Returning to the main menu clears usage and restores frame rate, but the behavior returns in subsequent play sessions. On 8GB GPUs, this shows up faster when running higher settings or turning off upscaling.
Dying Light: The Beast memory leak symptoms (what players see)
| Symptom | Impact | Observed workaround |
|---|---|---|
| VRAM usage rises over a single session | Stutter increases, FPS declines over time | Quit to main menu, then continue; usage resets temporarily |
| Extended play on 8GB GPUs | Sharper drops with high settings and no upscaling | Use the game’s upscaler (e.g., a Balanced preset) to reduce load |
| Session-to-session behavior repeats | Performance decay returns after 30–90 minutes (varies) | Shorter sessions; periodic menu resets |
Example reports cite midrange hardware (e.g., Ryzen 5 class CPU with an 8GB GPU) holding 60+ FPS at High settings with a Balanced upscaler, then dropping well below that during longer play.
Why this looks like a VRAM leak
In practical terms, a “leak” here means the game allocates GPU memory but fails to release it effectively during play. As VRAM pressure rises, the driver juggles assets, causing shader compilation hitches, asset swaps, and heavier CPU-GPU synchronization. The immediate tell: a clean reset of VRAM after returning to the main menu, followed by a fresh ramp in the next session.
Stabilize performance: baseline steps from Techland
Techland’s official PC performance guidance (for Dying Light) includes several steps that also apply here—driver currency, power profiles, sync behavior, and background conflicts. Start with these:
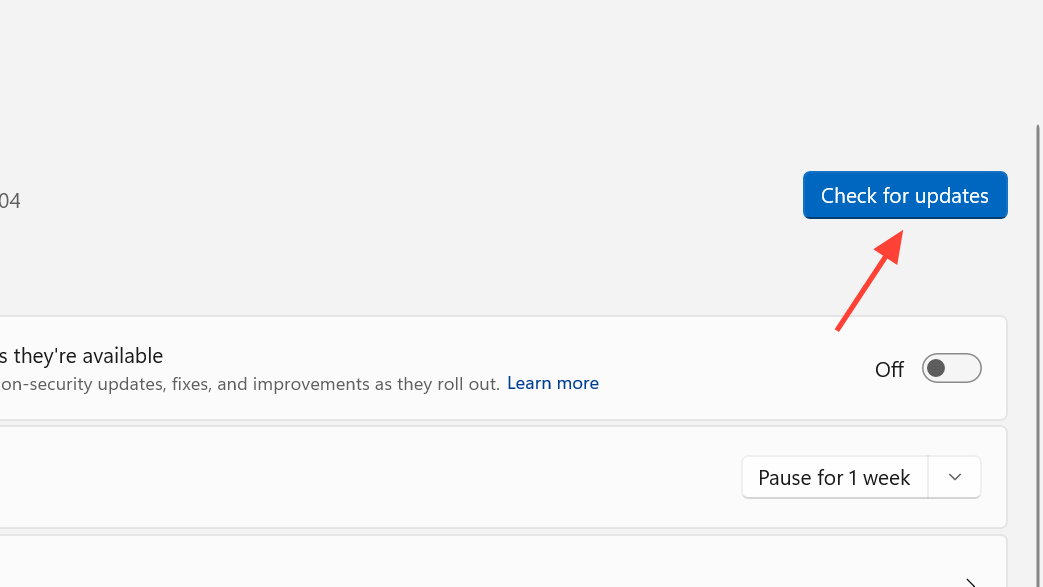
- Update Windows to the latest build.
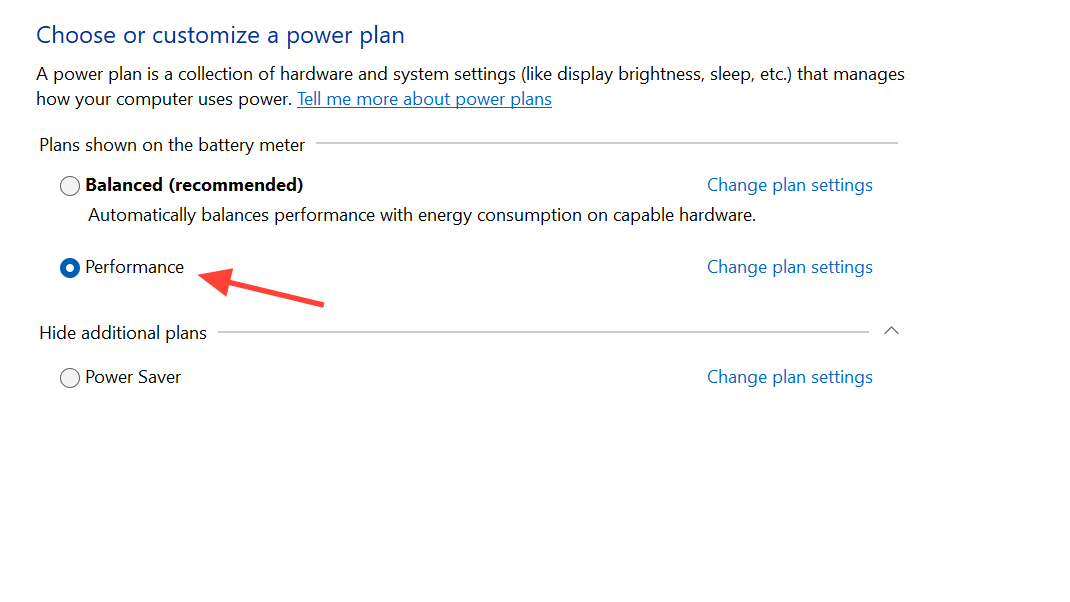
- Force maximum performance on your GPU and system power plan (disable battery saver modes).
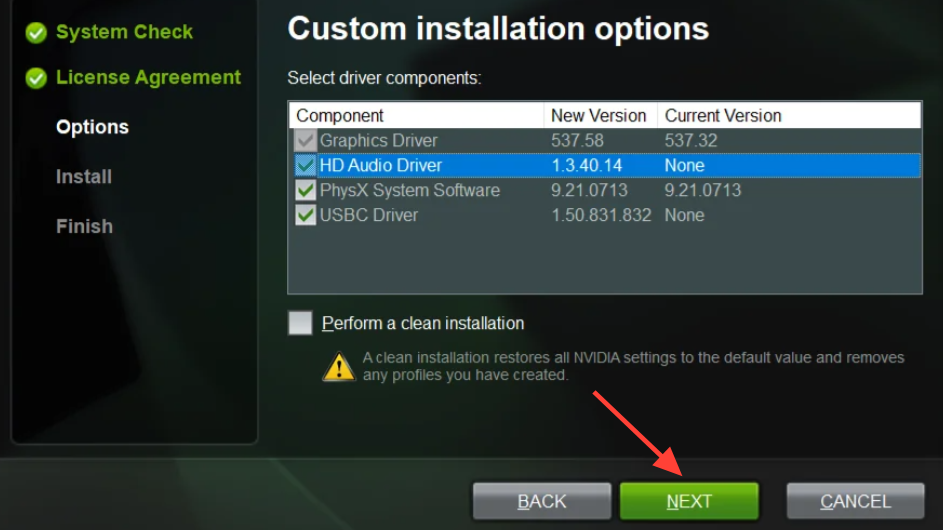
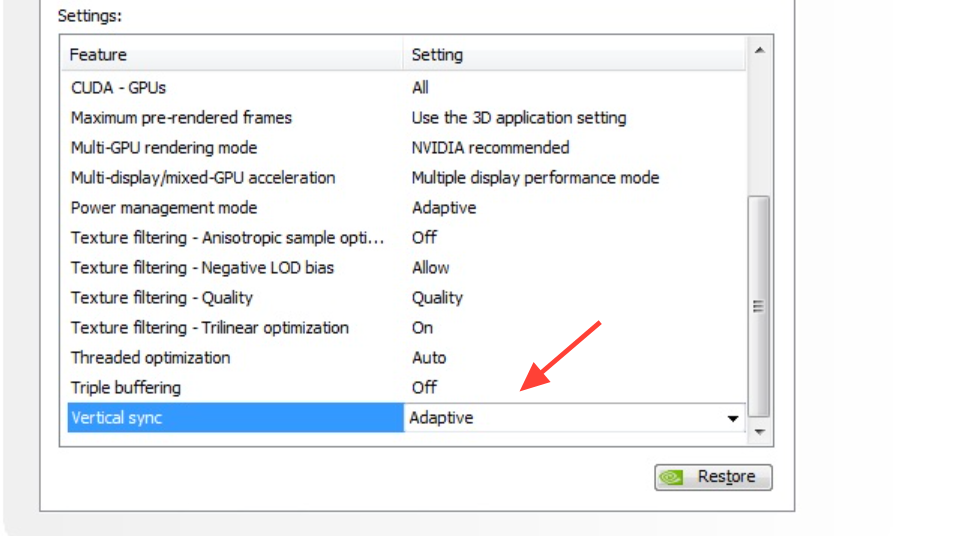
- If you use Nvidia: enable V‑Sync in the Nvidia Control Panel specifically for the game, and keep the in‑game V‑Sync setting off. This configuration is called out on Techland’s support page: Performance / Stuttering / FPS Issues.
- Disable interfering background tools (driver “optimizers,” overlays, VPN clients) and ensure the game uses your dedicated GPU, not the integrated one.
Reduce VRAM pressure (8GB GPUs)
Until a patch addresses VRAM behavior, trimming GPU load can delay or soften the performance slide within each session. Prioritize changes with the biggest payoff:
| Setting or change | Why it helps | Recommendation |
|---|---|---|
| Upscaler (Balanced‑type preset) | Renders fewer pixels; lowers VRAM and bandwidth demand | Enable the game’s built‑in upscaler; avoid Native on 8GB |
| Resolution and view distance | High-pixel and far-scene detail balloon memory usage | Drop one resolution step; reduce view distance |
| Depth of Field and Motion Blur | Post‑processing can add passes and buffers | Turn both off |
| Chromatic Aberration | Small but steady post-process overhead | Turn off |
| V‑Sync + frame cap (30/60) | Stabilizes frame pacing; caps worst‑case spikes | Enable V‑Sync (per Techland guidance) and cap FPS |
| “Nvidia Depth of Field” (if present) | Vendor DOF can be heavier than standard | Disable if available in the menu |
Power and pacing tweaks that smooth hitches
- Prefer maximum performance on GPU: set your vendor control panel to a high‑performance mode for this title.
- Close background apps that wake the CPU or overlay the GPU (messaging, updaters, screen recorders) before launching the game.
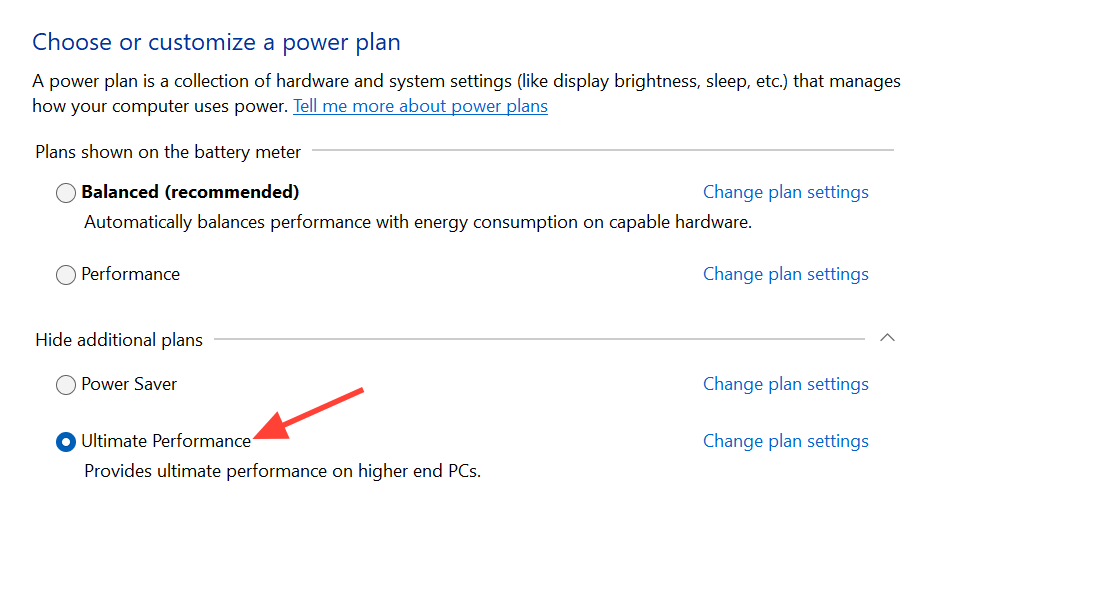
Use Windows’ Ultimate Performance plan (desktop systems). Create it via:
powercfg -duplicatescheme e9a42b02-d5df-448d-aa00-03f14749eb61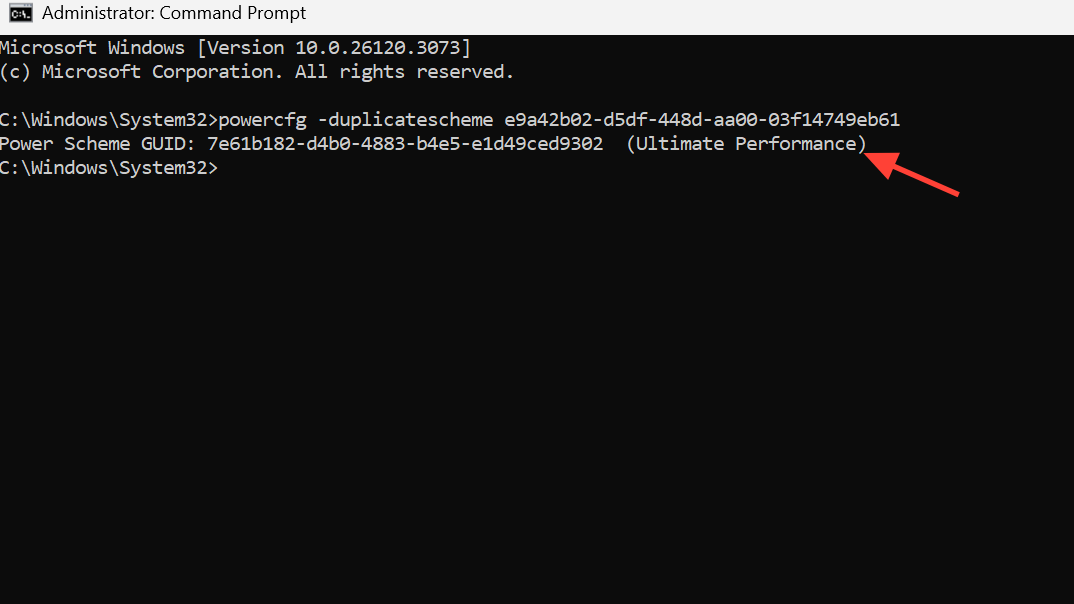
Then select it in Power Options.
Session management while waiting for a patch
- Use shorter play sessions; return to the main menu every so often to clear VRAM.
- Start heavier activities (hordes, set pieces) right after a menu reset when headroom is highest.
- Re‑evaluate settings if stutter returns quickly on 8GB GPUs—dial back view distance first, then resolution.
When to contact support
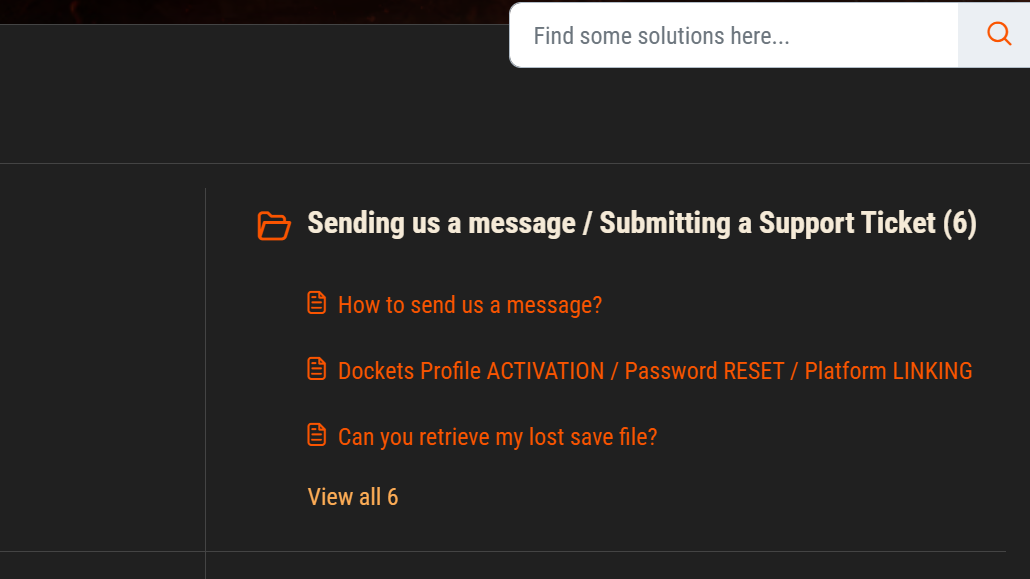
If performance collapses within minutes on current drivers and a lean settings profile, gather your specs, driver versions, and a short description of when stutter starts (elapsed time, location types), then proceed through Techland’s troubleshooting steps on the official performance support page. If the issue persists after those steps, use the support portal to open a ticket with your findings.
The behavior described by players points to a VRAM leak that a game update can address. Until then, combining a Balanced upscaler, trimmed view distance, stable sync and power settings, and periodic menu resets is the most reliable way to keep Dying Light: The Beast playable across long sessions on 8GB GPUs.