
Call of Duty: Black Ops 7 on PC blocks launch until Secure Boot is enabled (and TPM 2.0 is available) in your system’s UEFI firmware. Secure Boot verifies trusted bootloaders and drivers at startup, which anti-cheat systems rely on to prevent low-level tampering.
Before you begin: requirements and terminology
Secure Boot only works when your PC uses UEFI firmware and your Windows system drive is formatted as GPT (GUID Partition Table). If either is missing, you’ll need to switch from Legacy/CSM to UEFI and, if required, convert the disk from MBR to GPT.
- UEFI: Modern motherboard firmware that replaces Legacy/CSM BIOS and supports Secure Boot.
- Secure Boot: A UEFI feature that loads only trusted boot components to reduce cheat and malware injection.
- GPT vs. MBR: Disk partition styles. Secure Boot requires GPT on the Windows system drive.
- TPM 2.0: A security chip or firmware module (Intel PTT/AMD fTPM) BO7 expects to be available.
Method 1 — Verify Secure Boot status and UEFI mode in Windows
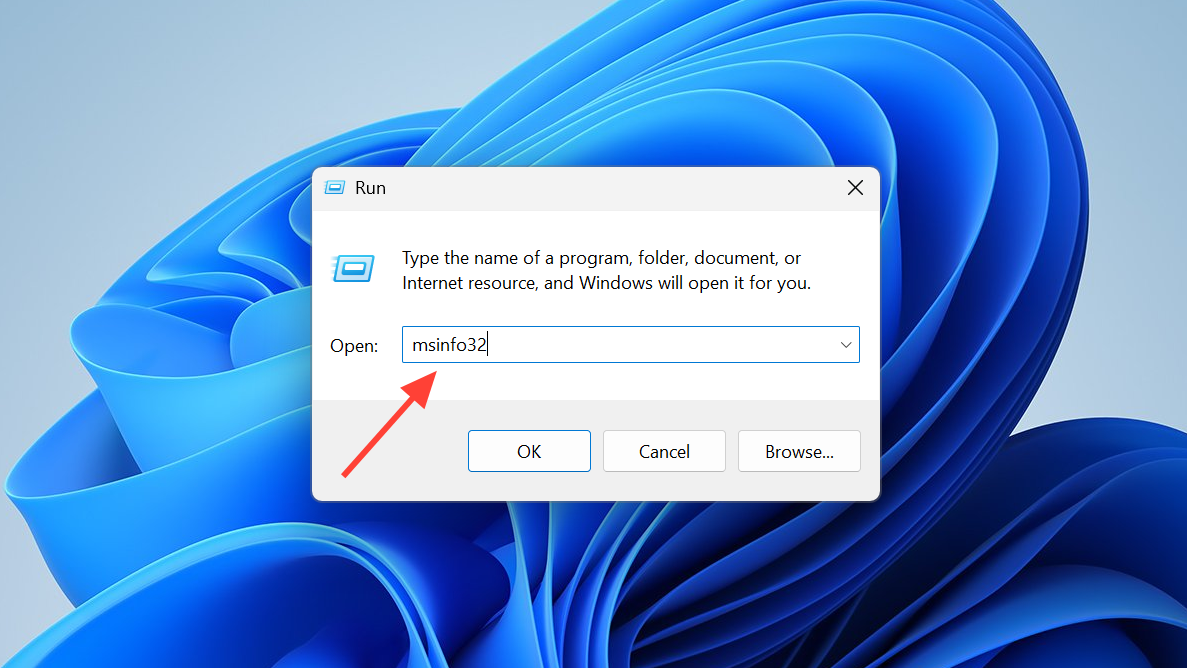
Step 1: Open System Information. Press Windows + R, type msinfo32, then press Enter. This shows a full summary of your PC’s firmware and security state.
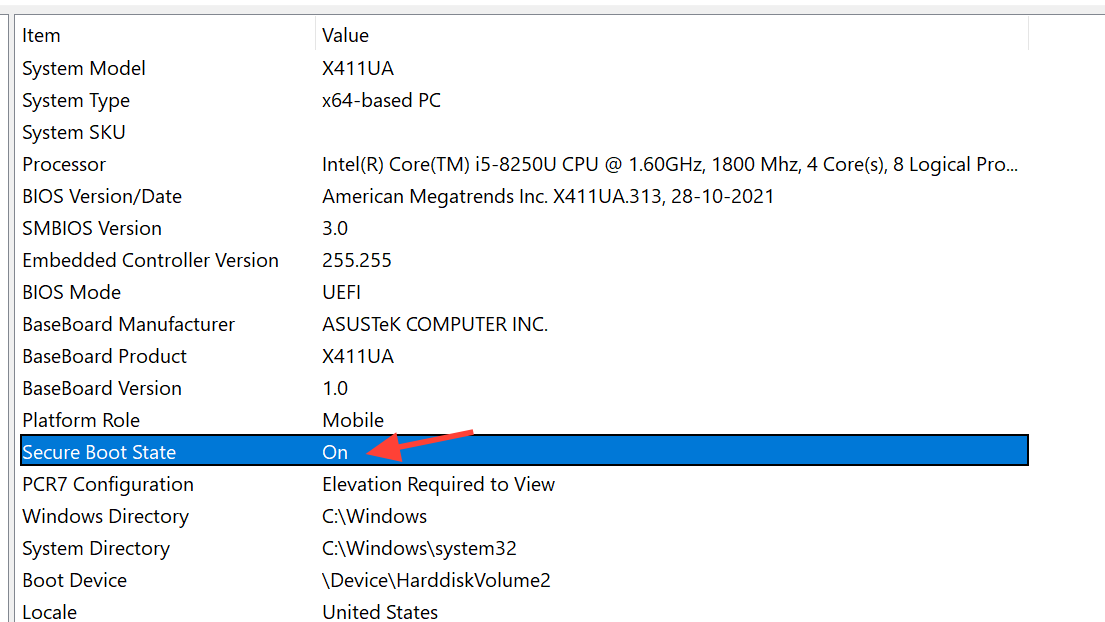
Step 2: Check two fields in System Summary. BIOS Mode should read UEFI, and Secure Boot State should read On. If Secure Boot is Off with BIOS Mode = UEFI, continue below; if BIOS Mode = Legacy/CSM, you’ll need to switch to UEFI and likely convert the disk to GPT; if Secure Boot is Unsupported, consult your motherboard’s specifications or support.
Method 2 — Check the Windows disk partition style (GPT vs. MBR)
Step 1: Open Disk Management. Press Windows + X and choose Disk Management. This utility shows your drives and their layouts.

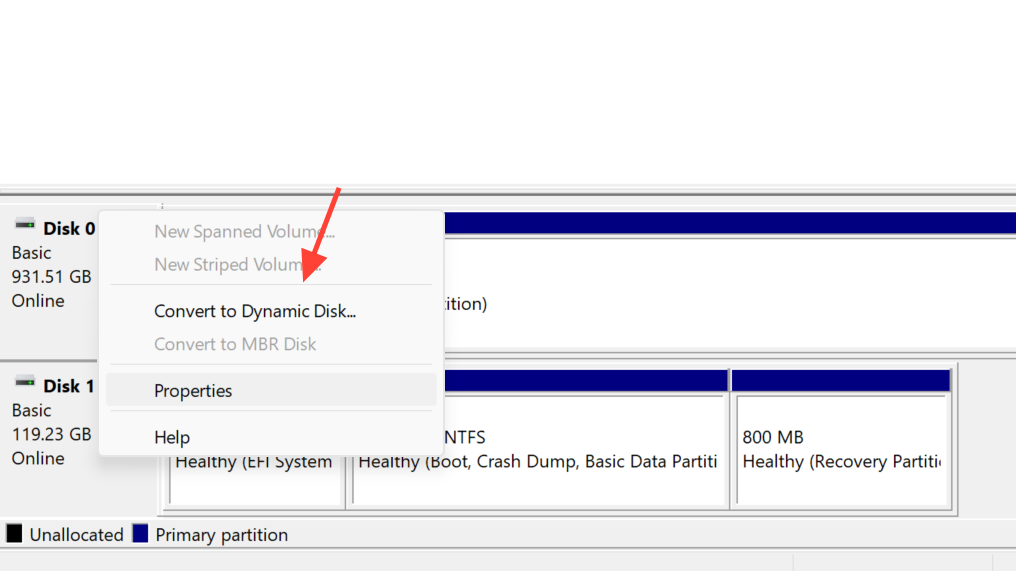
Step 2: Identify the Windows system drive. In the bottom pane, right-click the disk label on the left (for example, Disk 0) that contains your C: partition, then select Properties.
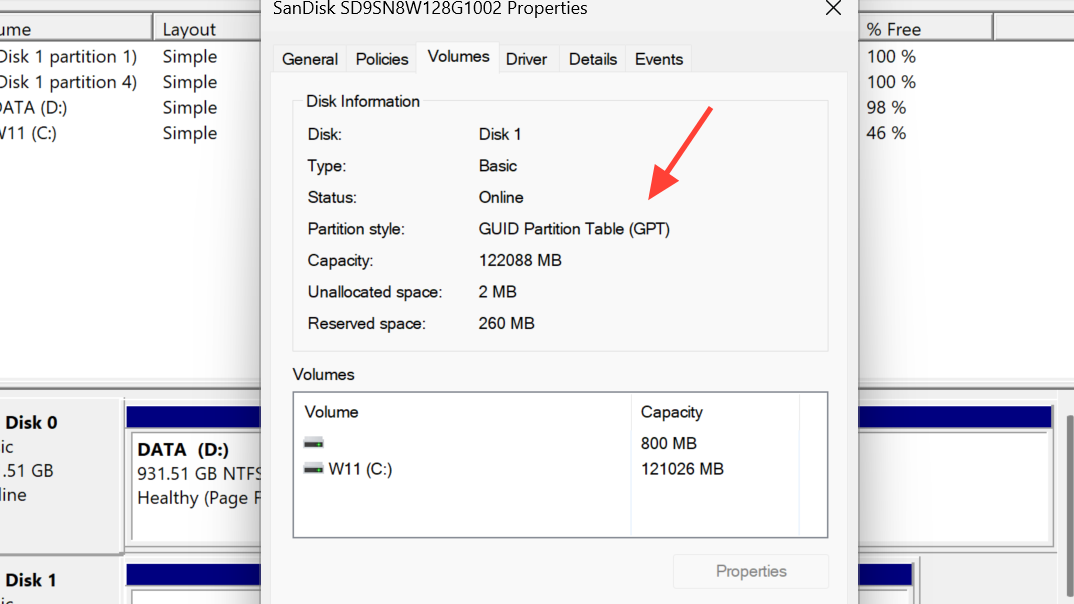
Step 3: On the Volumes tab, check Partition style. If it reads GUID Partition Table (GPT), you’re set; if it reads Master Boot Record (MBR), proceed to the conversion method below.
Method 3 — Convert the system disk from MBR to GPT (no data wipe)
Step 1: Confirm the correct disk number. In Disk Management, note the disk number for the drive that contains Windows (commonly Disk 0). Using the wrong number can affect another drive.
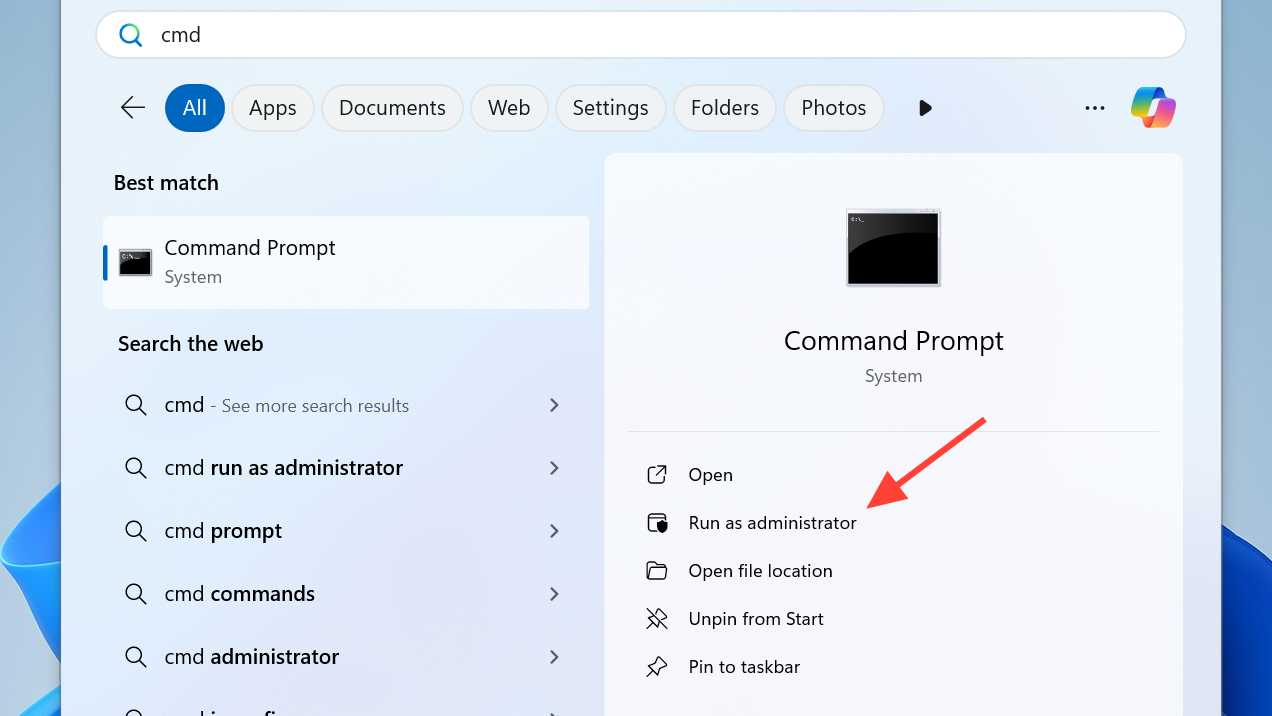
Step 2: Open an elevated terminal. Right-click Start and open Windows Terminal (Admin) or Command Prompt (Admin). Administrative rights are required for conversion.
Step 3: Validate the disk with Microsoft’s tool. This checks prerequisites while Windows is running.
mbr2gpt /validate /disk:X /allowFullOS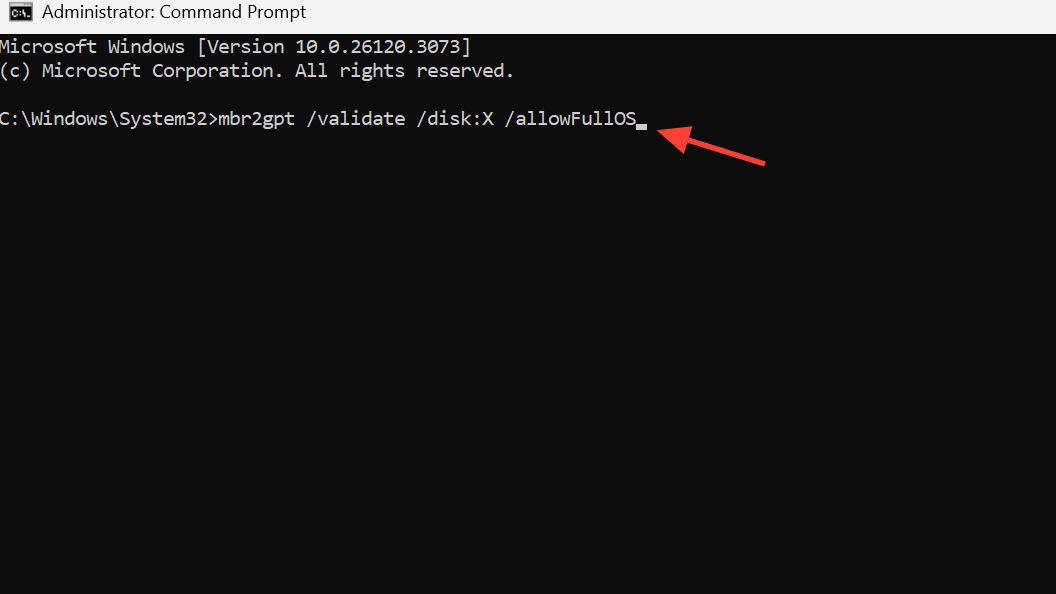
Step 4: Convert to GPT if validation succeeds. Replace X with the same disk number used above. The tool shrinks space for an EFI System Partition and updates boot files.
mbr2gpt /convert /disk:X /allowFullOSStep 5: Re-check the result. Return to Disk Management > Properties > Volumes for that disk and confirm the Partition style now reads GPT. If the tool reports errors, read its message, free small amounts of space if required, and try validation again.
Method 4 — Enable Secure Boot in UEFI firmware
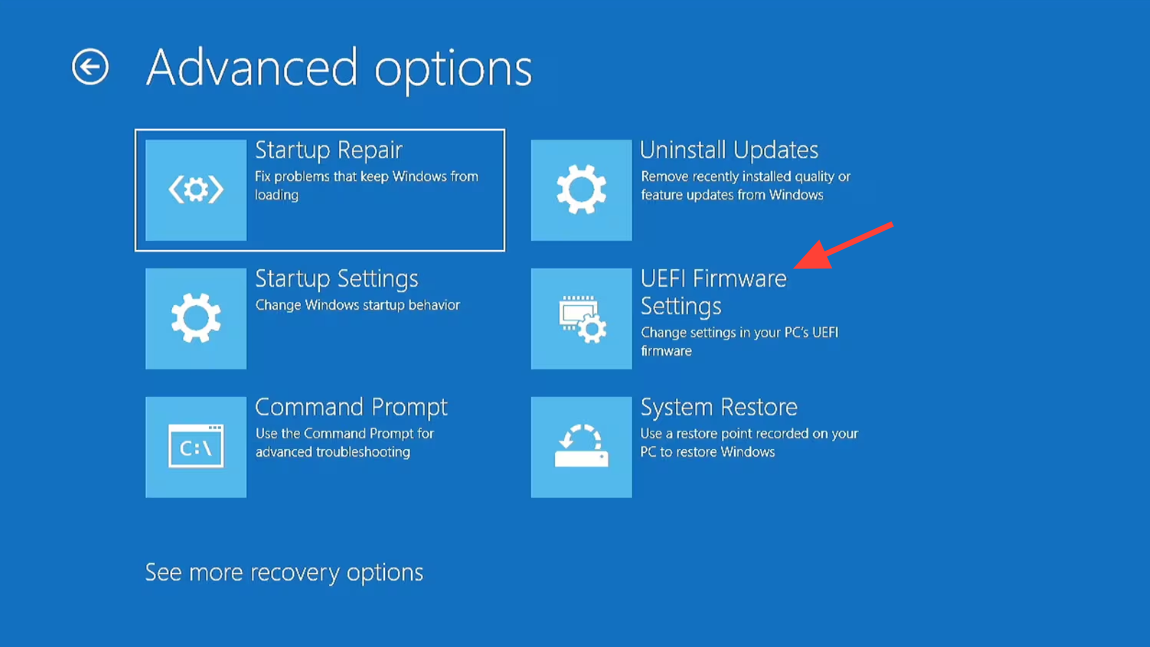
Step 1: Enter UEFI from Windows. Click Start > Power, hold Shift and click Restart, then go to Troubleshoot > Advanced options > UEFI Firmware Settings > Restart. This is the most reliable route on modern systems.
Step 2: Locate Secure Boot. In UEFI, open the Security, Boot, or Authentication menu where Secure Boot settings typically reside.
Step 3: Set boot mode to UEFI. If you see options for Boot Mode, choose UEFI (or UEFI Only). Apply or save changes within the firmware menu.
Step 4: Disable CSM/Legacy. If Compatibility Support Module (CSM) or Legacy Option ROMs are enabled, turn them off so UEFI can enforce Secure Boot.
Step 5: Install default Secure Boot keys if prompted. Use options such as “Install Default Keys” or “Restore Factory Keys” to provision the Platform Key and signature databases.
Step 6: Enable Secure Boot. Change the Secure Boot setting to Enabled. Some firmware shows both Enabled and Active; after installing keys and disabling CSM, it should report Active.
Step 7: Save and exit. Use the firmware’s Save/Exit option or press the listed hotkey (commonly F10) to apply changes and reboot to Windows.
Method 5 — Enable TPM 2.0 (Intel PTT / AMD fTPM)
Step 1: Re-enter UEFI firmware. Use the same path from Windows or your motherboard’s boot hotkey (often Del, F2, F10, or Esc) during startup.
Step 2: Open the TPM menu. Look for a section named Security, Advanced, or Trusted Computing in your UEFI interface.
Step 3: Turn on the firmware TPM. Enable Intel Platform Trust Technology (PTT) on Intel boards or AMD fTPM on AMD boards, then confirm the setting.
Step 4: Save and reboot. Apply changes and allow Windows to start normally so the OS can enumerate TPM 2.0 for BO7’s checks.
Method 6 — Confirm and start BO7
Step 1: Verify the final state in Windows. Open msinfo32 again and confirm BIOS Mode = UEFI and Secure Boot State = On. You can also check Device Security in Windows Security to see that TPM is available.
Step 2: Launch the game. If BO7 still flags Secure Boot or TPM, review your firmware toggles, ensure keys are installed, and consult Activision’s explainer if needed: Trusted Platform Module and Secure Boot.
Troubleshooting
Secure Boot shows Unsupported
Step 1: Confirm motherboard capabilities. Check your model’s manual or product page for UEFI and Secure Boot support; some older boards do not support it.
Step 2: Update the firmware. If support exists, install the latest UEFI/BIOS from your manufacturer to add fixes or options related to Secure Boot.
Step 3: Contact the manufacturer if options are missing. If your menu lacks UEFI or Secure Boot even after updating, vendor guidance or a hardware upgrade may be required.
Step 1: Verify the disk is GPT. Secure Boot will not activate on MBR system disks; complete the MBR-to-GPT conversion first, then re-check Secure Boot.
Step 2: Disable CSM explicitly. Some firmware keeps Secure Boot inactive until CSM is off; apply this change and reinstall default keys if necessary.
Step 3: Reinstall Secure Boot keys. Use “Install Default Keys” or “Restore Factory Keys” to provision PK/KEK/DB before enabling Secure Boot.
Black screen or no display after enabling Secure Boot/TPM
Step 1: Power off fully. Shut down the PC and switch the power supply off (or unplug) for a full minute to clear transient states.
Step 2: Reset CMOS if the display doesn’t return. Remove the coin-cell CMOS battery on the motherboard, wait five minutes, reinstall it, then power on to restore default firmware settings.
Step 3: Re-apply settings carefully. Set UEFI mode, disable CSM, install default keys, and re-enable Secure Boot and TPM one at a time, testing boot between changes.
mbr2gpt validation or conversion failed
Step 1: Read the error text. Validation indicates what’s missing (for example, insufficient space for the EFI System Partition or unsupported layout).
Step 2: Free a small amount of space if prompted. Shrinking the OS partition slightly can allow the tool to create the EFI partition, then run validation again.
Step 3: Retry conversion with admin rights. Ensure you’re using the correct disk number and an elevated terminal when running the commands.
Once UEFI is active, the disk is GPT, and Secure Boot plus TPM 2.0 are enabled, BO7 should launch without the security prompt. If you still hit a roadblock, a quick check with your motherboard support team can save time.