
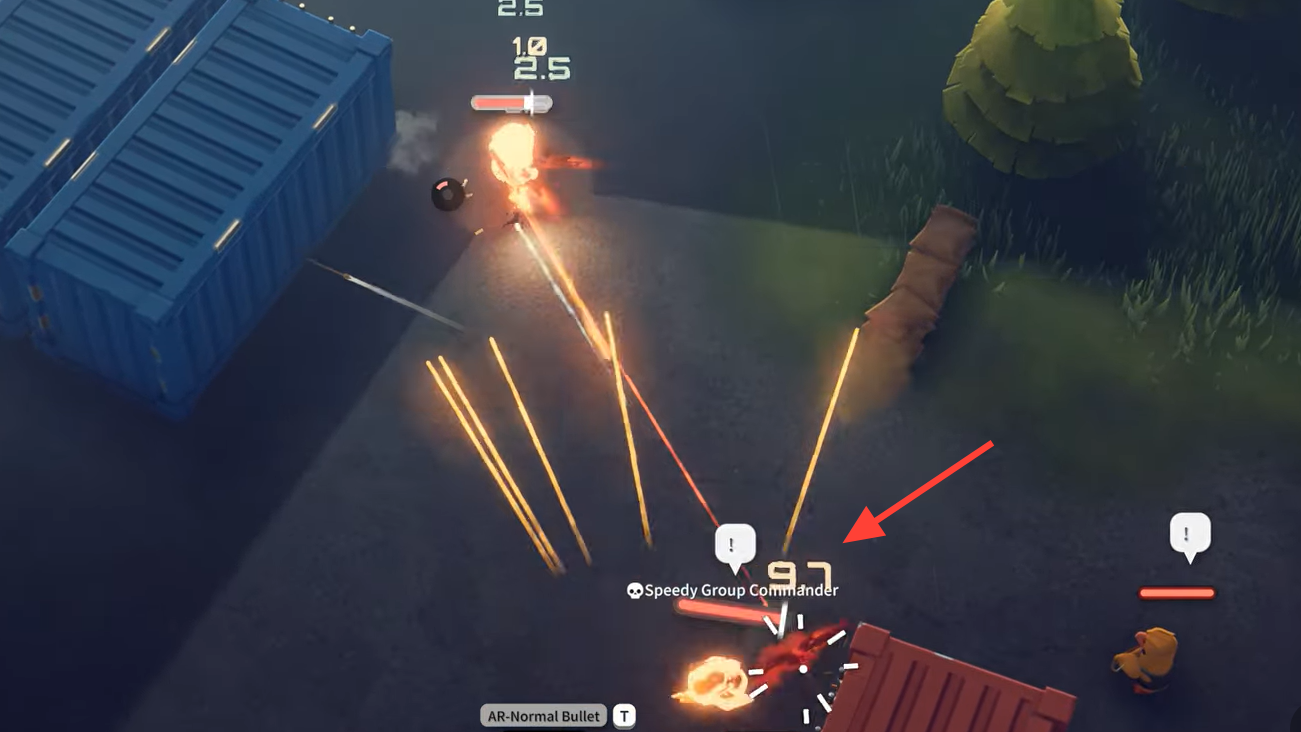
The Speedy Group Commander is a roaming elite on the Warehouse map that you’ll need to eliminate for a task. He doesn’t spawn in a fixed spot, he moves fast, and he’s flanked by a squad that likes to rush. Here’s how to find him reliably and clear the fight without getting pinned.
Speedy Commander spawn: location and telltale signs
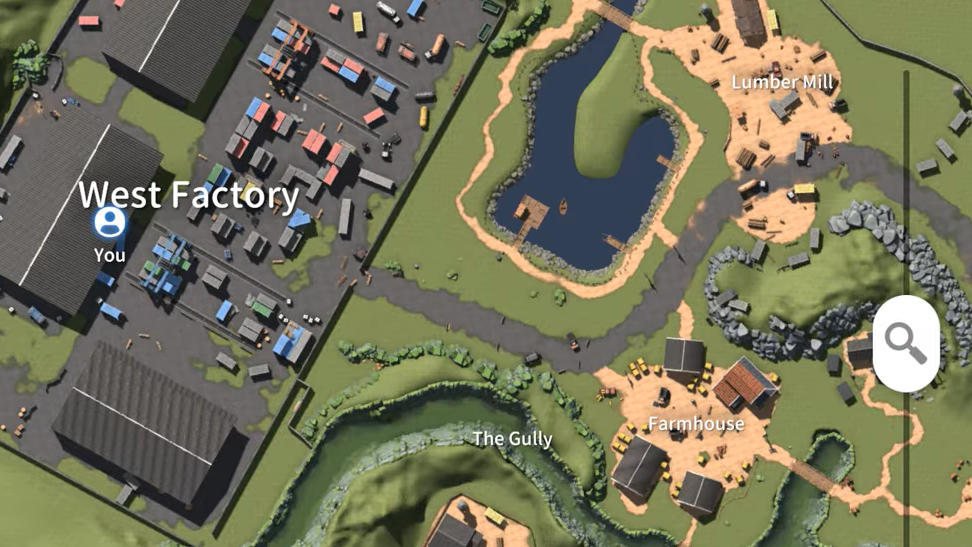
You’re looking in the Factory Zone on the Warehouse map. The highest hit rate is around the central, walled farm compound near the middle of the area. The Commander patrols with a pack of yellow-uniformed enemies that sprint in formation; if you see a fast-moving yellow squad, you’re close, and he’s leading it.
| Quick profile | Details |
|---|---|
| Map / Zone | Warehouse / Factory Zone |
| Common hotspot | Central farm compound (walled section near the map’s center) |
| Spawn type | Random, roaming patrol (not fixed) |
| Visual cue | Group of sprinting yellow enemies with a leader out front |
| Escort | Typically three guards |
| Commander gear | Armor Level 3, Electrified MP7 |
Factory Zone sweep: a simple route that catches most patrols
Start at the Factory Zone perimeter and rotate clockwise to avoid getting surrounded. Cut in toward the central farm compound and clear each entrance, then sweep the inner yard. If you don’t spot the squad outside, pivot through the factory walls and check interior aisles and loading bays; the Commander can show up inside, not just in open ground.
How to increase your odds of a spawn
- Work the Factory Zone after you’ve cleared nearby camps or finished quick errands; active patrols become easier to run into when the area has reset.
- Alternate between the outer lanes and the central farm compound. The patrol path often crosses those two spaces.
- Listen for sprinting footsteps and tight, coordinated movement. The Commander’s group runs faster and bunches up more than standard scav packs.
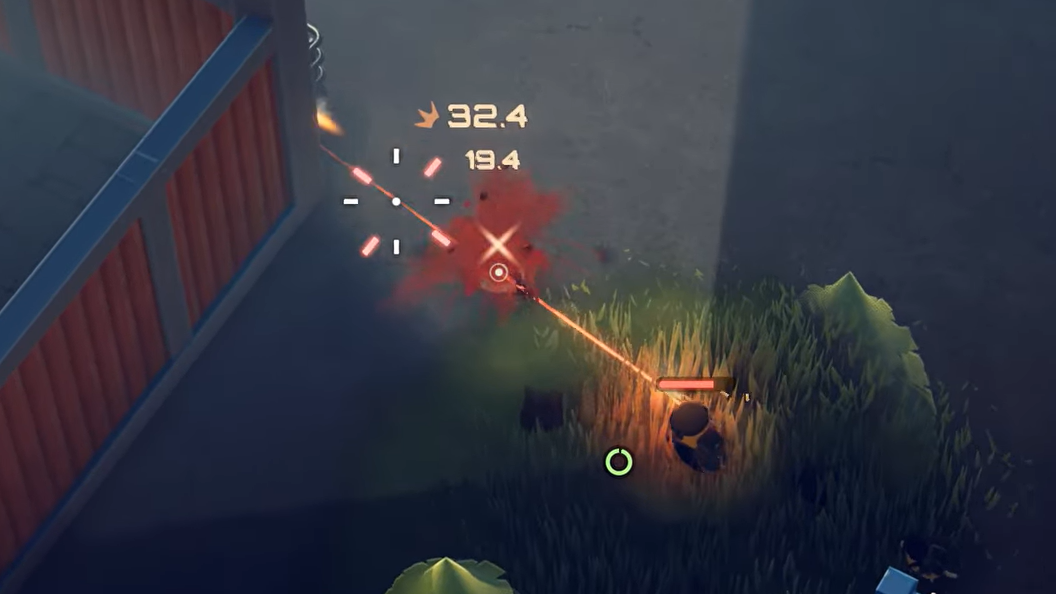
Fight plan: control distance, delete the leader, then clean up
The Commander is most dangerous up close, where his burst damage spikes. Keep him at mid-range and let cover do the heavy lifting.
- Open with distance: Use fences, trucks, and crate stacks to break line of sight and stop rush angles.
- Focus the leader first: Drop the Commander before his escorts. It cuts incoming burst and often scrambles the group’s push.
- Use measured peeks: Peek, burst, and re-peek. Don’t hold angles against the MP7—its time to kill is punishing in close quarters.
- Play the reloads: If the group surges, kite them through chokepoints and force staggered reloads behind cover.
Recommended loadout and positioning
Bring a rifle that’s comfortable from mid to long range. Two reliable picks for this fight are the MF and the AK‑103. Pair either with a low- to mid-zoom optic; you’ll be threading shots around cover, not sniping across the map.
| Gear | Role | Why it works |
|---|---|---|
| MF (rifle) | Primary | Stable mid-range bursts to shred the Commander before he closes. |
| AK‑103 | Primary | Reliable stopping power and control at 20–60 meters. |
| Mid-zoom optic | Sight picture | Quick target reacquisition around cover and while kiting. |
| Flexible armor/meds | Sustain | Survive a rushed flank while you reposition. |
Positioning priorities: keep a barrier between you and the squad, angle out to tag the Commander’s head and chest, then fall back a few meters to reset. If they flood a lane, cut laterally rather than retreating straight back—that keeps you from getting pinned against a wall.
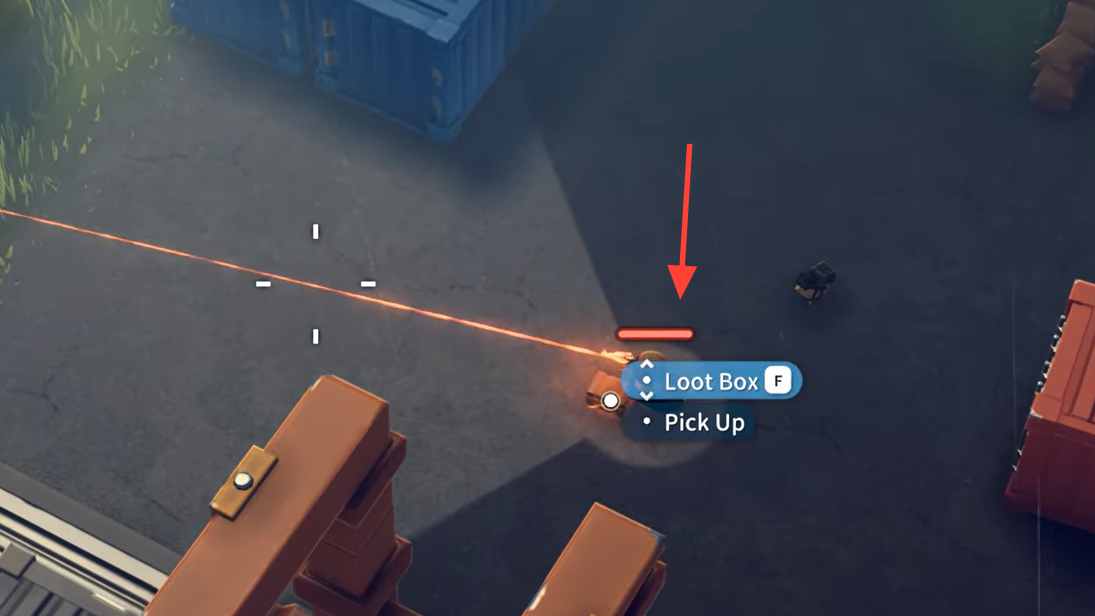
Quest completion: don’t leave without looting
Once the Commander drops, loot his body to register task progress. Without the loot interaction, the elimination may not count for your objective. After the confirmation, extract on your terms—don’t rush the exit and risk getting third-partied while you’re managing inventory.
Fast answers
- Where to look: Factory Zone on Warehouse; prioritize the central walled farm compound.
- How to identify: A sprinting yellow squad with a single leader out front.
- Spawn rules: Random; patrol-based. Check again after the area resets.
- Best range: Mid to long. Avoid extended close-quarters trades.
- Must-do step: Loot the Commander’s body to secure task credit.
If you’re striking out, it’s usually timing. Run a quick loop, reset the area, and sweep the farm compound again. When the yellow squad appears, take the first clean angle on the leader and end the fight on your terms.