
Windows 11 blocks printer installation if a device with the same name already exists, displaying the message: “Unable to install printer. Another printer or printers shared with this name already exists. Please use another name for the printer.” This issue often arises when a previous printer wasn’t fully removed or its registry entry remains, preventing new installations with the same name. Clearing out these remnants allows the system to recognize the new printer and complete the setup successfully.
Remove Existing Printer and Its Driver
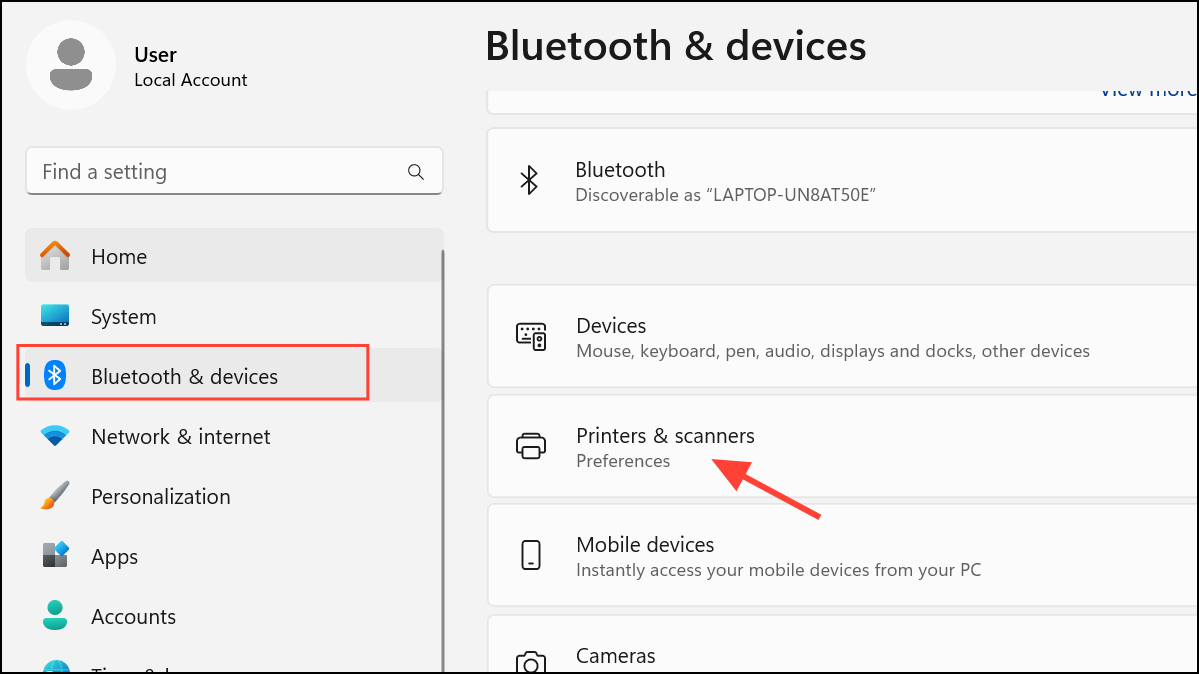
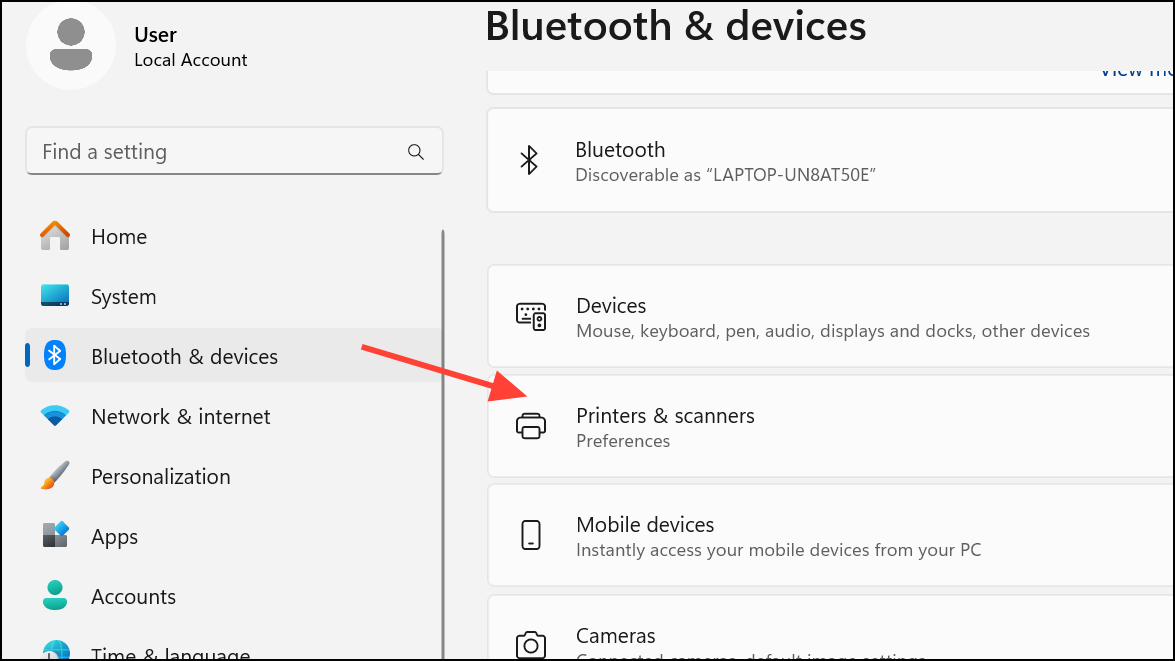
Step 1: Open Windows Settings by pressing Windows Key + I. Navigate to Bluetooth & Devices > Printers & Scanners. Find the printer with the conflicting name in the list, select it, and click Remove to uninstall it. This action deletes the printer from your system’s device list, but sometimes leaves registry traces behind.
Step 2: Restart your PC. This ensures that any pending changes are applied and the printer is fully unregistered from active device management.
Delete Leftover Printer Entries From the Registry
When uninstalling a printer doesn’t resolve the error, leftover registry entries are often the cause. These entries prevent Windows from recognizing the printer as “new,” even after removal. Always back up your registry before making changes to avoid accidental misconfiguration.
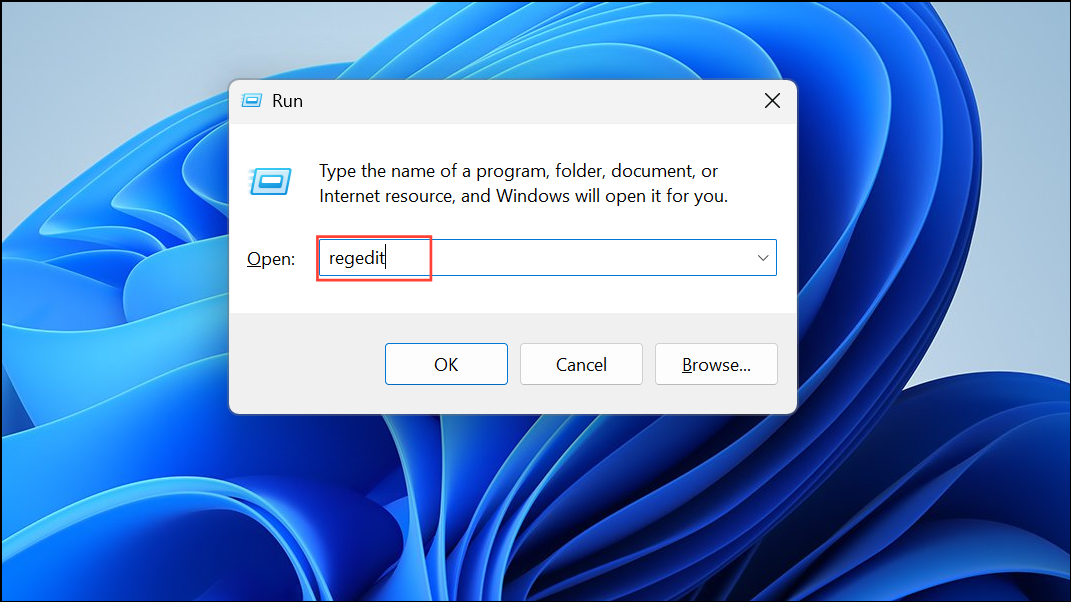
Step 1: Press Windows Key + R to open the Run dialog, type regedit, and press Enter to launch the Registry Editor.
Step 2: In the Registry Editor, navigate to:
HKEY_LOCAL_MACHINE\SYSTEM\CurrentControlSet\Control\Print\Printers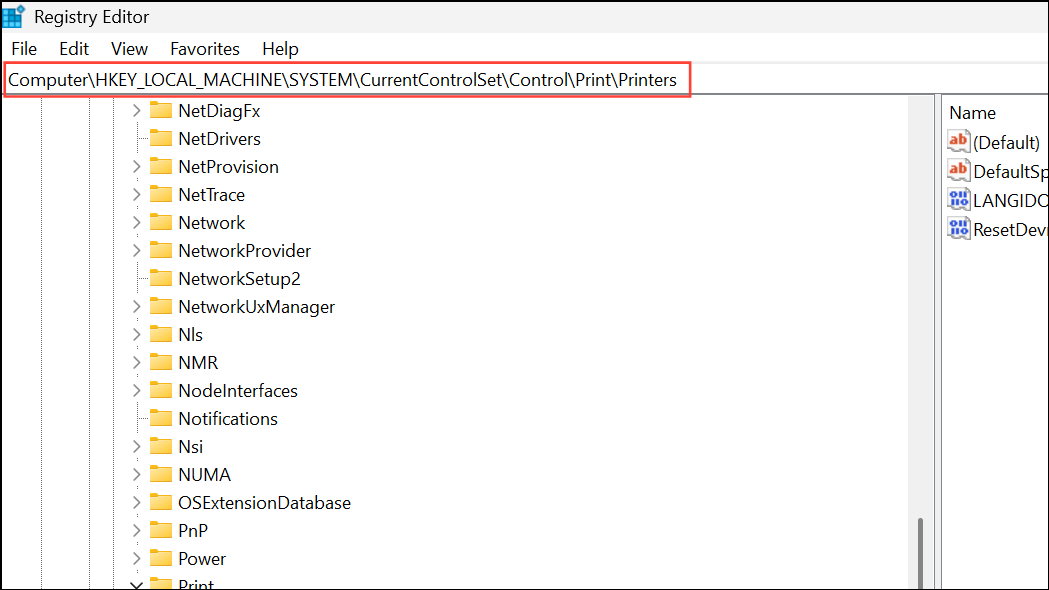
Examine the list of subkeys (folders) under Printers. Each subkey represents a printer installed on your system. Look for a subkey matching the name of the printer you are trying to reinstall. Right-click this subkey and select Delete to remove it. This clears the lingering identifier that causes the conflict.

Step 3: Close the Registry Editor and restart your PC. This ensures that Windows reloads the registry with the updated information and no longer blocks printer installation due to duplicate names.
Restart the Print Spooler Service
If you’re unable to remove a printer or its registry entry, the Print Spooler service may be interfering. The Print Spooler manages all print jobs and printer discovery on Windows. Restarting it can release locked resources and allow changes to take effect.
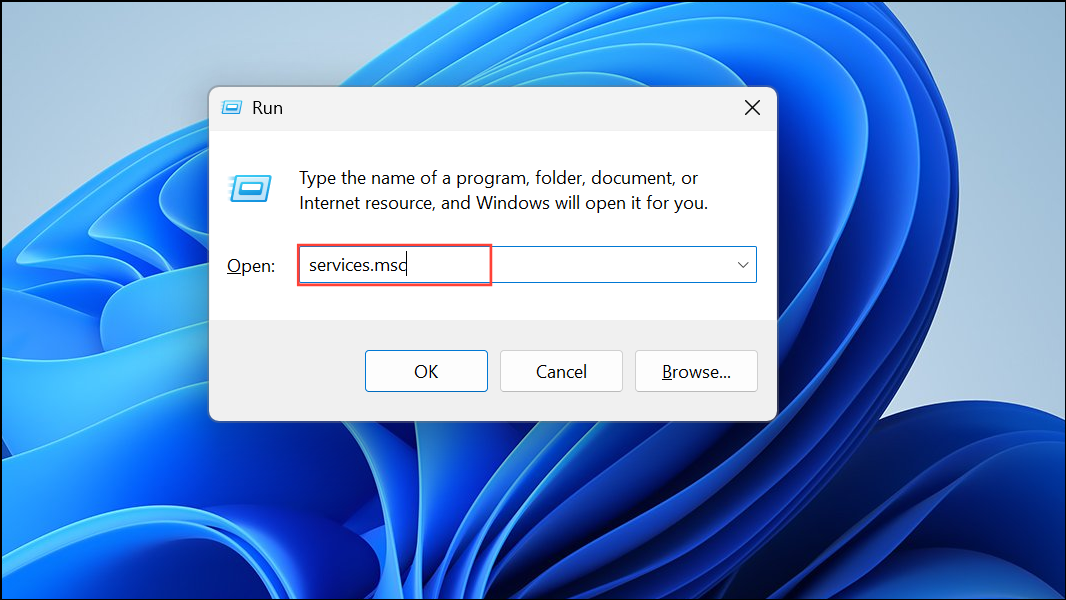
Step 1: Press Windows Key + R, type services.msc, and press Enter.
Step 2: In the Services window, scroll down to Print Spooler. Right-click it and select Properties. If the service is running, click Stop to halt it. Wait a few seconds, then click Start to restart the service. This process refreshes the system’s print management, freeing up any locked entries.
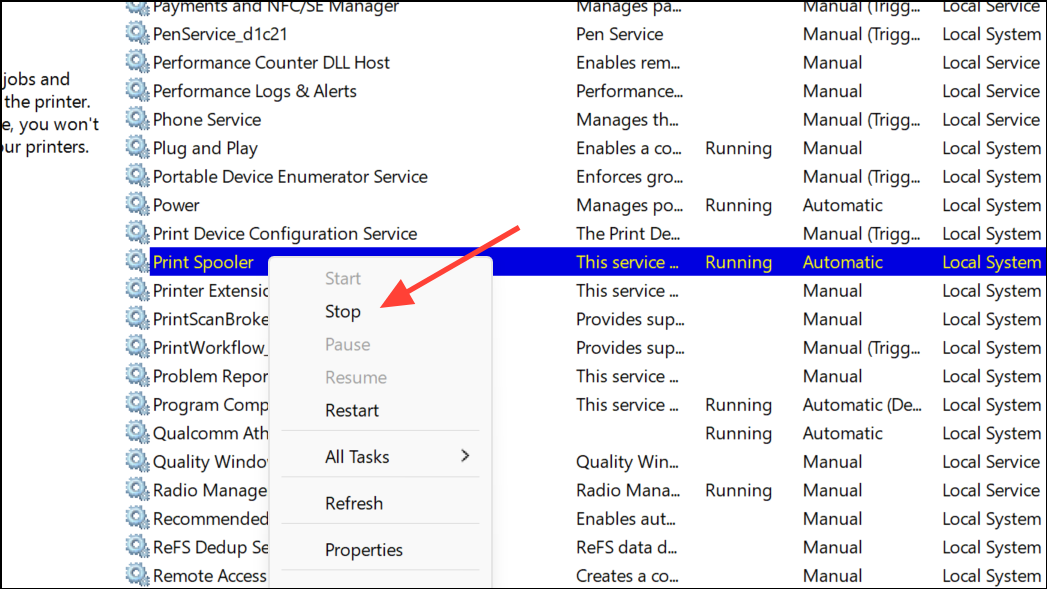
Step 3: After restarting the Print Spooler, attempt to remove any remaining printer entries or proceed with the installation of your printer using the desired name.
Change the Printer Name During Installation
When installing or sharing a printer on a network, Windows requires a unique printer name. If you encounter the error despite removing previous entries, try assigning a different name during installation. In the printer setup process, look for the option to specify a printer name and choose one that hasn’t been used on your system or network.
To rename an existing printer, go to Settings > Bluetooth & Devices > Printers & Scanners, select the printer, click Printer Properties, and change the name under the General tab. This allows you to avoid conflicts without deleting or editing registry entries.
Removing duplicate printers, clearing registry leftovers, and restarting the Print Spooler resolves the “Another printer with this name already exists” error in Windows 11. Assigning a unique name during installation also helps prevent future conflicts.