
The message “We couldn’t install Windows in the location you chose. Please check your media drive. Here’s more info about what happened: 0x80300002” appears during Windows 11 setup when the installer encounters problems with the target drive, partition table, or installation media. This error prevents the operating system from installing, often due to partition corruption, hardware compatibility mismatches, or a faulty USB installer. Addressing these root causes restores the ability to complete the Windows 11 installation process smoothly.
Recreate Windows Installation Media
Step 1: Download a fresh Windows 11 ISO directly from Microsoft’s official website or use the Media Creation Tool. Old or corrupted installation files are a common source of error 0x80300002, so starting with a verified, up-to-date ISO file is essential.
Step 2: Prepare a blank USB flash drive with at least 8 GB of storage. Use the official Media Creation Tool or a trusted utility like Rufus to create a new bootable USB installer. When using Rufus, select the correct partition scheme (GPT for UEFI systems, MBR for legacy BIOS) based on your system’s firmware settings.
Step 3: Safely eject the USB drive after the process completes and use this newly created media for installation. This step eliminates corrupted or mismatched files that could trigger installation errors.
Clean Target Drive and Remove All Partitions
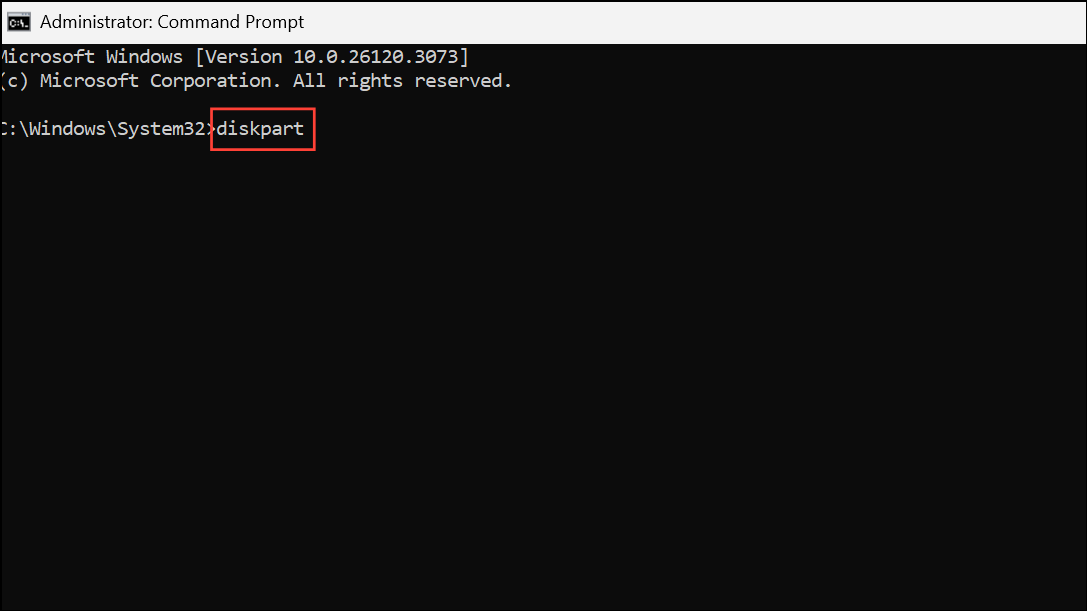
Step 1: Boot your computer from the Windows 11 USB installer. When you reach the Windows setup screen, press Shift + F10 to open a command prompt window.
Step 2: Type diskpart and press Enter. This launches the DiskPart utility, which manages disks and partitions.
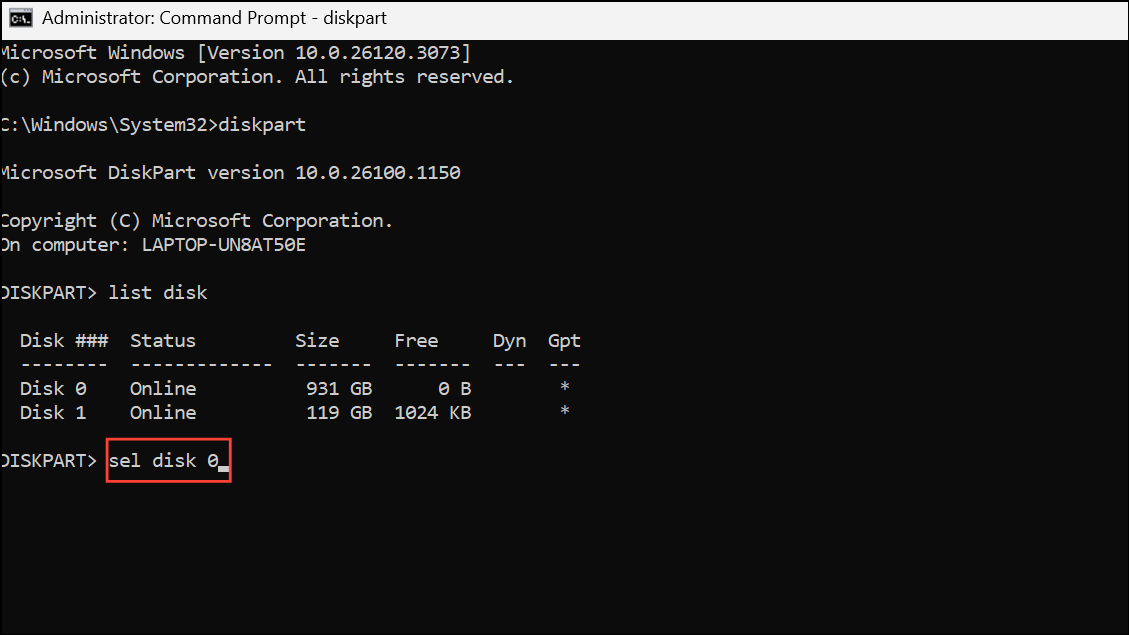
Step 3: Enter list disk to display all connected drives. Identify the disk you want to install Windows on, usually Disk 0 if only one drive is present. Double-check the size to avoid selecting your USB installer by mistake.

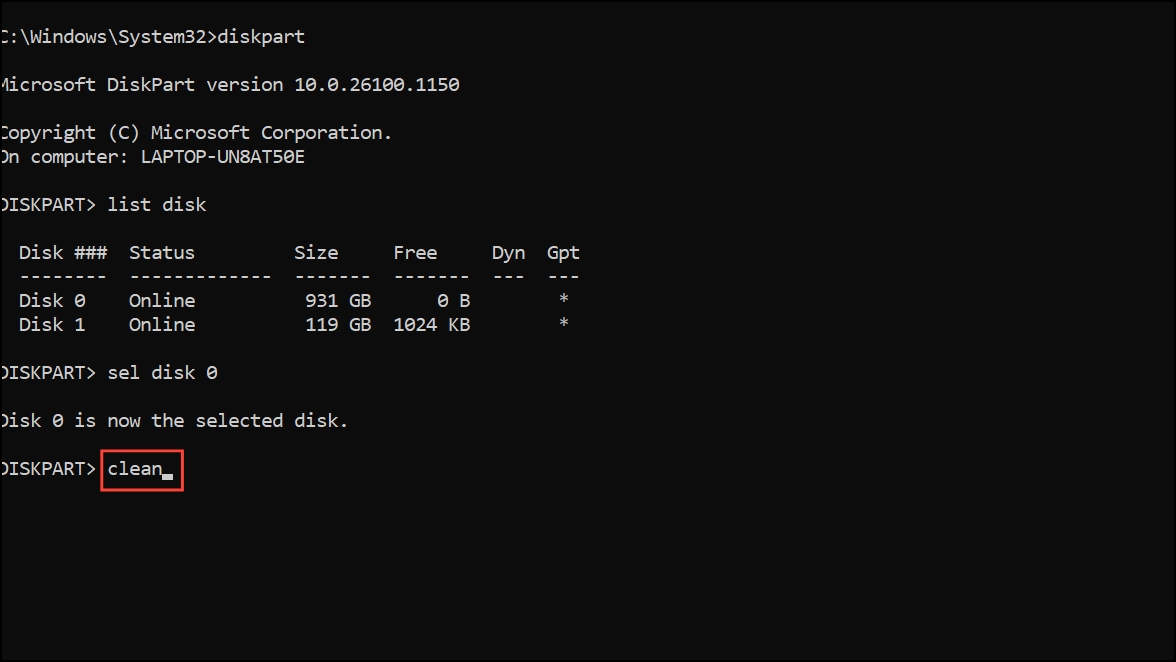
Step 4: Select the target disk by typing sel disk 0 (replace 0 if your target disk has a different number) and press Enter.
Step 5: Type clean and press Enter. This command removes all partitions and data from the selected disk, returning it to unallocated space.
Step 6: Optionally, if your system uses UEFI, convert the disk to GPT by entering convert gpt. For legacy BIOS systems, use convert mbr if necessary.
Step 7: Type exit twice to close DiskPart and the command prompt. Continue with the Windows installation and select the now unallocated space as the destination. The installer will create the necessary partitions automatically.
Check BIOS/UEFI Settings and Drive Compatibility
Step 1: Restart your PC and enter BIOS or UEFI firmware settings (commonly by pressing Del, F2, or another key shown at boot).
Step 2: Locate the boot mode setting. If your USB installer was created for UEFI (using GPT), ensure the firmware is set to UEFI mode. If the installer uses MBR, set the firmware to legacy or CSM mode. Incompatible settings can prevent Windows from installing and cause error 0x80300002.
Step 3: Confirm that the SATA controller is set to AHCI (not IDE or RAID), which improves compatibility and performance with modern SSDs and HDDs. Save changes and exit the firmware settings.
Step 4: Disconnect all unnecessary external devices except the keyboard, mouse, and USB installer. Extra drives or peripherals can confuse the installer or interfere with the setup process.
Test and Replace Failing Hardware
Step 1: If the error persists after recreating the installer and cleaning the drive, run built-in diagnostics from your PC’s firmware or use manufacturer tools (such as CrystalDiskInfo or the SSD/HDD vendor’s diagnostic utility) to check for drive health issues. Drives with bad sectors, failing controllers, or intermittent connectivity can cause partition errors and installation failures.
Step 2: Try connecting the target drive to another computer to test if it is recognized and can be formatted. If the drive cannot be initialized or throws errors, replacement may be necessary.
Step 3: For desktops, swap SATA cables or ports to rule out connection problems. For laptops, reseat the drive if possible. If the drive passes diagnostics but installation still fails, consider updating the motherboard firmware (BIOS/UEFI) to the latest version, as outdated firmware can cause compatibility issues during installation.
Additional Solutions
- Attempt a System Restore if you previously had Windows running and system restore points are available. This can revert the system to a working state before the error appeared.
- If the drive was previously used in another system or has foreign partitions, clear all partitions as described above to avoid conflicts.
- For persistent issues, try installing Windows on another drive to isolate whether the problem is with the installer, drive, or system hardware.
Addressing error 0x80300002 during Windows 11 installation involves recreating installation media, fully cleaning the target drive, and verifying hardware and firmware compatibility. These steps resolve the majority of installation failures and restore your ability to install Windows 11 without further interruption.