
Screen tearing disrupts the visual experience by causing misaligned frames, often resulting in horizontal lines or partial image freezes. This issue frequently appears during gaming, video playback, or even everyday tasks like browsing and document editing. Windows 11 users have reported screen tearing across a range of hardware and applications, especially after system updates or driver changes. Addressing this problem involves a combination of graphics settings adjustments, driver management, and system configuration tweaks.
Disable Hardware Accelerated GPU Scheduling
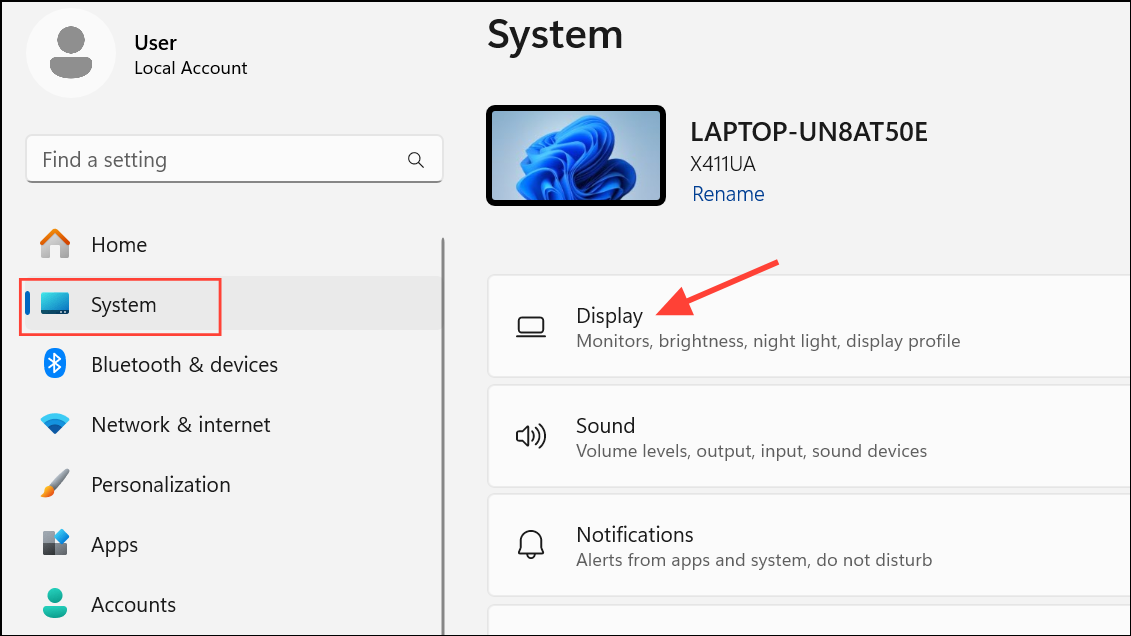
Step 1: Open the Windows Settings app by pressing Win + I. Navigate to System > Display.
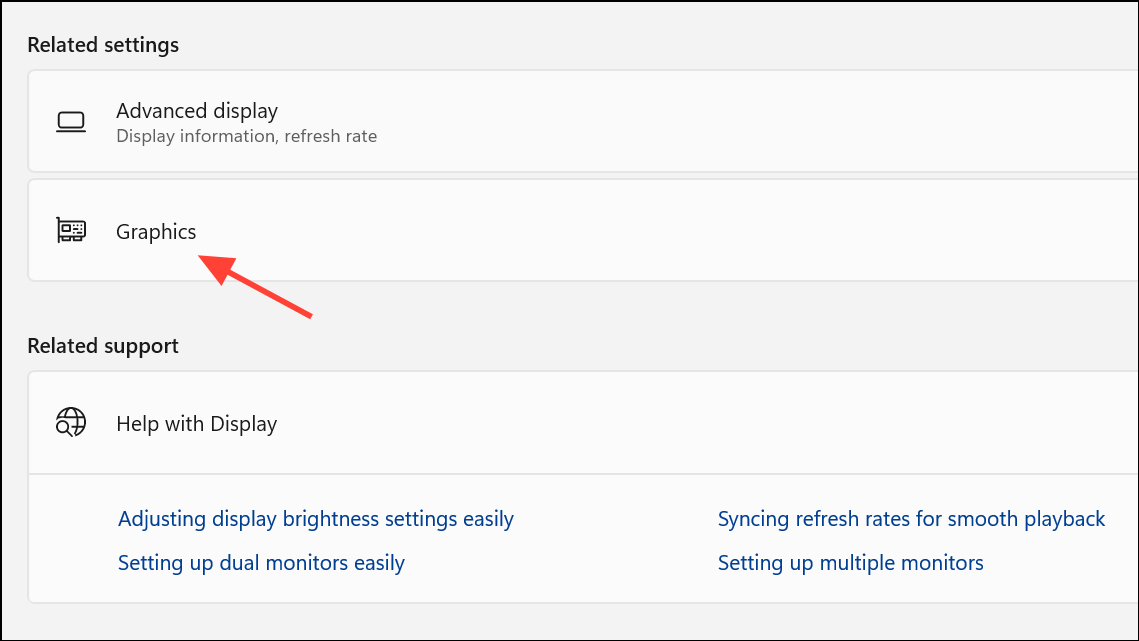
Step 2: Scroll down and select Graphics. Under Default graphics settings, locate the option labeled Hardware-accelerated GPU scheduling.
Step 3: Toggle this setting to Off. Disabling hardware-accelerated GPU scheduling can reduce or eliminate screen tearing, particularly in scenarios where partial application windows freeze or distort. This change is especially effective on systems with NVIDIA or AMD discrete graphics cards, and users have reported immediate improvements in applications like Discord, Chrome, and various games.
Step 4: Restart your computer to apply the changes. After rebooting, observe whether screen tearing persists during normal usage and gaming.
Turn Off Optimizations for Windowed Games and Dynamic Refresh Rate
Step 1: In the Default graphics settings section (as above), find and disable Optimizations for windowed games and Dynamic Refresh Rate.
Step 2: Turning off these features forces Windows to use a more traditional rendering pipeline, which can resolve tearing that occurs when switching between fullscreen and windowed modes, or when alt-tabbing between applications.
Step 3: Restart your system for these settings to take effect. Test your common applications and games to see if the tearing issue has been resolved.
Update or Roll Back Graphics Drivers
Step 1: Use the Intel® Driver and Support Assistant or your GPU manufacturer’s software (such as NVIDIA GeForce Experience or AMD Adrenalin) to check for the latest drivers. Download and install any available updates for your graphics hardware.
Step 2: If you notice screen tearing after a recent driver update, use a tool like Display Driver Uninstaller (DDU) to completely remove your current drivers. Then, reinstall a previous stable version known to work correctly. This approach helps eliminate conflicts or bugs introduced in newer driver releases.
Step 3: Restart your computer after installing or rolling back the driver. Monitor your system for any changes in screen tearing behavior.
Adjust Application-Specific Hardware Acceleration
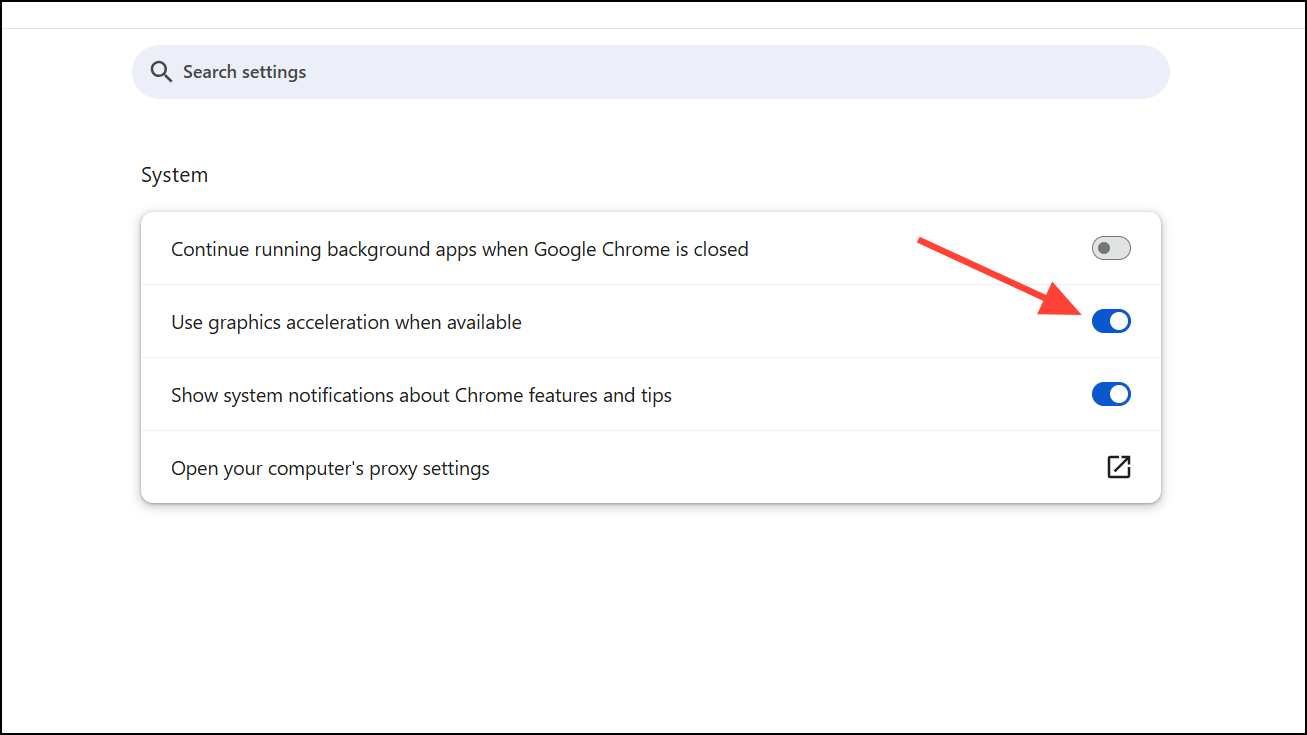
Step 1: For browsers like Chrome or applications such as Discord and Word, access the settings menu and locate the hardware acceleration option. In Chrome, go to Settings > System and toggle Use hardware acceleration when available on or off.
Step 2: Experiment with enabling or disabling hardware acceleration in each application. Some users report that disabling it in Discord and enabling it in Chrome reduces tearing, while others find the opposite works better. The effect can vary depending on your GPU and driver version.
Step 3: Restart the affected applications after changing the setting. Observe if the screen tearing or partial window freezes improve.
Enable or Adjust VSync and Frame Rate Settings
Step 1: Access your GPU control panel (NVIDIA Control Panel, AMD Radeon Software, or Intel Graphics Command Center). Look for Vertical Sync (VSync) settings.
Step 2: Enable VSync globally, or for specific applications experiencing tearing. VSync synchronizes the frame output of your GPU with your monitor’s refresh rate, which can eliminate visible tearing in many cases.
Step 3: In games or video players, set the frame rate cap to match your monitor’s refresh rate if possible. For example, limit FPS to 60 on a 60Hz display.
Check Display Resolution, Refresh Rate, and Cables
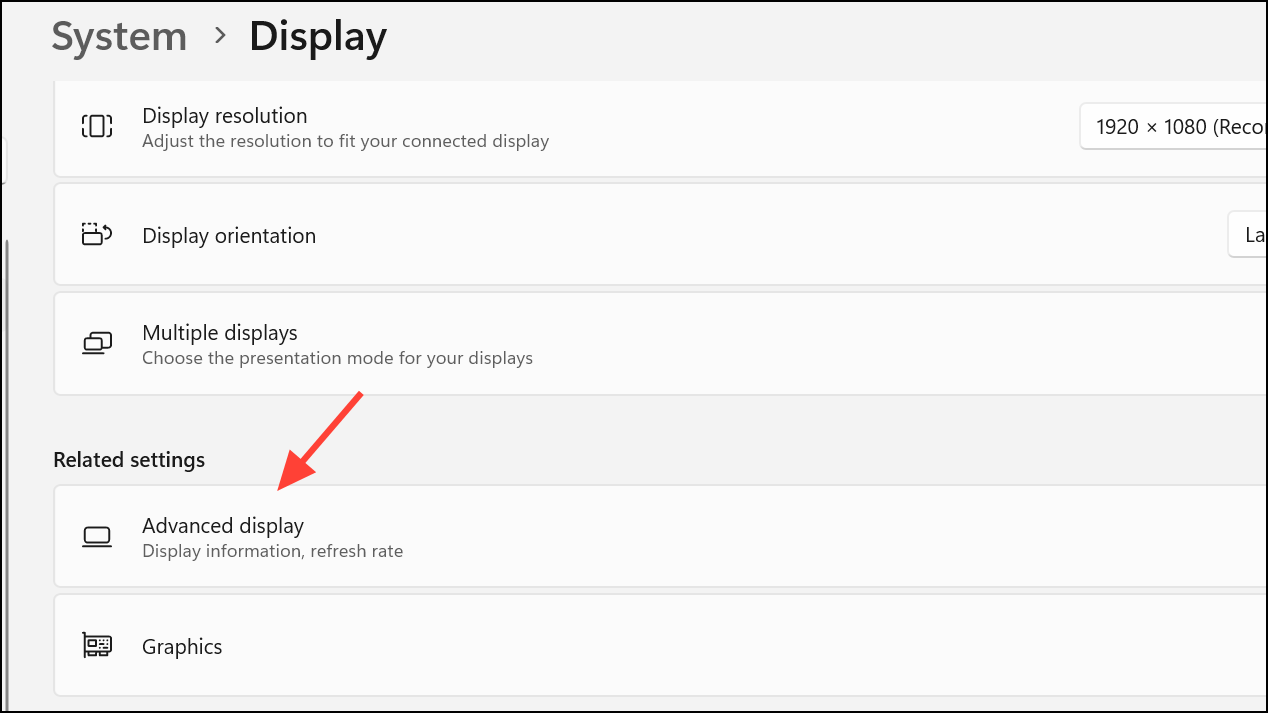
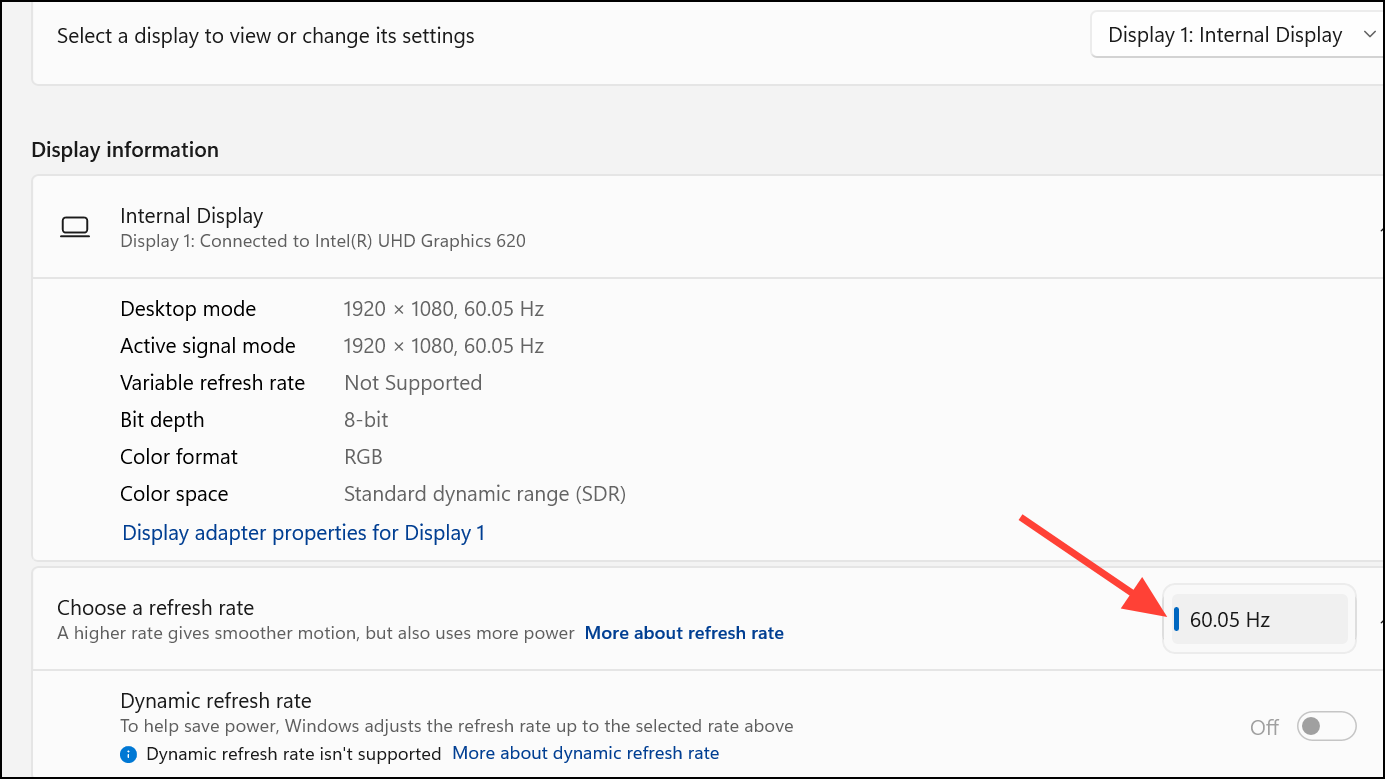
Step 1: In Windows Settings, go to System > Display > Advanced display. Confirm that your resolution and refresh rate match your monitor’s specifications. Mismatched settings can cause visual artifacts, including tearing.
Step 2: If your display supports higher refresh rates (such as 120Hz or 144Hz), ensure both Windows and your GPU control panel are set to use the correct value. If you recently changed refresh rates, try reverting to the previous stable setting to see if the issue resolves.
Step 3: Test with different video cables (HDMI, DisplayPort) and, if possible, a different monitor. Faulty or incompatible cables can trigger or worsen screen tearing, especially at higher resolutions or refresh rates.
Test in Safe Mode or With Clean Boot
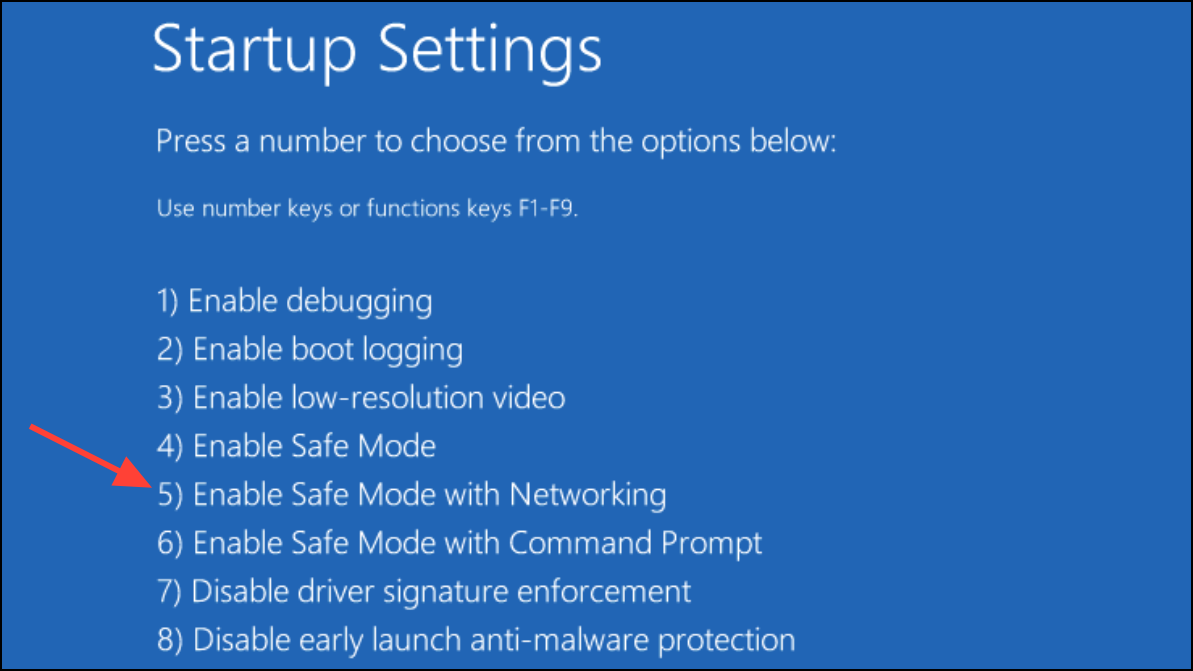
Step 1: Boot into Windows Safe Mode with networking by holding Shift and selecting Restart from the Start menu. Navigate through Troubleshoot > Advanced options > Startup Settings, then select Enable Safe Mode with Networking.
Step 2: Use your system in Safe Mode for a period of time. If screen tearing disappears, the problem may be caused by third-party software or services. Consider performing a clean boot by disabling non-Microsoft startup items and services to isolate the culprit.
Step 3: Gradually re-enable startup items and services while monitoring for the return of screen tearing. This process helps identify software conflicts that may not be directly related to graphics drivers.
Additional Troubleshooting Steps
- Load default BIOS settings to rule out firmware-level configuration issues.
- Ensure RAM is running at a supported speed for your motherboard and processor.
- Run system diagnostics using tools like the Intel® Processor Diagnostic Tool to check for hardware faults.
- If issues persist after all troubleshooting, contact your device manufacturer for further support, especially for OEM laptops with custom drivers.
Resolving screen tearing in Windows 11 often requires a combination of driver updates, targeted graphics settings changes, and careful system troubleshooting. Applying these steps should restore smooth visuals and responsive applications across your device.