
Webcam interruptions—where the camera repeatedly turns off and on by itself—can break video calls, disrupt online meetings, and interfere with streaming or recording. On Windows 11, this problem is often tied to driver conflicts, system updates, hardware issues, privacy restrictions, or even specific power management settings. Addressing these factors restores stable camera operation and prevents further disruptions.
Run the Windows Camera Troubleshooter
Step 1: Open the Get Help app by searching for it in the Start menu.
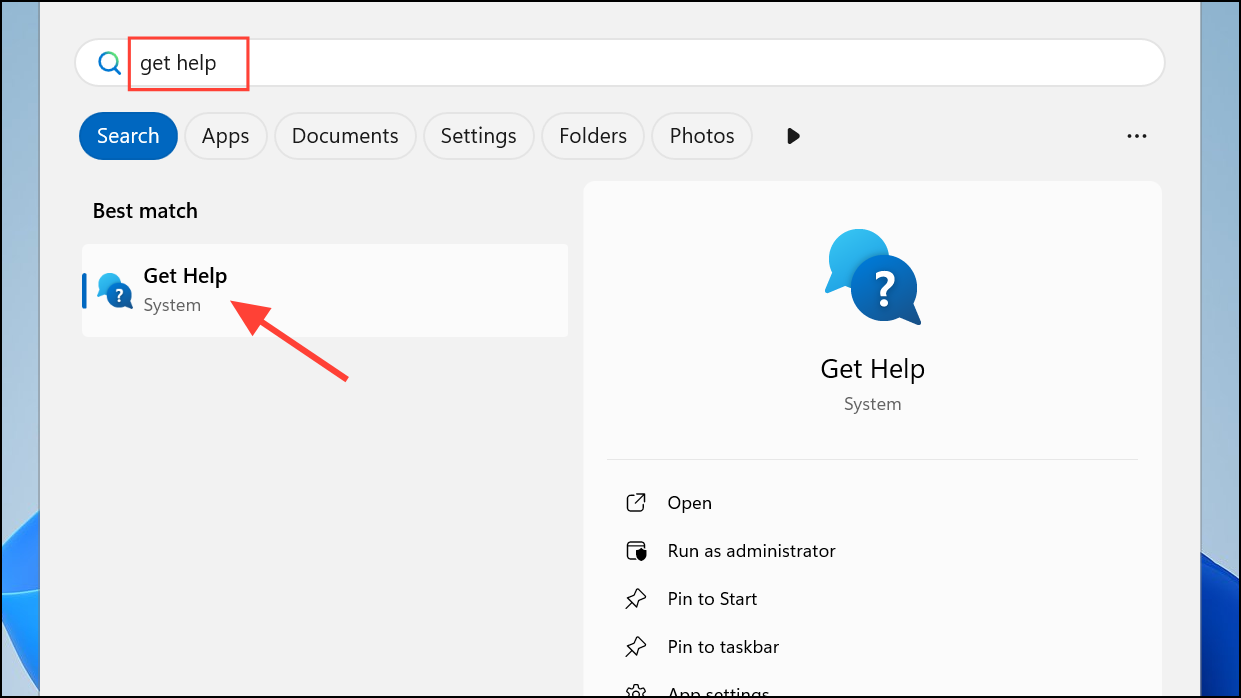
Step 2: Type camera troubleshooter in the search bar and select the recommended troubleshooter.
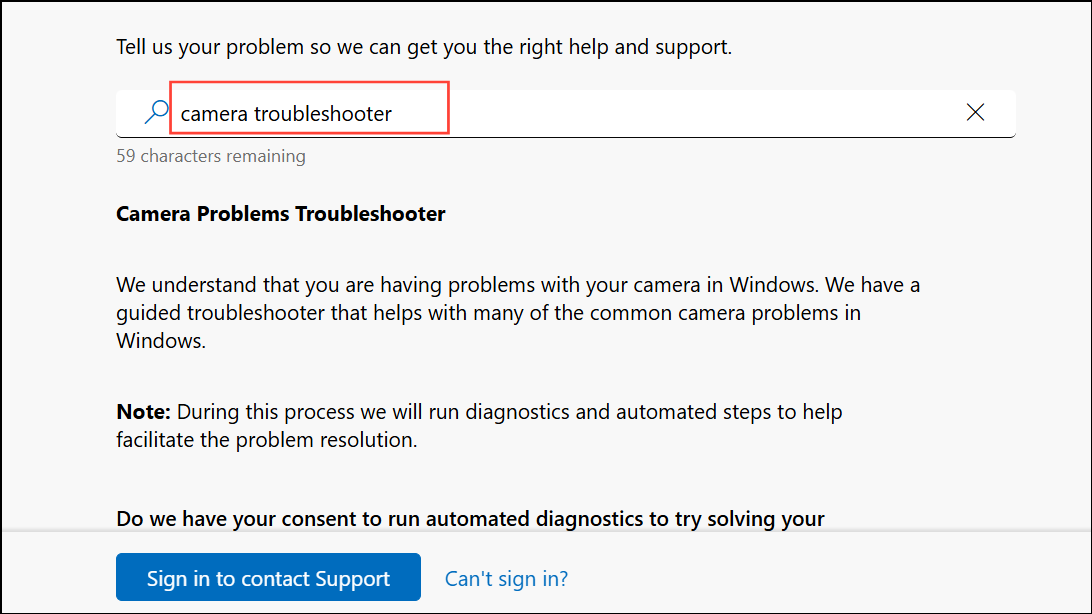
Step 3: Follow the on-screen prompts. The troubleshooter will automatically scan for common issues and attempt to resolve them, such as misconfigured drivers or blocked access. This process can quickly restore camera functionality if the cause is software-related.
Check Physical Connections and Hardware
Step 1: For external webcams, inspect the USB cable and port for any looseness or visible damage. Unplug the camera and reconnect it to a different USB port. If possible, test the camera on another computer to confirm whether the issue is specific to your device or the webcam itself.
Step 2: For built-in cameras, examine your laptop for a physical camera switch or privacy shutter. Some laptops have a dedicated key (often activated with Fn + camera icon), a side slider, or a shutter that must be open for the camera to function. Make sure the camera is physically enabled.
Update or Reinstall Camera Drivers
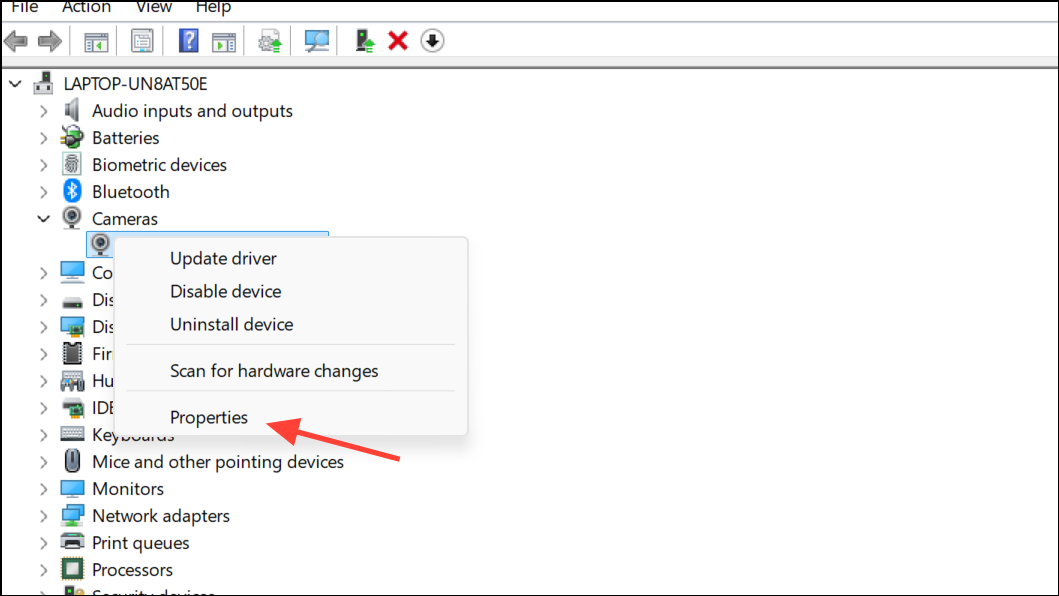
Step 1: Open Device Manager by pressing Windows + X and selecting Device Manager.

Step 2: Expand the Cameras or Imaging Devices section. Right-click your webcam and select Update driver. Choose Search automatically for drivers and allow Windows to find and install the latest version.
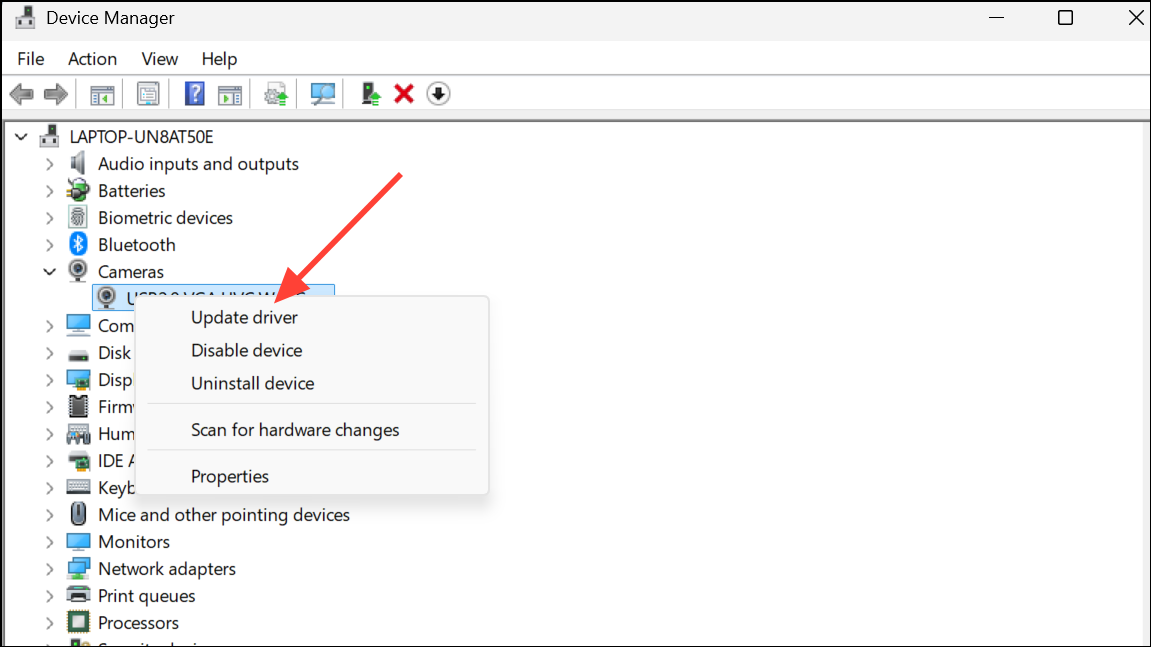
Step 3: If updating does not resolve the issue, right-click the camera device again and select Uninstall device. After uninstalling, restart your computer. Windows will attempt to reinstall the default driver automatically.
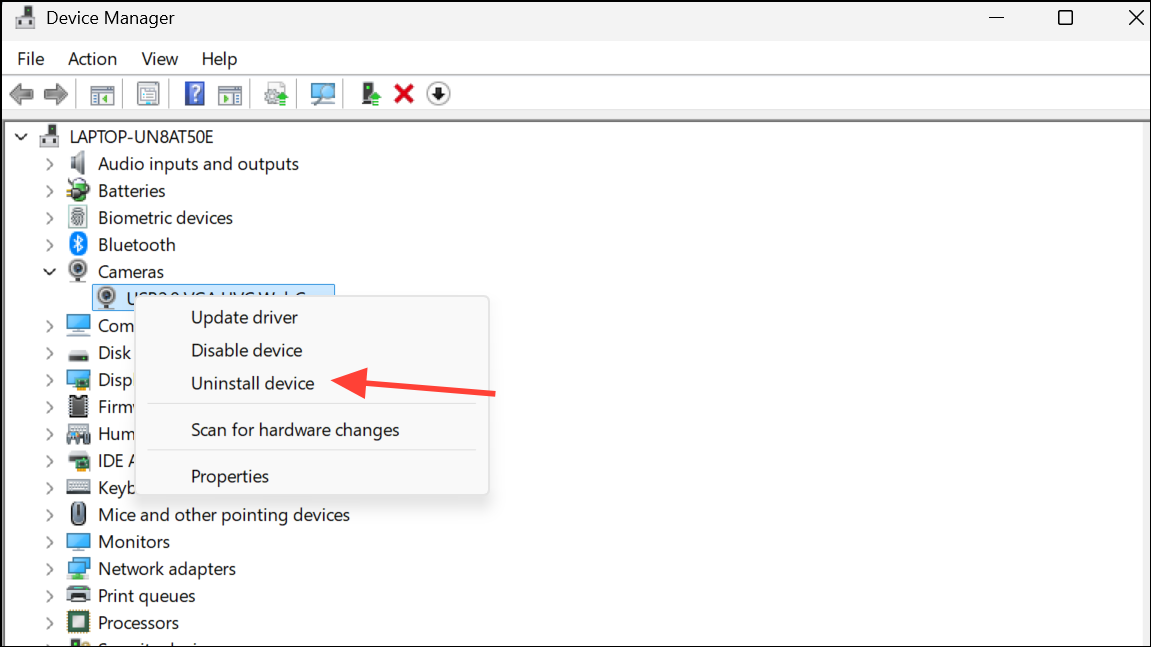
Step 4: For USB webcams, you can also switch to the built-in UVC (USB Video Class) driver. In Device Manager, right-click the webcam, select Update driver, then Browse my computer for drivers > Let me pick from a list of available drivers on my computer. Select USB Video Device and click Next.
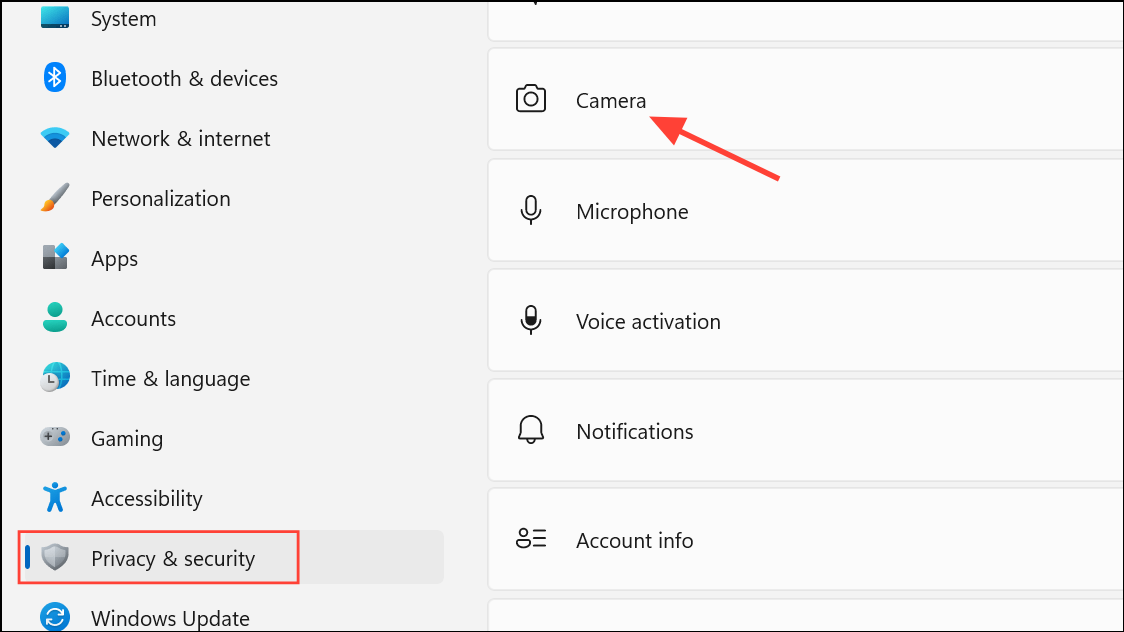
Review Camera Privacy Settings
Step 1: Go to Start > Settings > Privacy & security > Camera.
Step 2: Ensure Camera access is turned on for the device. If it is greyed out, administrator access is required.
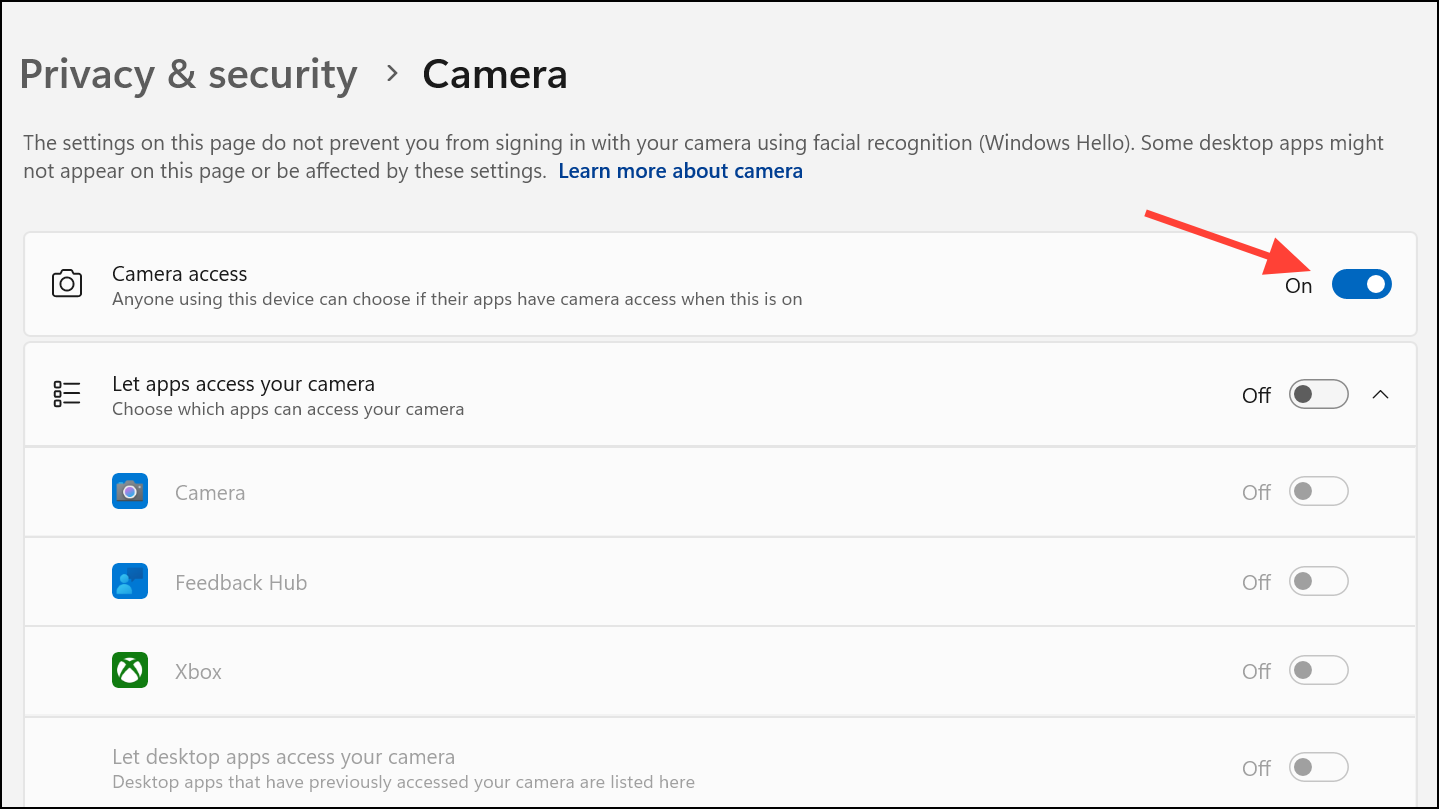
Step 3: Make sure Let apps access your camera is enabled. Scroll down and verify that the specific app you’re using (e.g., Teams, Zoom, Camera app) is also permitted.
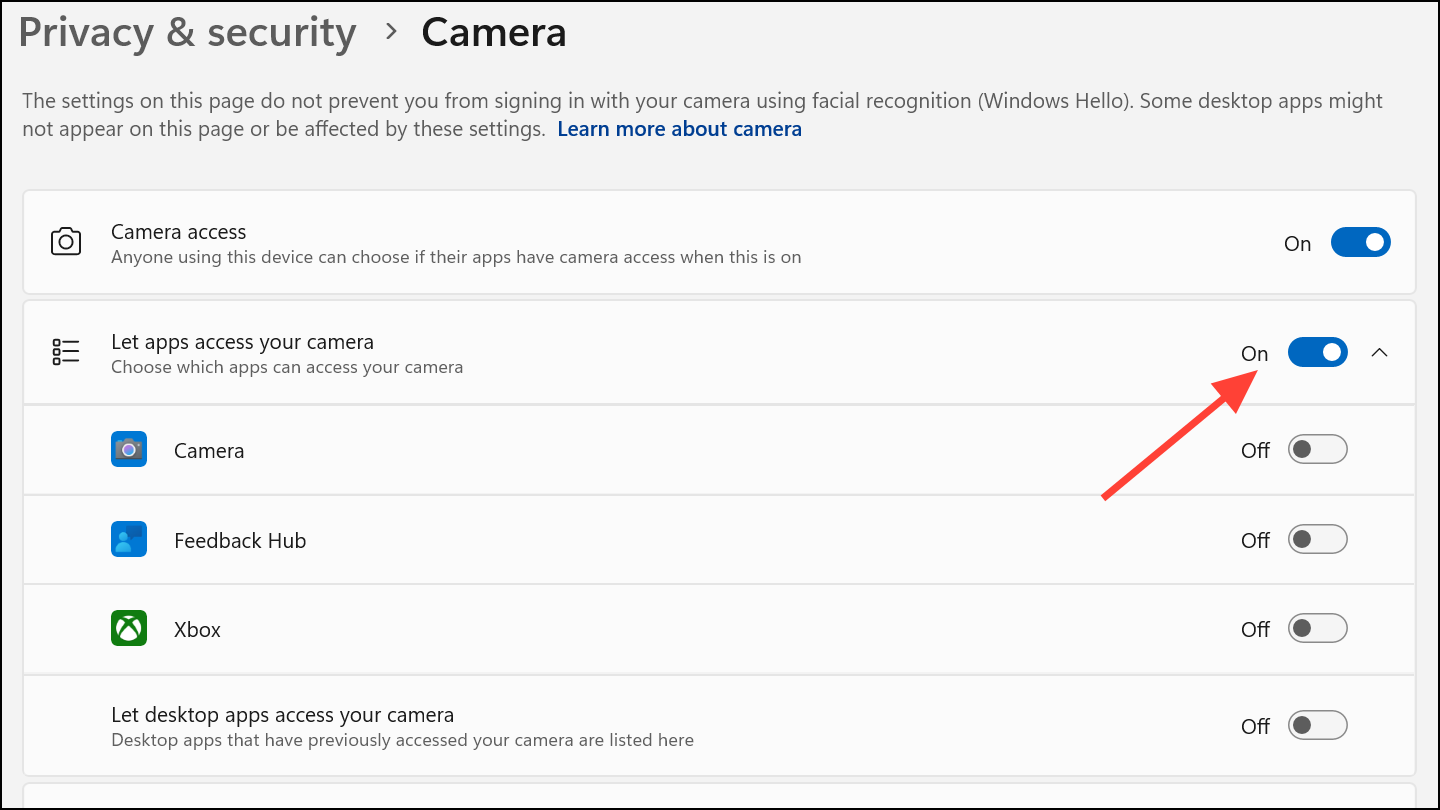
Step 4: For desktop apps (including browsers and video conference software), confirm that Let desktop apps access your camera is switched on. This setting is required for non-Microsoft Store apps.
Modify Power Management and USB Settings
Step 1: Open Device Manager, right-click your webcam, and select Properties.
Step 2: Go to the Power Management tab and uncheck Allow the computer to turn off this device to save power. Click OK.
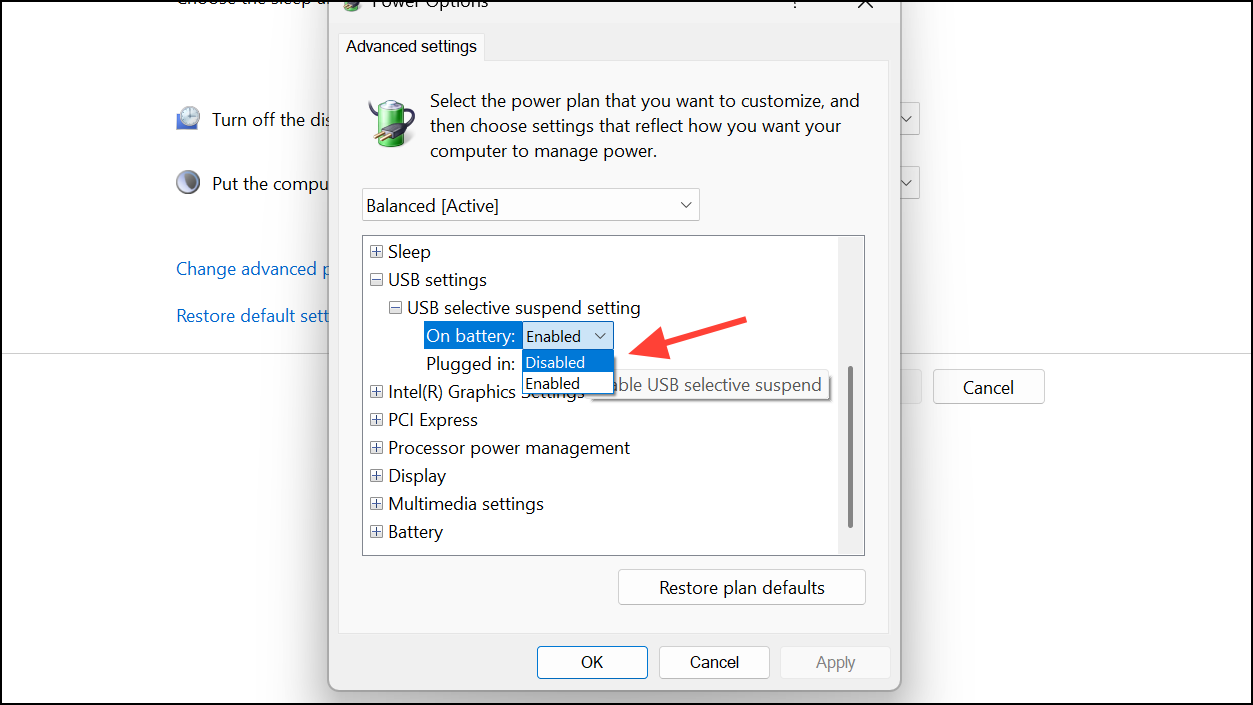
Step 3: Adjust USB power settings by opening Start > Settings > System > Power & battery > Additional power settings.
Step 4: Click Change plan settings next to your active plan, then Change advanced power settings.

Step 5: Expand USB settings > USB selective suspend setting and set both On battery and Plugged in to Disabled. Apply and save changes.
Check for Windows and Firmware Updates
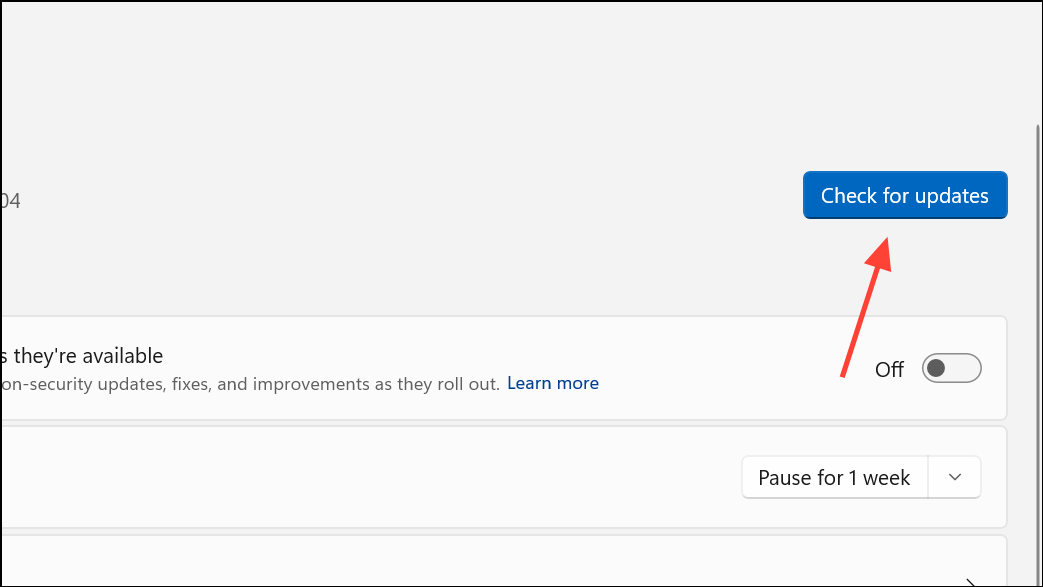
Step 1: Go to Start > Settings > Windows Update and select Check for updates. Install any available system or driver updates.
Step 2: For manufacturer-specific webcams, visit your device or webcam manufacturer’s support website to download and install the latest firmware or driver updates. This is especially important if the camera was working before a Windows 11 upgrade or a recent patch.
Test Camera in Different Applications
Step 1: Open the built-in Camera app from the Start menu and check if the camera preview works. If it does, the issue may be with a specific third-party app’s settings.
Step 2: If the camera fails in all apps, the problem is likely at the driver, hardware, or system level. If it only fails in one app, check that app’s video settings and permissions.
Restart Camera Services
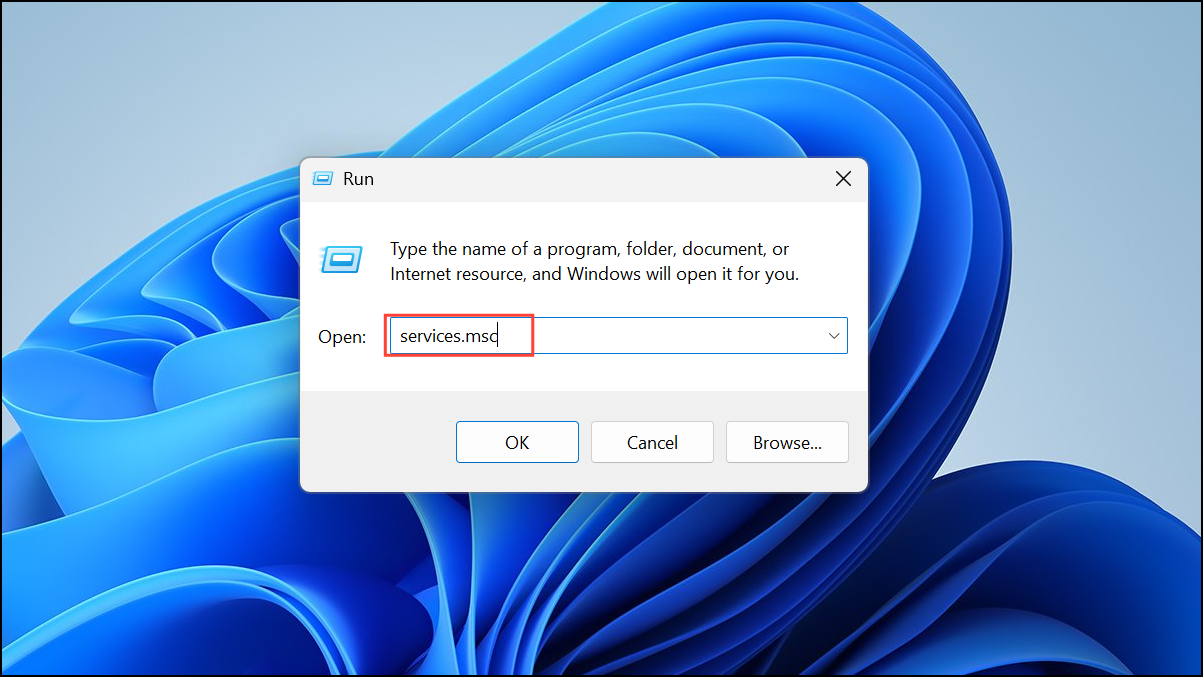
Step 1: Press Windows + R, type services.msc, and press Enter.
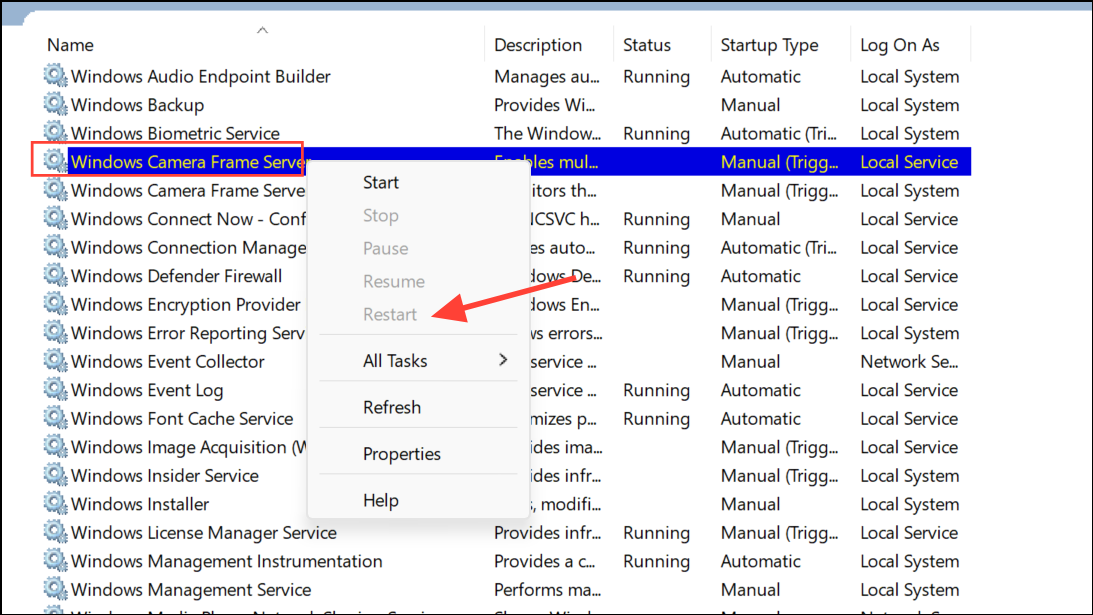
Step 2: Locate Windows Camera Frame Server in the list. Right-click and select Restart. This can reinitialize the camera if it’s stuck in a failed state.
Additional Troubleshooting and Hardware Checks
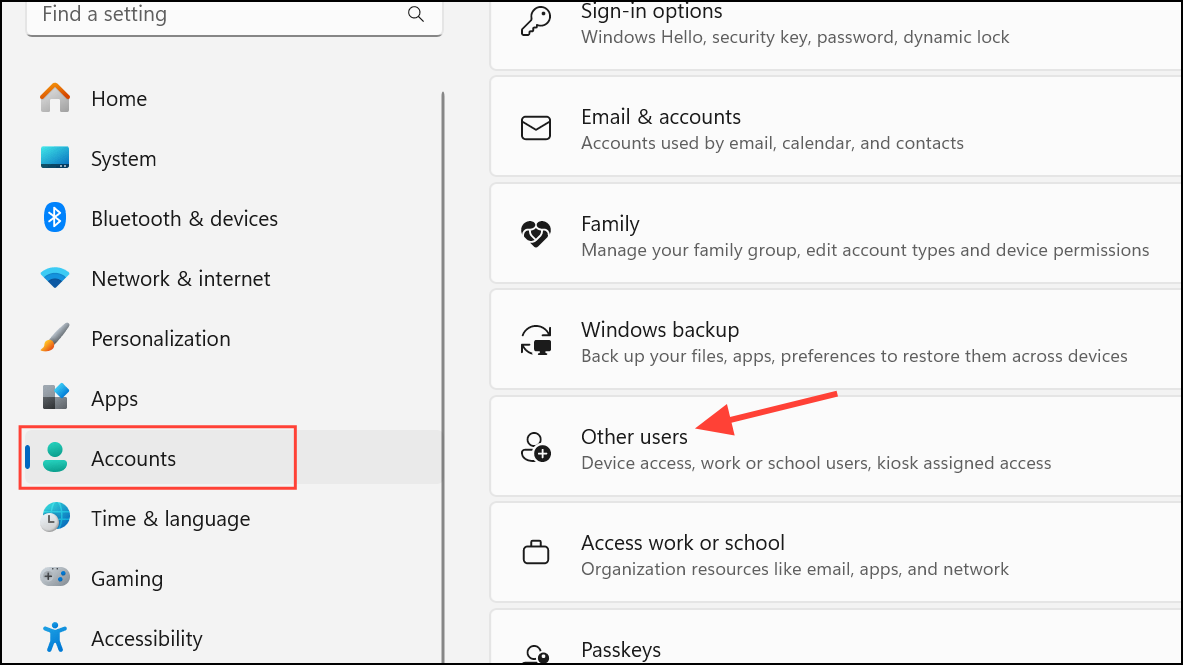
Step 1: If the camera still disconnects, try creating a new local administrator account (Settings > Accounts > Other users) and test the camera there. This rules out issues with user profile corruption.
Step 2: Temporarily disable antivirus or security software to check if it is blocking camera access. Re-enable protection after testing.
Step 3: For persistent issues, especially if the camera disconnects on multiple computers, the webcam hardware or its cable may be faulty. Contact manufacturer support or consider professional repair if under warranty.
By systematically reviewing these steps, you can restore stable webcam operation and prevent the camera from turning off and on automatically in Windows 11. Regularly updating drivers and checking connections helps maintain reliable performance over time.