
Windows 11 requires you to have Secure Boot enabled on your machine. Unfortunately, in certain cases, doing so can prevent your computer from booting up at all. There are a few fixes that can help resolve this issue, but you will have to boot your PC to the Windows Recovery page or boot it into Safe Mode.
Boot Into Windows Recovery Environment
To sort out the problem, you need to boot your PC into the Windows Recovery Environment, which will let you access Safe Mode for trying out various fixes. There are a couple of ways you can boot into the Windows Recovery Environment.
- Power on your computer and press and hold the boot key, which can be
F9,F12or some other key, depending on your computer manufacturer. - Alternatively, let your PC restart a few times, and it will automatically enter the WinRE.
- You can also use a Windows installation USB or other installation media to access the recovery environment.
- Once you enter this environment, navigate to Troubleshoot > Advanced Options and select Startup Settings.
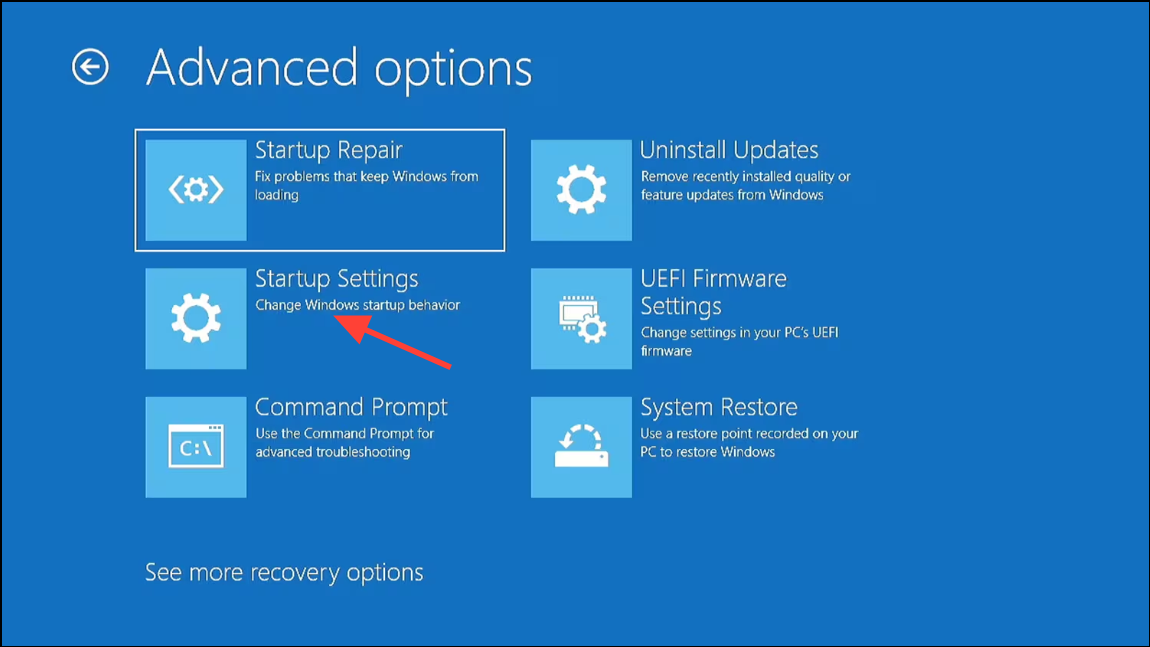
- On the Startup Settings page, click the Restart button and then press
4orF4to boot into Safe Mode.
Check the Drive Partition Format
After you successfully boot into Safe Mode, you need to check the partition format used to partition your drive.
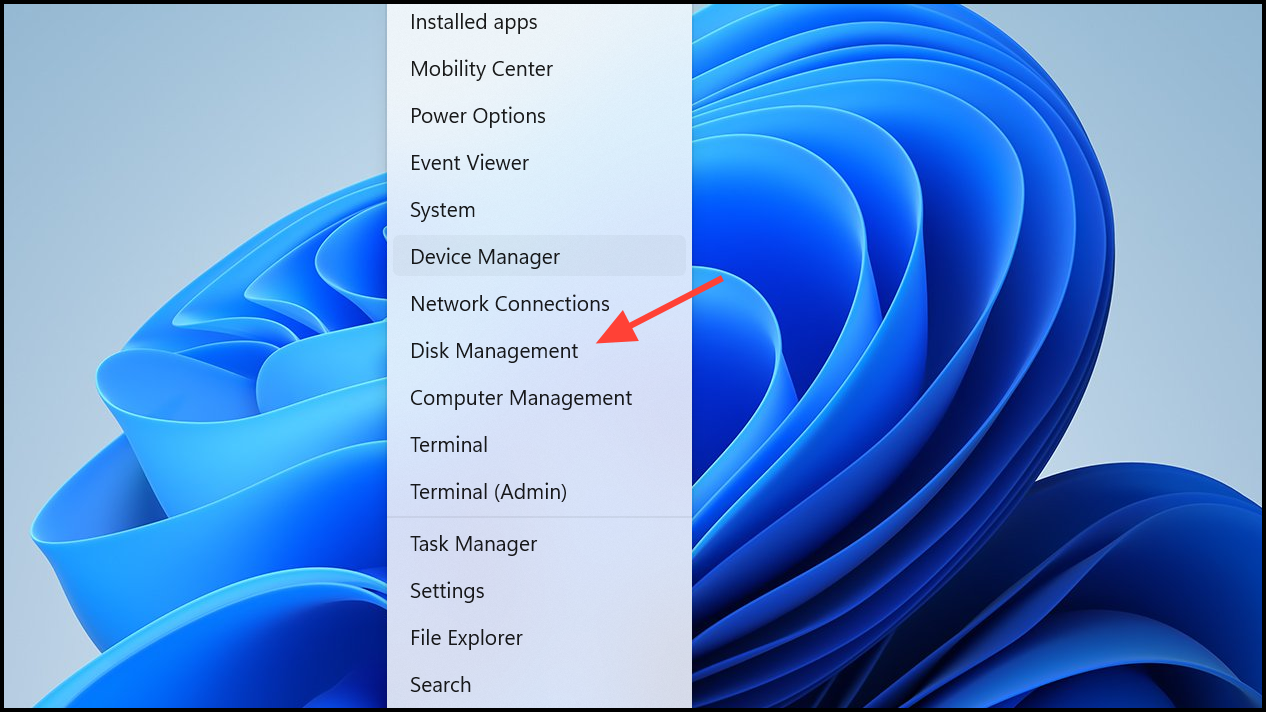
- Right-click the Start button and select Disk Management.
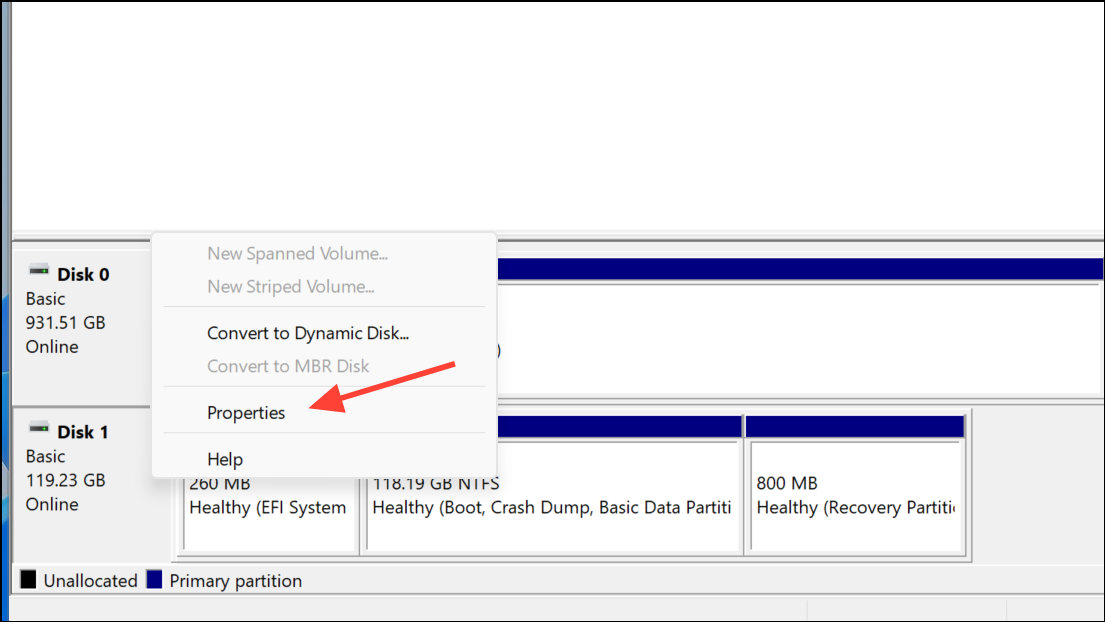
- Once Disk Management opens, right-click on the disk on which Windows is installed and click Properties.
- In the Properties dialog box, go to the Volumes tab and you will see whether the disk has been formatted as MBR or GPT.
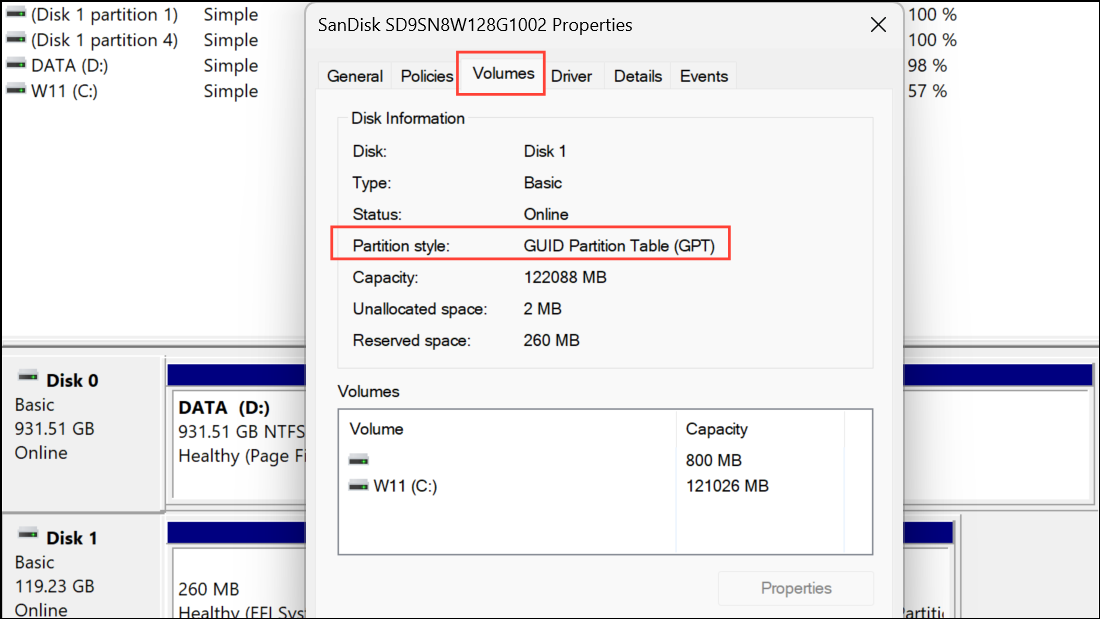
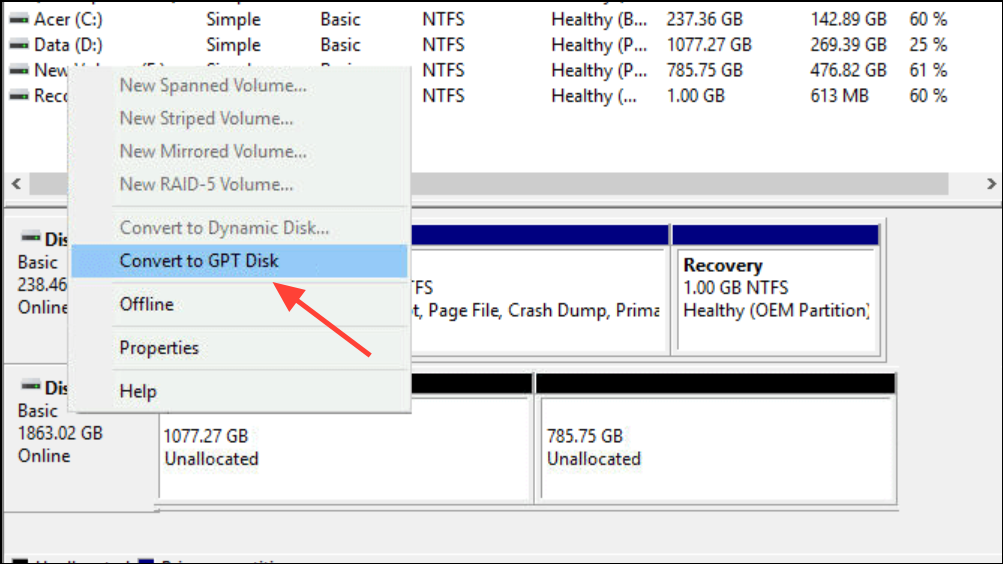
- If you are using an MBR disk, you will need to format it and change it to GPT. You can do this by right-clicking on the disk and selecting Convert to GPT Disk. Make sure to back up your data before doing so as there's always a chance of data loss when changing the disk partition style.
- After converting the disk to GPT, reboot your PC. You should now be able to boot into Windows with Secure Boot enabled.
Remove External Devices
If the above method doesn't work, try disconnecting and removing all externally connected devices from your computer and then booting it up. External devices, such as storage drives, can sometimes cause problems and prevent Windows from booting up. Disconnecting them can remove any interference caused by them and allow the OS to boot.
Boot Manually Using the bootia32.efi or bootx64.efi File
Sometimes, manually booting your computer using the bootx64.efi file can help fix problems with the OS. Files with EFI extensions are boot loaders and are usually present on a hidden system partition without any drive letter. On UEFI-based systems, the file is present at the following location: \EFI\boot\bootx64.efi or \EFI\boot\bootia32.efi.
- Enter the BIOS by powering on your machine and pressing
F2or whichever key is assigned for the purpose. - Navigate to the Boot section to see all available booting options. Look for the .efi files mentioned above.
- If you find any of the files present, select it to boot from it manually.
Secure Boot helps protect your computer from harmful software while it is booting up. Keeping it enabled is a good security practice that you should always follow. Once you fix your Windows 11 boot issue, make sure to re-enable secure boot if you had disabled it earlier.