
Yellow-tinted screens in Windows 11 often make white backgrounds appear sepia or warm-toned, distorting colors across apps, images, and videos. This issue can stem from system settings, color profiles, driver problems, or hardware connections. Restoring accurate display colors requires methodical troubleshooting, starting with the most effective solutions and progressing through other possible causes.
Disable Night Light or Blue Light Filter
Step 1: The Night Light feature shifts your display toward warmer colors to reduce eye strain, but it can also cause an unwanted yellow tint. To quickly check if Night Light is active, press Windows + A to open Quick Settings. Look for the Night Light tile—if it's highlighted, click it to turn it off. The tint should immediately disappear if Night Light was the cause.
Step 2: For a more thorough approach, open the Settings app using Windows + I. Navigate to System > Display.
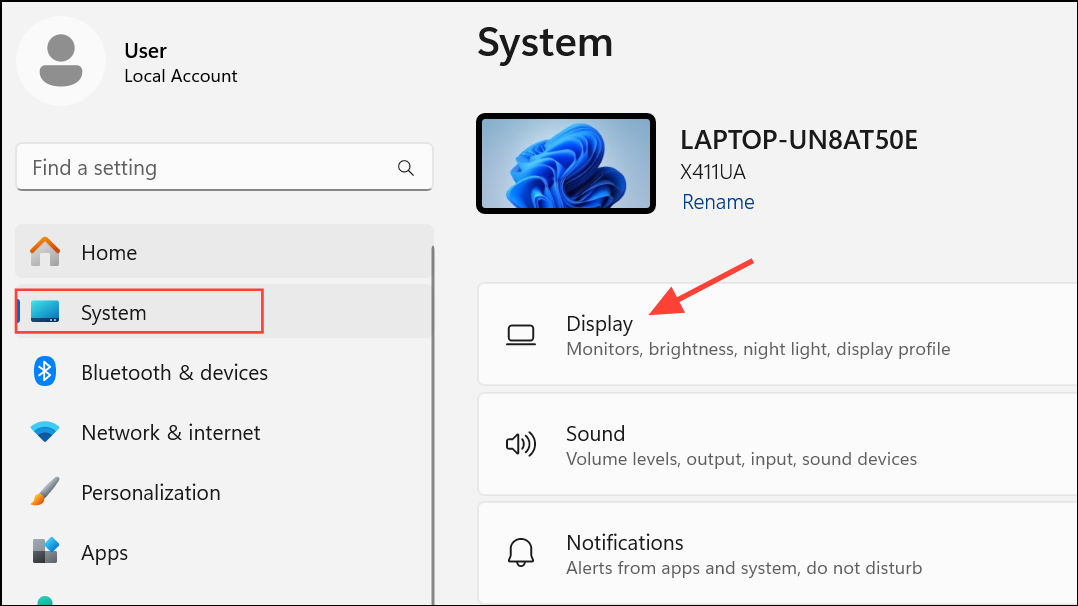
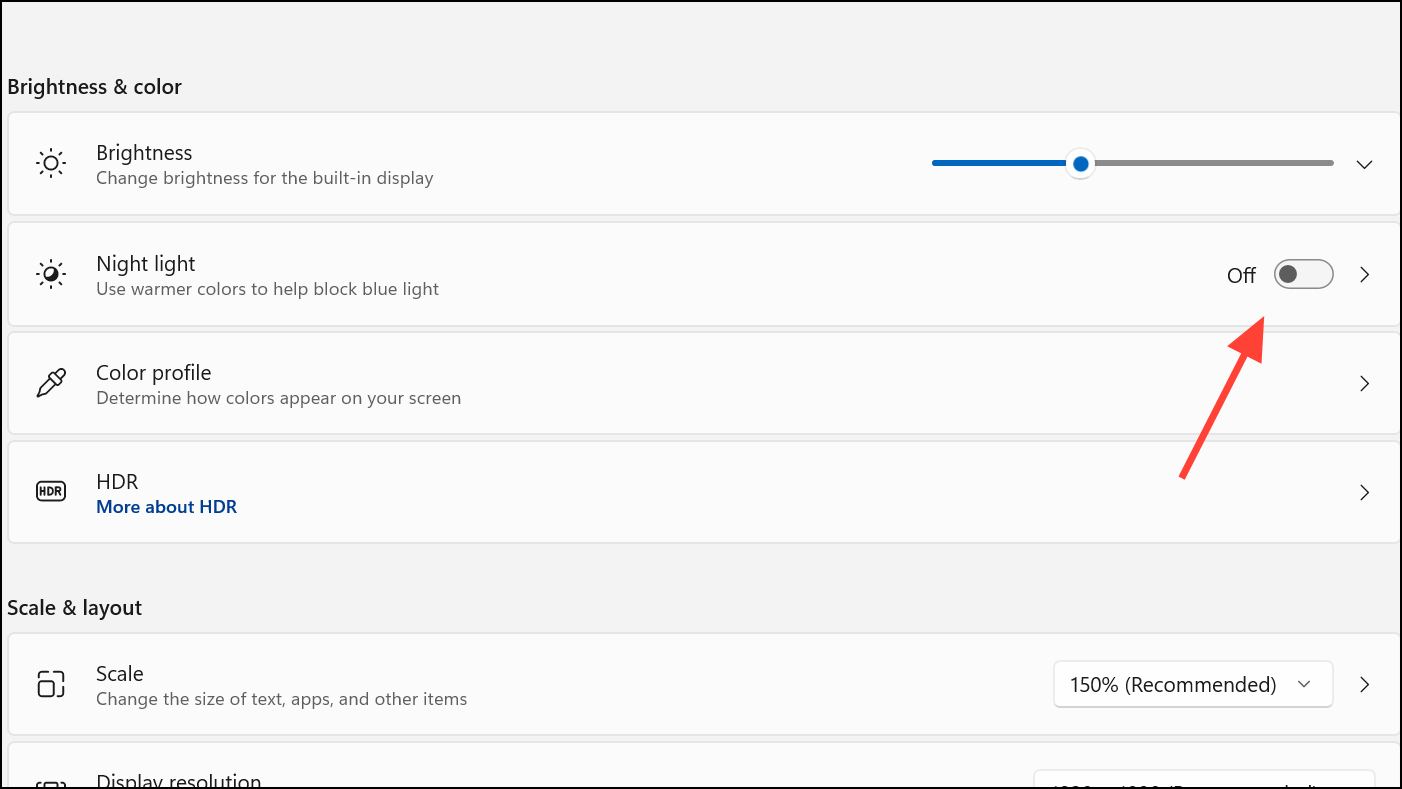
Step 3: At the top of the Display page, locate the Night Light toggle and set it to Off. If you want to use Night Light in the future, you can adjust its schedule and color temperature to prevent excessive yellowing.
Calibrate Display Colors Using Built-in Tools
Step 1: Incorrect color calibration can cause persistent yellow tints. In the Windows search box, type Color Management and open the corresponding result.

Step 2: Switch to the Advanced tab and click Calibrate display. This launches the Display Color Calibration tool.
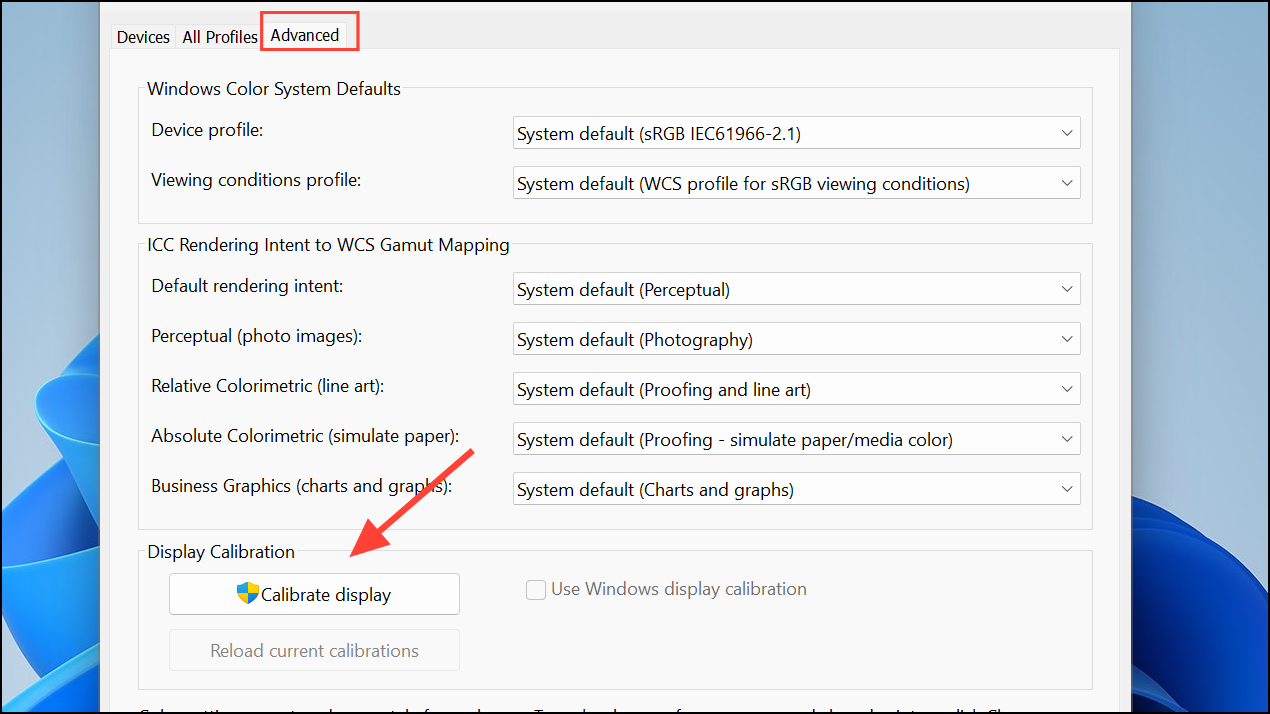
Step 3: The calibration wizard will guide you through adjusting gamma, brightness, contrast, and color balance. For each step, compare your display to the on-screen reference images and adjust sliders or buttons as instructed. Pay special attention to the color balance section—ensure the red, green, and blue levels are balanced so that white appears neutral, not yellowish.
Step 4: When finished, save the new calibration profile. Windows will apply these settings as the default, which can correct color deviations caused by prior miscalibration.
Change or Reset the Color Profile
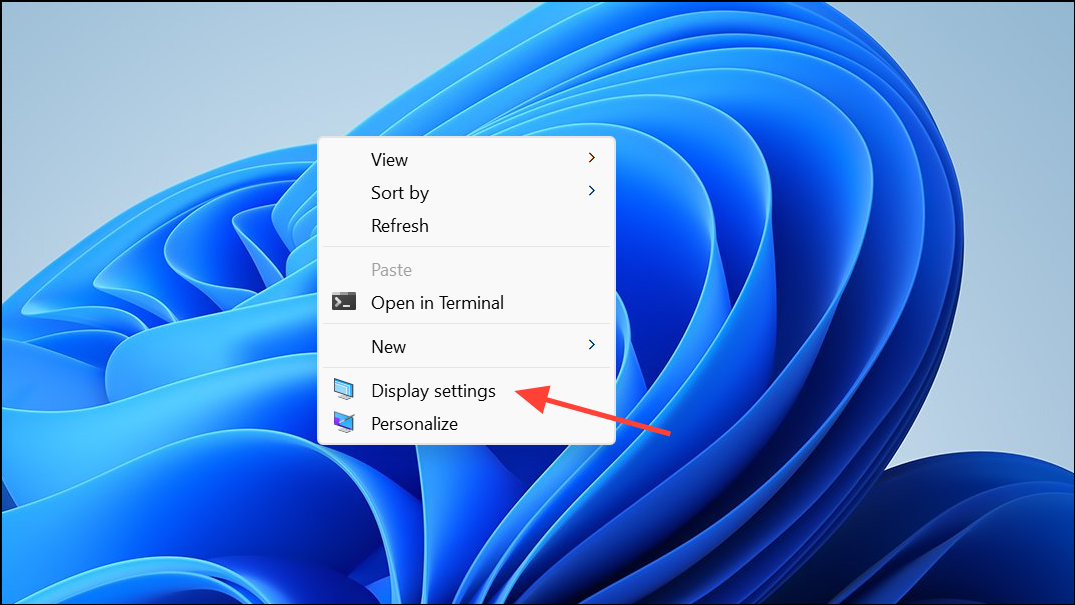
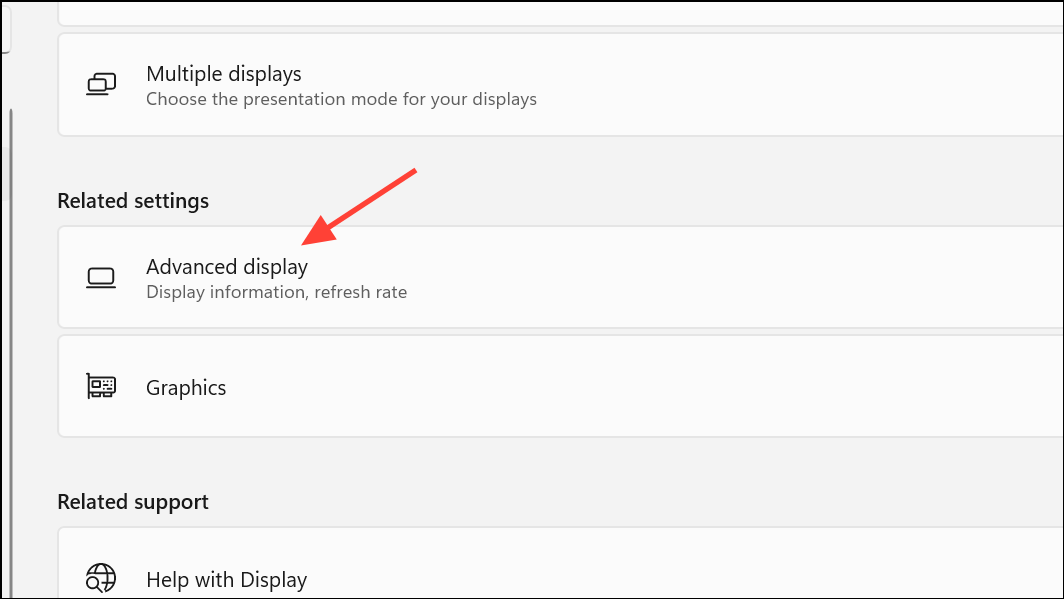
Step 1: Custom or incorrect color profiles can introduce a yellow cast. Right-click your desktop and select Display settings.
Step 2: Scroll down and click Advanced display, then choose Display adapter properties for Display 1.
Step 3: In the properties window, switch to the Color Management tab and click the Color Management button.

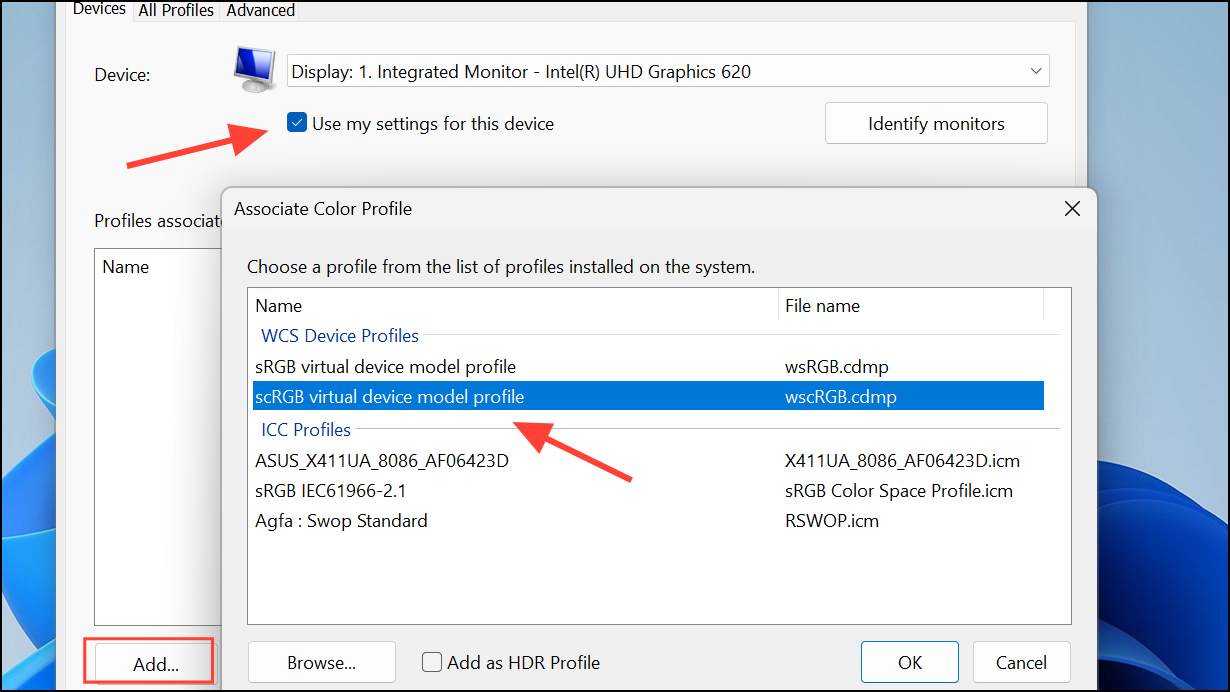
Step 4: In the new window, select your monitor from the device list, then check Use my settings for this device. Click Add, select sRGB virtual device model profile, and click OK.
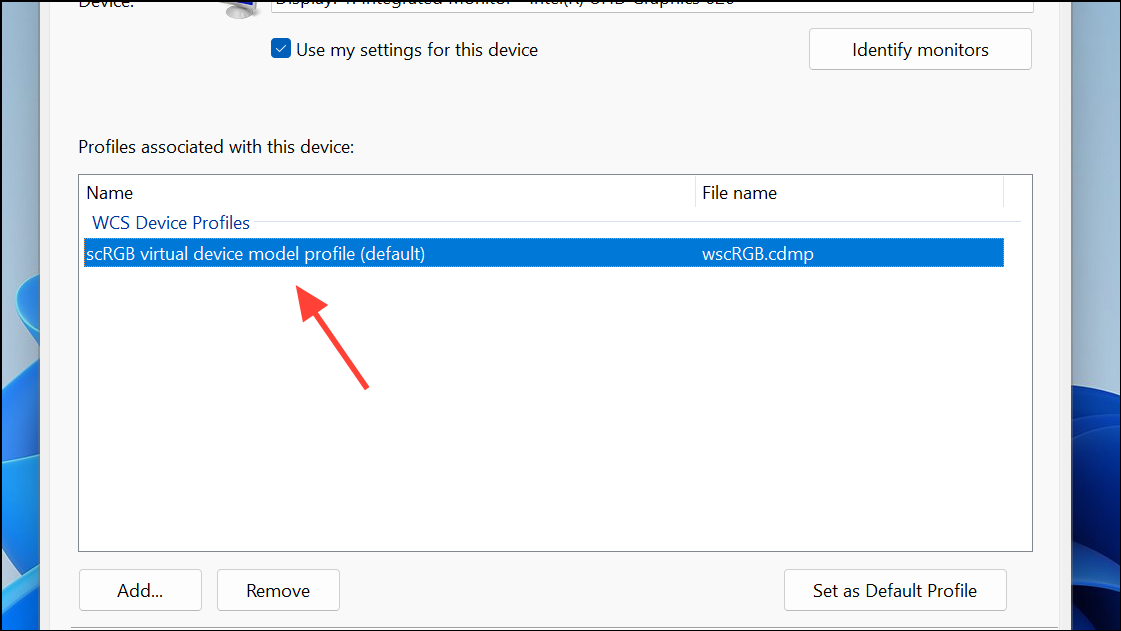
Step 5: Back in the main Color Management window, select the sRGB profile you just added and click Set as Default Profile. This resets your display to a standard color space, which often resolves yellow tint issues caused by incompatible or corrupted profiles.
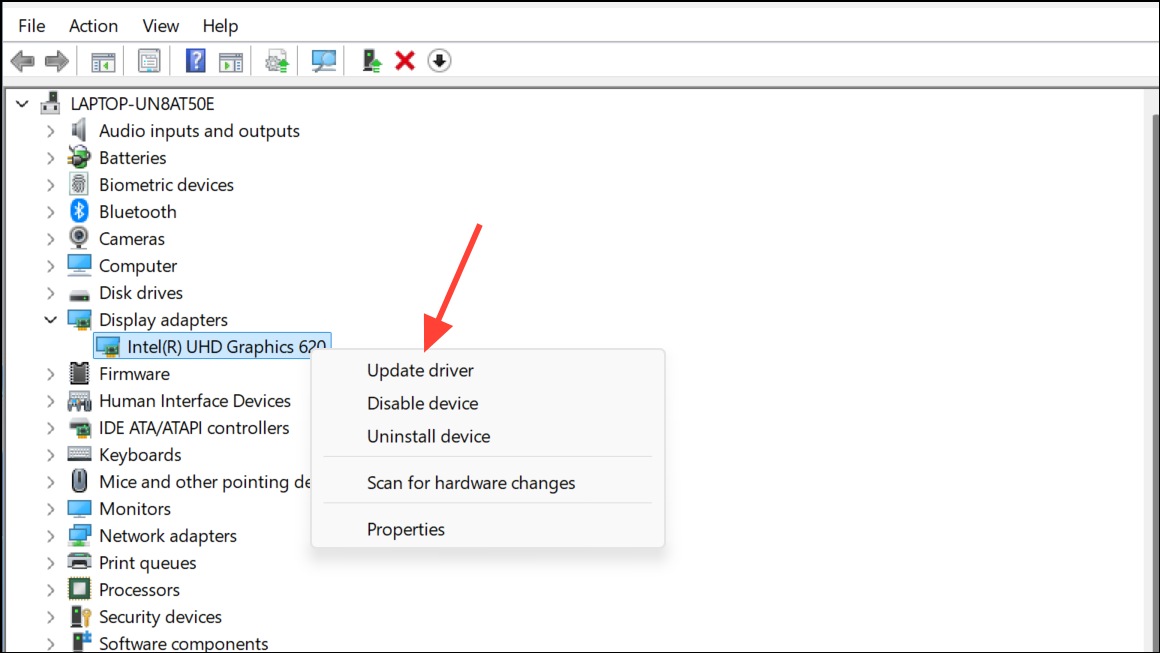
Update or Reinstall Display Drivers
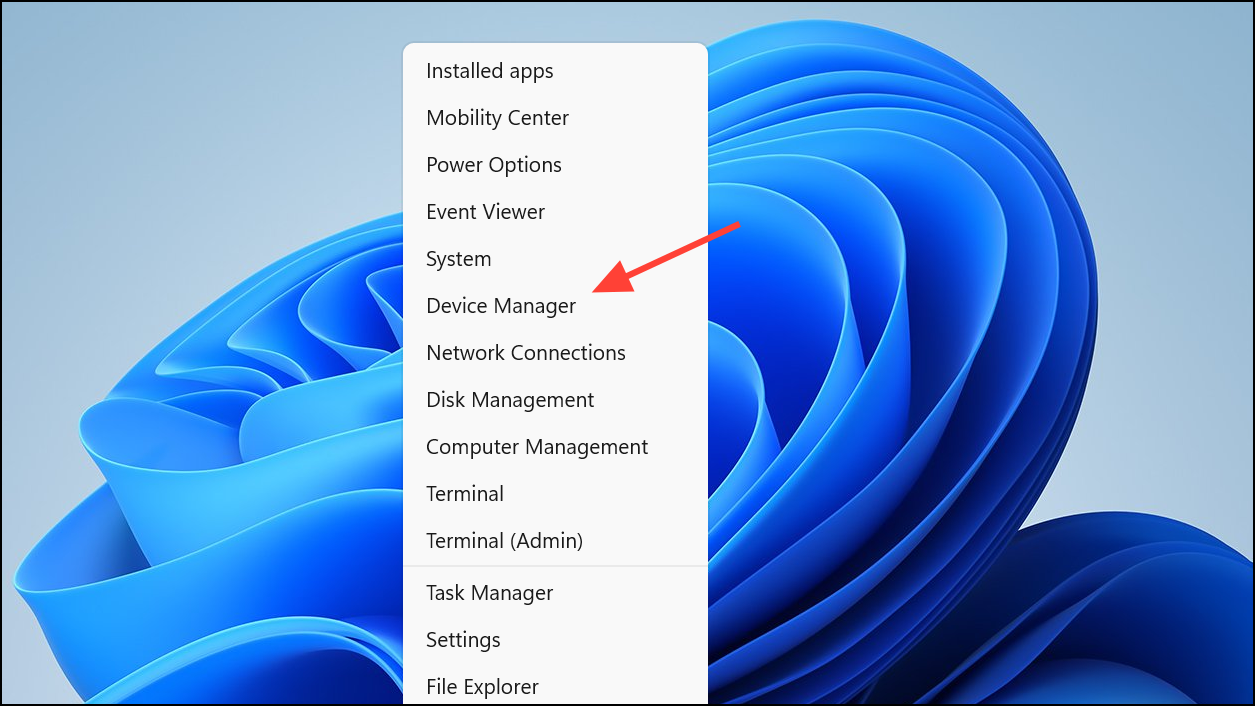
Step 1: Outdated or faulty display drivers can interfere with color accuracy. Right-click the Start button and select Device Manager.
Step 2: Expand the Display adapters section, right-click your graphics card, and choose Update driver.
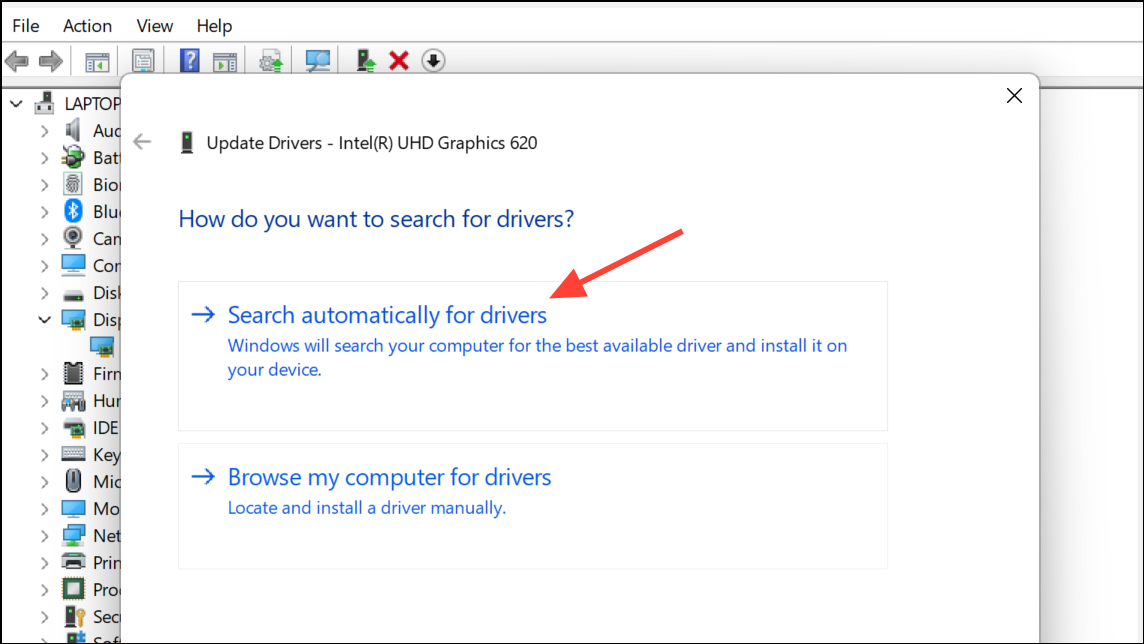
Step 3: Select Search automatically for drivers. Windows will check for updates and install any available improvements. If no updates are found or the issue persists, visit your graphics card manufacturer's website (such as Nvidia, AMD, or Intel) to download and install the latest driver for your hardware. Follow the installation prompts and restart your computer afterward.
Step 4: If updating does not help, consider uninstalling the current driver using Device Manager and reinstalling the latest version. In rare cases, using a tool like Display Driver Uninstaller (DDU) in Safe Mode can fully remove old driver traces before reinstalling.
Check Hardware Connections and Monitor Settings
Step 1: A loose or damaged monitor cable can introduce color distortions, including yellow tints. Power off your computer and monitor, then disconnect and reconnect the video cable (HDMI, DisplayPort, VGA, or DVI) on both ends. Inspect the cable for visible damage and replace it if necessary.
Step 2: If possible, connect your monitor to another computer or use a different cable to determine if the issue is with your original setup. Persistent yellow tint across devices may indicate a failing monitor or internal hardware issue.
Step 3: Many monitors include built-in color settings and presets. Use your monitor's on-screen display (OSD) menu to reset color settings to factory defaults or select the sRGB or Standard mode for neutral color reproduction.
Additional Troubleshooting and Considerations
If your display continues to show a yellow tint after these steps, consider these additional checks:
- Restart your computer to resolve temporary glitches.
- Check for third-party software that may alter color temperature, such as f.lux or manufacturer utilities.
- Review accessibility settings in Windows for filters that may affect color.
- If your system uses multiple monitors, calibrate each display individually.
For users unable to perform a clean Windows installation due to important data, ensure you have backups before attempting major changes. If all troubleshooting fails and the yellow tint persists, professional hardware diagnosis may be necessary.
Restoring accurate colors on your Windows 11 screen often comes down to adjusting system settings, updating drivers, or correcting hardware connections. These steps should resolve most yellow tint issues and help your display show true-to-life colors again.