
The "Which device did you plug in?" message often appears on Windows 11 systems with Realtek audio hardware when a new audio device, such as headphones or a headset, is connected. This prompt allows you to specify the type of device you plugged in, which can affect how Windows configures audio input and output. However, users may encounter two main issues: the pop-up appears repeatedly and disrupts workflow, or it no longer appears, preventing manual selection and causing misconfigured audio devices. Both scenarios can interfere with microphone or headphone functionality, especially on systems with combined audio jacks or when switching between devices.
Disable the "Which Device Did You Plug In?" Pop-Up
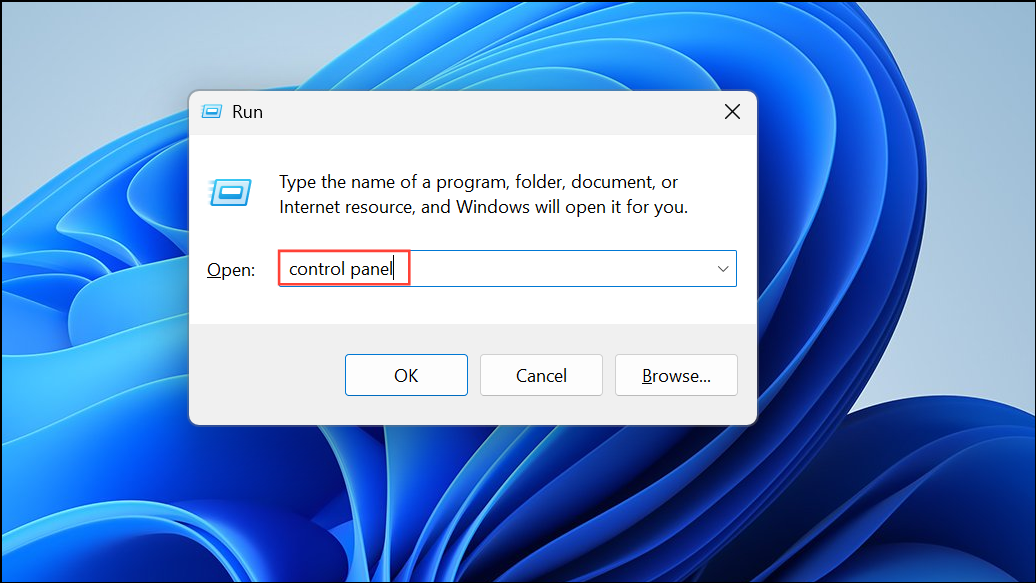
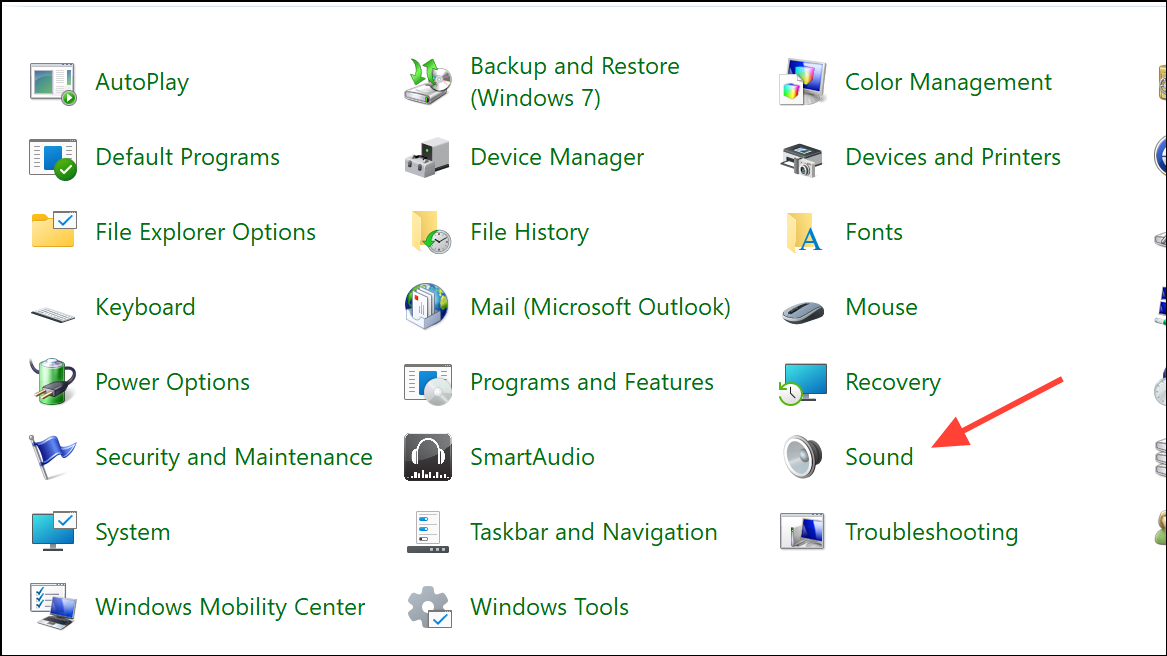
Step 1: Open the Realtek Audio Console or Realtek HD Audio Manager on your system. You can find this by pressing Windows + R, typing control panel, and pressing Enter. Then, select "Hardware and Sound" and look for Realtek HD Audio Manager.
Step 2: In the Realtek HD Audio Manager, locate the small folder icon near the top right or within the analog panel section. Click this icon to open connector settings.
Step 3: Uncheck the box labeled "Enable auto popup dialog when device has been plugged in" or a similarly worded option. This will stop the pop-up from appearing each time you connect an audio device.
Step 4: Click OK to save your changes. Restart your computer to ensure the new settings take effect.
If you do not see Realtek HD Audio Manager, your system may use a different audio management tool, such as Waves MaxxAudio Pro (common on Dell systems). In that case, open the corresponding app, navigate to device or advanced settings, and look for a similar option to disable pop-up dialogs when devices are connected.
Restore or Enable the "Which Device Did You Plug In?" Pop-Up
Newer Windows 11 systems with Realtek Universal Audio Driver (UAD) may not display the "Which device did you plug in?" dialog by default, relying instead on automatic device detection. This can lead to issues where the wrong device type is selected, disabling the microphone or causing incorrect audio routing.
Step 1: Check if your system has Realtek HD Audio Manager installed. If not, you may need to install an older Realtek HDA (High Definition Audio) driver, as the UAD driver often omits the manual selection feature.
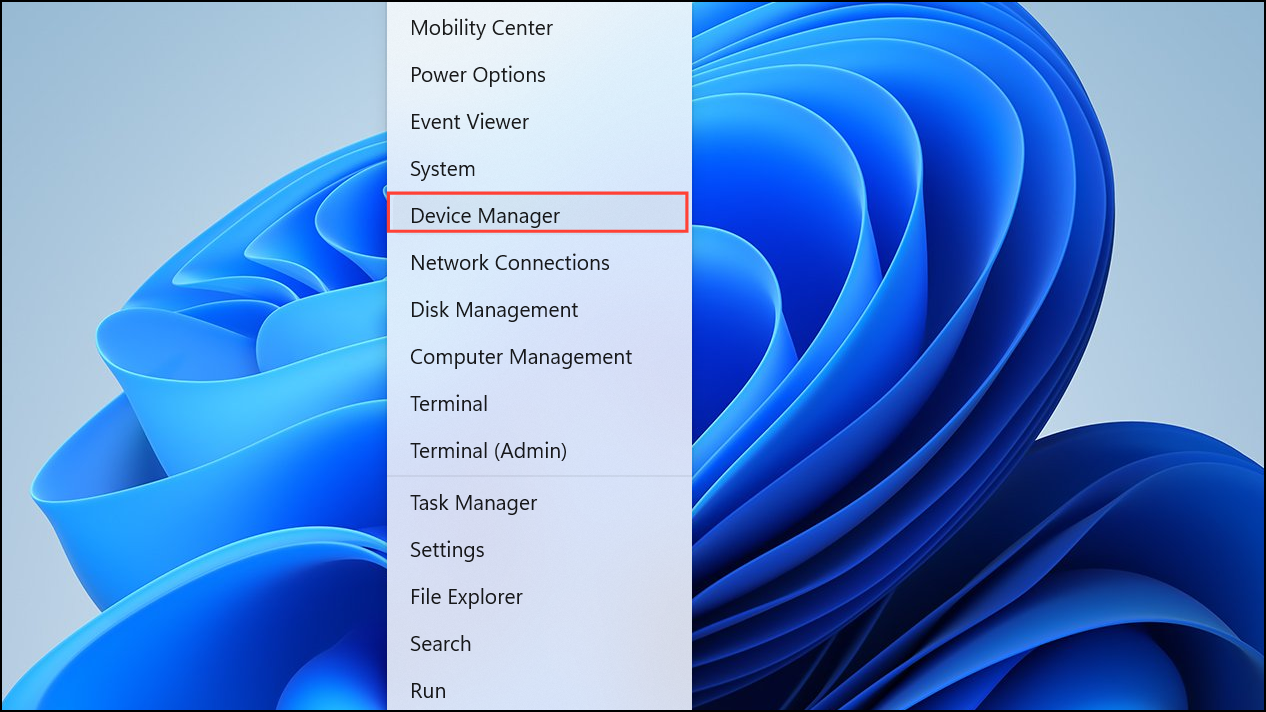
Step 2: To install an older driver, open Device Manager by pressing Windows + X and selecting "Device Manager."
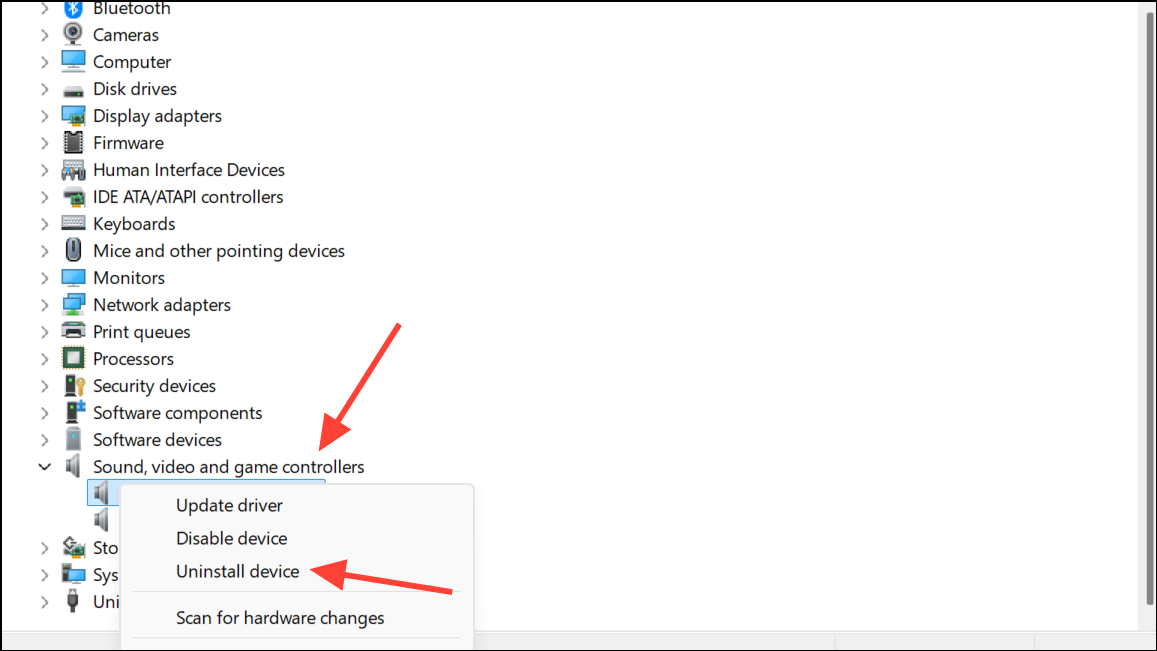
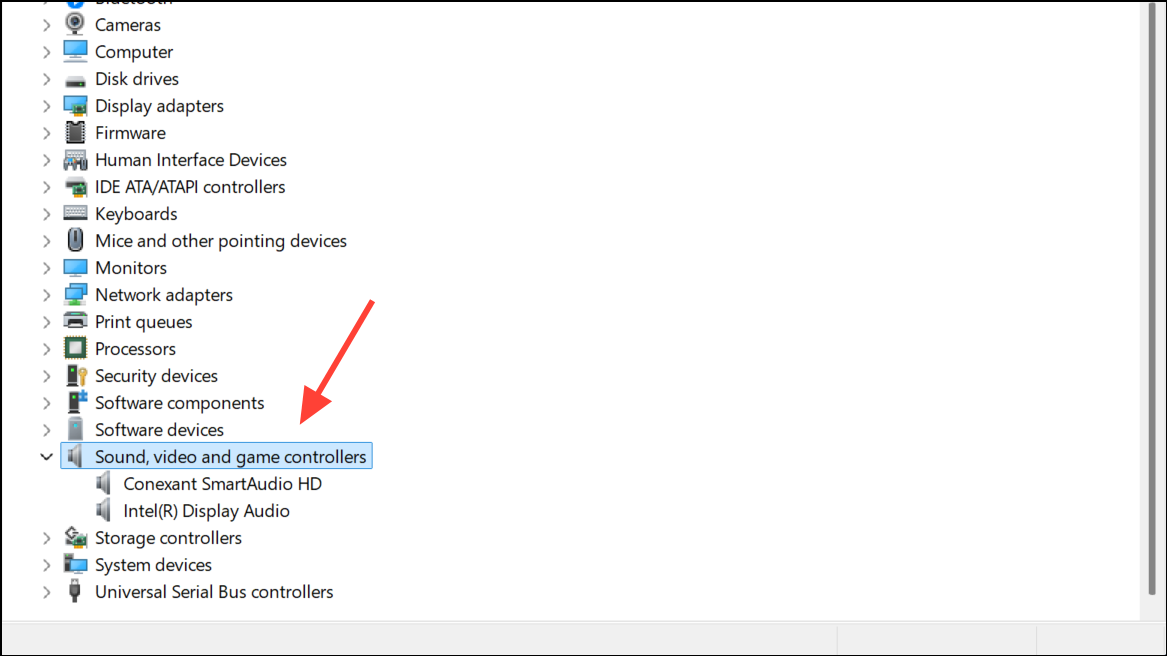
Step 3: Expand "Sound, video and game controllers," right-click "Realtek Audio" or "Realtek High Definition Audio," and choose "Uninstall device." If prompted, check "Delete the driver software for this device." Restart your computer.
Step 4: Visit your PC or motherboard manufacturer's support website. Download the latest available Realtek HDA driver (preferably version R2.79 or earlier, as these typically include the HD Audio Manager). Install the driver and restart your computer.
Step 5: Once installed, open Realtek HD Audio Manager via the Control Panel. Click the folder icon in the analog panel section and check "Enable auto popup dialog when device has been plugged in." Click OK to confirm.
Step 6: Plug in your audio device. The pop-up should now appear, allowing you to select "Headphones," "Headset," or other relevant options. This manual selection ensures the correct configuration for both audio output and microphone input.
Step 7: If your system uses custom audio management software (such as MaxxAudio Pro or ASUS ICEsound), open the respective application and look for device detection or connector settings. Enable any options that prompt you to select the device type when plugging in new hardware.
Alternative Method: Adjust Device Settings Without the Pop-Up
On systems where restoring the pop-up is not possible, you can manually configure input and output devices to ensure correct operation.
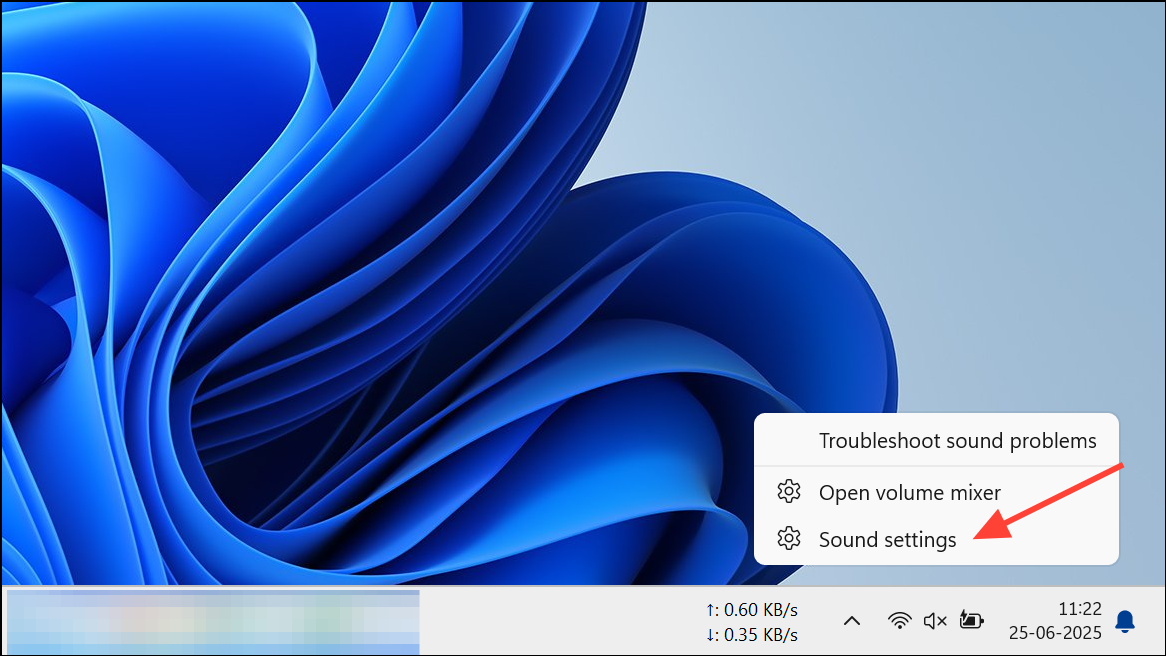
Step 1: Right-click the speaker icon in the system tray and select "Sound settings."
Step 2: Under "Output," verify which device is selected for audio playback. Under "Input," check the microphone device.

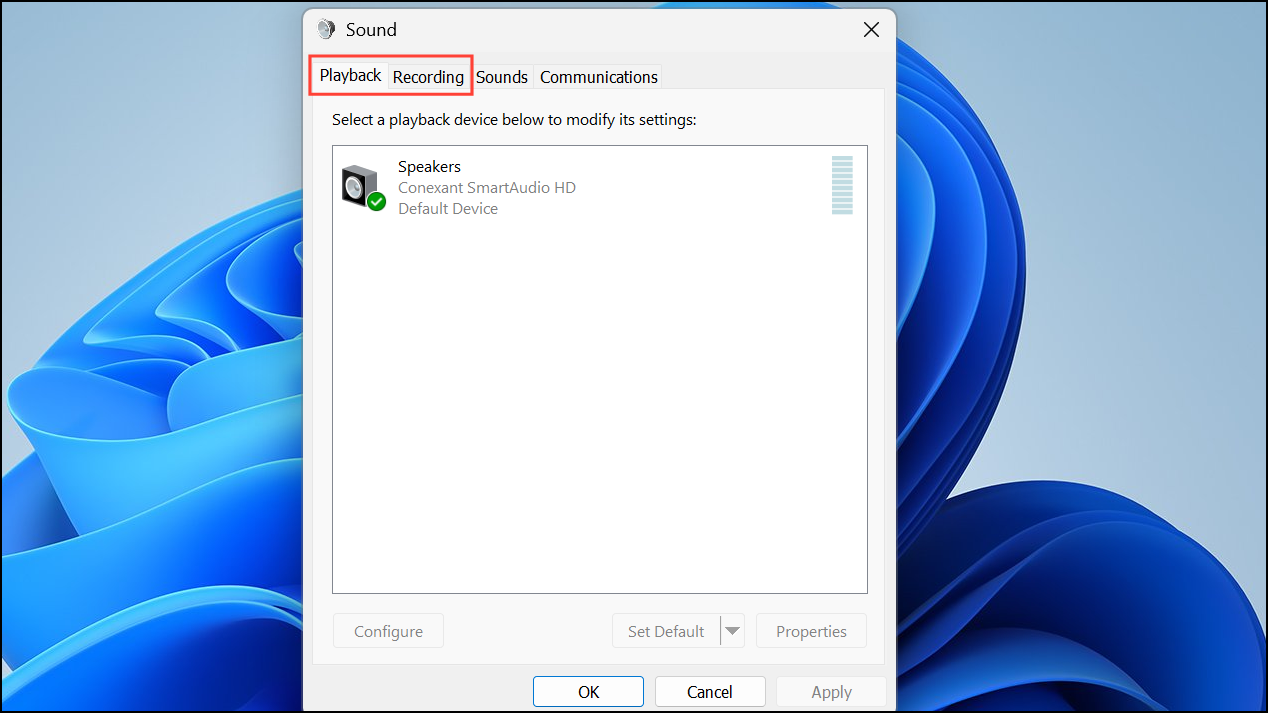
Step 3: If your microphone or headphones are not working as expected, open the Control Panel and go to "Hardware and Sound" > "Sound."
Step 4: Use the "Playback" and "Recording" tabs to enable, disable, or set default devices. Right-click within these tabs and select "Show Disabled Devices" if you do not see your hardware listed.
Step 5: For further troubleshooting, open Device Manager, expand "Sound, video and game controllers," and check that the correct drivers are installed. You can update, roll back, or reinstall drivers as needed.
Step 6: In privacy settings, ensure microphone access is enabled. Go to Settings > Privacy > Microphone and confirm that apps have permission to use your microphone.

This method allows you to manually control which devices are active, even if the automatic pop-up is unavailable.
Addressing Persistent or Repetitive Pop-Ups
If the "Which device did you plug in?" message appears repeatedly or interrupts your workflow, a setting in the Realtek Audio Console may be causing the issue.
Step 1: Open the Realtek Audio Console app. In the analog section, click the gear or cog icon at the bottom.
Step 2: Enable "Disable front panel jack detection." This setting can stop the system from repeatedly prompting you when a device is connected to the front panel audio jack, especially if the hardware is malfunctioning or not properly detected.
Step 3: If the issue persists, check for hardware problems with the audio jack or cable, or consider updating to the latest compatible Realtek drivers from your manufacturer.
By adjusting Realtek Audio Console or HD Audio Manager settings, updating or rolling back drivers, and manually configuring device preferences, you can resolve issues with the "Which device did you plug in?" message on Windows 11 and restore reliable audio functionality.