
The Bounty Master armor is Ghost of Yotei’s precision set. It trades away standard parries in exchange for much larger Perfect Parry and Perfect Dodge windows, and it adds extra counterattacks when you hit those windows. If you like timing-based defense and duels that reward clean reads, this set is built for you.
How to unlock Bounty Master armor (Soma the Condemned)
You earn the armor by completing the Soma the Condemned bounty. To trigger it:
- Finish several other bounties in the Yotei Grasslands. After roughly four, the Soma contract appears.
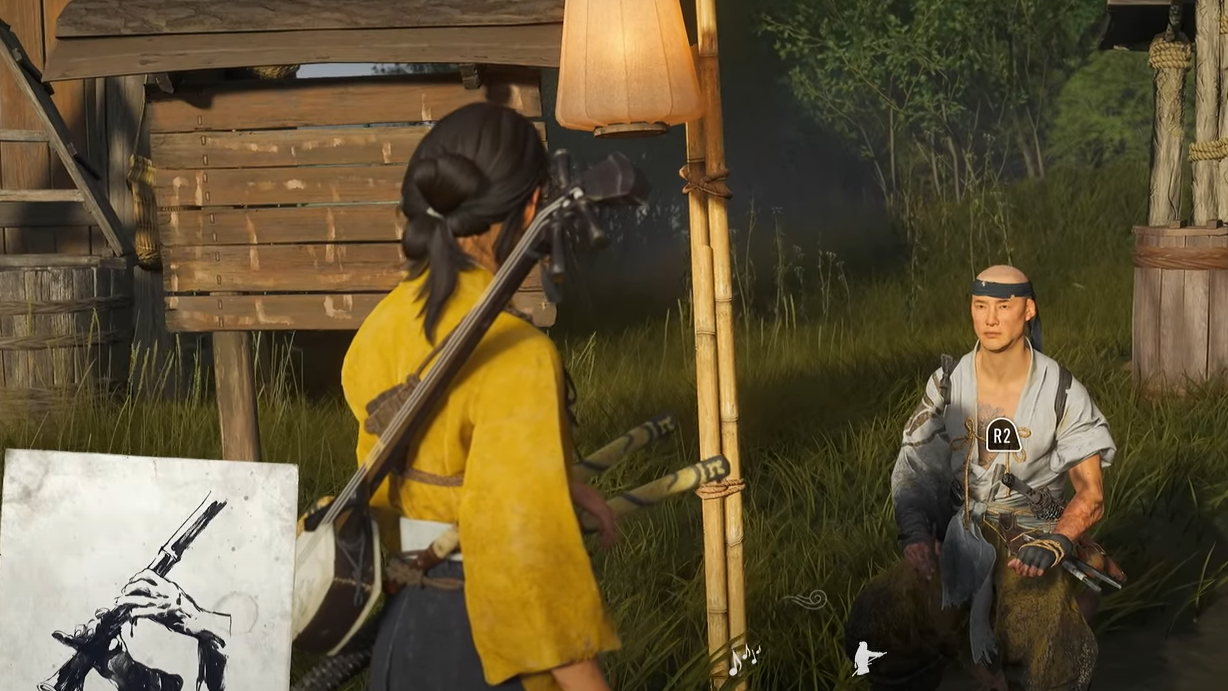
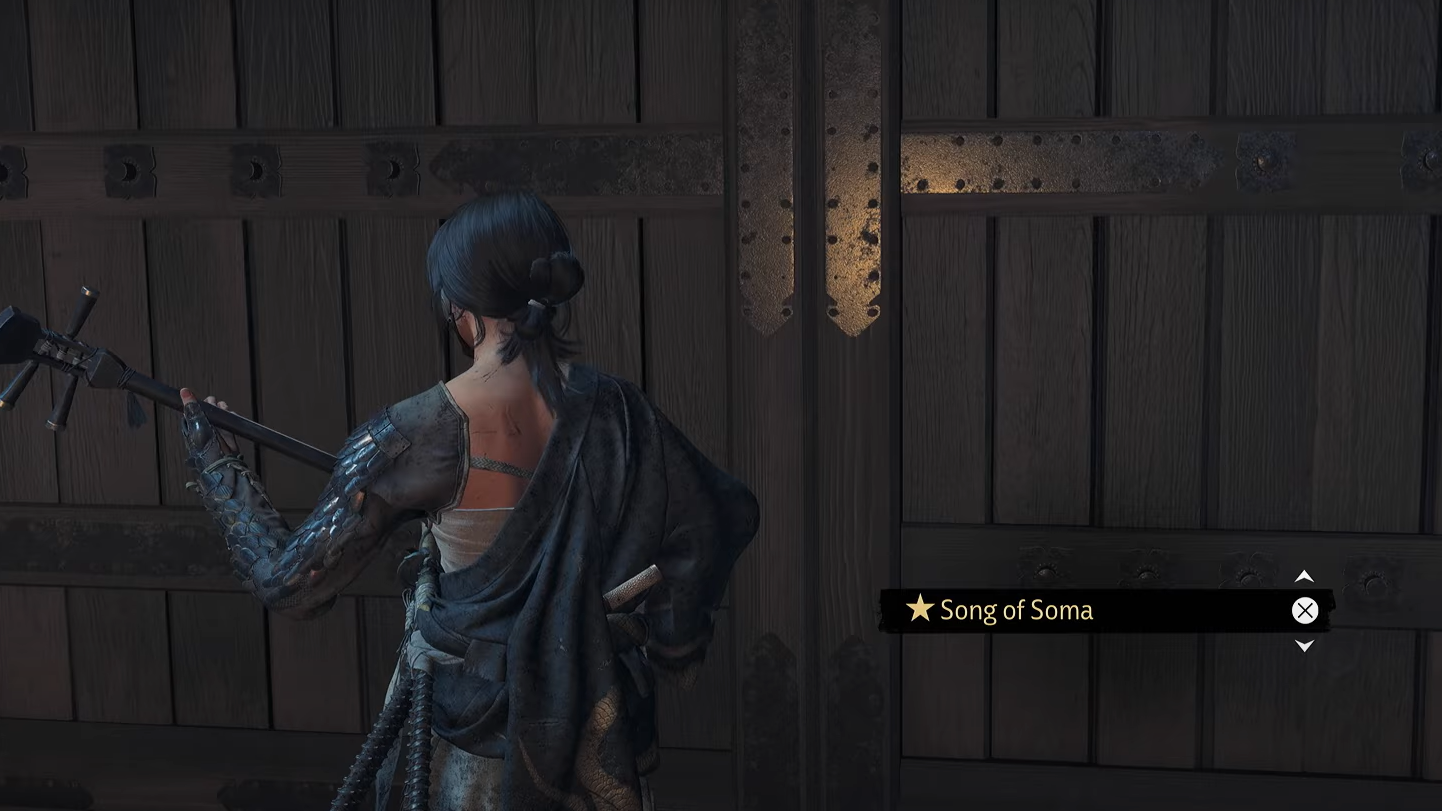
- Head to Lake Jozan as directed by the bounty trail. Use the Shamisen at the sealed door to open the way forward.
- Complete the bounty to receive the Bounty Master armor.

What the Bounty Master armor changes
This set reshapes defense into a high-risk, high-reward style. Regular parries are disabled, so you either nail the timing or you don’t parry at all. In return, Perfect Parry and Perfect Dodge are significantly easier to hit, and successful Perfect Parries open free counterattacks.
| Baseline perks | Impact |
|---|---|
| Perfect Parry window increased (minor) | More forgiving timing for Perfect Parry |
| Perfect Dodge window increased (minor) | More forgiving timing for Perfect Dodge |
| Regular parries disabled | No standard parry; commit to perfect timing |
| Perfect Parry enables 2 bonus counterattacks | Immediate, guaranteed follow-up strikes |
| All Spirit gains increased (minor) | Faster build toward Spirit-driven actions |

Upgrade path, effects, and costs
Upgrading sharpens the armor’s identity: bigger perfect windows, much higher Spirit generation, and more follow-up hits after a Perfect Parry.
| Upgrade level | Added effect | Cost |
|---|---|---|
| Level 2 | Perfect Parry and Perfect Dodge windows increase by a major amount; regular parries remain disabled | Coin ×650 |
| Level 3 | All Spirit gains increase by a massive amount | Coin ×1100, Young Bamboo ×50, Textiles ×10 |
| Level 4 | Perfect Parry enables 3 additional counterattacks | Coin ×2000, Textiles ×20, Rare Metals ×10 |
Cosmetics unlock as you advance the set. If you’re upgrading with a limited pool of materials, prioritize Level 2 for the larger timing windows, then Level 4 if you lean on Perfect Parries in duels.

Set pieces and appearance
- Body: Bounty Master armor
- Headgear: Bounty Master headband
- Mask: Bounty Master mask
Additional dye options and visual variants are earned separately from functional upgrades. These do not impact combat stats.

When to use it (and when not to)
- Use in duels and elite encounters: The expanded Perfect Parry/Dodge windows and free counterattacks make boss pacing easier to control.
- Avoid in chaotic group fights—at first: Until you’re comfortable reading multi-enemy strings, no standard parry can feel punishing when the arena gets crowded.
- Lean on Perfect Dodge: It’s part of the set’s identity; use it to reposition and bait single-hit punish windows when parry timing feels tight.
Quick takeaways
- Unlock by completing the Soma the Condemned bounty after clearing several Grasslands bounties, then opening the Lake Jozan door with the Shamisen.
- It disables regular parries; in exchange, perfect windows get larger, and Perfect Parry unlocks bonus counterattacks.
- Maxing the set adds a third bonus counter hit and greatly accelerates Spirit gain.
- Best for players who prefer clean timing and duel control over general-purpose safety.
If you live for the satisfaction of landing a Perfect Parry and flipping a fight instantly, this is the loadout to build around. Clear the Grasslands board, hunt Soma, and commit to the timing—the armor pays you back every time you’re precise.