
Gold sits at the center of Heartopia’s economy. It pays for outfits, furniture, home plot expansions, tool upgrades, and many of the systems that unlock over time. The game throws a lot of options at you, but only a few activities generate strong, reliable profit per minute, especially in the early hours.
The most efficient way to earn is to treat gold like a production chain. Free or cheap materials feed into high-value recipes or crafted items, which you then sell to the right NPCs. As your hobbies level up and more systems unlock, that chain becomes more complex and profitable.

Know your currencies and main buyers
Heartopia uses three main currency types.
- Gold pays for almost everything day to day: clothing, furniture, crafting materials, gardening supplies, bus fares, and plot expansions.
- Wishing stars are a limited, earnable premium currency for banners, exhibition passes, and items from vendors like Ka’Ching.
- Moonlight crystals/heart diamonds are paid currency for gacha-style pulls and cosmetics.
Your core gold sink early on is expanding home plots and buying furniture or clothes from the rotating town shops and Time Limited Festival stalls. Plot expansions ramp up quickly into the tens of thousands of gold, so building a sustainable income early is important.
The main buyer for almost everything you produce is Albert Jr. from the Gilded Acorn Merchant’s Guild. He wanders the map in a yellow jumpsuit and bucket hat, and you can always track him on your map and fast travel via bus for a small fee. He buys materials, cooked food, fish, bugs, fireworks, puzzles, and more.

Claim free gold and premium rewards first
Before grinding, make sure you’re not leaving free currency unclaimed.
Step 1: Open the settings menu and redeem any active Heartopia codes via the in-game code redemption option. Codes can grant gold, wishing stars, and premium currency with no gameplay required.
Step 2: Visit the Discovery tab. Following official channels or simply tapping the embedded links triggers reward drops.
Step 3: Check your mailbox regularly. Developer surveys and server maintenance compensation have already included payouts like 20,000 gold and multiple wishing stars. These expire if ignored, so make mail checks part of your routine.
Cooking: the fastest early-game money maker
Cooking is the single strongest early-game gold hobby because ingredients are easy to obtain and recipes scale well with your time investment.
Turn free fruit into jam
You can forage apples, oranges, blueberries, and other fruit from trees and bushes near player homes and around town. That fruit costs nothing but time to gather.
Step 1: Spend a few in-game minutes looping through residential areas and forest edges, grabbing every fruit and berry you see.
Step 2: Back at home, use your stove to cook simple jams. Single-fruit jams made from free ingredients sell for solid early-game profit and give cooking experience.
Using four tomatoes in the jam recipe unlocks a tomato-based sauce that also sells well, so stock tomato seeds and keep a patch allocated to them once gardening is online.

Fish and chips, lattes, and truffle dishes
Certain recipes stand out for their return on time and materials.
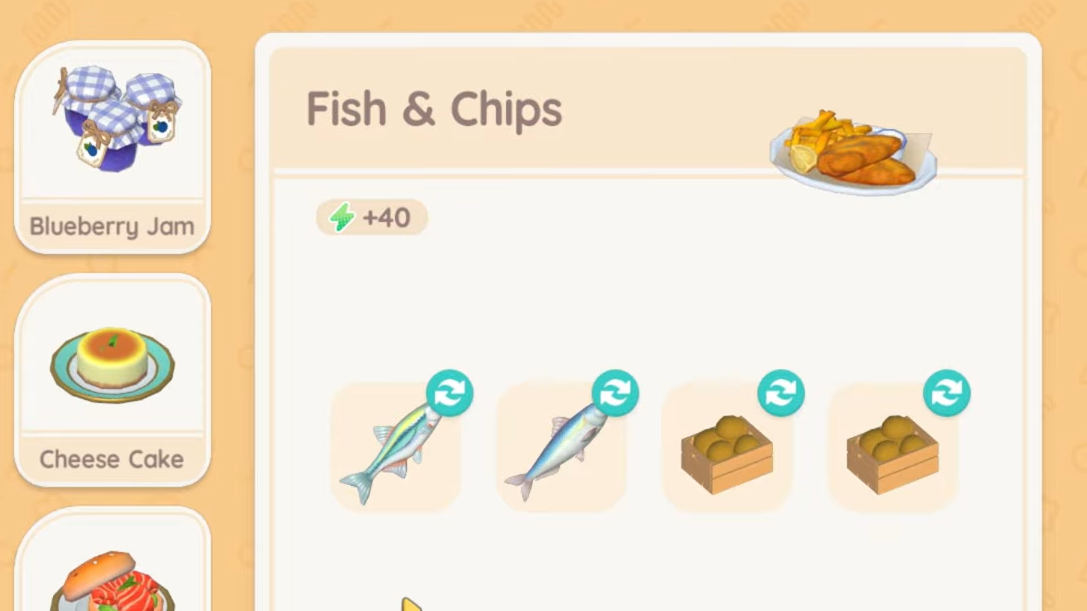
- Fish and chips unlocks as a paid recipe very early in the cooking track (around level 1). It uses basic fish and potatoes from your garden and sells for far more than the ingredients alone. Players consistently report plate prices around the mid-hundreds of gold.
- Basic lattes (coffee plus milk) become available at cooking level 3. Beans and milk bought for about 200 gold together can be cooked into lattes that sell for about 290 gold. The margin per cup is modest, but the recipe requires no foraging or gardening and scales well if you buy the daily cap of ingredients.
- Mushroom pie and truffle pie convert foraged mushrooms into high-value dishes. Standard mushroom pies already pay well; pies made with black truffle or truffle mushrooms jump into the ~800+ gold range at one star and climb sharply for higher star ratings.
- Truffle pasta unlocks at cooking level 3 via Massimo’s recipe shop and combines truffles with garden crops like wheat for another late-early-game money dish.
Massimo runs the cooking materials and recipe shop. Check his inventory daily for ingredient discounts and new recipes, but note that he does not sell core farming outputs like wheat, potatoes, or fish. Those still come from your hobbies.
Multi-stove setups and collection rewards
Cooking throughput is just as important as recipe choice.
Step 1: Place multiple stoves in your home once you can afford them. Two to three stoves is a good balance; this lets you queue multiple dishes at once without losing track and burning food.
Step 2: When friends visit, they can help click stoves to speed cooking, but make sure you start each dish yourself so the finished meals land in your inventory, not theirs.
Step 3: Periodically open your cooking collection tabs. The game pays out bonus gold when you discover new recipes, cook them for the first time, and hit new star tiers. This passive reward stream adds up as you experiment with ingredient combinations.

Gardening: slow but essential for long-term income
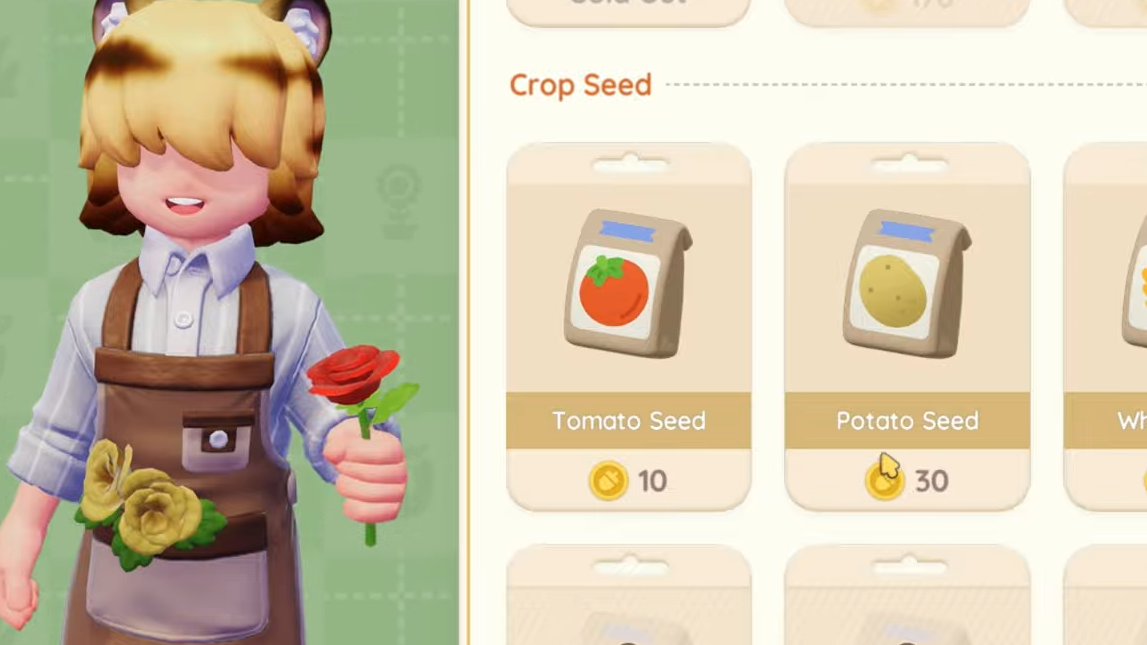
Gardening unlocks through Blanc during the tutorial. He provides a watering can and sells seeds and farming tools. Garden plots start small and expand gradually, so early optimization matters.
Crop timing and rotation
Every crop has a different growth time, which determines both your gold per hour and your gardening experience gain.
- Tomatoes grow quickly (around 15 minutes) and are ideal for rapid gardening XP and jam or salad production.
- Potatoes and wheat grow more slowly but are critical for high-value recipes like fish and chips, truffle pie, and truffle pasta.
- Long-grow crops such as corn and strawberries can be paired in rotations: plant a 12-hour crop like corn before logging off or going to bed, then replant a 6-hour crop like strawberries when you return for a mid-day harvest.
Turn crops into dishes, not raw sales
Raw crops sell for modest amounts. Cooking them almost always multiplies your profit.
Examples include:
- Tomatoes into house salads or tomato sauce.
- Corn into corn soup.
- Strawberries into strawberry jam.
House salad, in particular, has been calculated at several hundred gold per hour in early plot setups when you factor in growth times and cooking throughput. The exact number depends on the number of plots and stoves you have, but the pattern holds: crops are inputs, not final products.
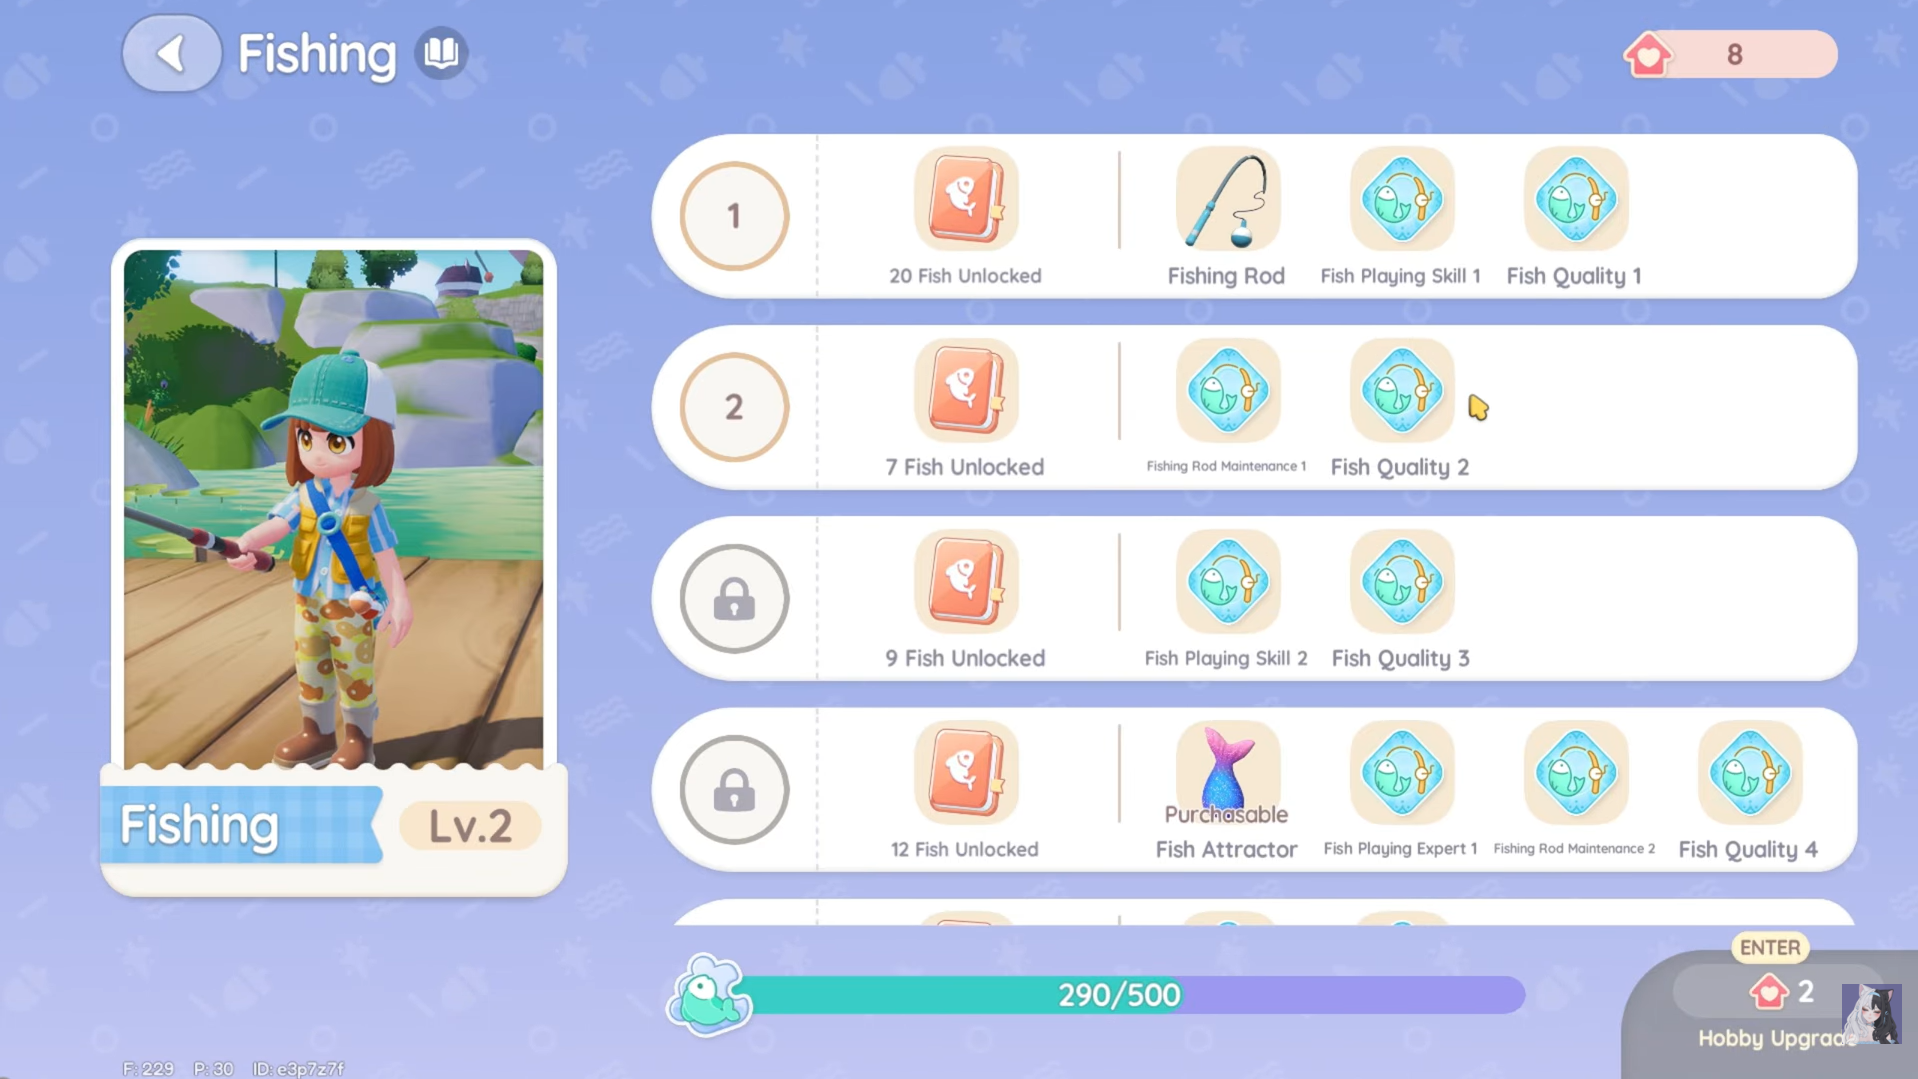
Fishing: strong cash flow, especially during events
Fishing is the first hobby you unlock and one of the easiest to level. It begins as a solid, low-effort income stream and becomes extremely profitable once you access events and special weather.
Everyday fishing vs. high-yield spots
With the basic rod, most open water spots yield common fish worth under 100 gold each. That’s fine early on, but it falls behind cooking if you only sell raw fish.
Profit jumps once you move into targeted strategies:
- Crucian Carp method at Spring Lake, where crucian carp are available all day and appear more often in the rain. Cooking them into fried crucian carp multiplies their sale value several times over compared to selling fish directly.
- Rainbow weather fishing at Starlight Sea with premium bait. Rainbow Fish from this setup can sell for about 5,000 gold each, turning short focused sessions into tens of thousands of gold.

Fishing events: four-minute bursts of rare fish
Later in the main questline, events unlock as timed multiplayer instances with high rewards. The fishing event is one of the most lucrative activities in the game.
Step 1: Travel to the fishing boats once events are unlocked. Starting an event costs gold that increases with each run during a session, beginning near 2,000 gold and rising to around 5,000.
Step 2: During the event, prioritize casting toward gold fish silhouettes. They are harder to reel in but almost always yield rare or high-star fish worth significantly more gold.
Step 3: When bonus shoals appear (marked, high-density spots), cast nonstop. In these windows, the game auto-reels fish for you, letting you grab far more catches within the event’s sub‑four‑minute rounds.
Step 4: Run events with other players and take turns paying the entry fee. You all share access to bonus fish, and each keeps your own catches, which spreads the gold cost and concentrates the rewards.
Fishing events also award Galaxy Eggs at the end, which can contain high-value consumables like fireworks.

Bug catching events: sell everything you catch
The second major event, Bait the Insects, unlocks via Eric and the insect statue.
Step 1: Talk to Eric to unlock the event, then activate the bug statue to start a session.
Step 2: Prepare plenty of repair kits. The bug-catching wand degrades quickly, often needing repairs after nearly every round.
Step 3: During insect swarm outbreaks, head promptly to the indicated area. These spots fill the map with catchable bugs, letting you complete personal goals like “catch 10 insects” and group totals like “catch 50 insects together” for bonus rewards.
Unlike fish and crops, insects are not used in cooking or crafting. You can safely sell all of them to Albert Jr. without worrying about missing out on other uses. The real value here is volume: a single event can spit out dozens of bugs, many of them rare or multi-star for high sell prices.

Foraging and truffles: premium ingredients without tools
Foraging supports almost every other money route: cooking, crafting, and some flipping strategies.
Forest zones are dense with standard mushrooms and, crucially, truffles. Truffles are the most expensive mushroom type and respawn on a roughly 13‑minute timer in specific spots, without requiring tools to harvest.
Step 1: Learn the truffle spawn locations on the forest island near the deer tower and adjoining bridge. Only a handful spawn at once, so efficiency matters.
Step 2: Loop these points every 10–15 minutes during other activities. A quick detour to grab four truffles can fund several high-value pies or pasta dishes.
On rainbow weather days, foraging gets an extra boost: you can collect more items per node, while fishing and cooking both skew toward higher star results. If you see rainbow weather, shift your schedule toward foraging, events, and cooking to exploit the temporary buff.

Crafting and selling furniture with rare timber
Woodworking and furniture crafting become strong mid-game earners once you unlock access to special resources.
Two reliable high-tier materials appear near player plots:
- Fluorite crystal that spawns next to a player’s home once every 24 hours.
- Wandering Oak tree that appears in front of a different player’s lot each day and drops roaming wood when chopped.
Elsewhere on the map, enormous giant trees drop quality timber and have a chance to give rare timber, one of the most valuable materials in the game.
Step 1: Hit your daily fluorite and roaming oak spawns every day. They are limited but predictable free value.
Step 2: Farm giant trees whenever you pass them for quality and rare timber.
Step 3: Use rare timber and fluorite only on high-rarity furniture recipes. Finished rare furniture sells to Albert Jr. for “small fortune”-level payouts compared to standard pieces.
Because these inputs are capped by daily spawns, avoid burning them on low-tier items. Treat them like gold bars: save until you can craft premium sets.

Fireworks, puzzles, and Ka’Ching’s shop
Some of the highest gold-per-click items in Heartopia are consumables you might be tempted to burn for fun.
Fireworks flipping
Fireworks come from several sources: Galaxy Eggs from events, general quest rewards, and a limited pink gacha machine that uses coins from daily tasks. You can also buy single fireworks from Ka’Ching for 1 wishing star, or larger ones for 3 wishing stars.
Instead of detonating them, selling fireworks to Albert Jr. yields thousands of gold per piece. Colorful skyrocket fireworks, in particular, are known for selling around four digits each, making them a straightforward conversion from rare items into liquid gold.

Puzzles from Ka’Ching
Ka’Ching also sells puzzles that refresh daily. Completing a puzzle and then selling it can net over 3,000 gold per item. The actual minigame takes a bit of time, but the payout per puzzle is strong, especially when you’re between crop timers or waiting on event cooldowns.
Requests, pets, and other passive income
Beyond your main loops, several systems drip-feed gold with relatively low effort.
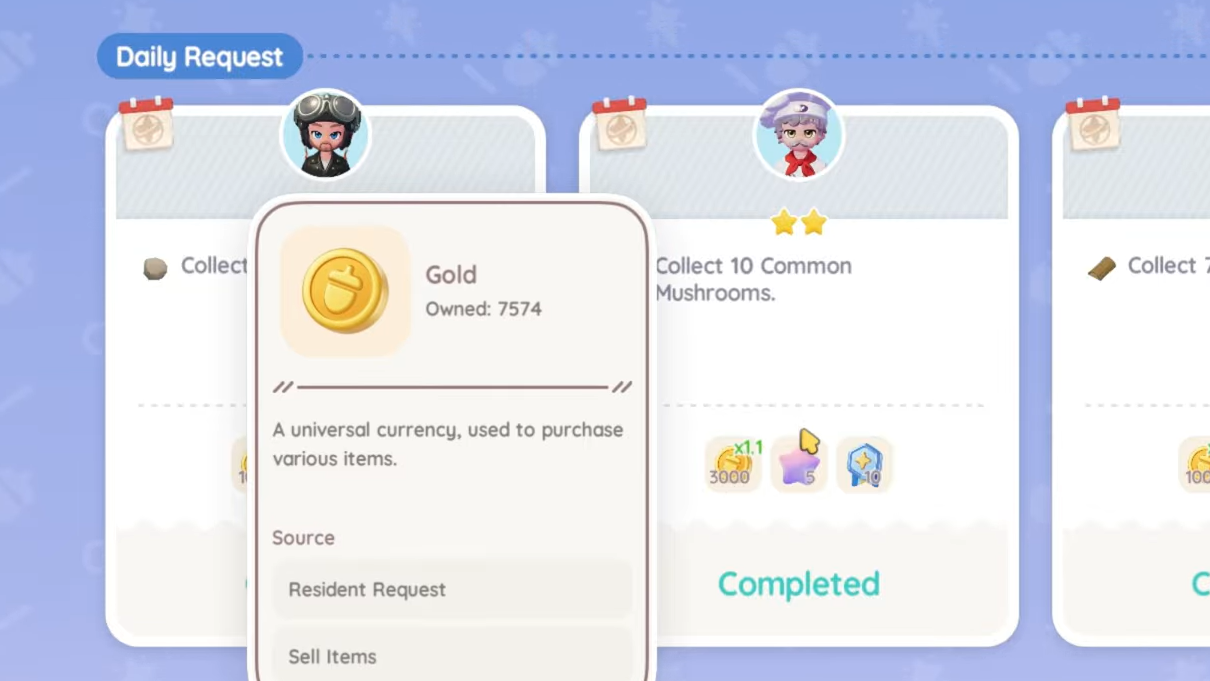
Resident requests
NPCs around town regularly post small errands in the request list, accessible through the calendar-style icon at the top left of the HUD.
Step 1: Open the calendar icon to see current tasks and their rewards.
Step 2: Prioritize urgent requests marked with a fire icon. These usually pay around 50 percent more gold than standard tasks for the same effort.
Requests often ask for crafted items, specific fish, or simple fetch quests. They are especially worthwhile in early levels, when each one can fund multiple seed packs or cooking ingredients.
Pet gifts
Once you unlock pets and adopt an animal like an orange cat or Golden Retriever, they become small passive income generators.
Step 1: Feed pets up to three times per day to increase their affection and pet-care level.
Step 2: Whenever you see a present icon above a pet’s head, click it to claim a gift. These can be 2,000–3,000 gold bags or sellable rares like feathers, worth around 2,000 gold each.
Over days and weeks, these gifts add up to a significant amount of free money without any dedicated grind.

What not to do if you want fast gold
Several common habits slow down your progression.
- Selling raw ore instead of turning it into bars at the woodworking station. Iron ore, for example, can triple in value when processed, and smelting takes only a couple of in-game minutes.
- Fishing randomly across low-yield locations instead of targeting known high-value spots (Spring Lake, Starlight Sea during rainbow weather) or events.
- Over-investing in slow hobbies early, such as birdwatching, which generates less gold per time unit compared with cooking, fishing, or gardening/cooking combos.
- Burning valuable consumables like fireworks you don’t need for quests instead of selling them to Albert Jr.
The most efficient way to stay solvent in Heartopia is to layer these systems rather than rely on only one. Cook jams and fish dishes while your crops grow, detour through truffle routes on the way to events, craft high-rarity furniture from your daily fluorite and timber, and regularly clear requests and puzzle stocks. With that rhythm in place, gold stops feeling scarce and starts to become a tool for experimenting with the game’s more expensive toys instead of a constant bottleneck.