
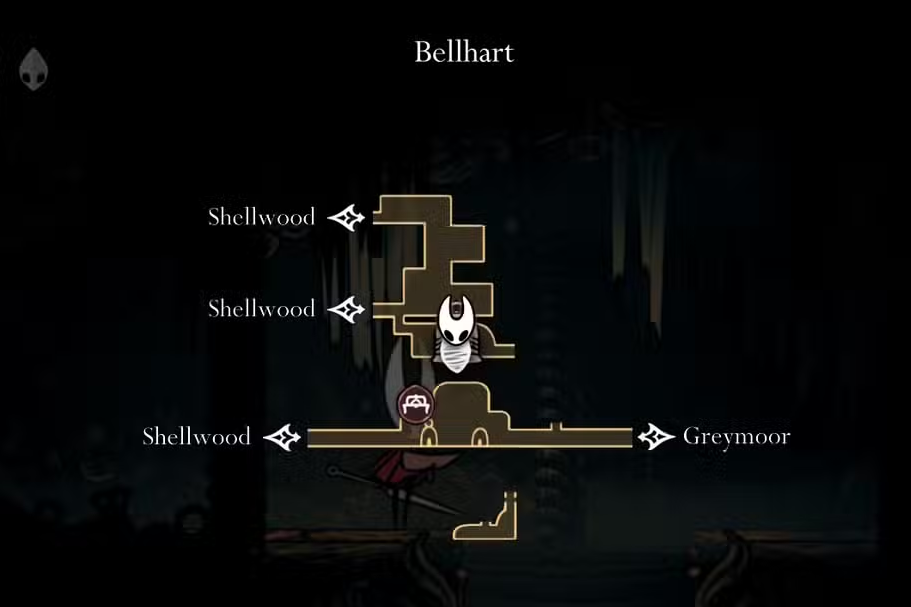
Freeing Bellhart requires defeating the Widow in the webbed chamber above town. This walkthrough gives you a clean route to the arena, a move-by-move counter plan, and simple habits that keep you healthy through her faster second phase.
Find the Widow (route from Shellwood)
The boss room sits above Bellhart but is entered from Shellwood. You should already have Cling Grip (wall jump) and Drifter’s Cloak by this point.
Step 1: From Shellwood’s central bench, climb the vertical ledges at the left of the room using Cling Grip. This puts you on the high path leading to the bell tunnels.
Step 2: Head right past the lift, then hop up the platforms and strike the weak wall to reveal the bell tunnel route.
Step 3: Descend through the bell tunnels, avoiding spikes and foes, until you reach an opening to the left. Drop, then move right to the floor gap that drops into the arena.
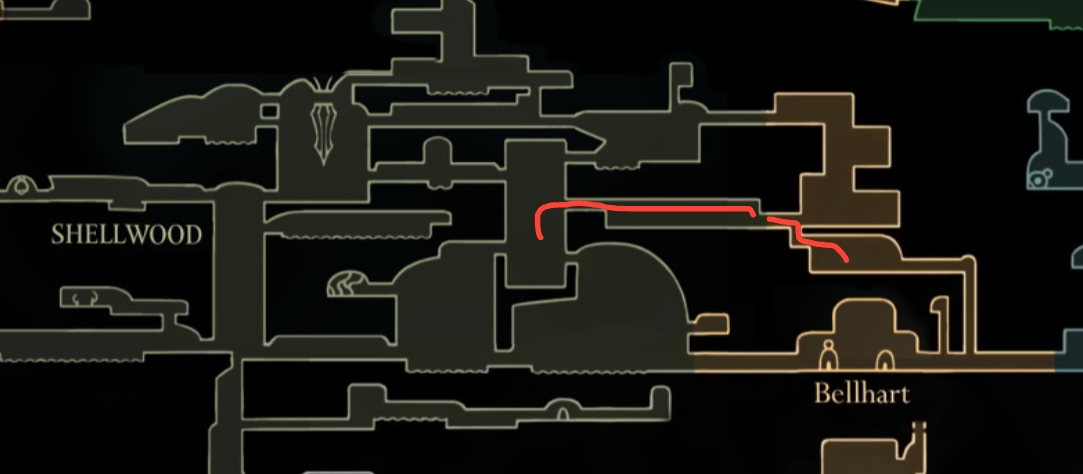
Step 4: Optional shortcut: from the same bench area, continue left to break a false wall and cut a quick route to the arena hallway. This shortens future runbacks.
Learn the moveset (what she does and what you should do)
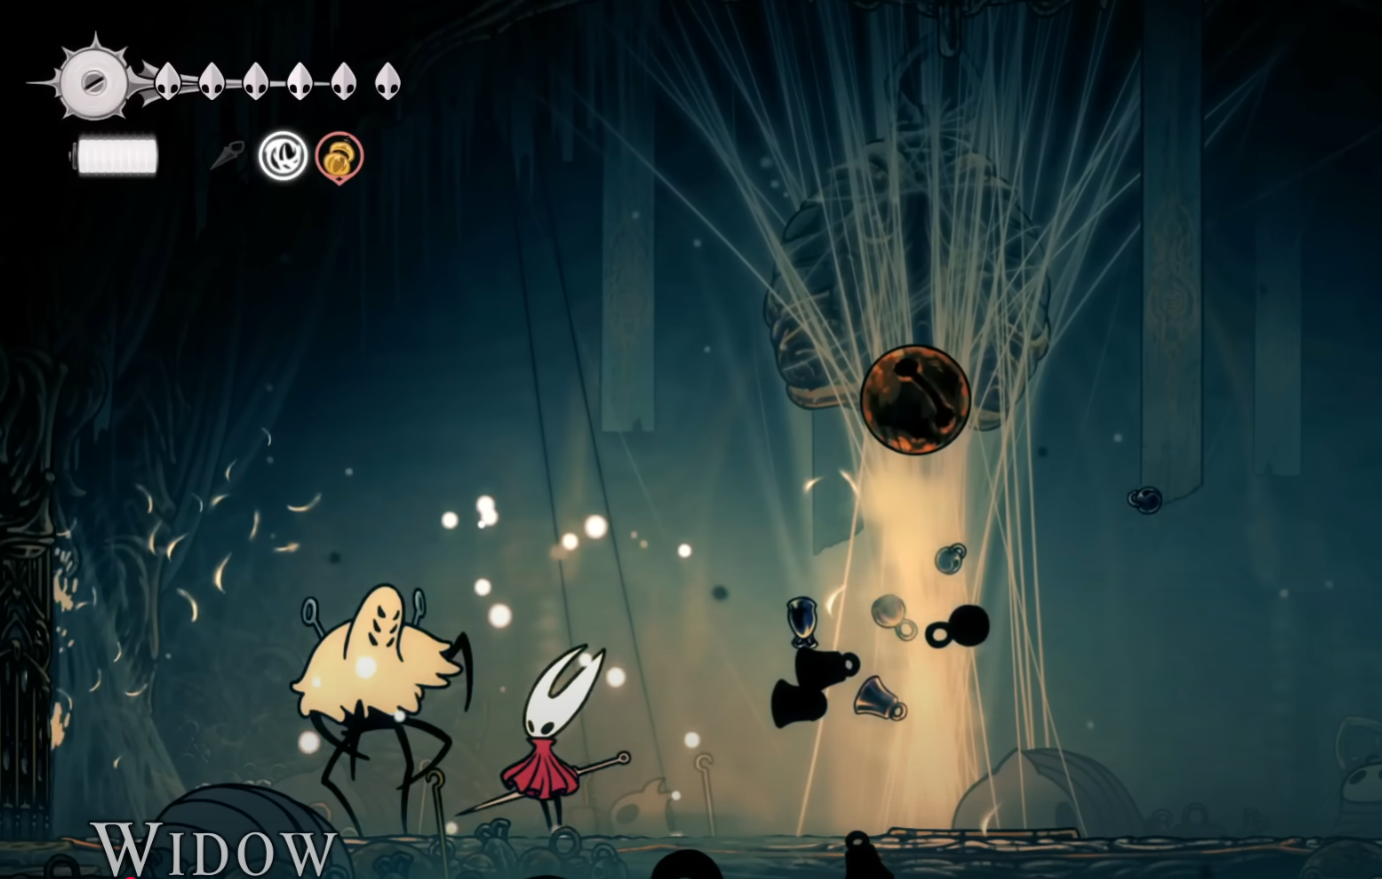
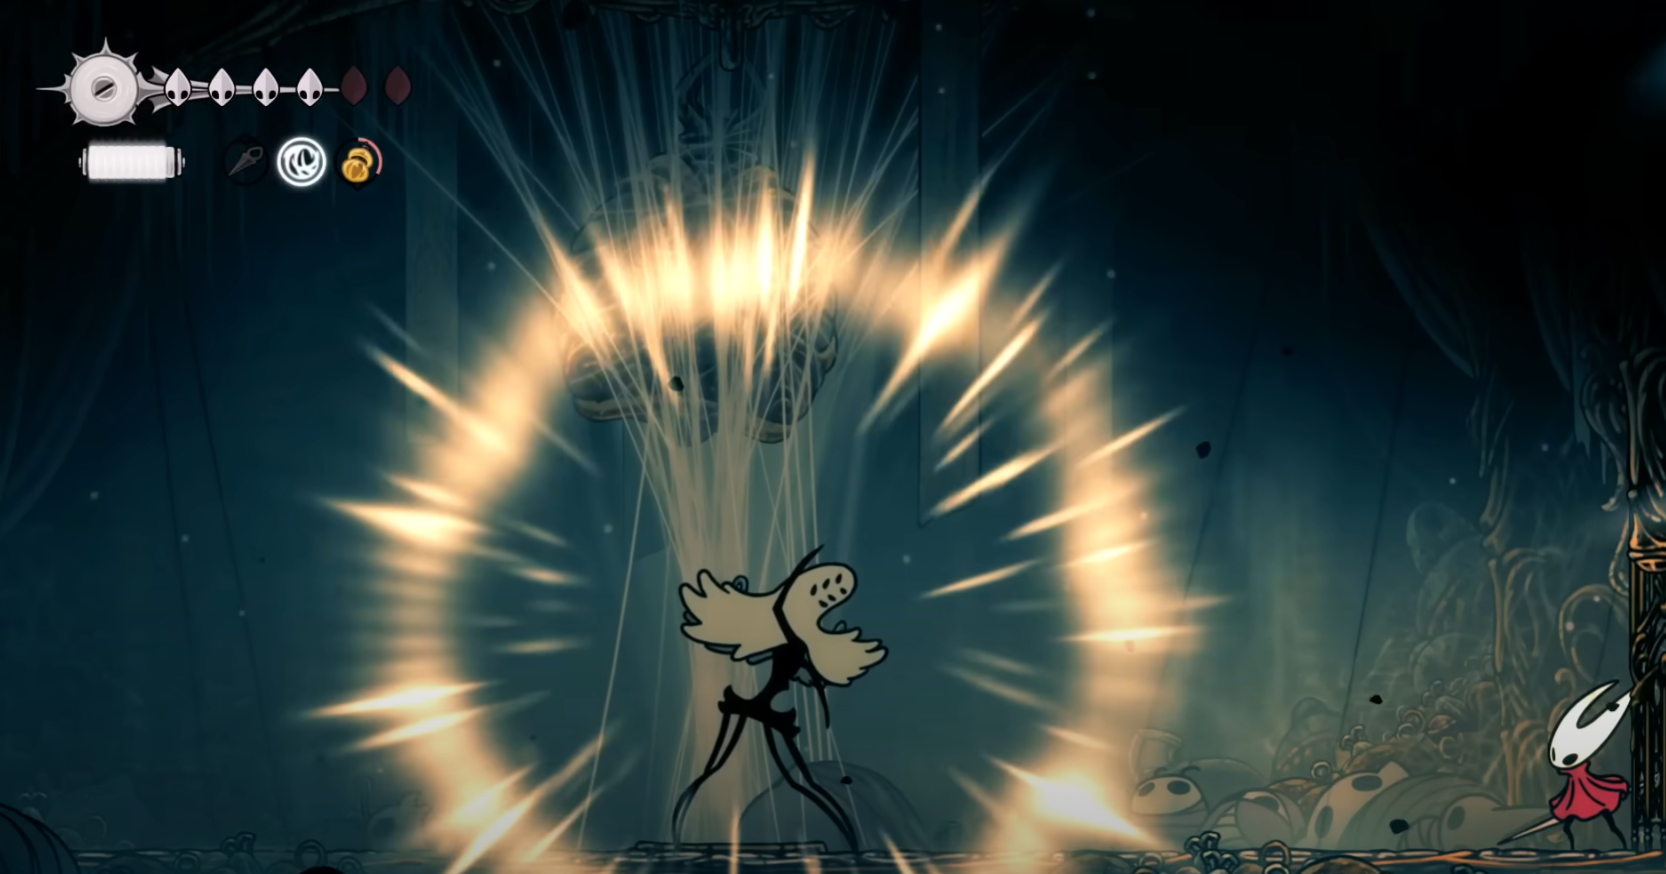
The Widow alternates between three core patterns in phase 1, adds multi-bell rains as the fight progresses, then returns in a faster phase 2. Bells telegraph their path via bright threads and bounce once before disappearing—don’t jump into a rebound.
Single-bell pulls (vertical or diagonal). Watch the silk thread path, step out of the line, then take 1–2 safe swings while she’s channeling. These hits are your lowest-risk damage.
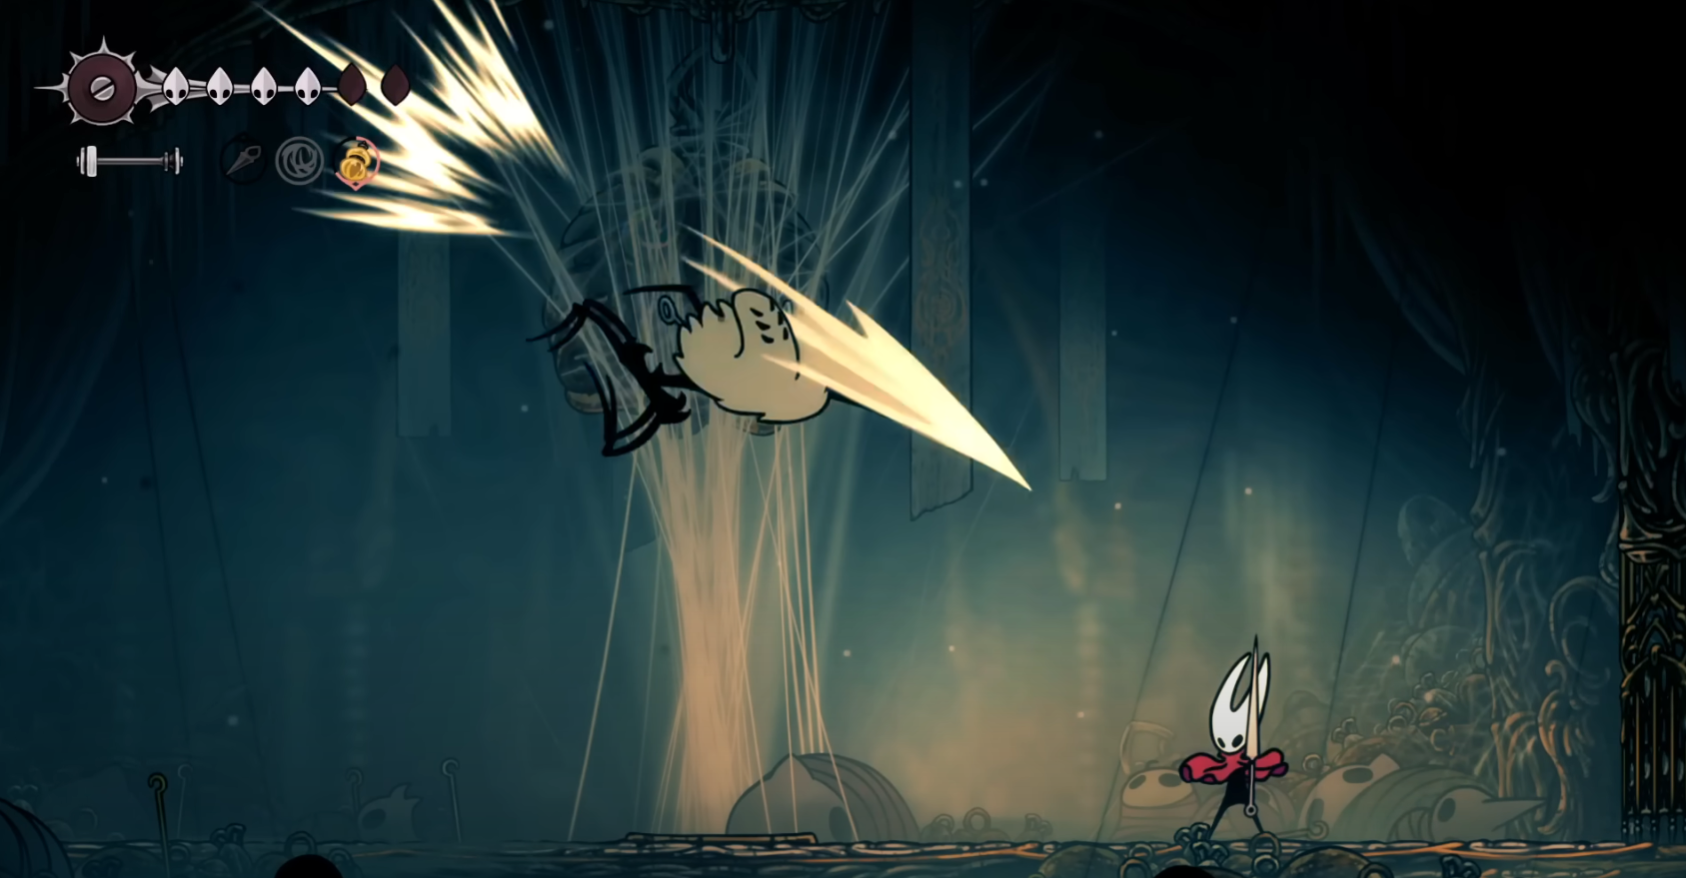
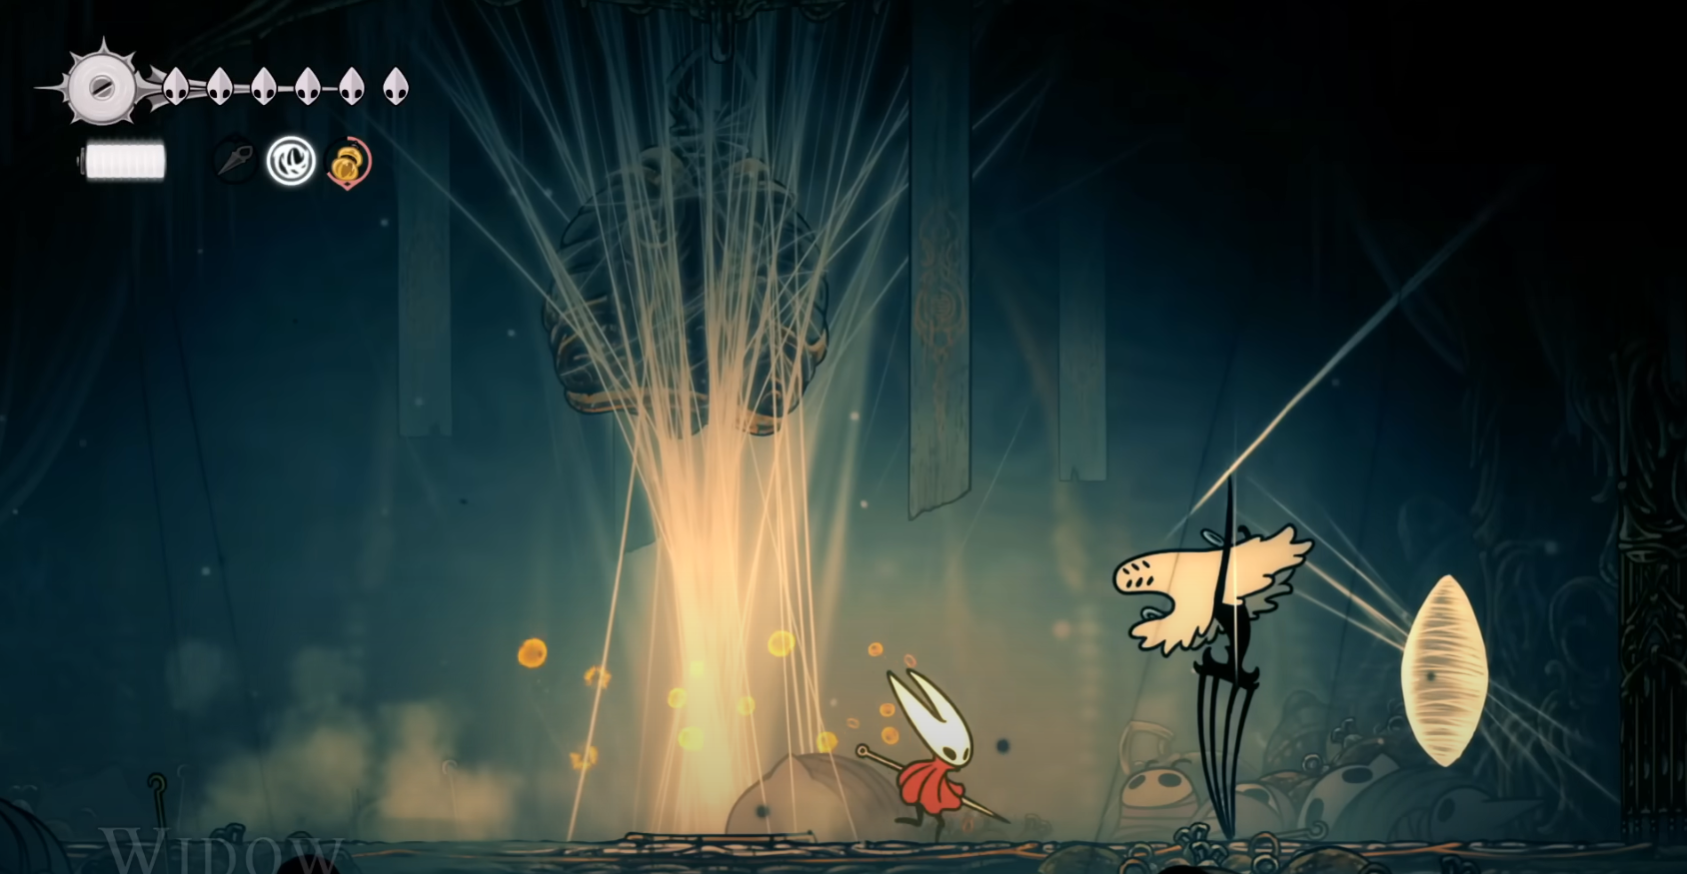
Aerial lunge into ground flurry. She appears above you and dashes diagonally down; dash underneath on the ground, then immediately jump as she turns and skitters into a multi-hit flurry. Options that work: pogo with a downstrike as she passes, jump straight up and heal midair, or parry by striking as she reaches you. The flurry is the dangerous part.
Ground debris sweep. She runs across the arena, then bell scrap erupts from the floor, dealing heavy contact damage while active. Use Cling Grip to hop on the side wall, or hold Jump with Drifter’s Cloak to float until the floor clears. This is a reliable heal window as she pauses during the eruption.
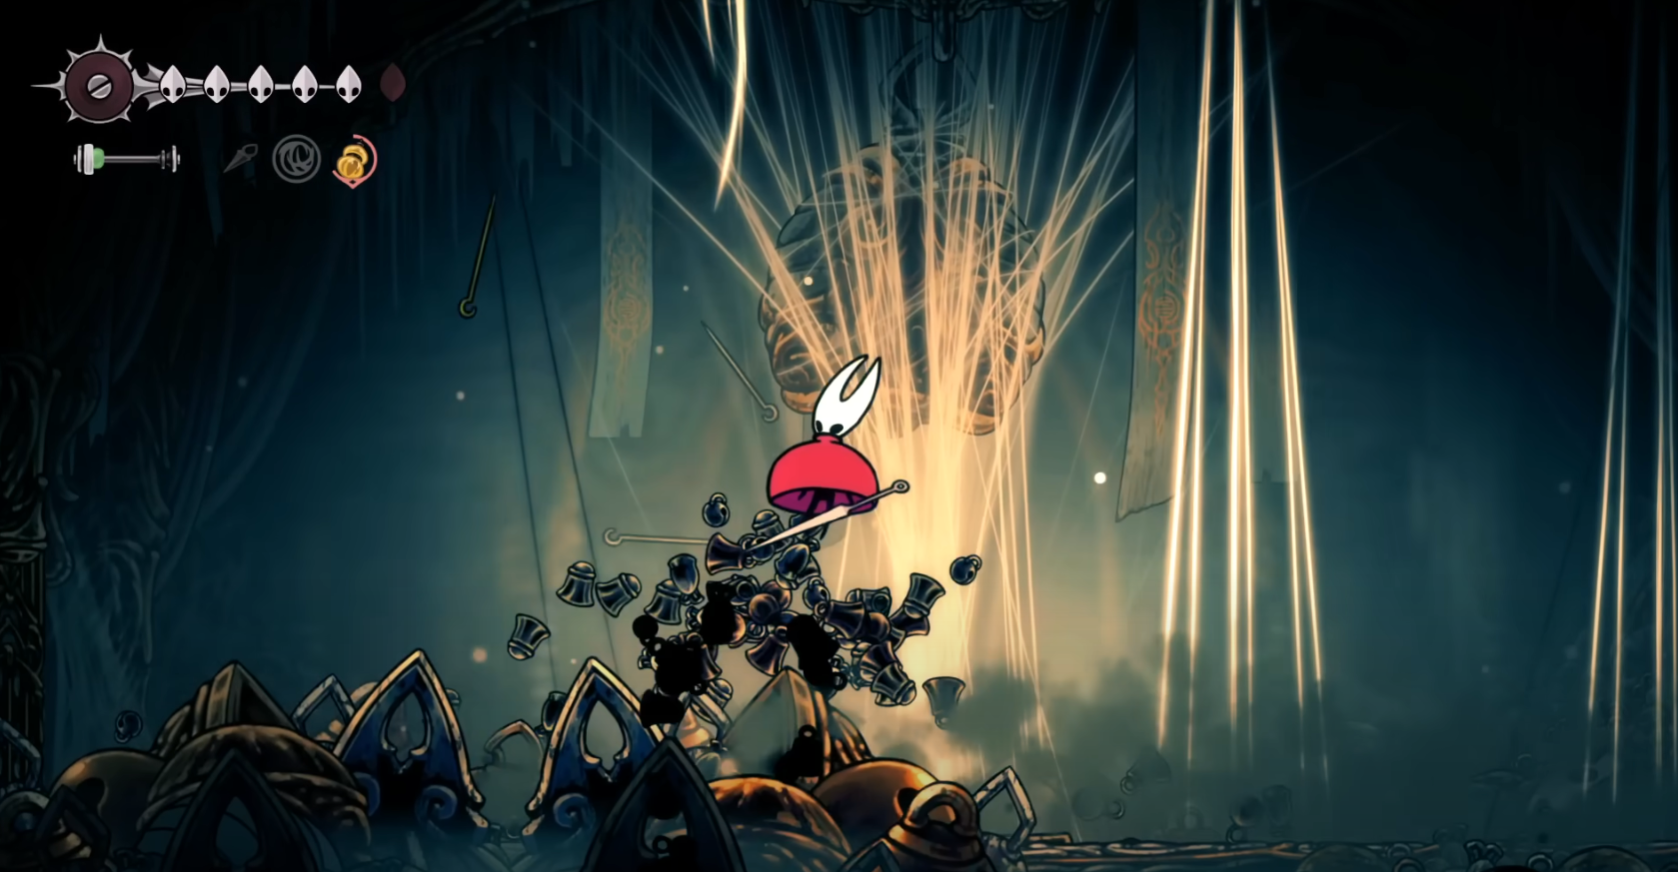
Multi-bell rains. Later in phase 1 she’ll summon blocks of bells (center or sides) and, closer to phase 2, several bells in quick succession. The threads tell you where to stand; find the gap and resist the urge to hop—most hits come from jumping into a rebound. Sneak a hit or two only if you’re certain of the spacing.
“Fake-out” defeat and phase 2. After enough damage, she staggers, then quickly returns faster and more aggressive. In phase 2 she can start the ground flurry immediately from the floor (no aerial prelude), and she cycles vertical/diagonal bell rains faster. Safe habits here: keep mid-range, jump only with intent, and be ready to pogo or jump-heal over the instant flurry.
A consistent fight plan you can repeat
Build this loop and stick to it—your mistakes drop, the run time shortens, and phase 2 becomes manageable.
Step 1: Center yourself mid-screen. This gives space both directions for the diagonal lunge and instant flurry, and keeps bell threads easier to read.
Step 2: Farm safe hits during single-bell pulls. Move off the thread line, take 1–2 swings, and reset position. Do not overstay for a third hit early on.
Step 3: Treat the lunge→flurry as a free action. Dash under the lunge on the ground, then either pogo the flurry, jump-heal straight up, or parry if you’re late. Avoid diagonal air dashes here—ground-to-air timing is simpler and safer.
Step 4: Use debris sweeps to heal or reset. Wall-hop or float with the cloak while the floor is hostile, then bind wounds midair. She won’t attack until the debris clears—capitalize on this pause.
Step 5: Phase 2: prioritize survival, then punish. If diagonal bells travel toward you, hugging the lower corner (right by the door) avoids their path; after her bell sequence, she almost always goes into the ground flurry—jump it, downstrike once, then reset to mid-range. Spend any stocked throws/pins here for safe chip if you need to stabilize.
Loadout and prep
This encounter is not gear-locked. The following choices reduce risk but aren’t mandatory.
- Skills you should already have: Cling Grip and Drifter’s Cloak. Both are core to your heal and dodge windows.
- Crest: longer reach crests make pogo timing and center pokes more forgiving.
- Tools: simple ranged pins/knives give safe phase‑2 chip while you hold position; a trap can catch her during the opening roar for a small, free life‑bar dent if placed pre-engage.
- Silk use: reserve silk primarily for healing; a single Silk Skill (e.g., Silkspear) is fine when she’s safely channeling bells, but don’t spend down your full spool if you’re at mid health.
Phase‑specific notes and common mistakes
These are the patterns most likely to cause avoidable damage and the simplest corrections.
Mistiming the diagonal bell rebounds. Fix: read the thread, move into the gap, and stay grounded; most hits happen from hopping into the bounce. Only jump if you’re pogoing the flurry or binding.
Getting clipped by instant flurry in phase 2. Fix: keep mid-range so you can jump cleanly when she commits; if she’s already on top of you, hold your ground and parry with fast strikes to avoid the multi-hit.
Over-greeding after safe hits. Fix: cap yourself at two swings after a single-bell pull until you’ve seen the next telegraph. A shorter fight is good, but a clean fight is faster overall.
Healing at the wrong time. Fix: bind during debris sweeps, during the flurry jump, or right after you clear a lunge. Binding mid-bells is only safe if you’re already standing in a thread gap.
After the win
Defeating the Widow frees Bellhart from its webbed curse and awards the Needolin. You also gain access to your first needle upgrade in Bellhart—claim it before heading out, as it shortens upcoming boss routes and lowers mistake costs in Act 1.
If you stick to the “safe hits on bell pulls, jump the flurry, heal during debris” loop, the fight becomes steady and phase 2 stops feeling chaotic.