
Crafting in Where Winds Meet is built into almost everything you do, but the game scatters each system across different menus, careers, and world locations. Once you understand how they fit together, you can turn raw materials and daily stamina into permanent power, quality-of-life upgrades, and a customized home.
Core crafting rules in Where Winds Meet
Every crafting system in the game follows a few consistent rules:
- You craft through dedicated menus or stations. Some menus open directly from your bag; others require a specific table or construction mode.
- Recipes are explicit. Each crafting menu lists recipes and the exact materials required, and it shows where those materials come from.
- Crafting consumes Stamina. You have a fixed Stamina pool per day, and crafting pulls from it. Having more materials does not let you bypass this limit.
- Many materials are time-gated at vendors. Most basic components can be purchased in capped daily or weekly quantities.
- Not all crafting is universal. Potions and Talismans are locked behind the Healer and Scholar careers; other categories are always available.
Stamina is the real bottleneck. Efficient players decide up front how much of their daily 450 Stamina will go into potions, weapon crafting, or housing instead of spreading it randomly.
How to access the main crafting menu
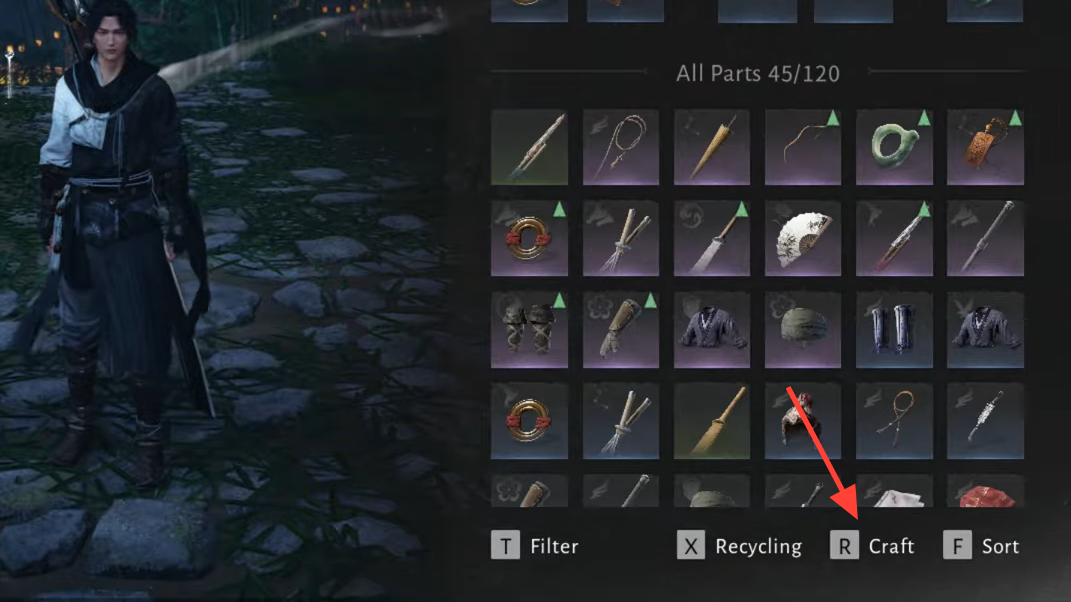
You can start basic crafting directly from your inventory without visiting any world object.
Step 1: Open your main menu and go to your bag (or press B on PC).
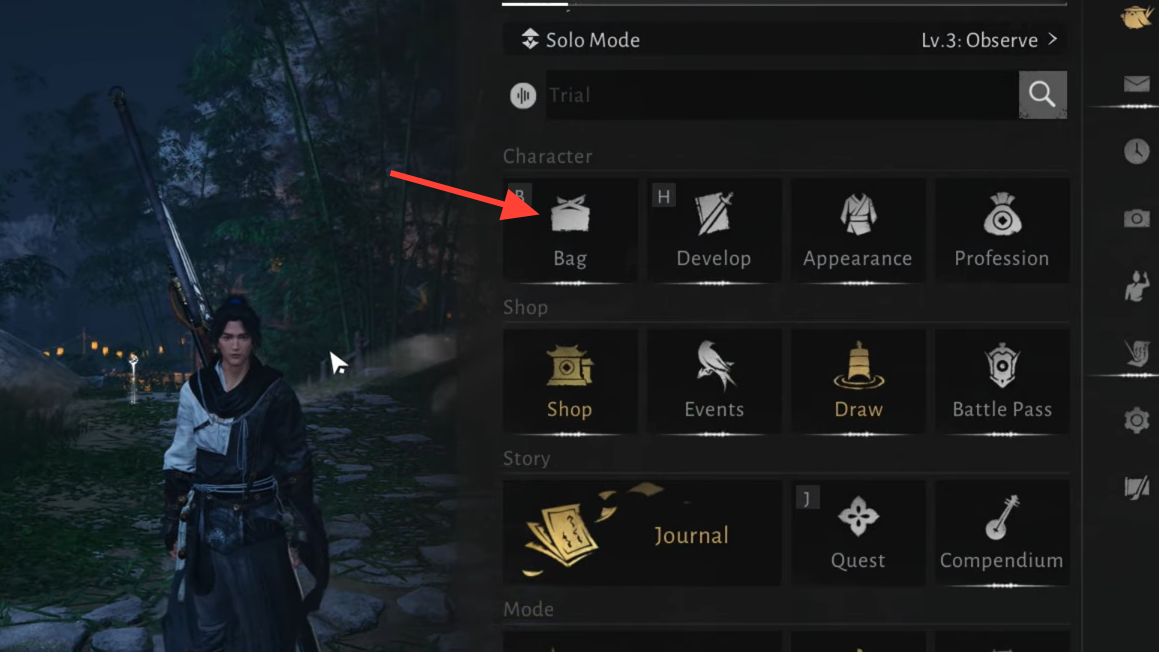
Step 2: Look at the bottom-right of the bag UI and select the Craft option (or press R on PC).
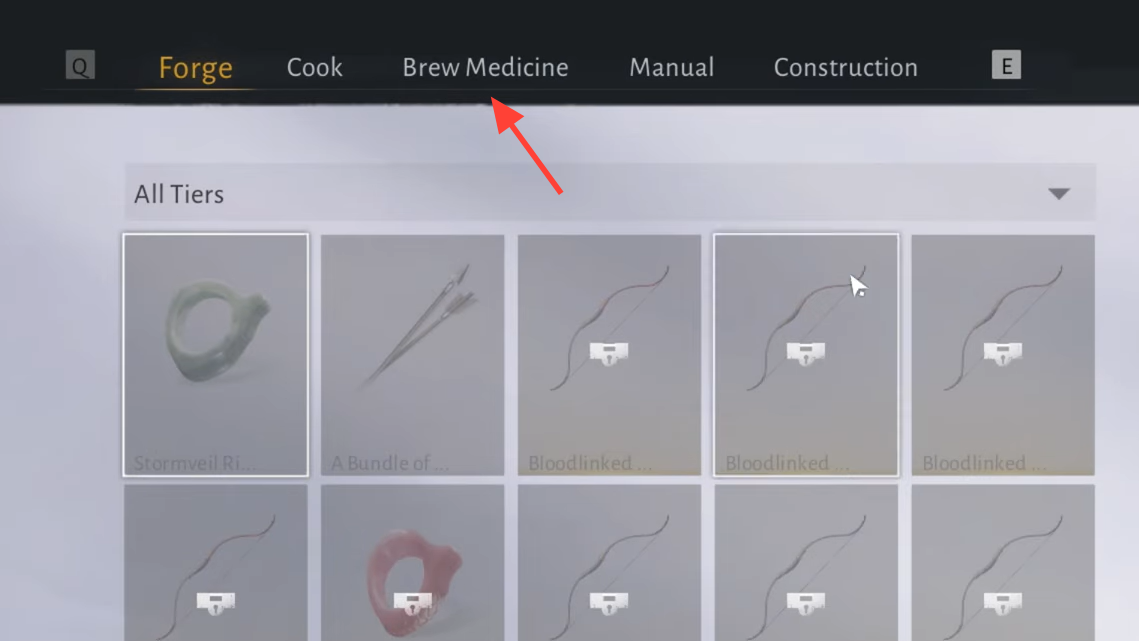
Step 3: Choose the category you want, such as Brew Medicine for potions or Forge for weapons and gear. Each category then lists all recipes you currently own.
When you select any recipe, the UI shows required materials and a button to jump directly to the NPC or location that sells or drops them. If a material count is red, you either don’t have enough yet or you’ve hit that vendor’s daily/weekly cap.
Crafting categories and what they’re for
| Category | Access | Main Outputs | Who Can Use It |
|---|---|---|---|
| Construction & Housing | Construction mode (F4 / controller wheel) | Building pieces, furniture, raw building materials | All players (after a specific quest) |
| Weapons & Gear | Crafting menu → Forge | Bows, arrows, rings | All players |
| Potions | Crafting menu → Brew Medicine | Healing potions, upgraded medicine | Healer career only for higher tiers |
| Talismans | Scholar career crafting menu | Paper, buff talismans, signposts | Scholar career only |
| Food | Food/recipe menus, stalls | Healing dishes, buff food | All players |
Construction & Housing crafting
Housing is the largest single crafting sink in the game, and it unlocks via a specific exploration quest.
Step 1: Reach around level 25 so the quest “Building One Last Job” becomes available.
Step 2: Open the quest menu, switch to Exploration quests, find “Building One Last Job,” and track it so it appears on your map.
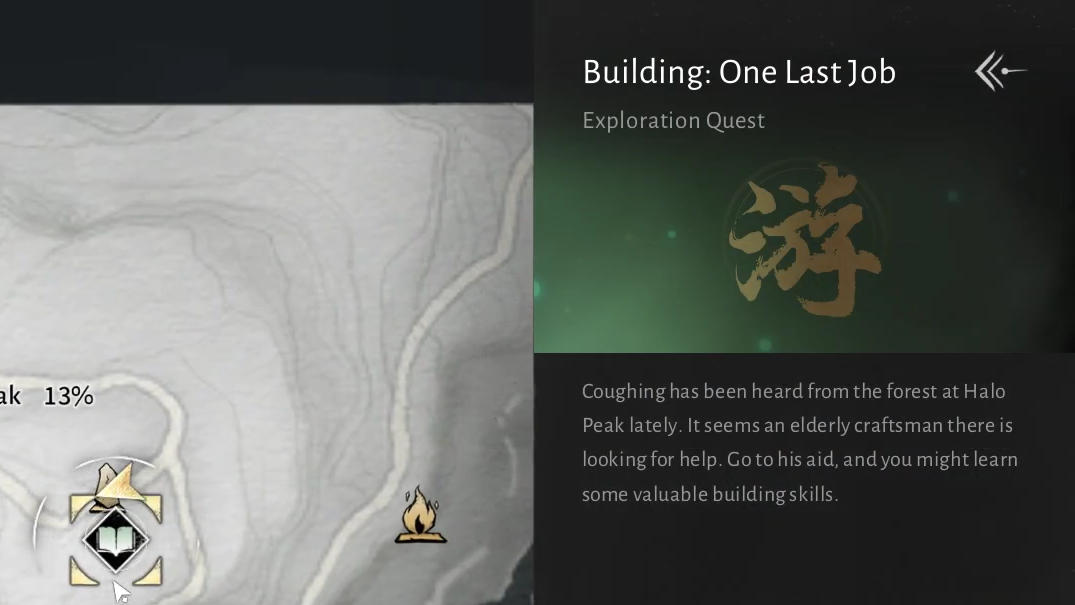
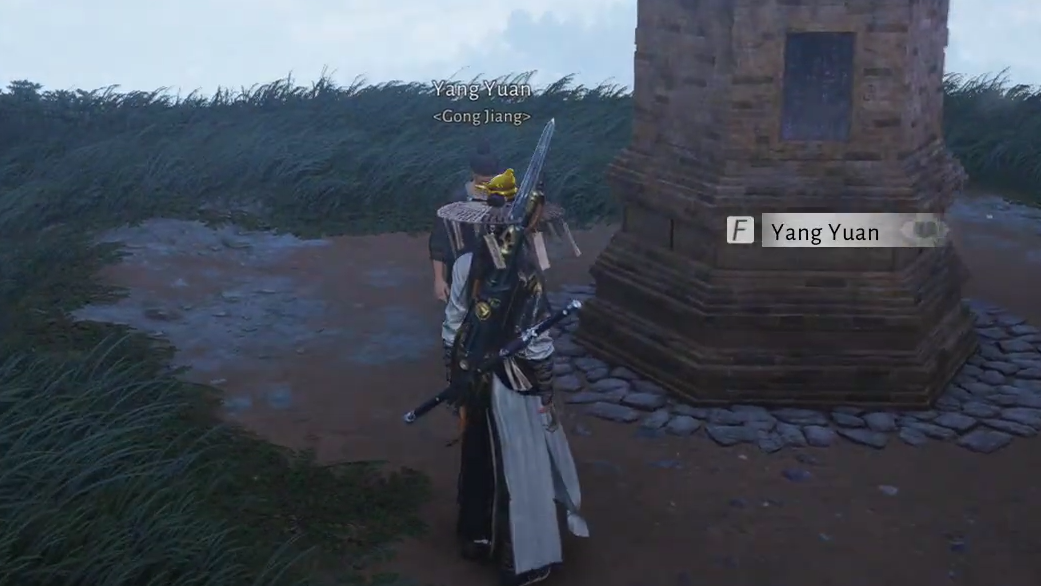
Step 3: Travel to Halo Peak and talk to the NPC who asks you to help reconstruct a stone structure. During this quest, you are prompted to open your bag, hit the Craft button, and create a specific building piece.
Finishing this quest turns on full construction for your character.
Using construction mode
Step 1: Go to a relatively open area in the world, away from towns and major outposts.
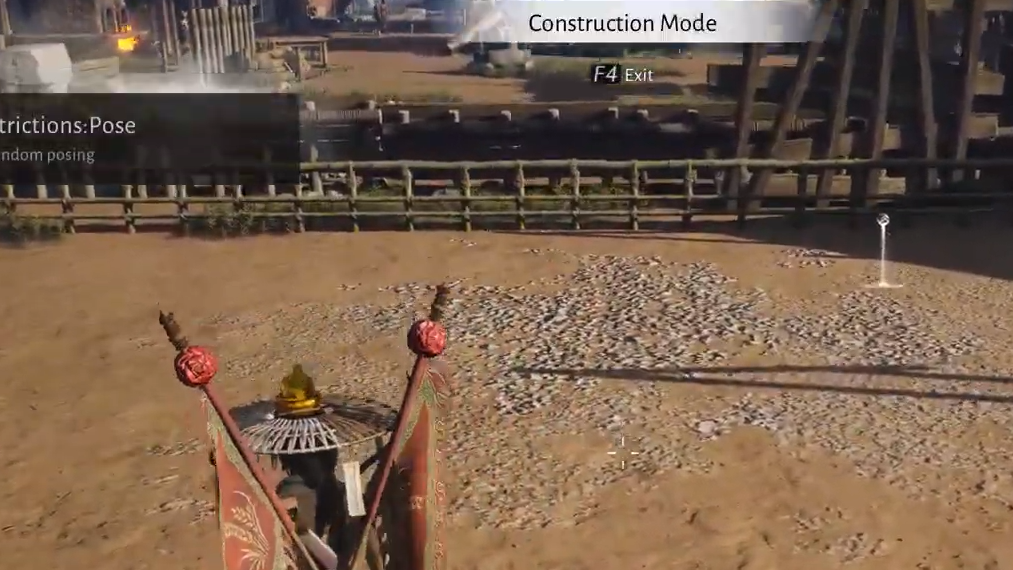
Step 2: Enter construction mode. On PC, this is typically F4; on controller you select the construction icon on the radial menu (right trigger on the default layout).
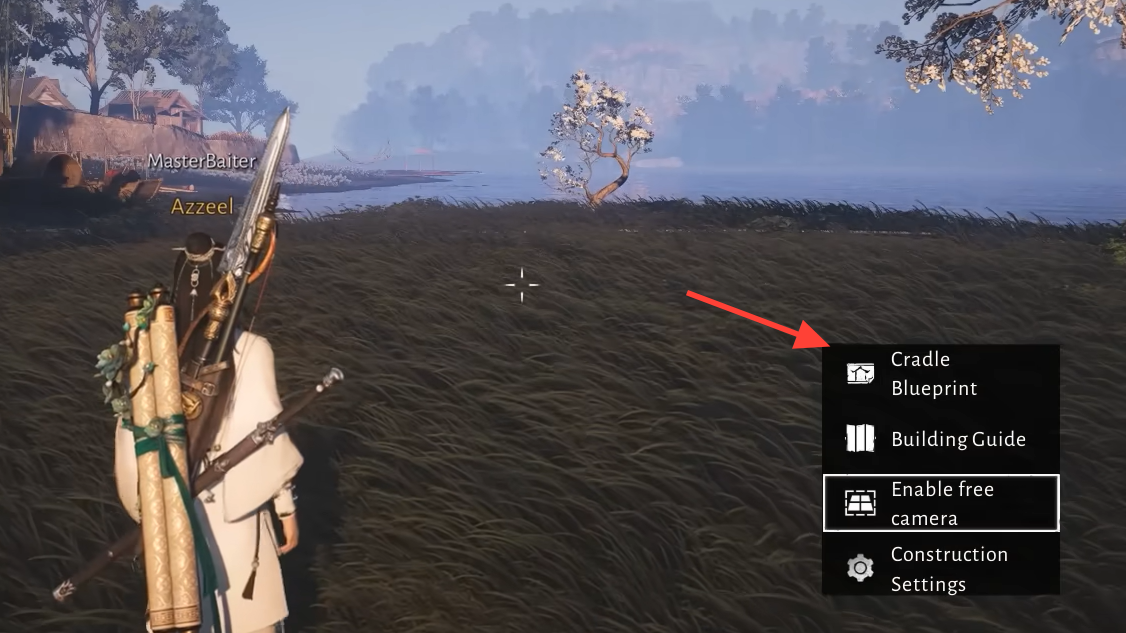
Step 3: Choose basic pieces (floors, walls, roofs, doors, windows) from the construction bar and place them. A free camera option makes precise placement easier.

Every placed piece consumes crafted or raw building materials such as wood, stone, or processed components. You can obtain these in three ways:
- Chopping trees and mining rocks. Walk up to trees and mineral nodes and attack them directly with your weapon to gather logs and ore.
- Buying building materials. General goods or specific construction vendors sell bricks, processed planks, stone blocks, and furs in weekly-limited quantities.
- Crafting intermediary materials at crafting zones. Villages such as Harvestfall Village have crafting zones built “for villagers’ crafting needs,” where NPCs like Blacksmith Li help you process raw resources.
Cradle blueprint tool and auto-completion
The game lets you plan houses and large compounds before spending any materials using a cradle blueprint system.
Step 1: From construction mode, open the blueprint (cradle) menu and define a building area (for example, 30×30).
Step 2: Confirm to load into a separate “blueprint world.” Here, you can freely place structures and furniture without consuming items.
Step 3: Once satisfied, open the blueprint details, choose Save Diagram, name your layout, and exit back to the normal world.
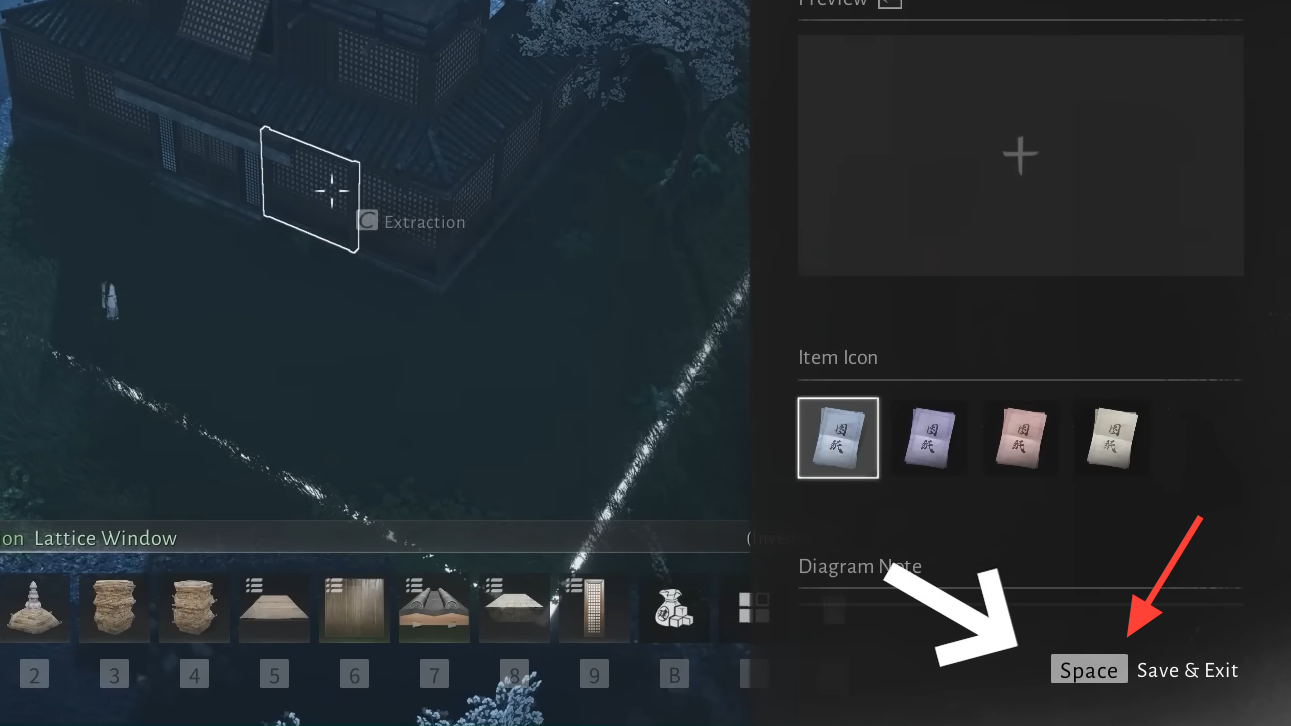
Step 4: In construction mode, select your saved diagram and place it in the world. A translucent “plan” version of your base appears where you can interact with it.
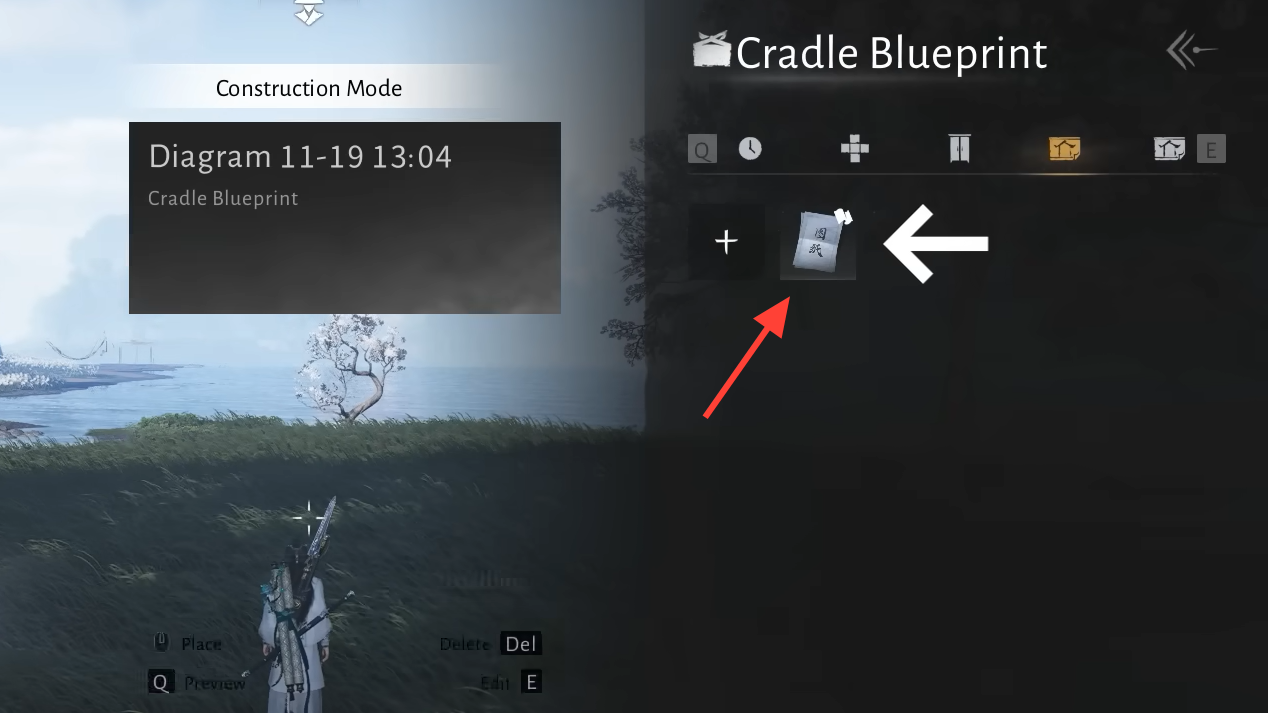
Step 5: Interact with the blueprint and select Auto completion to see the exact list and quantity of materials needed. You can optionally tick or untick a box that allows using raw resources directly instead of pre-crafted structural pieces.

Step 6: Once you have the required materials in your inventory or storage, return to the blueprint and choose Completion. The game constructs the entire planned building instantly, consuming the listed resources.
Construction also exists at the guild level. In guild garrisons, officers can assign empty plots to members. With the right permissions, you use the same construction and blueprint tools to shape guild territory.
Weapons & Gear crafting (bows and rings)
Weapon and gear crafting is narrower than in many MMOs: it focuses on a few upgradable slots that tie directly into mastery and endgame scaling.
How to access weapon crafting
Step 1: Open your bag and select Craft (or press R).
Step 2: Choose the Forge tab.
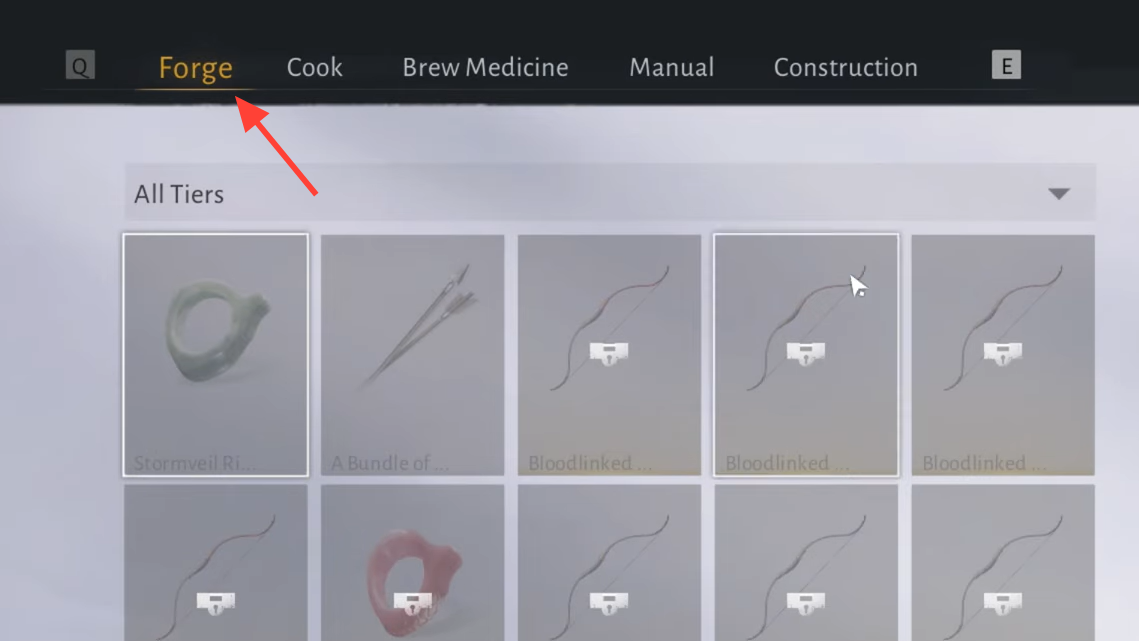
Step 3: Select either Bow or Ring (often referred to as “finger” in some UI text) and then choose the tier you want to craft.
Higher tiers unlock as you push your breakthrough level and obtain recipes:
- Bow recipes come from specific group content, such as Sword Trial–style five-player dungeons.
- Ring recipes may be obtained through the Season Shop or other seasonal reward paths.
Crafting a high-tier bow or ring requires both crafted and purchased components. Common examples include:
- Vendor-capped mats. Seasonal currency shops sell a limited number of high-tier crafting items per week, typically enough for a handful of top-tier crafts.
- Basic wood and leather. These can be chopped or looted in the field and also bought in large daily stacks (for example, up to 99 units) from specific vendors.
- Ore or jade. Gathered through mining nodes or drops from certain activities.
Weapon crafting has a chance-based element: rolling an epic-quality bow, for instance, can take dozens of crafts even with a nominal 10 percent success rate. Because Stamina is consumed on every attempt, many players dedicate a fixed share of their daily Stamina budget to bow or ring rolling and reserve the rest for other systems.
Potion crafting with the Healer career
Healing potions are technically available to everyone, but the stronger recipes and upgrades sit behind the Healer career.
Crafting basic and advanced potions
Step 1: Open your bag and hit Craft or R, then pick Brew Medicine.
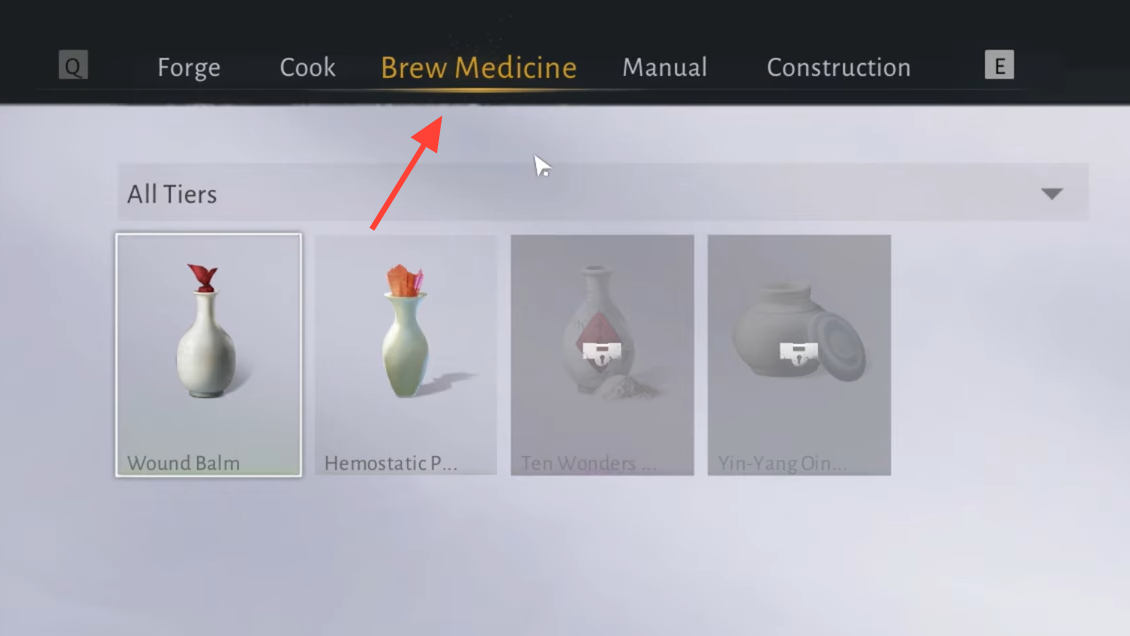
Step 2: To craft entry-level potions (for example, level 1 health potions), select the appropriate recipe. The materials listed on the lower-right can be purchased in capped quantities from general goods vendors. The UI can also highlight the exact vendor and location.

Step 3: Decide whether to craft low-level potions at all. On higher difficulty settings, it is usually more efficient to push directly toward stronger options such as level 20 medicine rather than spending Stamina on weak healing.
Every potion crafted drains Stamina. At around 450 Stamina per day, mass-producing low-impact potions quickly becomes costly compared to a smaller number of strong brews.
Unlocking the Healer career and Wound Balm
Step 1: In the Brew Medicine menu, select the higher-level potion recipe (for example, Wound Balm, a level 20 healing bottle). An Unlock button appears instead of a simple craft button.
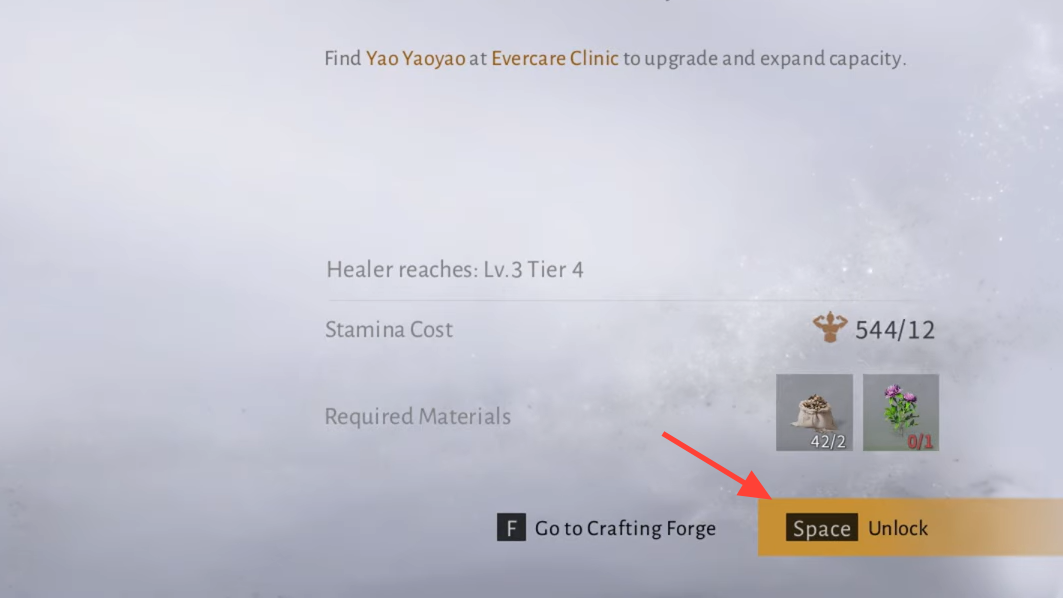
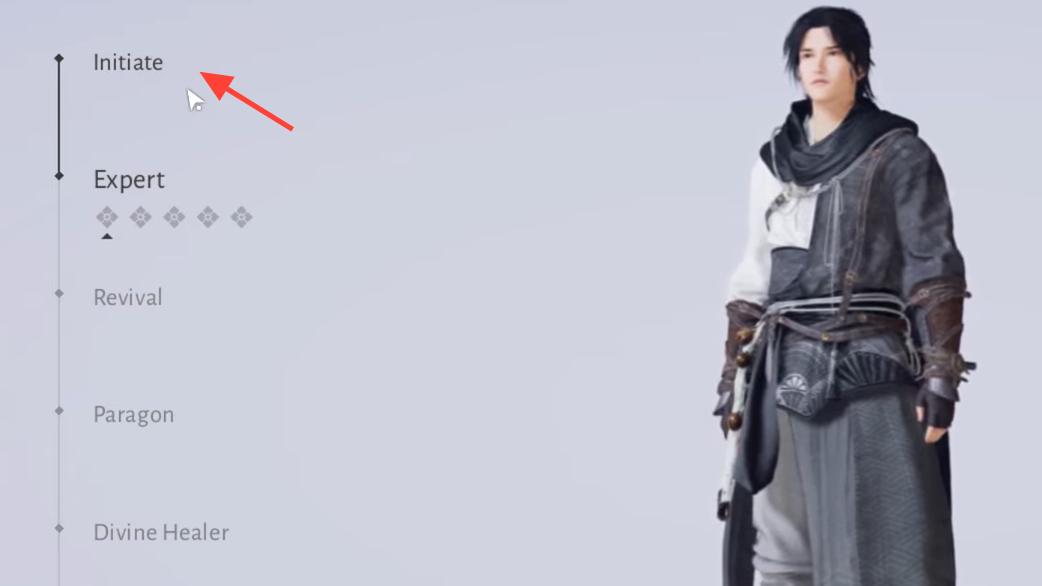
Step 2: Click Unlock, select Healer on the left side of the career selection screen, then choose Initiate and confirm with Gain Ability.
Step 3: Follow the map marker to the career NPC. You’ll complete a short Healer initiation quest, including a brief mini-game.
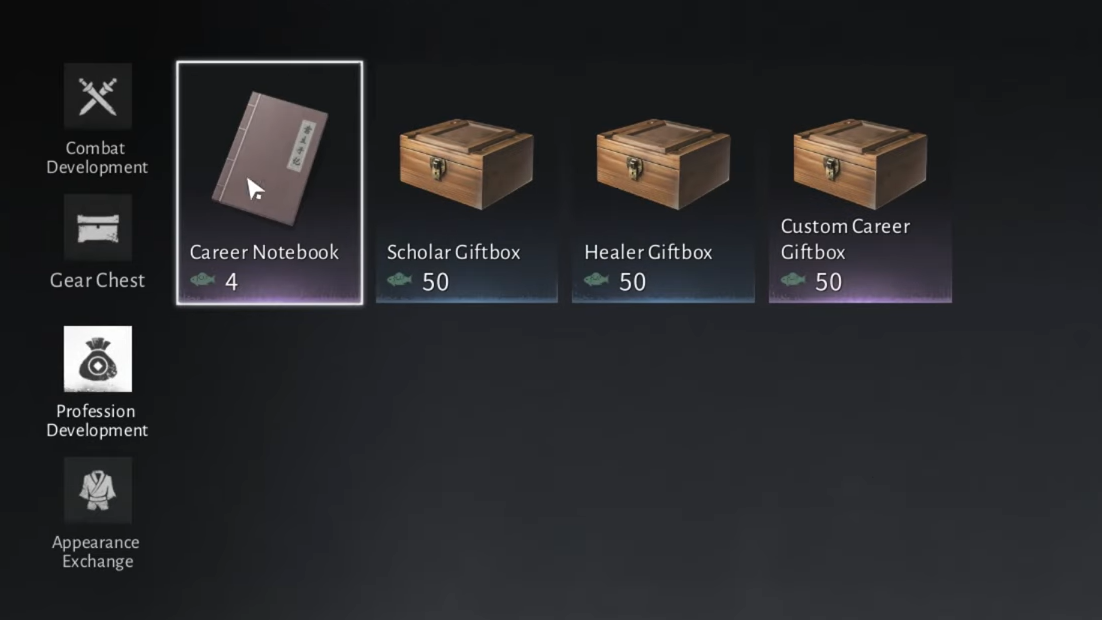
Step 4: After finishing, open the Healer panel again and upgrade your Healer rank using Career Notebooks bought from the Season Shop. Raising it to around Initiate 4-star is enough to unlock Wound Balm; going higher early on generally gives diminishing returns versus the resource cost.
Step 5: Return to the Brew Medicine menu, select Wound Balm, and hit Unlock again. You can now craft this higher-tier potion, using a different herb or component sold by a dedicated medicine vendor with its own daily cap.

Crafted potions are automatically replenished when you rest at Hero’s Rest points or Boundary Stones, so you do not consume inventory items each time you drink in combat. What you are really crafting is your maximum potion capacity and strength.
Upgrading the medicinal chest
The potency and carry limit of your potions also depend on a separate system: the medicinal chest.
Step 1: In your bag, open the medicine tab and choose the Upgrade option.
Step 2: Head to the designated NPC (for example, an apothecary named Yao Yao or similar healer figure).
Step 3: Use the dialogue option to Submit medicinal tale items. These consumables increase your medicinal chest level.
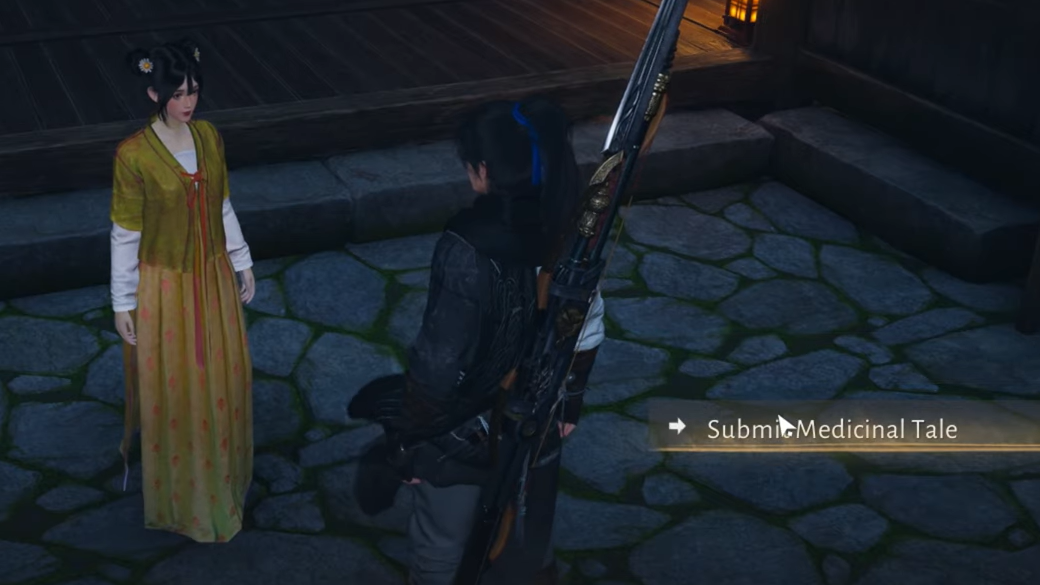
Each level of the chest typically raises your healing effectiveness (for example, +10 percent medicine recovery), adds extra carry slots (up to three potions), and can grant bonus healing over time after a potion is used—very noticeable in high-difficulty content.
Scholar Talismans and signposts
The Scholar career controls Talisman crafting, which functions as a second support branch alongside Healer.
- Paper is the base material. You craft it in the Talisman menu and then use it to produce higher-tier scrolls.
- Talismans act as consumable buffs. Examples include temporary defense boosts, movement speed increases, or other short-term combat bonuses.
- Signposts are placeable markers that can be dropped anywhere in Jianghu. Players use them as breadcrumbs for secrets, warning markers for dangerous areas, or notes for group activities.
As with Healer, unlocking Scholar involves taking the career through an initiation and ranking path, then spending Stamina on the talisman recipes you find most useful for your build or group composition.
Food and life-skilling buffs
Food bridges combat and life skills. Simple dishes are straightforward out-of-combat healing, while advanced meals drive gathering efficiency and resistance buffs.
- Basic food restores health outside combat and is a low-Stamina way to keep topped up between encounters.
- Buff food grants timed bonuses such as increased Stamina recovery or resistance to certain damage types.
- Gathering-focused dishes improve life skills. An example is a noodle dish that gives around a 20 percent “critical” gather chance, meaning you are more likely to get extra herbs or rare drops from a single node.
Food stalls across towns use a specific map icon; raising reputation at these stalls can unlock extra benefits, including Inner Way chests and strong life-skill meals. Reputation typically increases as you buy specific combinations of dishes using Commerce Coins earned from the Season Shop and story content.

Gathering and refining materials
Crafting doesn’t work without a steady stream of materials, and the game treats gathering as a core loop rather than a background chore.
- Herbs and plants are picked up directly in the world and feed potion and talisman recipes.
- Wood and stone are collected by hitting trees and rocks with your equipped weapon—no separate tools are required.
- Ore and jade come from mining nodes and are essential for higher-tier weapon crafting.
Some systems explicitly teach these basics through a short questline that sends you to NPCs who explain stone-cutting, logging, and refining. Harvestfall Village, for example, contains a crafting zone described as being built by Blacksmith Li for villagers’ crafting needs; speaking to NPCs here introduces refining stations and lets you turn raw resources into processed materials for housing or gear.
Material respawn timers are generous in online mode, and enemies at outposts can be repeatedly defeated for upgrade components: leave the area with one enemy alive, return, and the camp resets for another farm cycle.
Managing Stamina and crafting priorities
Across housing, potions, weapons, and talismans, Stamina is the limiting factor. A typical day’s 450 Stamina can disappear quickly if you try to engage with every system at once.
A practical approach is to set a loose priority order:
- Endgame combat: Reserve a share of Stamina for crafting or rerolling high-tier bows/rings and for brewing your best available potions.
- Support and utility: Allocate some Stamina for talismans and key buff foods if you play in challenging group content.
- Long-term projects: Spend whatever remains on construction materials, blueprint completion, or cosmetic housing pieces.
Seasonal resets ensure no one can permanently snowball ahead on gear; equipment tied to an old level cap eventually becomes obsolete. Skills, inner ways, cosmetics, and your understanding of these systems persist, so efficient use of each season’s crafting time matters more than hoarding low-impact items.
Once the basic loops make sense—open bag, craft, hit career unlocks, plan blueprints, and respect daily Stamina—crafting in Where Winds Meet turns into a predictable, flexible backbone for both combat power and world-building.